By M4rkoz & Megalith
¶ Disclaimer
This guide is a “prequel” of Megalith’s latest guide, “Mesh Component Swap” on which many people got confused because of the lack of guidance related to mesh importation.
This guide will take these in consideration, allowing you to import your own meshes and/or re-using different game meshes, as this is the base for every kind of model swap.
Also, this guide will focus on SWP meshes for now, but you can apply a similar logic with other meshes as well.
¶ Requirements
Tools:
- UassetGUI - To edit assets.
- UnrealPak 4.18 - To unpack/pack your game assets.
- AC7 UModel version - To visualize file directories & extract files.
AES Key is: https://ace7.acecombat.jp/specia - Blender - To import your own mesh & edit it
- PSK Importer (Matyalatte) - Imports the .PSK meshes from Umodel to Blender.
- Unreal Engine 4.18 - To prepare the content for packing.
¶ Step 1: Know your aircraft
During your Ace Combat 7 playtime, you might’ve noticed that some aircraft contain an animated pylon, while others don’t. Animated ones are named “Skeletal meshes” because the pylon mesh contains an armature & animation file. However, certain aircrafts don’t have these, and they’re called “Static meshes” because their filename ends with “_SM”, for example:
| Aircraft/SPW | Special Weapon 1 | Special Weapon 2 | Special Weapon 3 |
| ADF-11F | Static Mesh | Static Mesh | Static Mesh |
| CFA-44 | Skeletal Mesh | Skeletal Mesh | Skeletal Mesh |
| FALKEN | Skeletal Mesh | Static Mesh | Static Mesh |
| F-35C | Static Mesh | Skeletal Mesh | Static Mesh |
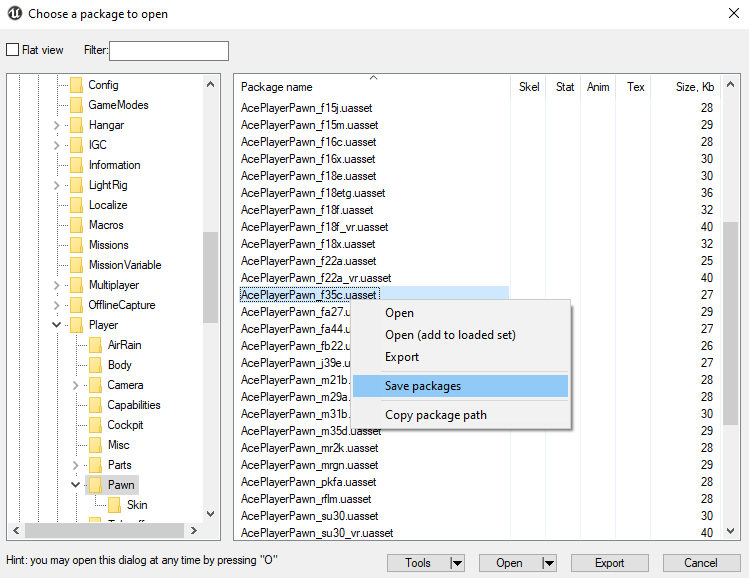
In order to check what aircraft contains what, you need to use the AC7 UModel version, which you’ll need to obtain files named “Aircraft pawns”.
Aircraft pawns are files that control different aspects of the aircraft, such as its health, meshes to use, etcetera. It’s basically the base to make an aircraft model to work in-game.
Open Umodel, select the directory where the game .paks are localized, and search for the directory of the aircraft pawns: Game/Blueprint/Player/Pawn and select the pawn of the aircraft you wish to replace the pylon model. Right click and “Save Packages”.
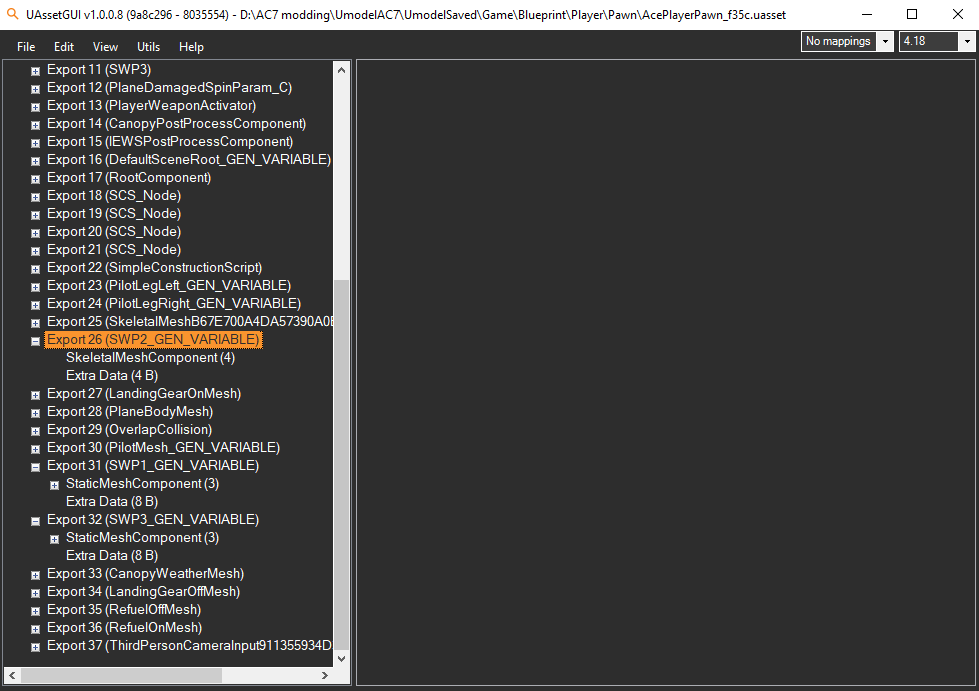
Open your UassetGUI, and load the pawn file you saved. Go to the SWP(x)_GEN_VARIABLE exports to verify if the weapon pylons used are static or skeletal.
After identifying the aircraft meshes your aircraft tend to use, you can proceed with the editing.
¶ Step 2: Preparing your mesh
Now you’ll proceed to enter the 3D aspect of things, you’ll need to have a grasp over Blender knowledge in case you wish to continue. (If you don’t, go check some Youtube tutorials first), this part shouldn’t be too hard for you.
¶ Step 2.1: Acquire the plane mesh
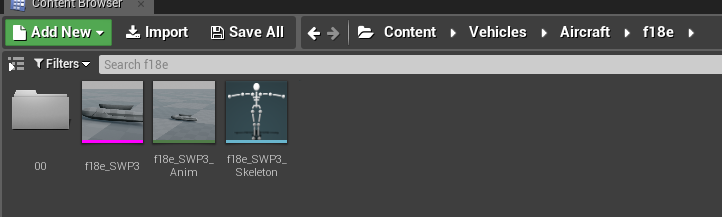
Use the AC7’s UModel version, and the process is the same as described in the Simple Weapon Swap guide, except the file directory is different: Game/Vehicles/Aircraft, where you’ll need to find the aircraft you’ve chosen. For the sake of the demonstration, the F-15 S/MTD mesh will be used for now.
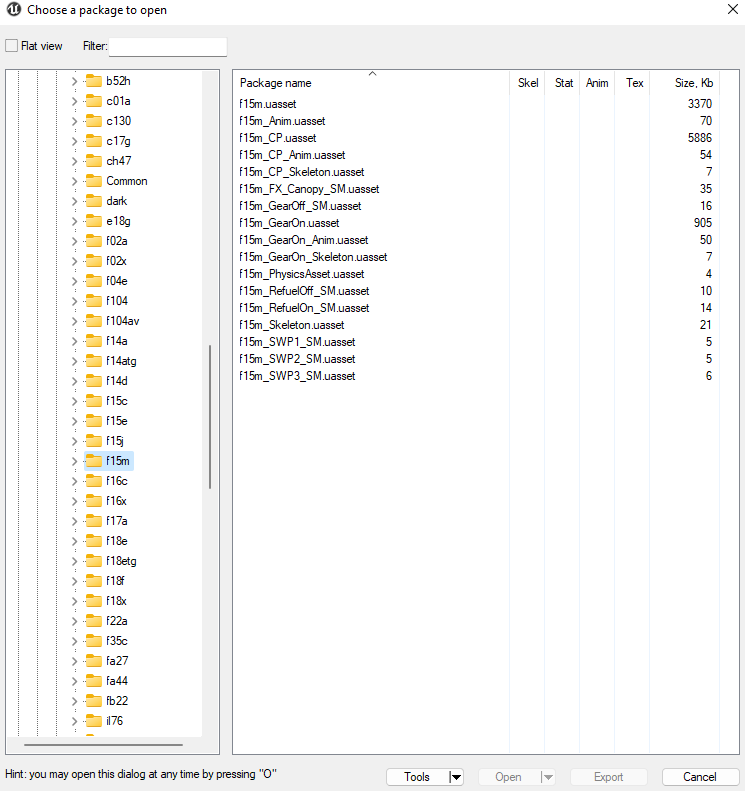
You’ll see a lot of file names, however they correspond to:
| Main Aircraft (Mesh, Skeleton, Animation & Hitbox) |
xxxx.uasset xxxx_Skeleton.uasset xxxx_Anim.uasset xxxx_PhysicsAsset.uasset |
| Aircraft Cockpit (Mesh, Skeleton & Animation) |
xxxx_CP.uasset xxxx_CP_Skeleton.uasset xxxx_CP_Anim.uasset |
| Aircraft Cockpit (Canopy effects mesh) | xxxx_FX_Canopy_SM.uasset |
| Aircraft Gears (Mesh, Skeleton & Animation) |
xxxx_GearOn.uasset xxxx_GearOn_Skeleton.uasset xxxx_GearOn_Anim.uasset |
| Aircraft Gears (Closed doors) | xxxx_GearOff_SM.uasset |
| Refuel models (During Minigame/Normal gameplay) |
xxxx_RefuelOn_SM.uasset xxxx_RefuelOff_SM.uasset |
| Weapon Pylons (If Skeletal) | xxxx_swp(x).uasset xxxx_swp(x)_Skeleton.uasset xxxx_swp(x)_Anim.uasset |
| Weapon Pylons (If Static) | xxxx_swp(x)_SM.uasset |
Your main focus for now is the main aircraft mesh (xxxx.uasset). It should be exported in .psk and .pskx formats. Recommended texture format is TGA.

¶ Step 2.2: Blender project preparation
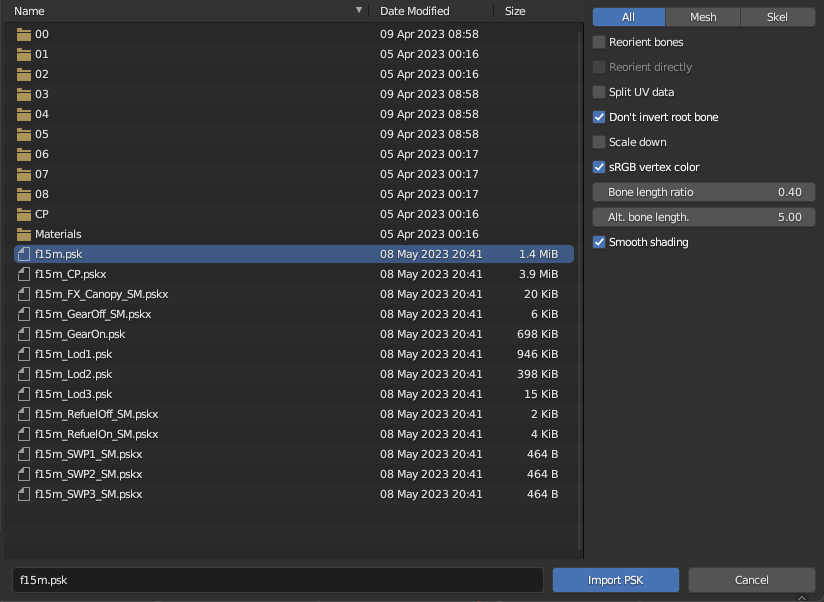
You will need Matyalatte’s PSK importer plugin for blender, link to which you can find above. Installation instructions are provided on the linked page. Here’s a guide on how to install plugins for Blender.
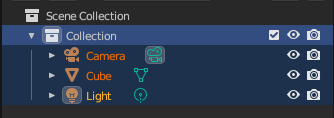
Create a new project. First of all, you should delete every element from the scene collection.
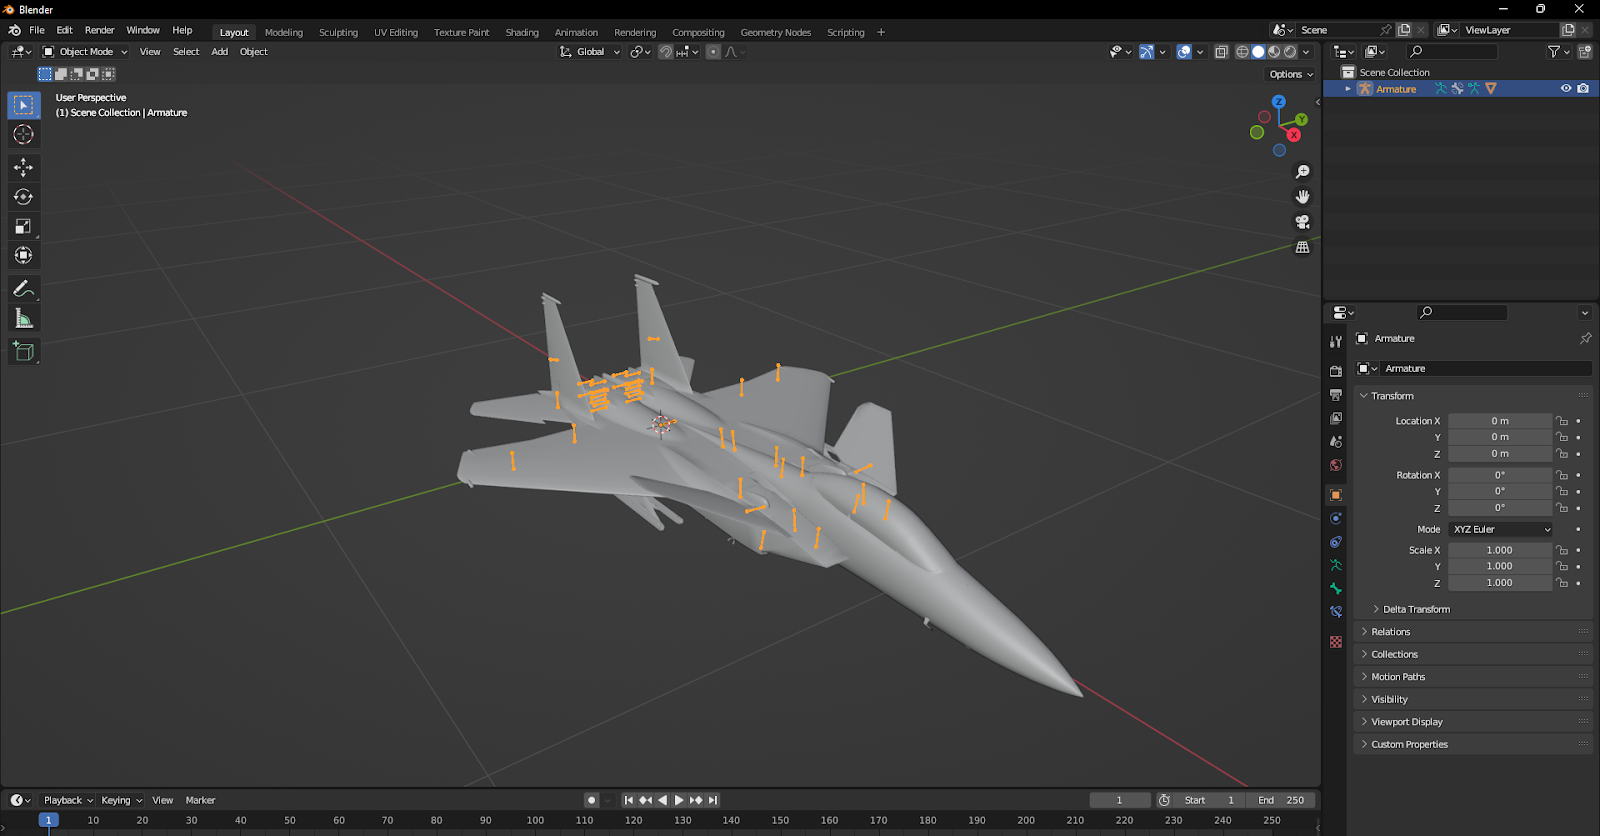
After deleting them, you can import your plane model.
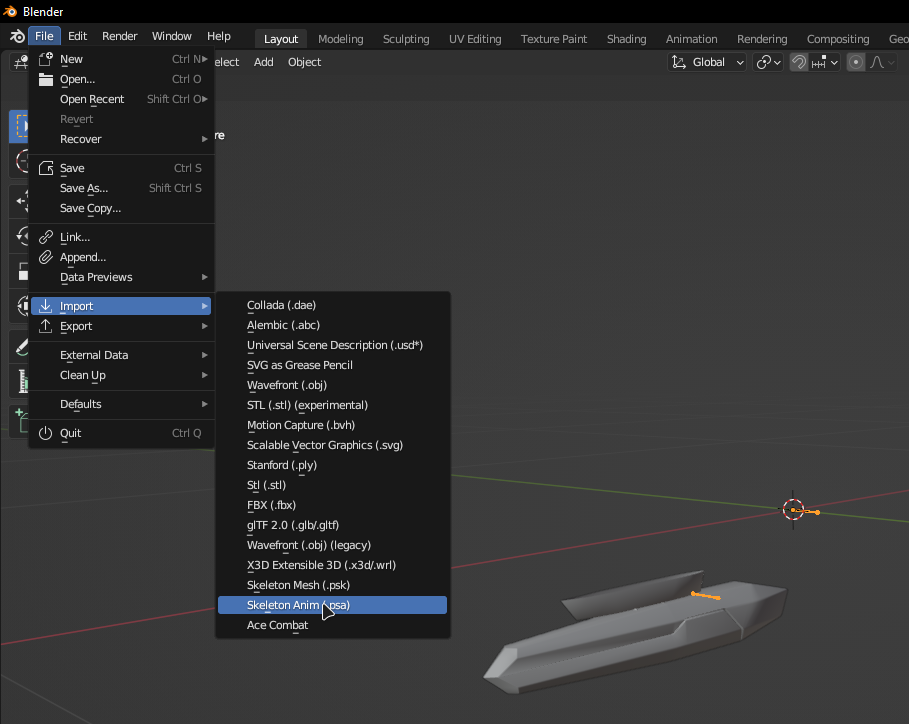
File -> Import -> Skeleton Mesh (.psk)
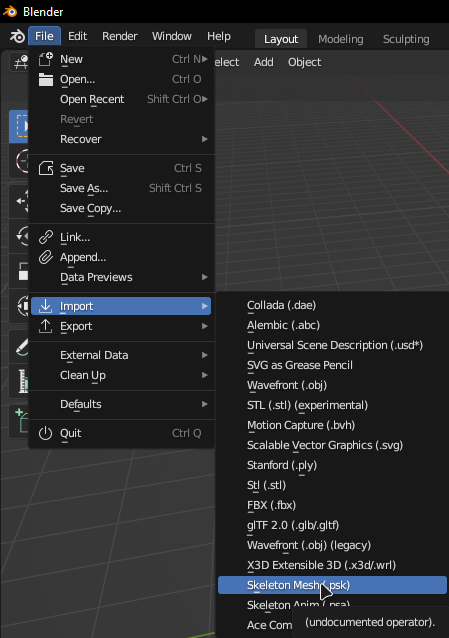
Choose the mesh you extracted earlier, and import it.
¶ Step 3: Types of SWP mesh
The pylon meshes use something that Unreal Engine 4 calls “Sockets”, which are used to attach objects into a certain mesh, and that’s how things like the gun, wind & vapor effects, missiles, etc. Are correctly positioned into the main body of an aircraft. This also applies for SWP meshes, which have different ways to be placed.
¶ Step 3.1: SWP sockets w/o custom mesh
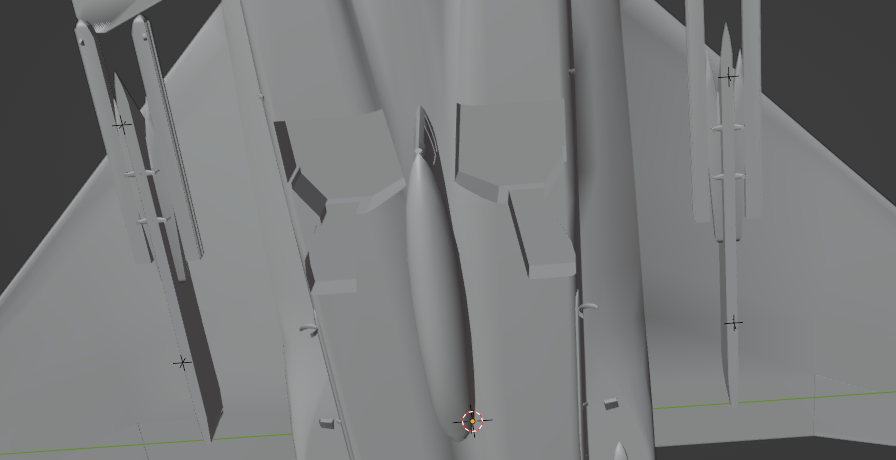
Some aircrafts (Such as the F-15C) have SWP meshes that don't contain any pylon mesh at all! That’s because their pylons are already placed on the aircraft’s main body but they’re still considered static meshes, because they depend on a small mesh to work and be loaded in-game.
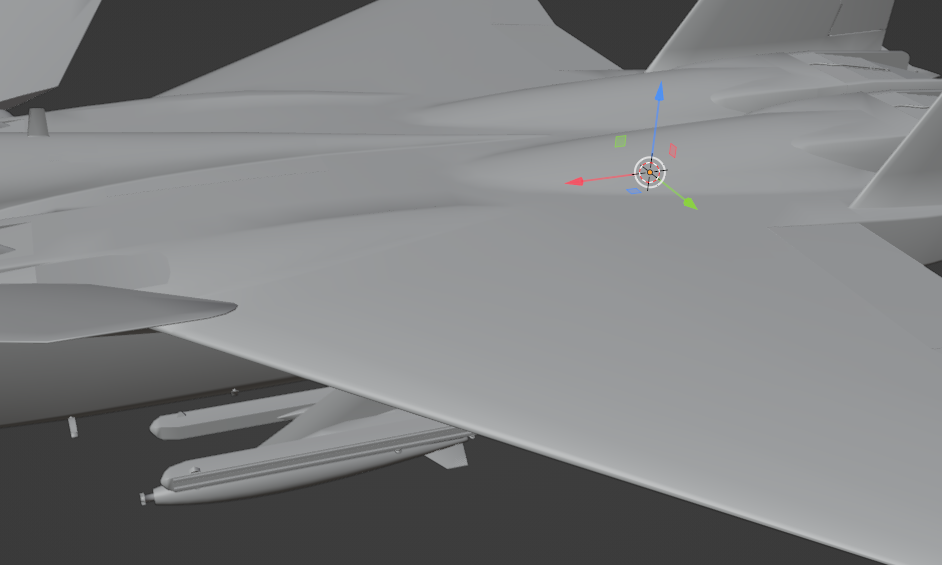
To align a socket properly, you will first need a mesh of your weapon as reference. For example, we want to add UGBs - 2x per pylon. You can import an UGB mesh and adjust its position the way you want.
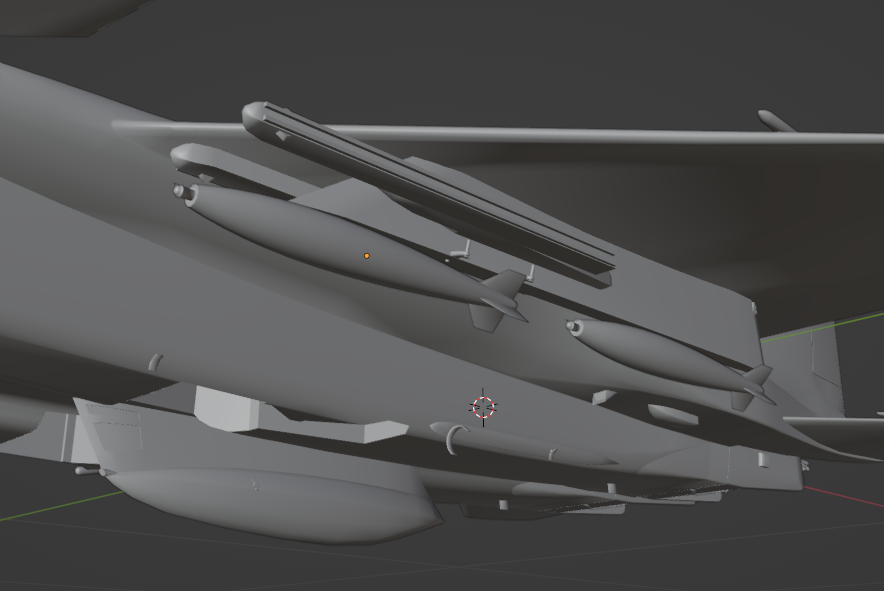
Feel free to rotate the weapon mesh according to the pylon angle (Some jets have angled pylons, like the F-16C).
After that, you need to create the actual sockets.
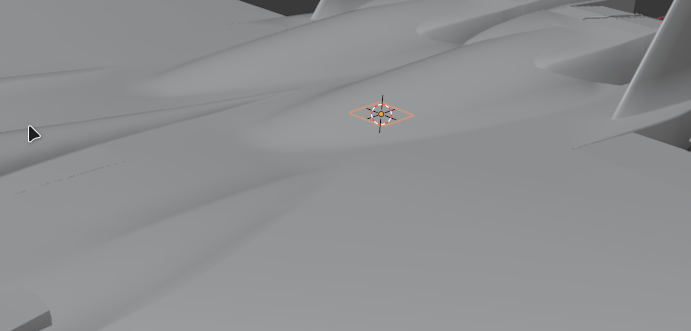
For Blender, sockets consist of “empties”, it doesn't matter the type. In this case “Plain Axes” will be used in order to rotate them & see their orientation consistently.
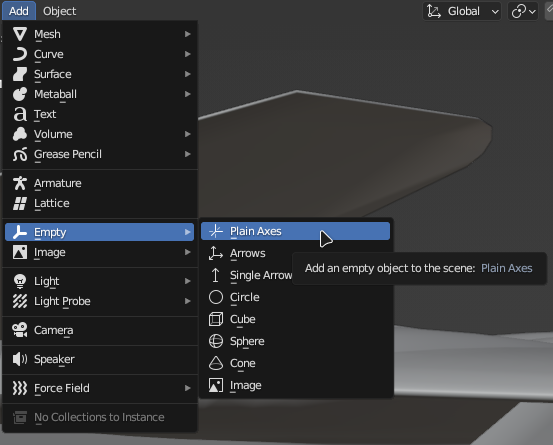
You create as many plain axes as you need (Or you can create only half of them if you want them paired symmetrically on both wings, then clone them after adjusting them for one wing and inverting their Y location).
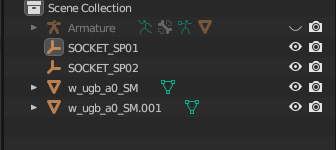
In the content browser, you will see an “Empty”.
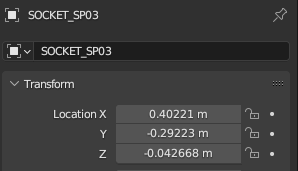
You should rename it to SOCKET_SPxx, where xx is the index of the socket. For example: SOCKET_sp01, SOCKET_sp02, SOCKET_sp03 and SOCKET_sp04.
Note that the socket index determines the firing order in-game.
Select your weapon mesh and look at the coordinates in the Object Properties tab.
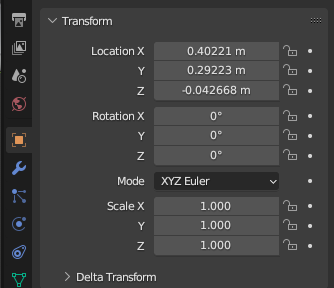
Select a socket and copy all the coordinates (and rotation if necessary).
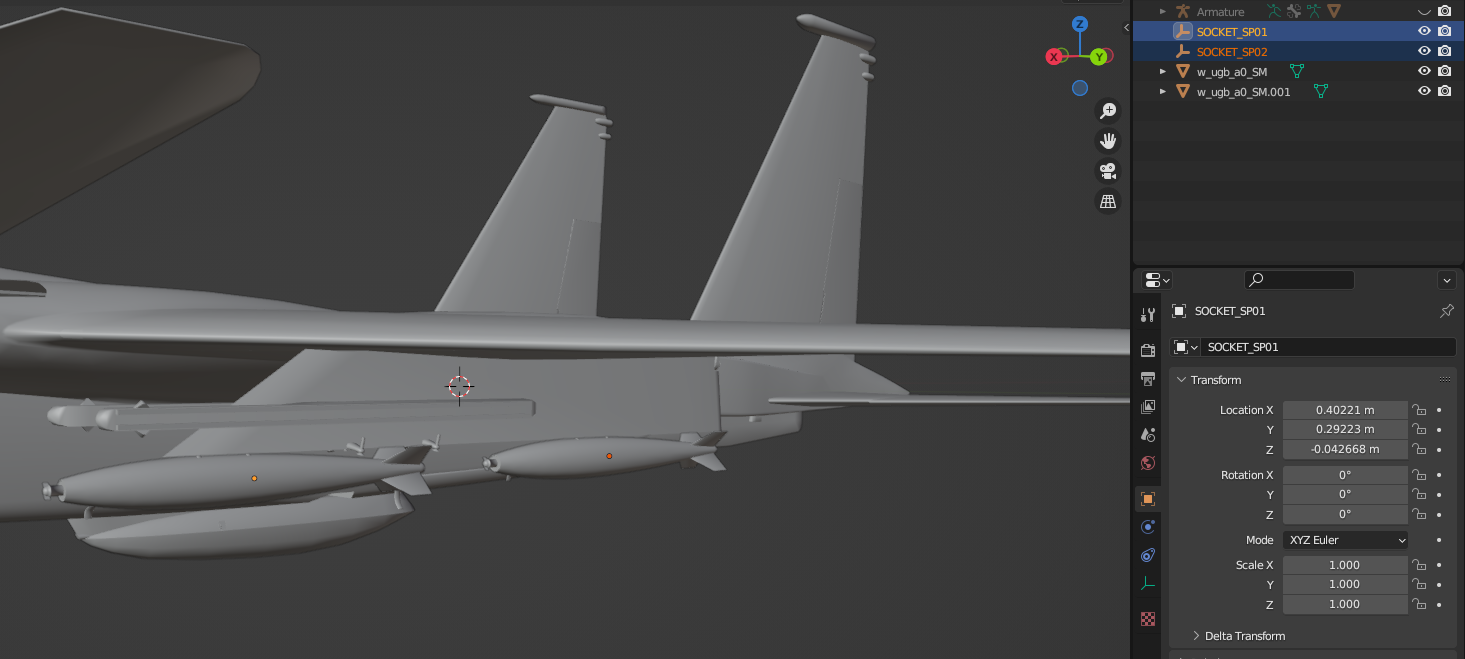
You can delete the weapon meshes if you want. (Do NOT delete the sockets).
Proceed to clone the sockets, adjust their index and invert their Y coordinate,

Now you have your necessary sockets. But you’re not done just yet.
You need to create a random mesh that you will shrink and hide inside the plane mesh. It's recommended to use a “plane”.

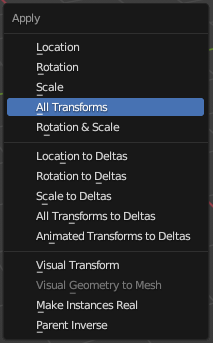
Rename your plane to (aircraft name)_SWPx_SM (x being the index of the SWP of your choice), then Ctrl+A > “All Transforms”
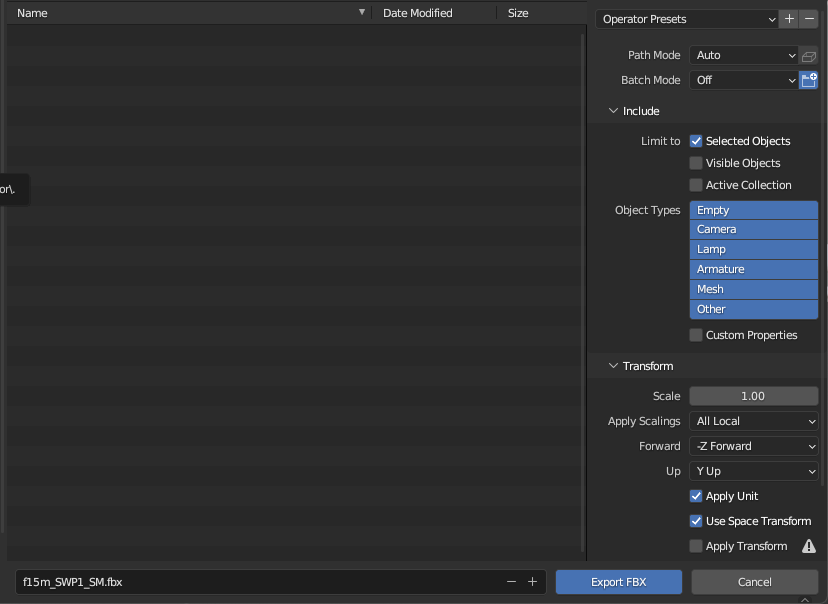
Now, select only the sockets and the plane, then go to File > Export > FBX (.fbx)
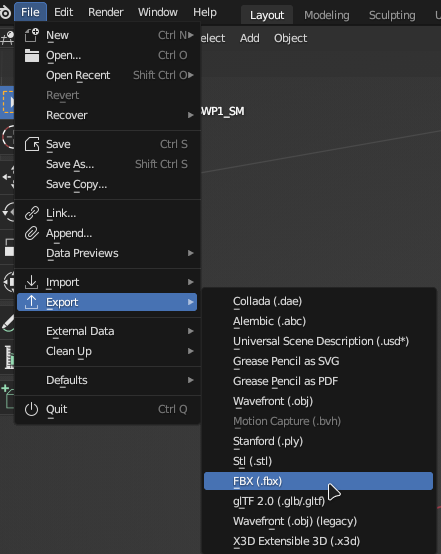
Name the export file the same way as the plane, (aircraftname)_SWPx_SM.

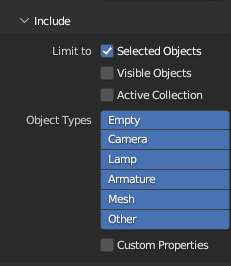
Make sure to check “Limit to Selected Objects”, and done.
¶ Step 3.2: SWP sockets with static pod/pylon
This part isn’t hard either. It’s pretty much the same as the previous indication, except instead of an empty and a plane, you’ll have a custom pylon/pod.
Tips for specific pods:
- MGP/PLSL/EML: Add a socket(s) right at the tip of the barrel.
- RKT: Add sockets in every rocket hole, use rocket meshes for location reference (lol good luck).
- TLS: Add a socket right at the center of the lens.
- IEWS: Add a socket wherever you want, it doesn’t really matter. If you’re doing a hidden IEWS like on the ADFX-01 Morgan, you can just do what’s described in 2.1.
You can borrow all of these pods from the Game/Vehicles/Weapons folder.
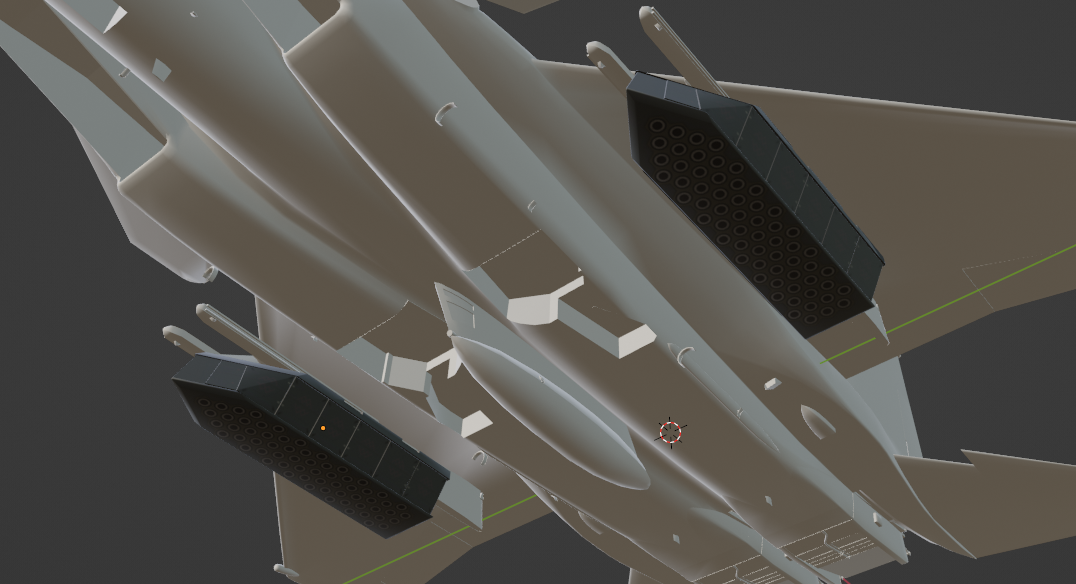
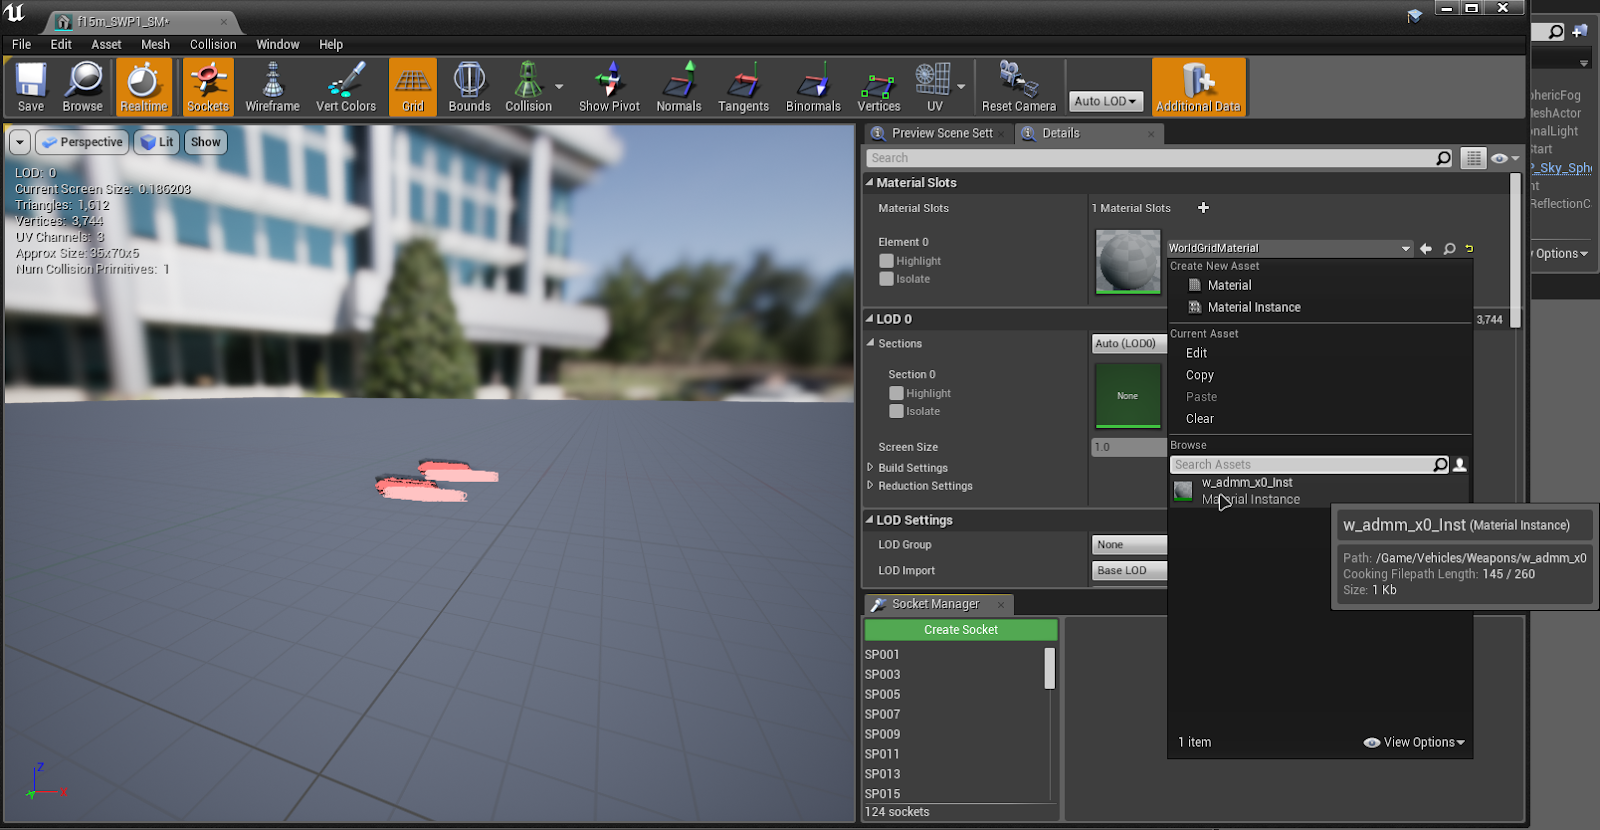
For this example, two ADMM launchers will be placed on the S/MTD’s pylon. You can obtain the mesh from the directory Game/Vehicles/Weapons/w_admm_x0, then import the w_admm_x0_SM.pskx file in Blender. Use the Mirror modifier in case you wish to apply the changes to the other wing.
After that, Rename the mesh to (aircraftname)_SWPx_SM. The pylon/pod meshes are basically the same as the blank square mesh from section 3.1.


Also, if you’re using a custom pylon, you can:
- Assign the plane’s Decal_Inst material to it, then UV-unwrap it onto the plane’s textures. (Modification of your custom pylon UV is required.)
- Fine-tune every single skin to account for your pylon.
- Make it use a completely separate material and texture.
For this case, ADMM pods have dedicated textures in-game, so it has its own material instance.
Now onto creating a lot of sockets for each hole.
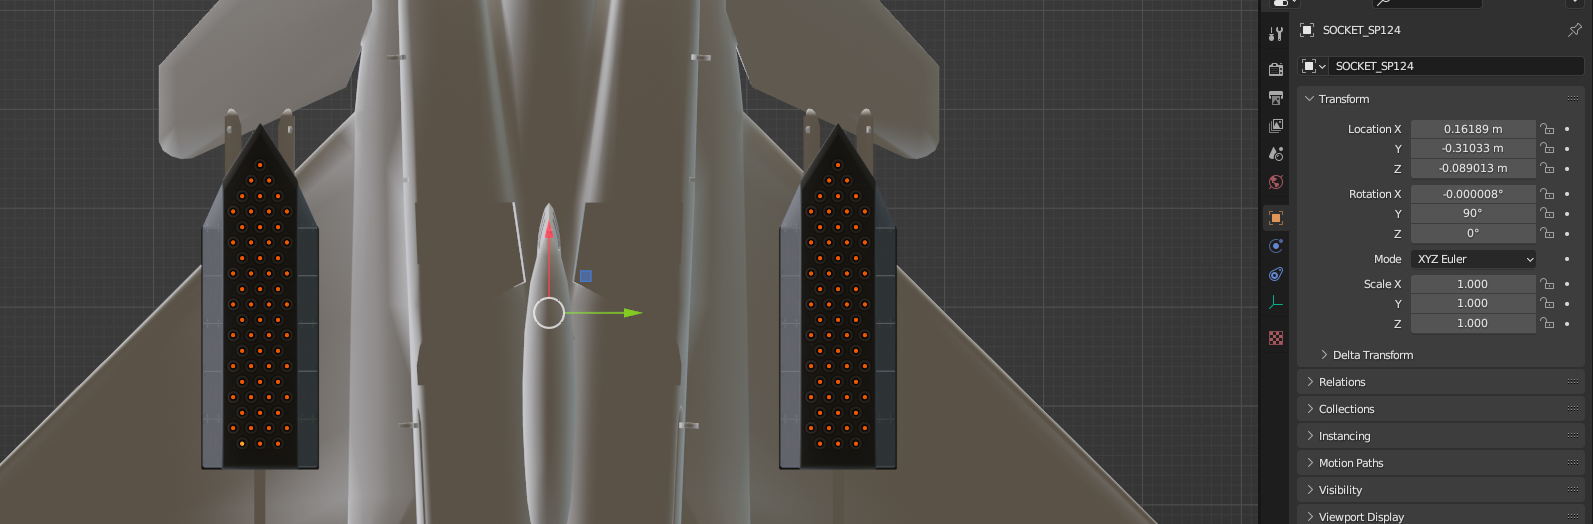
Make sure that the sockets are pointing in the right direction (the X coordinate of the socket indicates the front). so if you want the missiles/projectiles to go down, then rotate the sockets downwards.
Then, select your pylon/pod mesh and all your sockets, then export as .fbx with “Limit to selected objects” checked.
¶ Step 3.3: Animated SWP meshes
This part has a slightly higher level of complexity. There are several aircraft with animated SWP meshes in AC7, such as the Su-47, the X-02S and the F/A-18F.
Based on the Step 1, you might’ve already identified the aircraft that contains a skeletal SPW mesh. In that case, you can proceed to import your custom animated mesh, or re-use a weapon from the game itself.
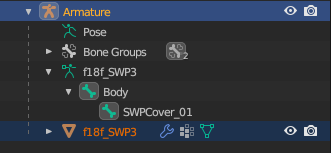
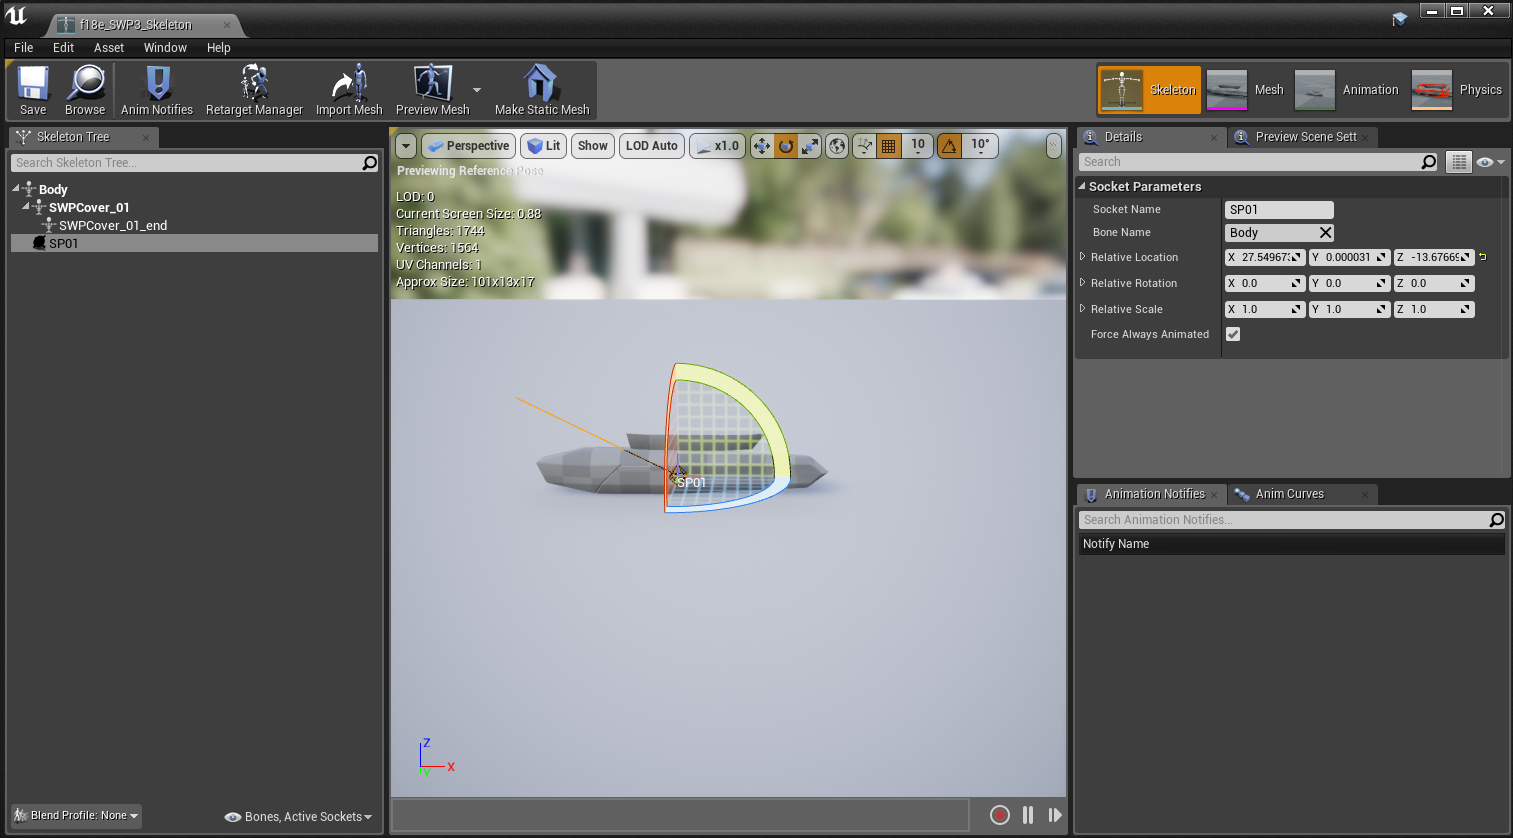
For example, we have the Hornet’s EML, extracted from the Hornet’s SWP with UModel, localized in the directory Game/Vehicles/Aircraft/f18f/f18f_SWP3.uasset

The black lines are bones. The “Body” bone should not be moved and remains static in the world origin (center). The other bones (SWPCover_xx) are parented to the Body bone.
Though, you’ll notice that this mesh does not have an animation. The reason for that couldn’t be more simple - you haven’t imported the animation yet.
Select the armature and, through File > Import, import Skeleton Animation (.psa).
Find the (planename)_SWPx_Anim.psa file (in this case, f18f_SWP3_Anim.psa) and import it.
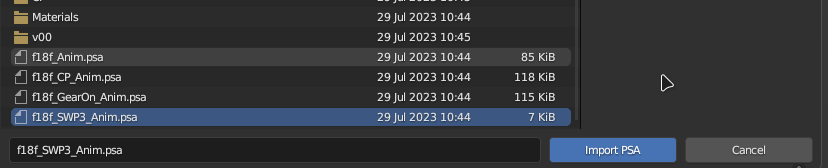
You will now see 100 keyframes on the animation timeline.
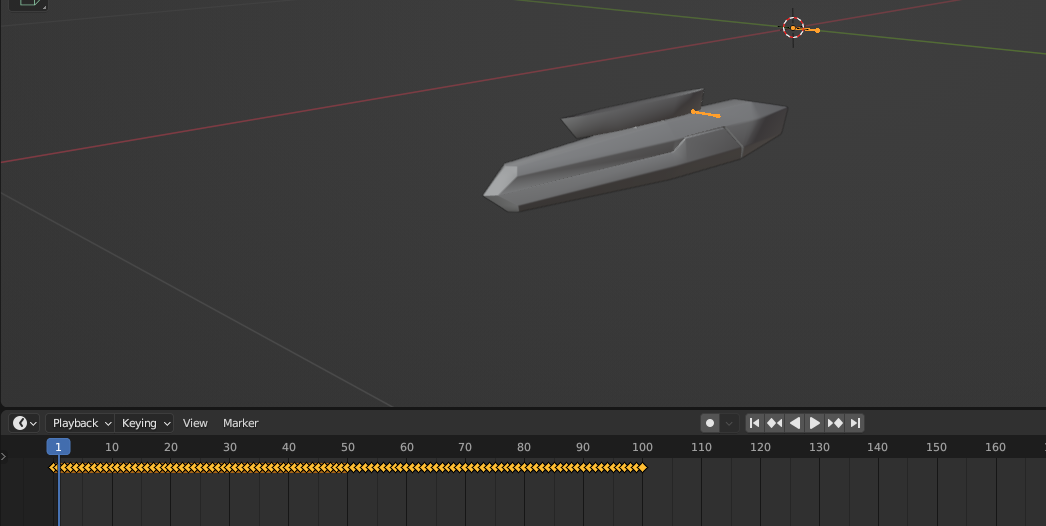
As you can see, the opening animation starts at frame 50 and ends at frame 100. The game uses the same animation for closing, but played in reverse. So, frames 0-50 are the same closed position, 50 is the starting point of the opening animation and 50-100 is the opening animation itself. You can adjust the mesh and the animation keeping this in mind.
You can also create the SWP mesh on your own, or modify a static mesh to make it animated, similarly to the Morgan animated TLS mod.
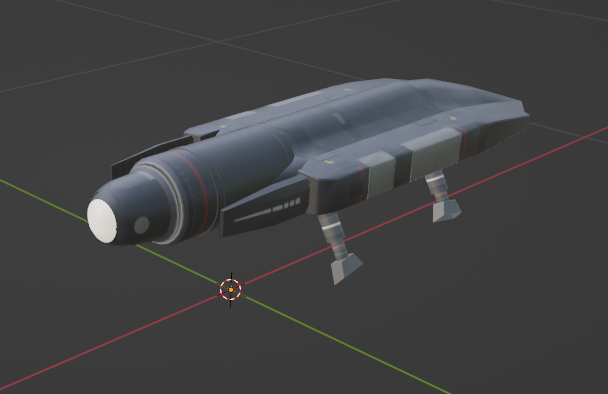 |
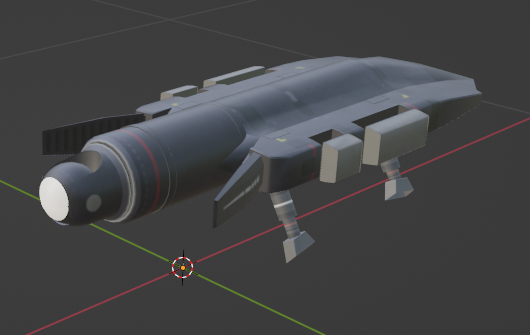 |
| Animation at the frame 0 | Animation at the frame 100 |
Do keep in mind that the bone structure should be like this:
Body
- SWPCover_xx (Parented to Body; You can also parent SWPCover bones to other SWPCover bones, but Body should be on the top of the hierarchy)
- - SPxx (UE Socket or Bone parented to the SWPCover_xx)
Note 1: You cannot use empties as sockets for skeletal meshes. There are two ways to create sockets:
- As UE4 sockets (Inside Unreal Engine 4)
- As bones (Add a bone with the name of the socket.)
Note 2: When extracting skeletal meshes using UModel, sockets do not get extracted. So, even if you’re using an existing SWP mesh with an existing skeleton, you still have to add the sockets manually.

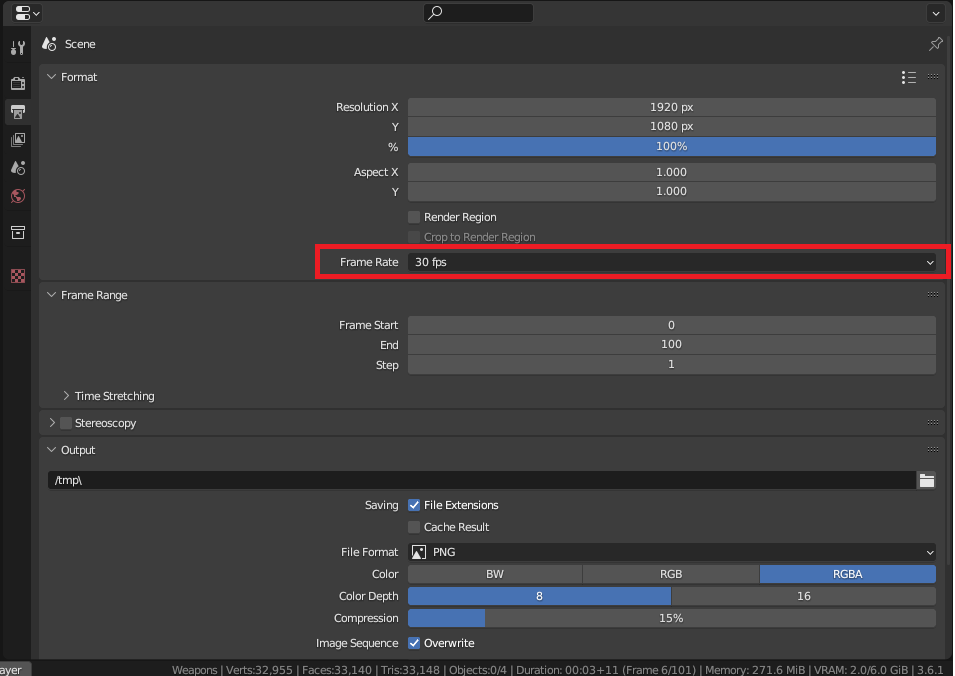
One step is remaining, which is checking the frame-rate of your blender project. It should be 30 fps before mesh exportation, or animation errors might occur in-game.
After you’re done in Blender, you should select your mesh and armature and export as .fbx the same way, with “Limit to selected objects” enabled.
¶ Step 4: Preparing your files
For this part you are going to need Unreal Engine 4.18 in order to prepare the files to be imported. (Download link provided in the beginning of the guide).
Keep in mind that UE4 always takes some time to start up, approximately a few minutes (especially if you’re working on an HDD)
¶ Step 4.1: UE4.18
When you open UE4, you’ll be greeted by this window, where you should create your desired project.
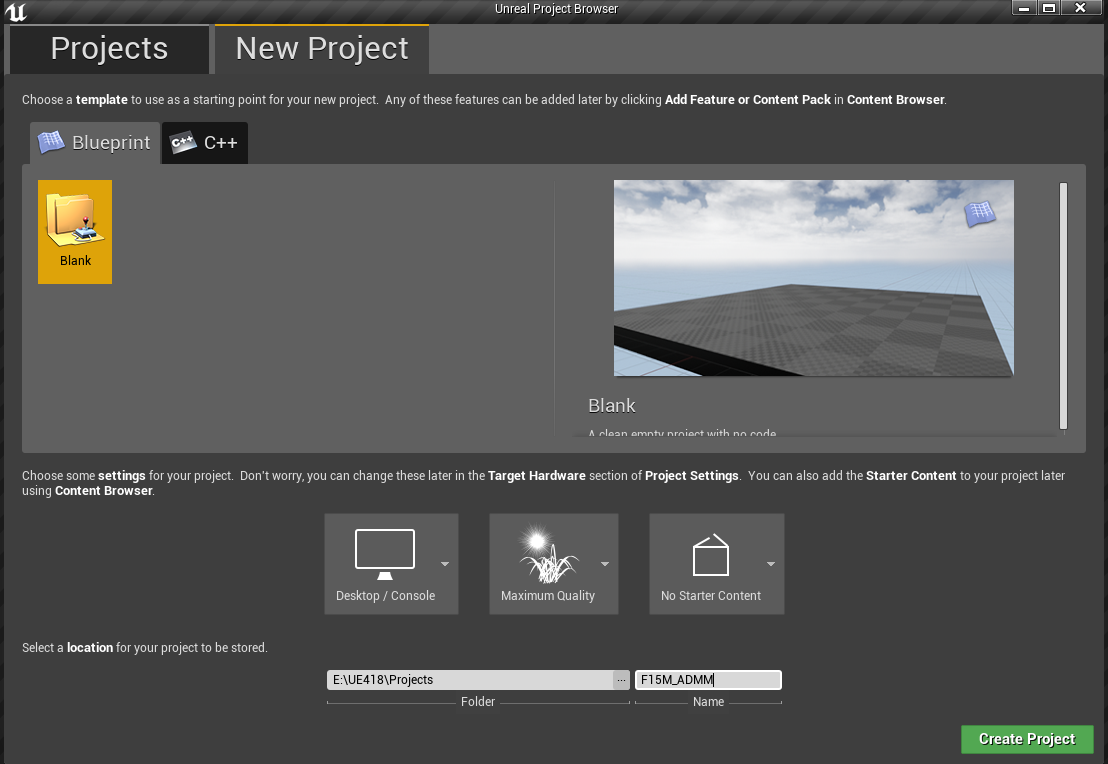
Hit “Create Project” and wait a few more minutes for the main window to open.

You’re only gonna need the bottom part of the window - the Content Browser.
Now, it’s recommended to replicate the game directory structure, with the folders of your aircraft of choice and, if necessary, weapon pod of choice.
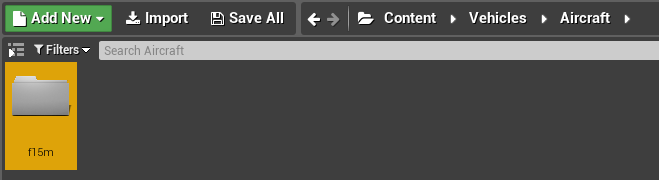
For this example, we need to create a Vehicles folder (by right-clicking the empty area and pressing New Folder), inside of which we need two separate folders: Aircraft and Weapons.
Inside Aircraft, you create a folder with your desired aircraft’s internal name, for example, f15m.
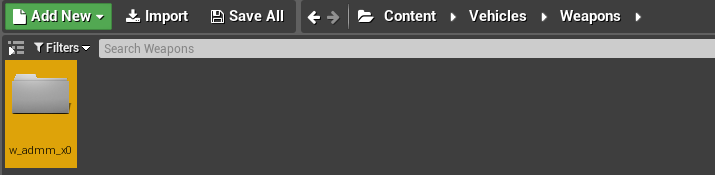
Inside Weapons, you create a folder with your desired pylon’s/pod’s internal name, for example, w_admm_x0, and inside of it, a folder called Material.
(Reminder: The whole Weapons folder is only necessary if you’re using a pre-existing pod/pylon. If you’re using the aircraft’s main texture for the pylon, you should do the following in Aircraft/(aircraftname)/00.)
There, you should create a dummy material instance. In this case, the material the ADMM pods use is called w_admm_x0_inst (Doesn’t apply in case you are working with a custom mesh of your own.)
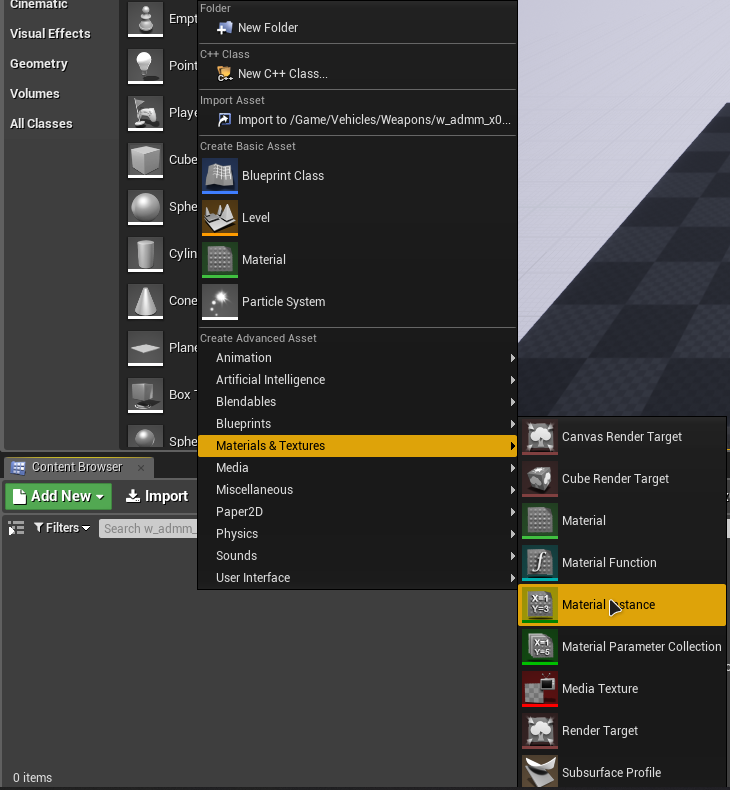
You don’t need to do anything with it, just create it and immediately save it.
The “dummy” material instance is a useful trick in order to load game material instances instead of making them from scratch. By assigning a material instance to your mesh, data related to its directory is saved, and the game would try to load the directory of the material instance your mesh has..
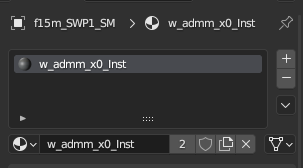
The material instance should have the same name as the material shown in Blender (SWP mesh’s Material Properties tab).
(In case of the base aircraft texture, it needs to be [aircraftname]_00_Decal_Inst.
Then, you go to your chosen aircraft’s folder (In this case, Vehicles/Aircraft/f15m) and import your SWP mesh’s .fbx file.
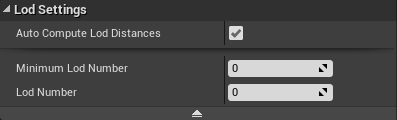
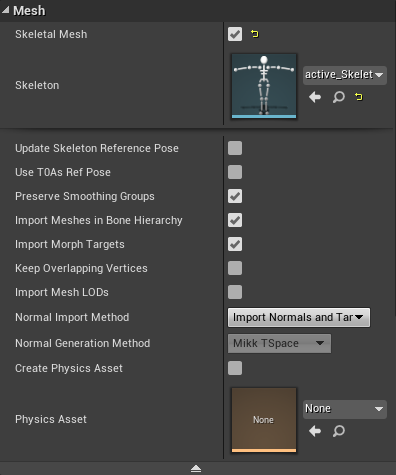
Now, you will be greeted with a small window with various checks and tabs. Check if these options are selected (The rest can be left by default) :
| Static SWP mesh | Skeletal SWP mesh |
  |
 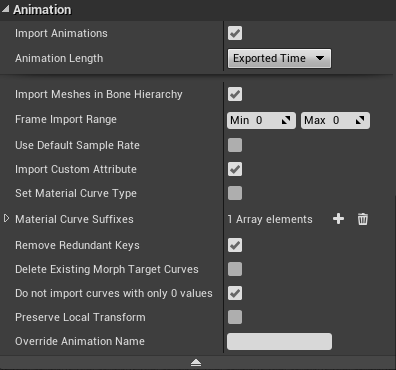 |
| Leave by default on both cases |
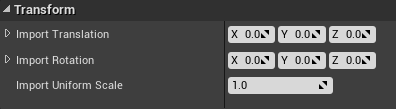 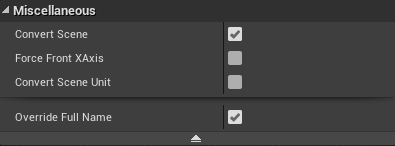 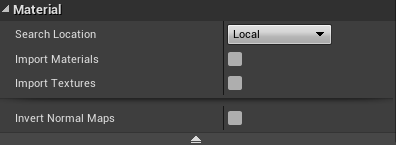 |
Press the “Import” button, you will see a few objects in your content browser.
- In case of static mesh:
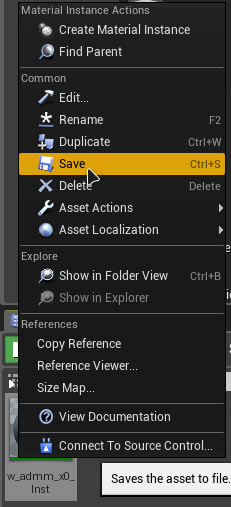
There will only be 1 item. That’s your SWP mesh. Double-click it, and select the necessary material instance in the drop-down menu.Then hit Ctrl+S or “Save”
- In case of skeletal mesh:
You will see 3 items: The mesh, the skeleton, and animation.
For the mesh, do the same thing as for the static mesh - assign the correct instance and save.
For the skeleton if you haven’t created socket bones in Blender, you should create sockets by right-clicking the necessary parent bone, creating the socket, and manually adjusting the coordinates and rotation. You can use the coordinates from a Blender mockup multiplied by 100. Then hit save.
Now that this is done, you should make sure that every asset is saved (you can just press “Save All” next to the Import button).
After that, select File->Cook content for Windows.
A popup will appear in the bottom right, followed with a sound effect in case the file is done.

¶ Step 4.2: Material overrides in the aircraft pawn
Now, if you’re using a material that’s different from the initial SWP mesh’s material, you’ll need to add material overrides to your aircraft’s skin pawns. For that, open UModel and save (not extract) every Blueprint/Player/Pawn/Skin/AcePlayerPawn_(aircraftname)_sxx.uasset (xx stands for skin number).
Open UAssetGUI and open any of the aforementioned skin pawn files (You’ll have to do the same thing for all of them).
Go to Import Data and find two lines which follow this format:


Copy both of them and paste them to the bottom of the list. Hit Ctrl+S for convenience, line IDs will appear after that.
Now, you should edit these lines to match the necessary material instance.
For this example, we need to use ADMM’s instance.

The MaterialInstanceConstant line should always point to the Package line.
After that, expand the Export Data section and find SWPx_GEN_VARIABLE, then, under it, its OverrideMaterials.
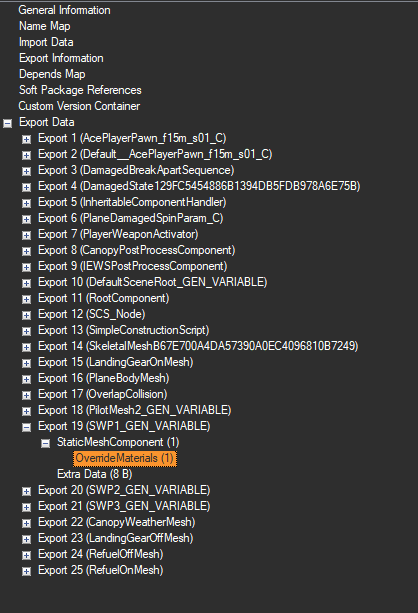
After that, instead of the existing specified material select the needed & newly-imported material’s Package string (through the ID in the Variant column).

Save the file, and repeat for every other skin pawn.
¶ Step 4.3: Weapon swap in the aircraft pawn
Explained in Weapon Swap guide, by M4rkoz
¶ Step 4.4: Packing
Pack the same way as described in the aforementioned guide.
 SWP Meshes |
 [ModName_P] / Nimbus / Content / Vehicles / Aircraft / (xxxx) |
|
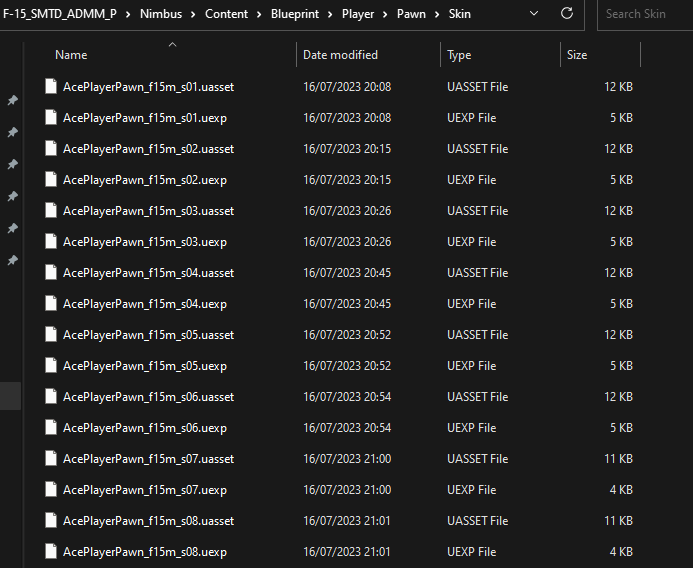
Skin Pawns |
[ModName_P] / Nimbus / Content / Blueprint / Player / Pawn / Skin |
Now, go to the directory where you created your UE4.18 project.
Go to (projectname)/Saved/Cooked/WindowsNoEditor/(projectname)/Content/Vehicles/Aircraft/(aircraftname) and copy all the .uasset and .uexp files into the mod folder
(Nimbus/…/Aircraft/(aircraftname)).
Do not copy any 00 or Material folders or their content. They’re dummy files as explained above. You only need the mesh files.
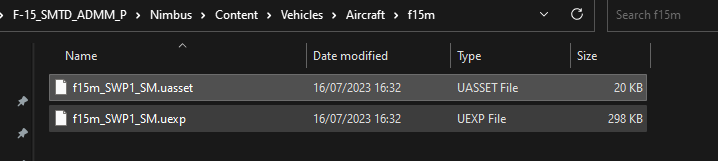
(This is the example of the static mesh. In case of a skeletal mesh, you need to copy the Skeleton and Animation files too.)
Then copy all skin pawns into the skin pawn folder (Not the .bak files, only .uasset and .uexp).
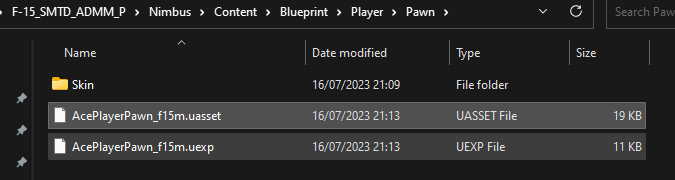
Also copy the aircraft pawn into the Pawn folder.
After that, you can pack the mod folder the usual way.

Your mod is now ready for use.
¶ Credits
I want to say thanks to M4rkoz for the incredible information he inserted into this document, including concise instructions about UE4 importation and other mesh-related info. Your efforts and dedication will be rewarded as well.
Kosnag, for motivating me and helping me back in 2021 about modding in general.
Fantasma, for helping me on getting the hang of Unreal Engine along with some testing. Thank you for your patience towards me, I owe you a lot.
Kazutoki Kono and Project Aces, for delivering the Ace Combat experience further and further.
And all the people/modders who picked interest on this small guide, we are more than grateful.

¶ Extras


ADF-01 -Heavenhold’s Protector-