¶ Step 1: Extraction
First of all, you will need UModel in order to extract the game files. Specifically, UModel’s PC executable file.
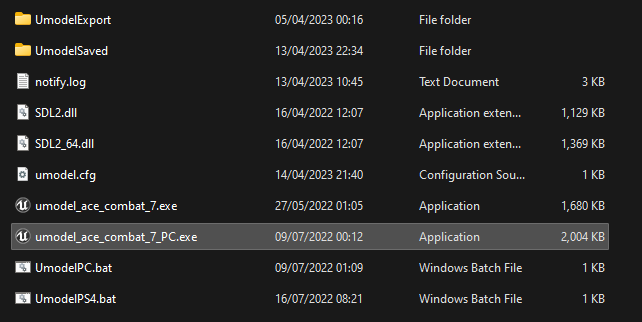
Two windows will pop up; One of them is a command prompt which you will not need, the other is the main window which is used to do pretty much everything you need to do in UModel.
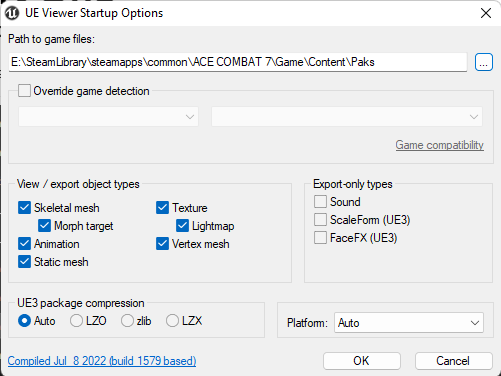
As shown in the image, you need to select the game files folder. Don’t check or uncheck anything - keep it the way it is.
After you hit OK, you will see another window pop up, which will ask you for an encryption key.
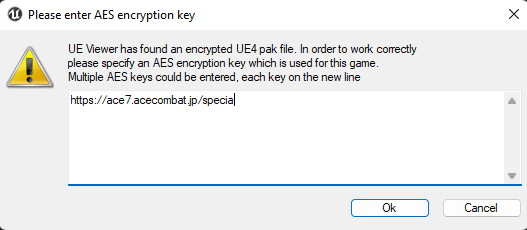
The key is https://ace7.acecombat.jp/specia or https://ace7.acecombat.jp/special/
Both keys can work, I personally use the first one but it doesn’t matter and is only up to personal preference.
After you hit OK once again, you will see a list of folders. Quite a big one, that is. But don’t get overwhelmed - you only need one directory from here.
The directory is Game\Blueprint\Player\Pawn, that’s where the files you need are placed.
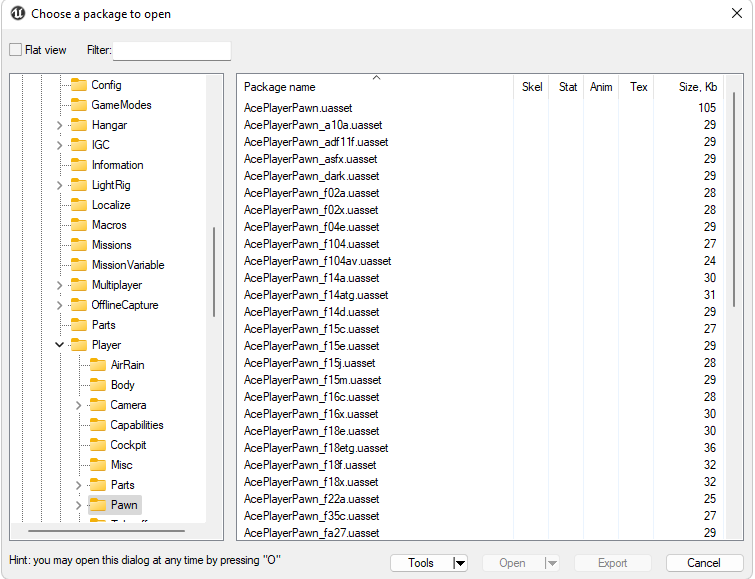
The amount of .uasset files might be overwhelming again, but you only need one depending on which aircraft you’re weapon-swapping for. The names are mostly intuitive, but some might be a little tricky to guess.
See the list of playable aircraft’s internal names
Now that we’ve got the list covered, let’s actually extract the necessary pawn file.
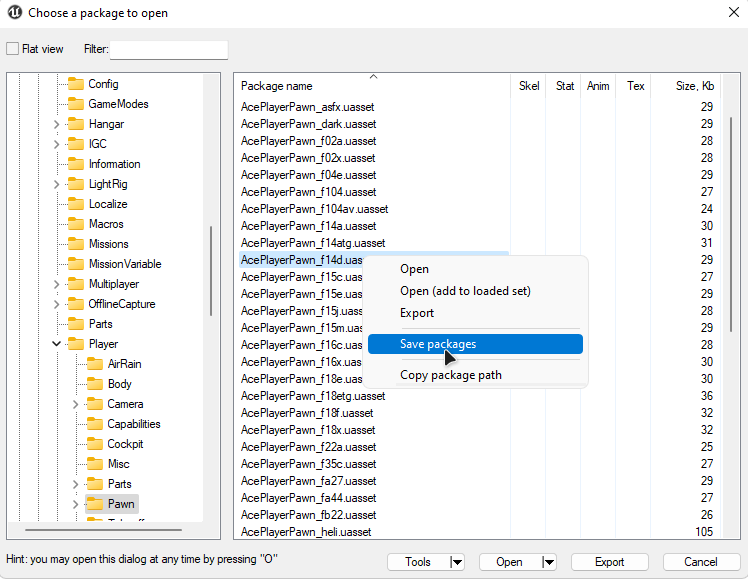
Find the desired .uasset file in the list (For this guide, I’ll be using the F-14D’s file), right click and press “Save packages”.
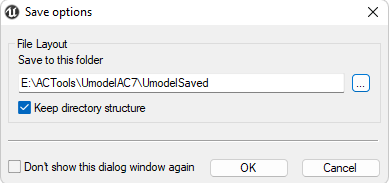
You will be offered to save the file to an automatically created UmodelSaved folder. You can choose the folder you want, I’ll stick with the default directory.
Don’t uncheck “Keep directory structure”, keeping it on is quite helpful.
After you’ve saved the file, you can close UModel. Moving onto…
¶ Step 2: Swapping the weapons
Now we move on to the main part - swapping the weapons on your aircraft.
Open up UAssetGUI.exe.

Now you grab your pawn file which should be in a similar directory to this :

And drag and drop it into the UAssetGUI window. You only need the .uasset file for now, but don’t delete the .uexp file.
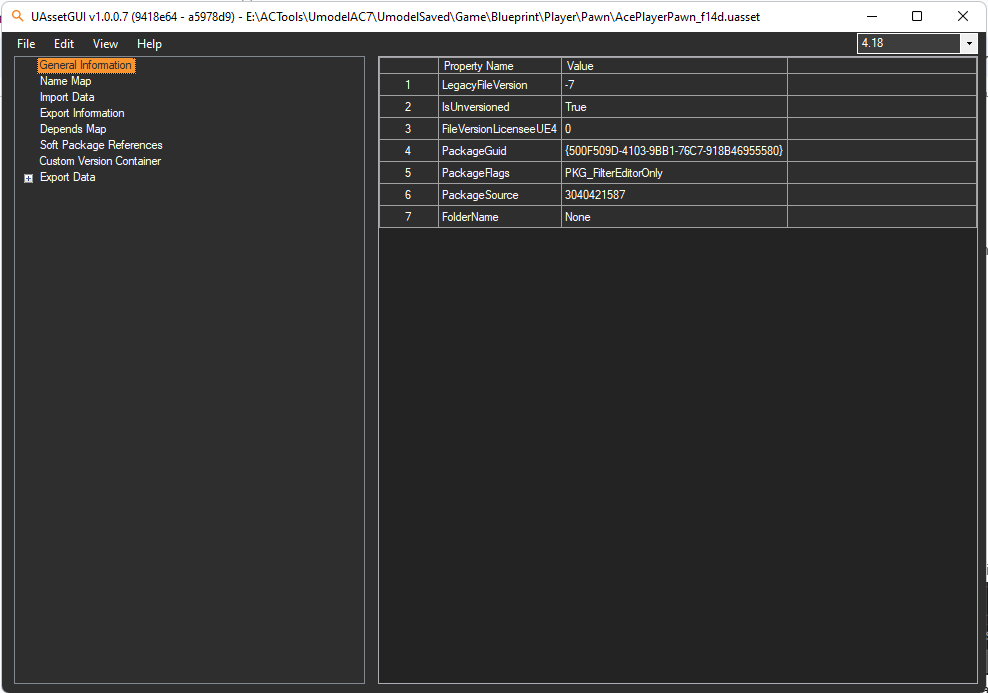
Once again, the interface and contents might be complicated for an inexperienced person, but, once again, we only need a small part of it.
Select “Import Data” on the left side.
You will see a list in which you need to find strings, names of which are formatted this way:plwp_(weapon internal name)_(variant) and plwp_(weapon internal name)_(variant)_C
There’s three sections in which there are these strings. You need to apply changes to all 3 sections.
1. Somewhere around number -10

2. Somewhere around number -65

3. Somewhere around number -90

Now you need to know what weapon you want to get rid of and what you want to use instead.
The full list of weapons is presented below.
¶ Base weapons
Game/Blueprint/Weapons/Player/Base
¶ Weapon variants
Game/Blueprint/Weapons/Player/Variation
These can be found in Game/Blueprint/Weapons/Player/Base and Game/Blueprint/Weapons/Player/Variation folders which you can also save through UModel.
(Note: You might not have some of those weapons because I can’t be bothered to move the mods folder out before exporting.)
Let’s say you want to swap the GPB for the FAEB.
You go to every line that mentions plwp_gpb_a0 in any way and change it with plwp_faeb_a0. It should look like this:


Note : Whenever you use a weapon variation, you should change the …Weapons/Player/Base/ to …/Weapons/Player/Variation and vice versa.
Note 2 : I don’t recommend trying to change weapons that have pods (MGP, EML, PLSL, TLS). They need mesh editing and the process is more complex. This won’t be explained in the guide simply because I don’t know how to do it.
You can change all 3 weapons to whatever you want. There also might be additional slots, one for the gun (can be set to pgun (PLSL gun) or gun) and for the standard missile (MSL, can be changed for anything). If they aren’t there, I don’t think you can change them, so trying isn’t a good idea.
After you’re done, you hit Ctrl+S to save.
Important note : DO NOT rename the .uasset and .uexp files in any case. It will break the mod and result in the game crashing.
You’re done with UAssetGUI, and now you can move on to the final part.
¶ Step 3: Packing
You’re almost there. Grab your saved Pawn files (both .uasset and .uexp, don’t mind the .bak ones)...

…and head over to your UnrealPAK directory.
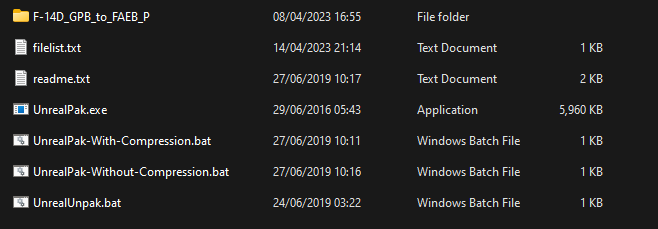
Right above the UnrealPak.exe and other files, you will see a folder. You need to rename it to whatever you want your mod to be named and add _P in the end, otherwise the mod won’t load.
For example, in my case it looks like this :
Now you go into the folder, go into the Nimbus folder, then into the Content folder. The directory should look like this :

Here, you replicate the directory of the .uasset file, imagining that the “Content” folder is the same as the “Game” folder. The directory should look like Nimbus/Content/Blueprint/Player/Pawn. Put the .uasset and .uexp file into the Pawn folder.

After that, you go back to the UnrealPAK folder, back to this scenario.
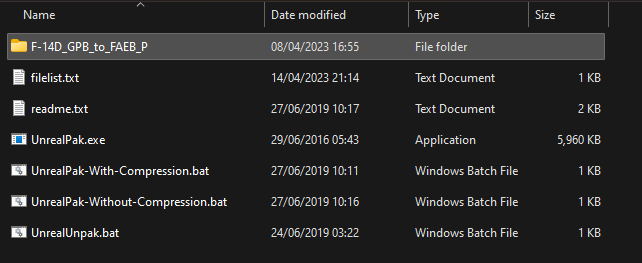
You grab the mod folder and drag-and-drop it right onto the UnrealPak-Without-Compression.bat file.
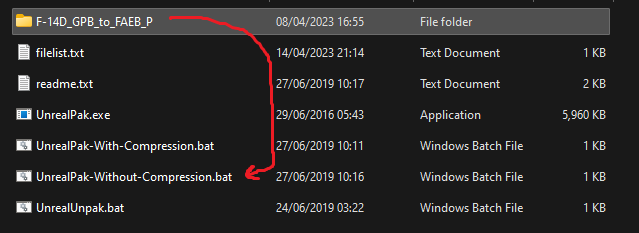
A command prompt window will open. After a very short while, you will be told to press any key to continue. Do so, and now you have a .pak file in front of you.
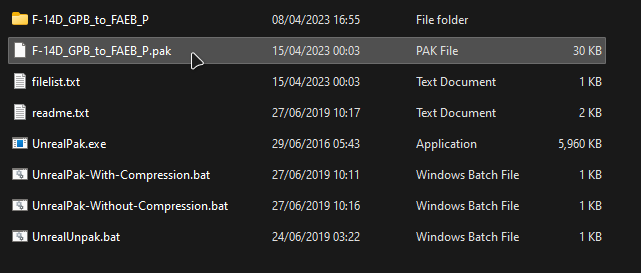
That is the finalized mod file. Unlike the .uasset and .uexp files, you can change the name of the .pak file, it won’t harm anything. If you want to give your mod a higher load priority, add a few tildes to the beginning of its name. For example, ~F-14D_GBP_to_FAEB_P.pak or ~~~~F-14D_GBP_TO_FAEB.pak. The more tildes there are, the higher the load priority.
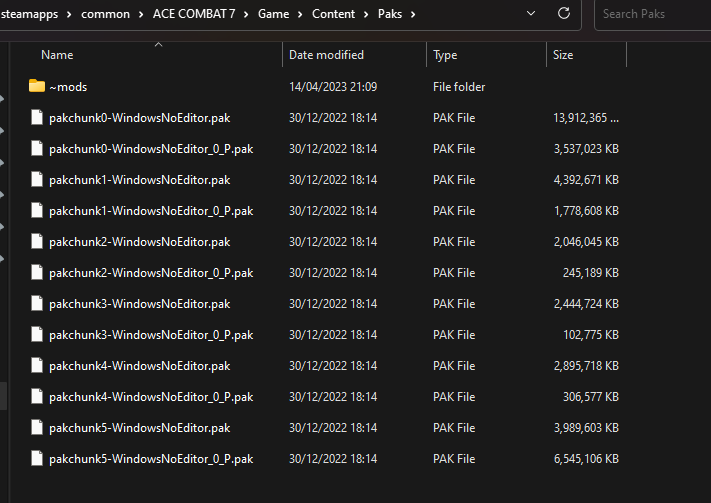
Now you grab the .pak file, preferably copy it to have a backup available, and go to your game folder - ACE COMBAT 7/Game/Content/Paks.
If you don’t have a ~mods folder there, create one. Open it and paste your mod there.

¶ Conclusion
You have finished your weapon swap mod.
You can see the results of your modding in the game. You will still see the name of the original SPW in the hangar, but the in-sortie HUD will show the correct name.
Thanks for sticking around till the end of the guide. I hope the explanation was good and clear and that the results satisfy you.
My Discord : m4rkoza7