¶ USM conversion
How to convert videos for use in AEW: Fight Forever
¶ Tools necessary
- ffmpeg
- Windows (10 and 11) quick install: open PowerShell and type
winget install ffmpeg
- Windows (10 and 11) quick install: open PowerShell and type
- Scaleform Video Encoder
- repak
¶ Tools recommended
¶ Converting from any video format to USM
Videos are stored in USM format, with intro videos being 1280x720, 30fps, without sound. Fullscreen videos used for overlay (nameplates during entrances, replays) or background (matchup screen or title screen) use 1920x1080, 30fps, without sound. For best conversion, prepare your videos ahead of time using a conversion program like ffmpeg, the free CLI-based video converter.
Note: paths with spaces in them (especially "C:\Program Files (x86)") tend to cause issues with CLI tools. Try to do your work in directories that don't have any spaces in the path, and if you DO have to reference them, enclose them in the single character doublequote marks. (eg ", not ' or ` ). You can also use the
cdcommand to change dirs so that you're in the directory in question, and not have to reference it by name.
In this example, I will use yt-dlp (an exercise left to the reader) to download the updated (2024) Dynamite video from AEW Music's Youtube page.
yt-dlp https://www.youtube.com/watch?v=MwTV9El-kXk --output=pop
This creates a local file: 'pop.webm', which is a movie file that can be converted via ffmpeg.
You don't necessarily have to try to set up yt-dlp or get this specific file -- try out your own movie files however you obtain them.
ffmpeg can handle a large variety of input files, not just webm -- try almost any video file as the first input argument and it should work.
We use the following command line arguments to reformat the video size, remove the audio, and crop to the first 30.1 seconds:
ffmpeg -i pop.webm -an -t 0:00:30.1 -vf scale=1920:1080 -q:v 0 pop.avi
The command line arguments here are:
-i pop.webm: input file-an: audiotrack none (remove this if you are replacing a movie with sound)-t 0:00:30.1: clip to the first 30.1 s (where this file's video loops, roughly)-vf scale=1920:1080: video filter, with the scale=1920:1080 being its parameter-q:v 0: maintain quality rather than remuxing for size/speed
Some optional command line parameters you can try if needed:
-f 30: force framerate to 30-b:v 16000k: force bitrate to 16000k rather than variable-vcodec copy: do not remux video at all (remove-vfand-q:voptions to use)
This creates in the same folder, pop.avi. Take note of the bitrate of the output file for later use.
FFMpeg documentation has more information about command line switches
Test it using your default media player to make sure it works, isn't choppy, doesn't have terrible compression artifacts, loops at the right spot, etc, before continuing. I recommend using VLC, which can handle a wide array of formats, to test videos.
Next, download and unzip the Scaleform Video Encoder. The actual video encoder application is located in Bin\Tools\VideoEncoder in the folder you unzipped this tool to. Run ScaleformVideoEncoder.exe and this window should appear:
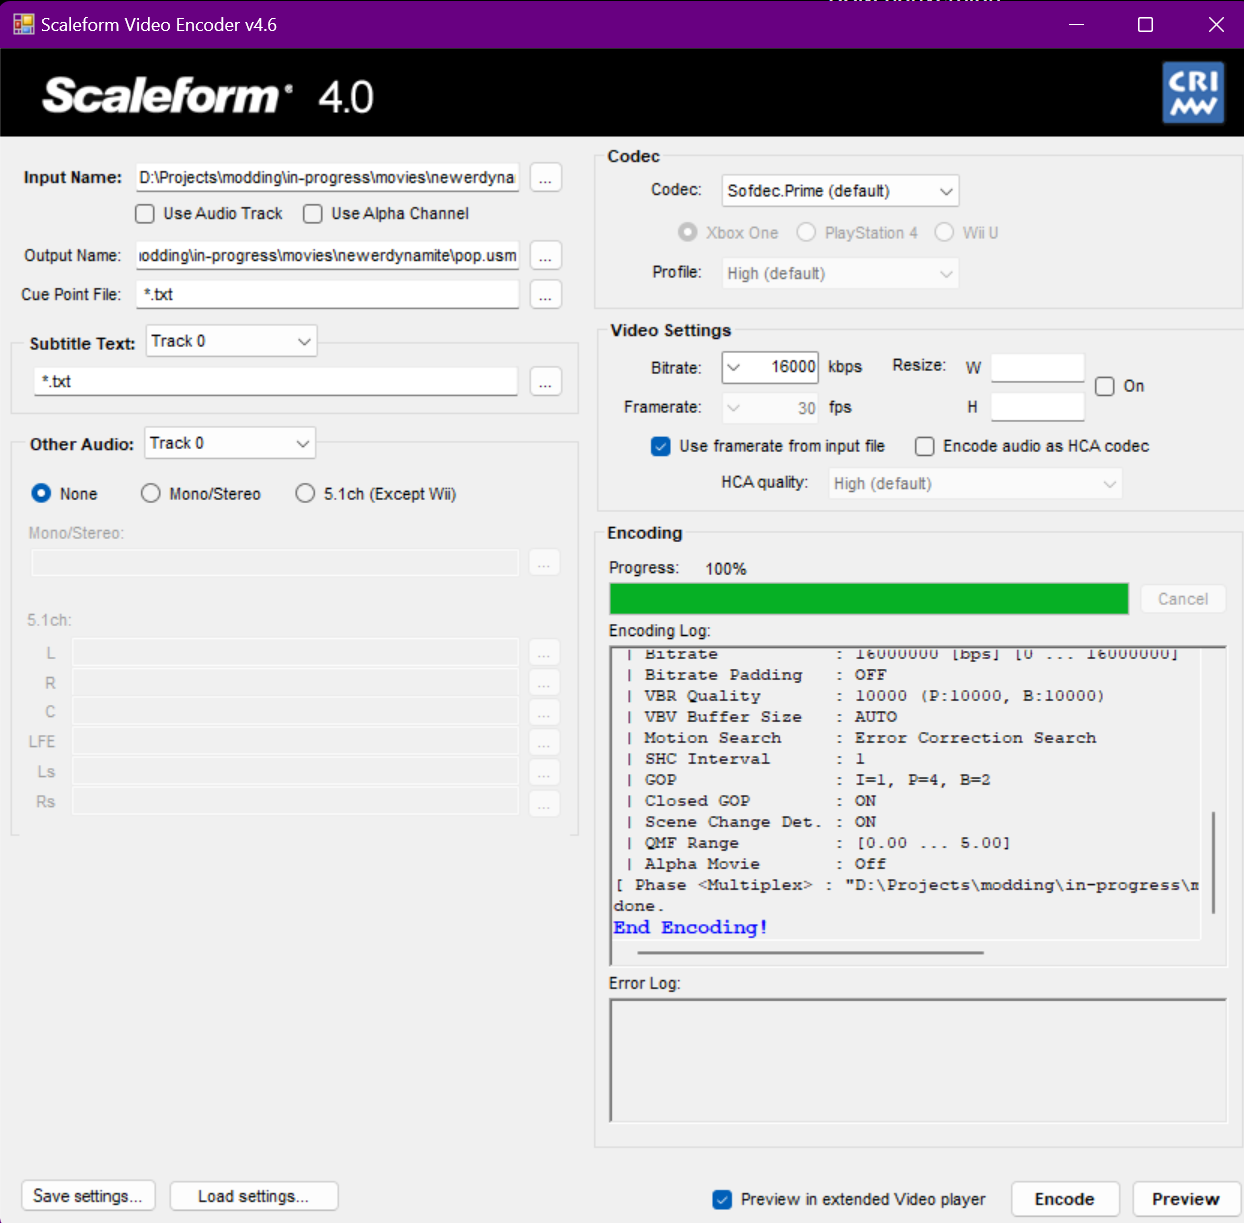
Select your .avi file in the Input Name, and it should automatically modify the Output Name to match, with .usm as the extension. Untick "Use Audio Track".
Under Video Settings, make sure your Bitrate is set to the smallest option that is greater than your bitrate -- for example, if the output bitrate of the file was 23750k, you should select 26000k. The other defaults should be acceptable for Video Settings, but note you can also force the framerate and size from this panel as well, if for some reason the video you're using is problematic in-game.
Once you press Encode, you should see output in the output window describing the process and hopefully ending without any errors.
It is also possible to convert via CLI if you wish to batch convert or build a script, using the medianoche.exe in the same folder:
"d:\Projects\modding\Tools\VideoEncoder\medianoche.exe" -gop_closed=on -gop_i=1 -gop_p=4 -gop_b=2 -video00="D:\Projects\modding\in-progress\movies\newerdynamite\pop.avi" -output="D:\Projects\modding\in-progress\movies\newerdynamite\pop.usm" -bitrate=20000000
When running the Scaleform GUI, it creates a .bat file in the same folder with the parameters it used to create this video, which generally looks identical to the above CLI.
¶ Packaging your mod
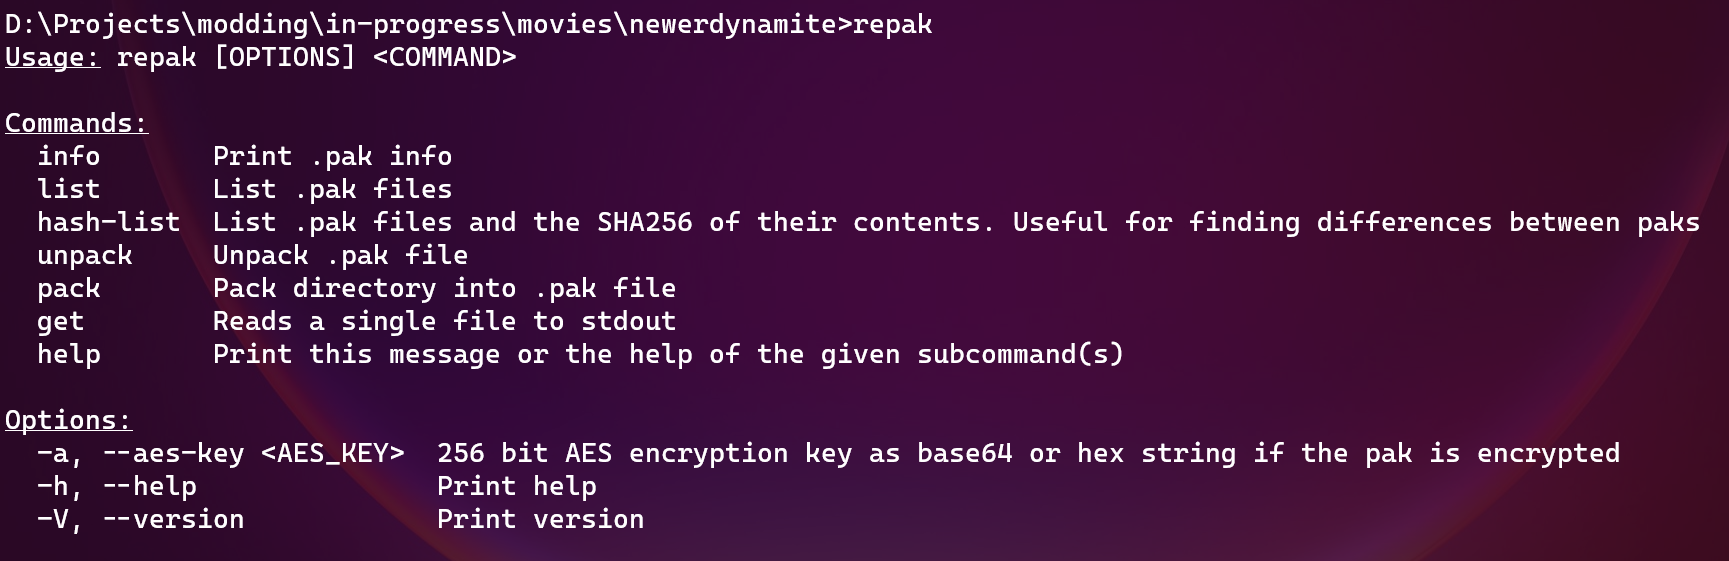
Video is one of the rare cases where we won't be using Unreal Engine at all. While we need to encrypt the output pak file with the correct AES key, it does not use a pakchunk, so we can use the CLI command repak. If using Windows, I recommend using the .msi installer to ensure it is installed in the default path. Afterward, test that you can run it by launching a command prompt and simply typing 'repak'. It should show you a help screen, rather than an error like "unknown command or filename":
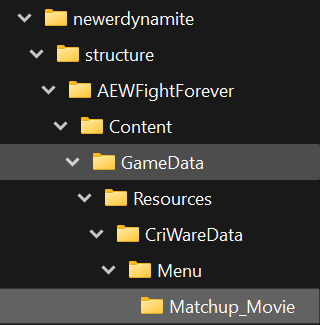
Now that it's installed and working, we have to set up a directory structure for it to pack. Let's create the folder as "structure".
Then using FModel (see setup tutorial), we find the path to the matchup screen we want to replace:
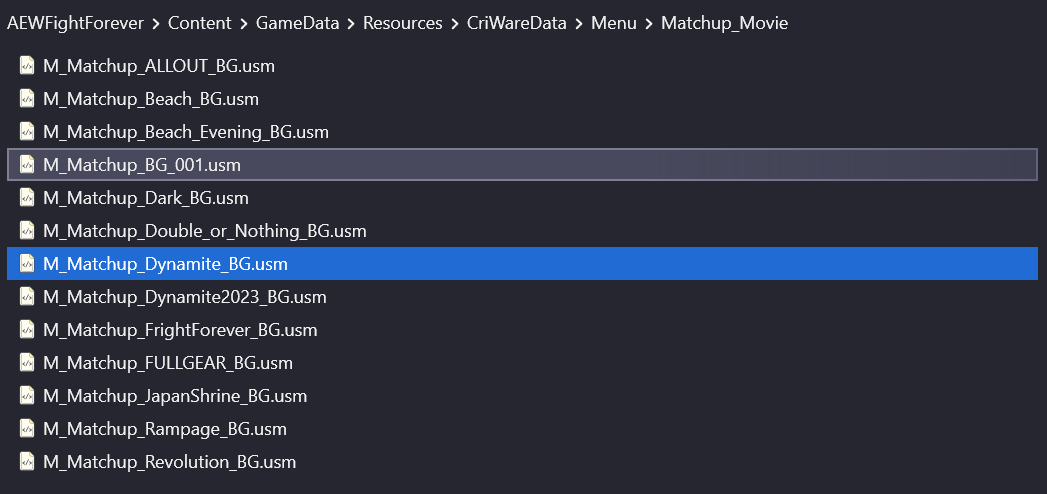
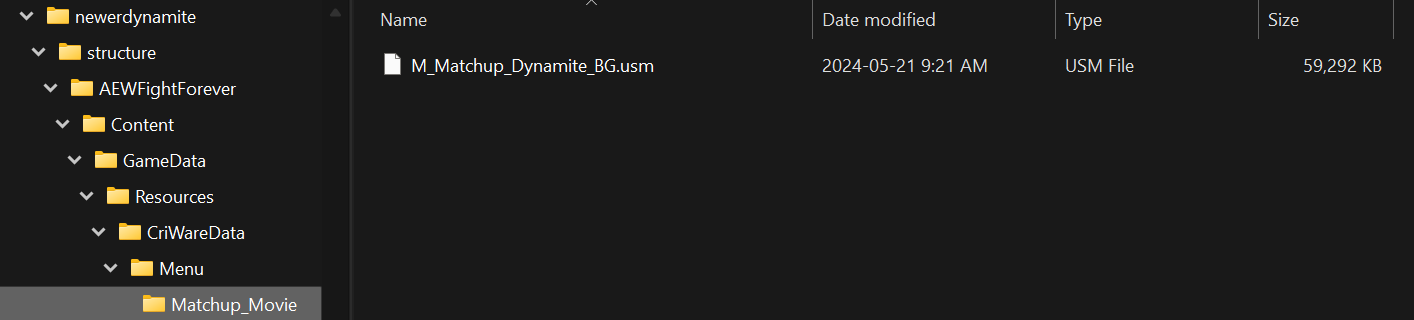
The matchup screens are at AEWFightForever\Content\GameData\Resources\CriWareData\Menu\Matchup_Movie, so we recreate this path in our directory structure, taking care to match case exactly:
We also want to replace a specific movie, so we copy our created USM to the appropriate filename in this folder, in this case M_Matchup_Dynamite_BG.usm:
Finally, we return to our command prompt to package our mod with the following command:
repak -a 0x766D2004BD1CA41B20A273CBEB8368FF267A819C30324F75B98C3EEAEB62BB1D pack -v structure
Note that we are using the AES key to encrypt the pak, but movie pak files do not require a pakchunk and therefore cannot conflict with any other mods.
This creates a pak in the local directory called "structure.pak", which we can now rename to z_DynamiteUpdater_P.pak and copy to our mods directory, or zip up and publish to Nexus.
¶ Transparent USMs
Experimental -- may not work! This will be updated as we've developed the skills.
Many of the videos in-game have alpha transparency, for use for replays and name plates, for example. AVIs only support transparency if they are encoded in rawvideo format with bgra colour settings: (Reddit thread)
ffmpeg -i input.mov -vcodec rawvideo -pix_fmt bgra -vf scale=1920:1080 -q:v 0 -vf vflip output.avi
You may need to hex-edit the resulting AVI, per the reddit thread, to change the resolution from "1920:-1080" to "1920:1080" as will be expected by Scaleform.
¶ Unpacking USMs from the game
Say you instead wish to unpack videos from the game, perhaps to edit them in movie-making software. For this, another simple CLI tool is available to convert the USM to m4v format, called UsmToolkit. This is a wrapper around VGToolkit, which makes things easier to batch unpack these files. Unzip this someplace where you can find the path to usmtoolkit.exe.
Assuming you used FModel to unpack multiple USMs to the same folder, open a command prompt in this folder and use the following command line, updating the path to Usmtoolkit.exe as appropriate:
FOR %A IN (./*.usm) DO d:\Projects\modding\Tools\UsmToolkit\UsmToolkit.exe extract %A
This will create movies in *.m4v format in the same folder with the same names. Any movies that have audio will also create a .adx file containing the audio track which would have to be reinserted into the video. You can do this with a video editing program like OpenShot, or another ffmpeg command:
ffmpeg -i REVOLUTION_21_EXPLODING_BARBED_WIRE_B_edited.m2v -i REVOLUTION_21_EXPLODING_BARBED_WIRE_B_edited.adx -q:v 0 Revolution.avi
¶ Shoutouts
Big thanks to idoser for help, testing, and refining this process!