Hogwarts Legacy is an ARPG video game developed by Avalanche Software and published by Warner Bros. Games. It was released on 10 February 2023 for PlayStation 5, Nintendo Switch, PlayStation 4, Xbox Series X and Series S, Xbox One, and Microsoft Windows.
¶ Brief Synopsis
This guide will walk you through building the Level Loader and ModActor Loader for UE4SS and Apparate ModLoader. Then we will start by building our custom blueprint to simply add a User Tag to the Screen for view inside the game.
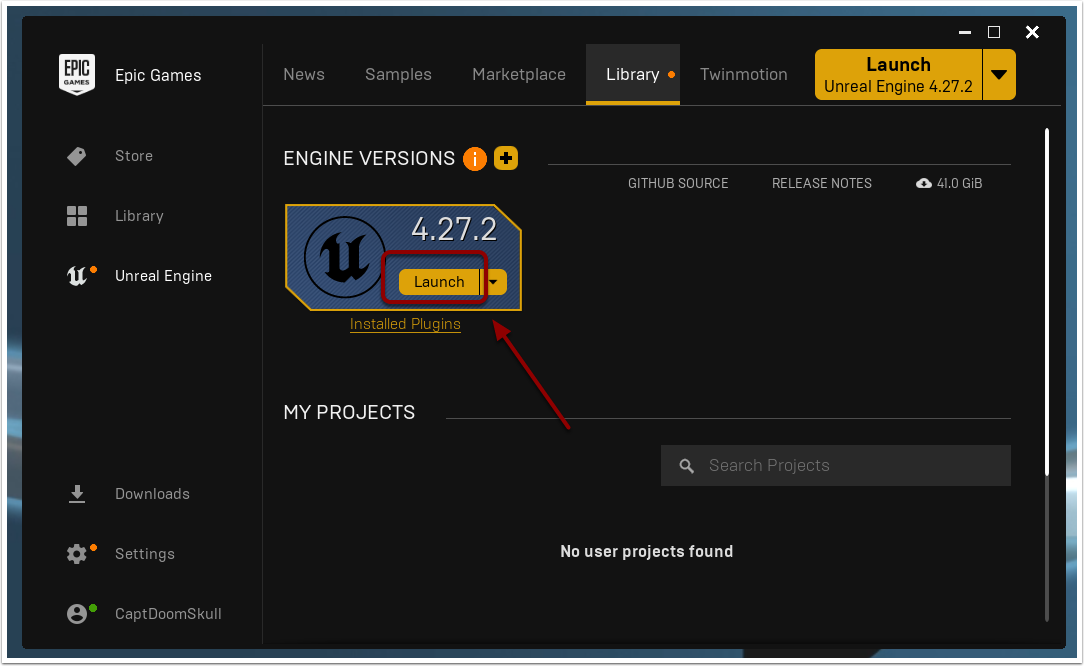
¶ Launch UnrealEngine 4.27.2
With Unreal Engine 4.27.2 select Launch


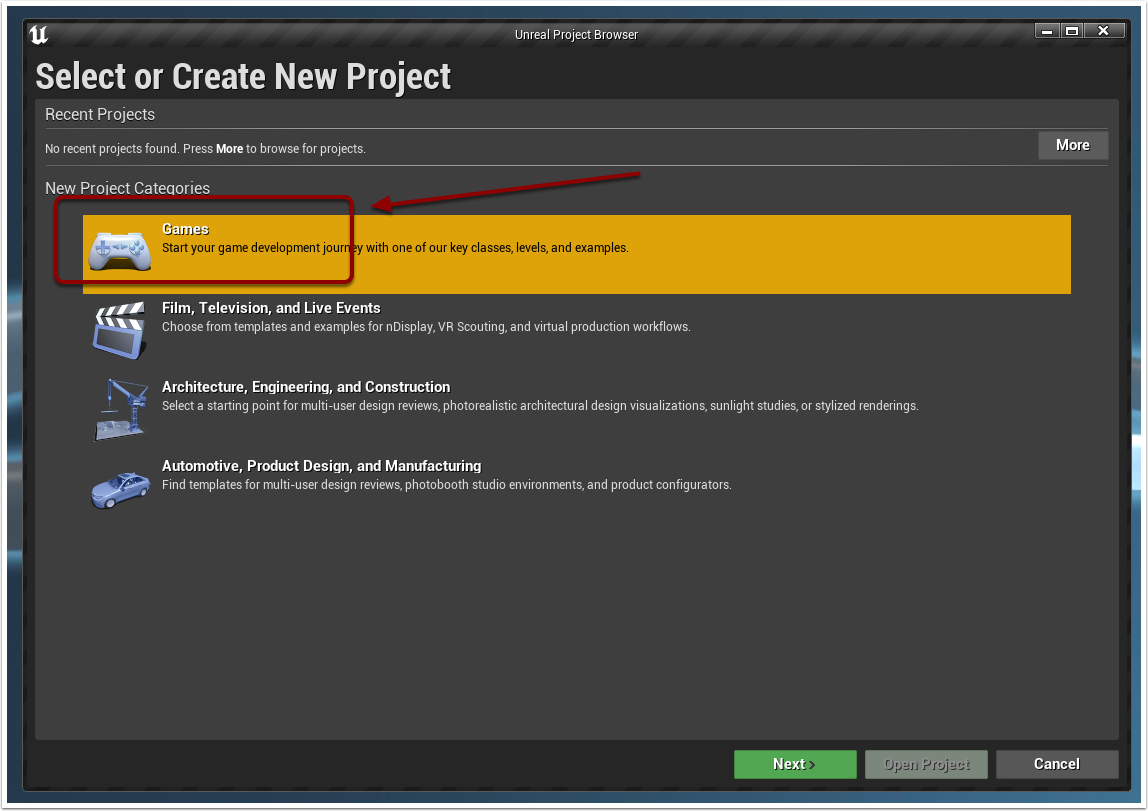
¶ Select Games Project
Select the Games option from the Categories and then click Next


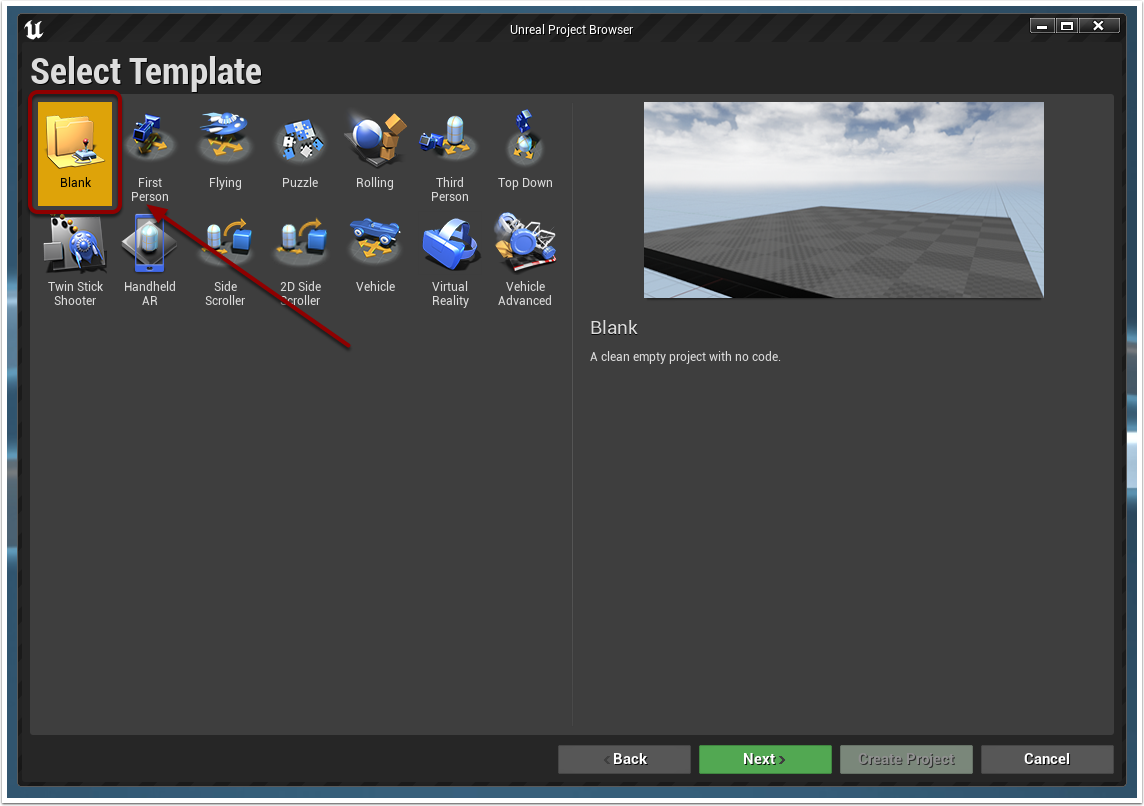
¶ Select Blank Template
Select the Blank Template and then select Next


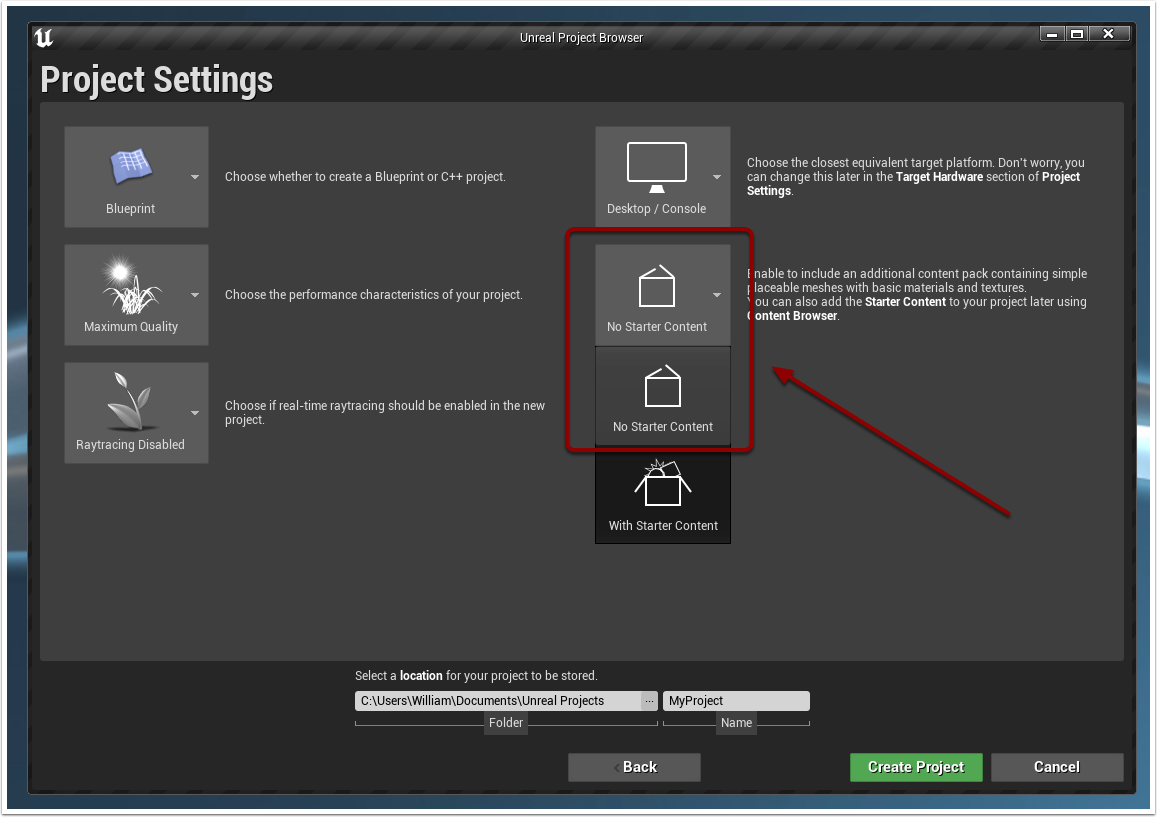
¶ Select No Starter Content
Select the No Starter Content from the dropdown


¶ Name and Create the Phoenix project
Name the Project as Phoenix
TIP: Hogwarts Legacy was build under the Phoenix project name so this is required


¶ Open Project Settings
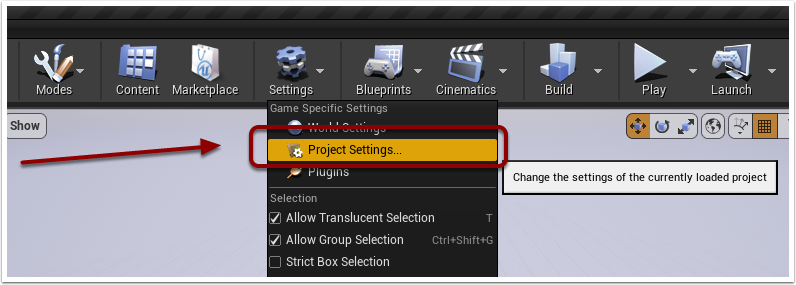
Go to Settings > Project Settings


¶ Open Packaging under Project Settings
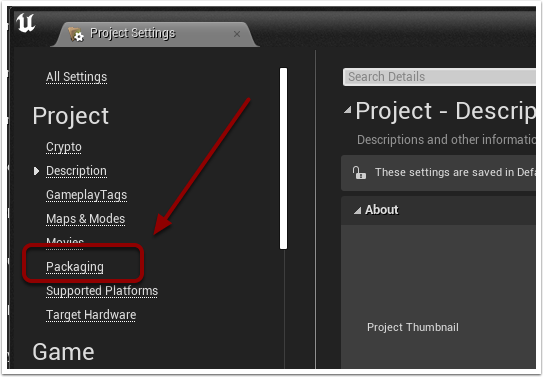
Select Packaging on the left sidebar


¶ Enable Packaging Options
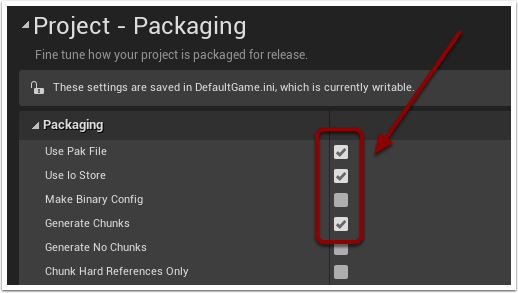
Make sure to check these options before closing the window:
Use Pak File
User Io Store
Generate Chunks


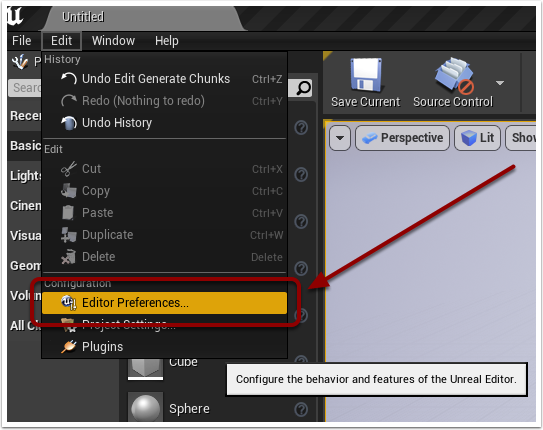
¶ Open Editor Preferences
Go to Edit > Editor Preferences


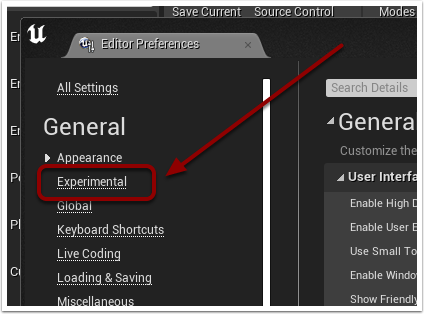
¶ Open Experimental under General Editor Preferences
Select Experimental on the left sidebar


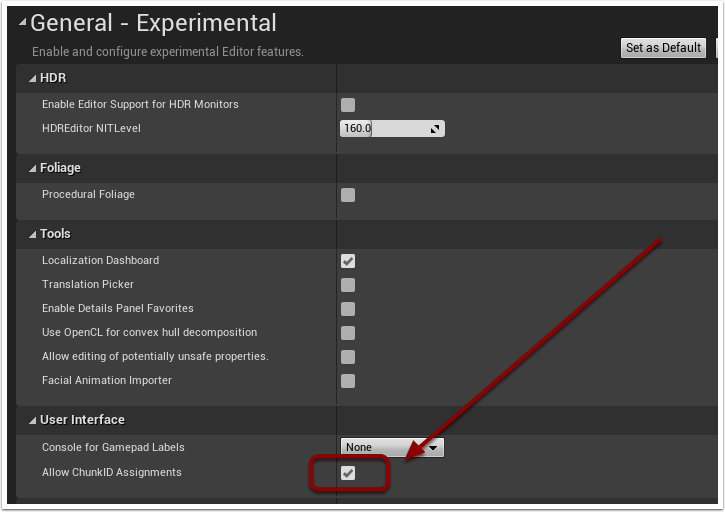
¶ Allow ChunkID Assignments
Make sure to check this option before closing the window:
Allow ChunkID Assignments


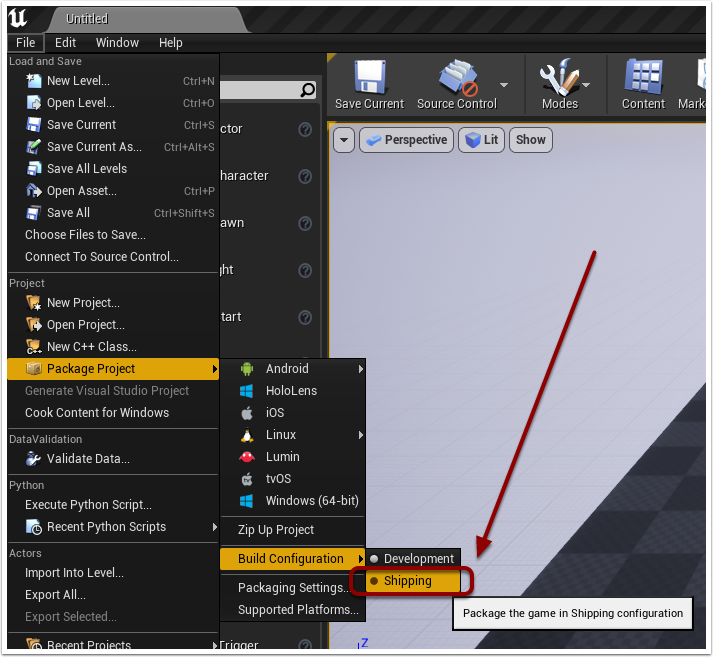
¶ Enable Shipping Build
Select Shipping option under
File > Package Project > Build Configuration


¶ Basic Folder Structure for BluePrint Mods
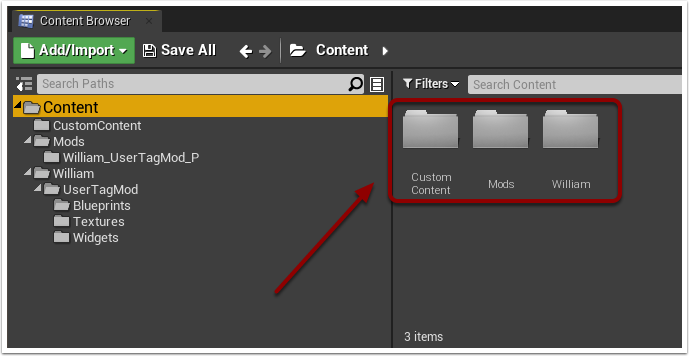
Root Directory will be Phoenix\Content
- Create "CustomContent" folder under "Content" for housing the Level Blueprints that allow UE4SS to trigger your mod
- Create "Mods" folder under "Content" for housing the ModActors for your individual mods that allow Apparate Modloader to trigger your mod
- Create YourName under "Content" for housing any specific elements related to your mods


¶ Create Blank Level in CustomContent for Apparate Modloader
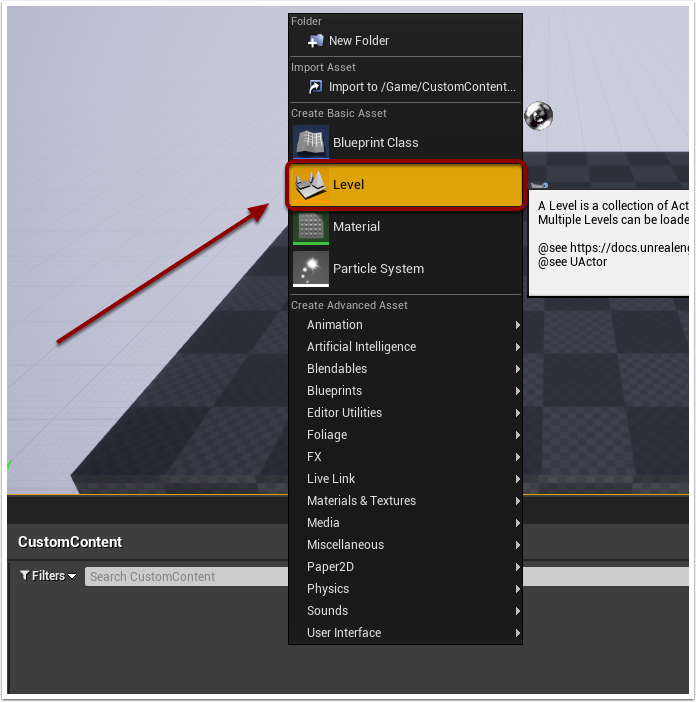
Right click in "CustomContent" folder and add a Level from the options.
Name this Level the Name that Apparate Modloader will trigger your mod with.
TIP: Once Modloader is install the End User will press F8 and type the Name of this level to activate your mod initially


¶ Compatibility with Apparate Modloader
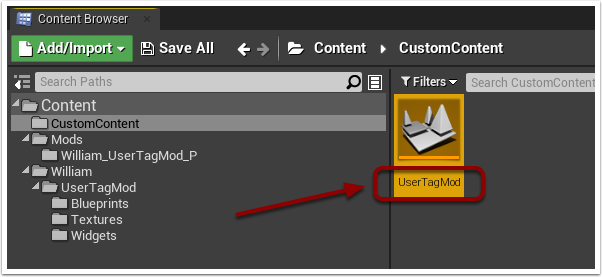
In our example we named the level "UserTagMod"
So in Apparate Modloader they will press F8 and type in UserTagMod to trigger the mod


¶ Open the Level
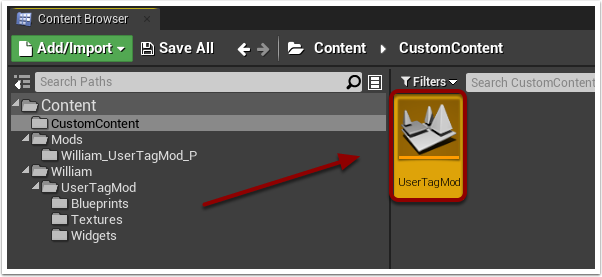
Double click your named level such as "UserTagMod" to open it


¶ Create Unique Mod folder under Mods folder
Next we will prepare for UE4SS entry point.
Create a folder with same name as your mod.
In this example we will name our William_UserTagMod_P
TIP: This will be the same name of your Pak, Utoc, and Ucas files later
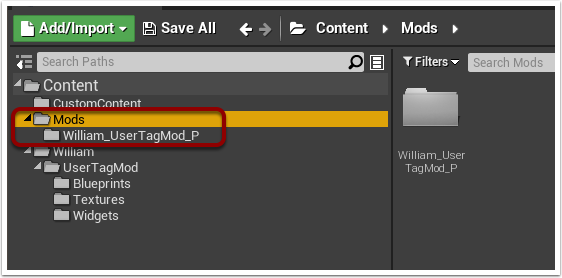


¶ Create a New Blueprint under your Unique Mod Folder
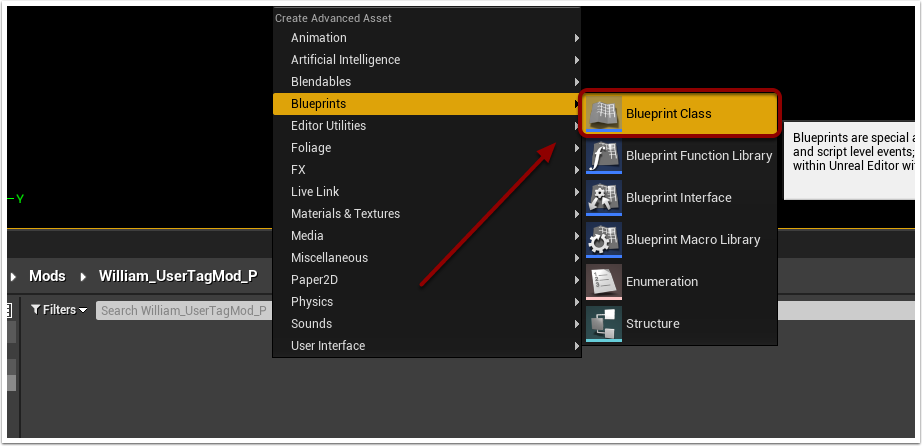
Right click in your New Mod folder such as "William_UserTagMod_P" and select Blueprint Class
This will open the Blueprint Class window


¶ Create ModActor from Blueprint Class Actor
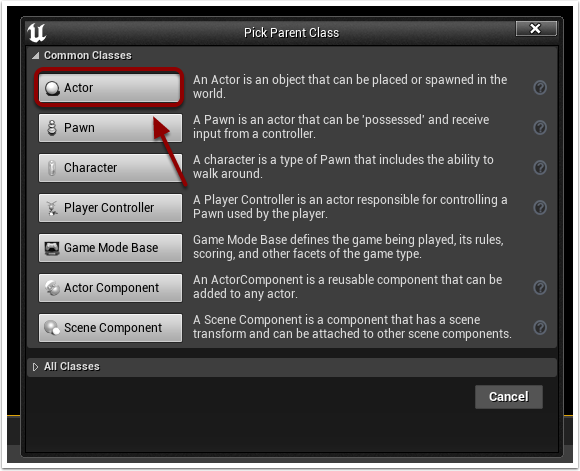
Select "Actor" from the Blueprint Class window and name it "ModActor"


¶ Compatibility with UE4SS
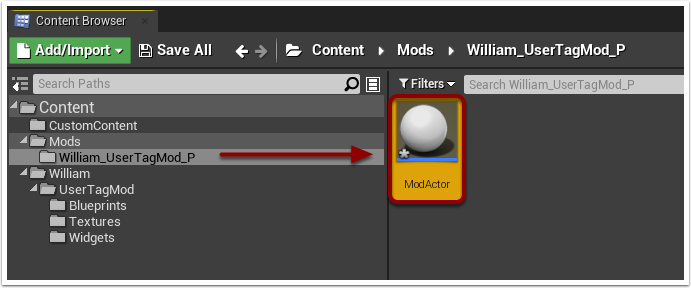
In our example we created a ModActor for our William_UserTagMod_P mod package


¶ Create a Widget
Under your folder we will begin making our assets for the mod.
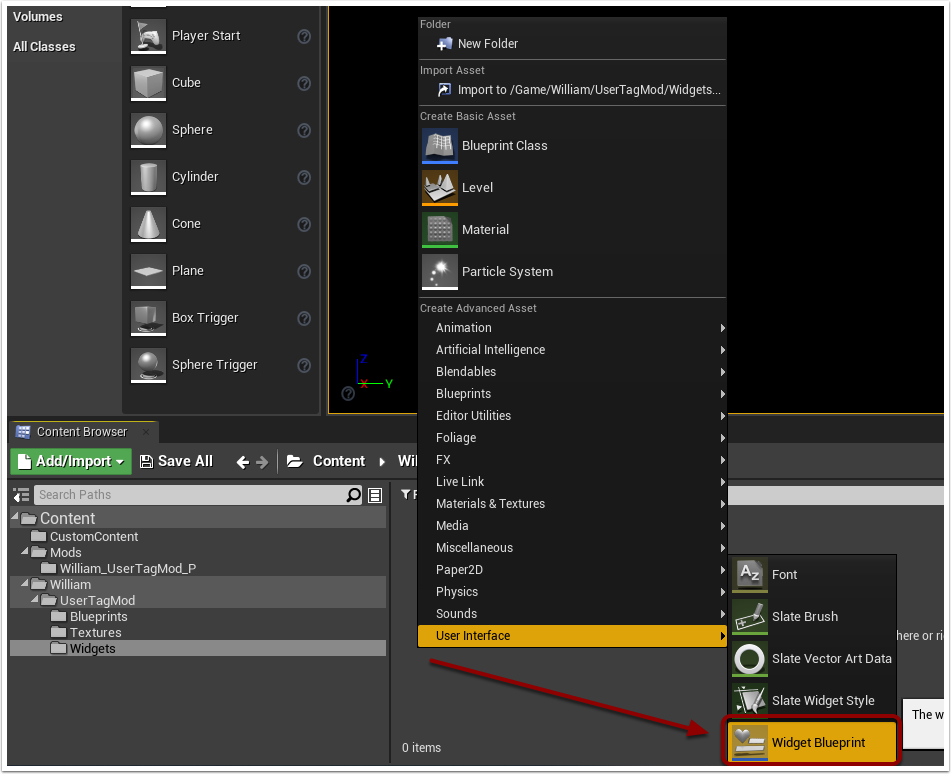
Right click and create a Widget Blueprint under the Widgets Folder


¶ Open the Widget
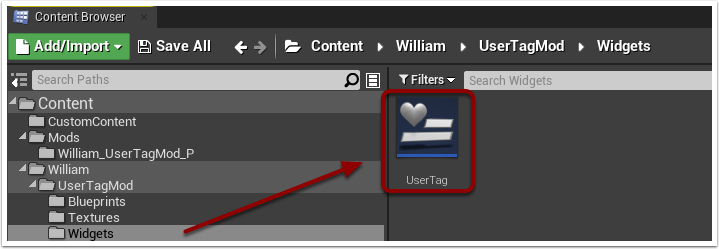
Double Click your Widget to open it.
TIP: In this case we named our widget UserTag to use in the class definition but the name doesn't particularly matter for these assets


¶ Create a Canvas and Text
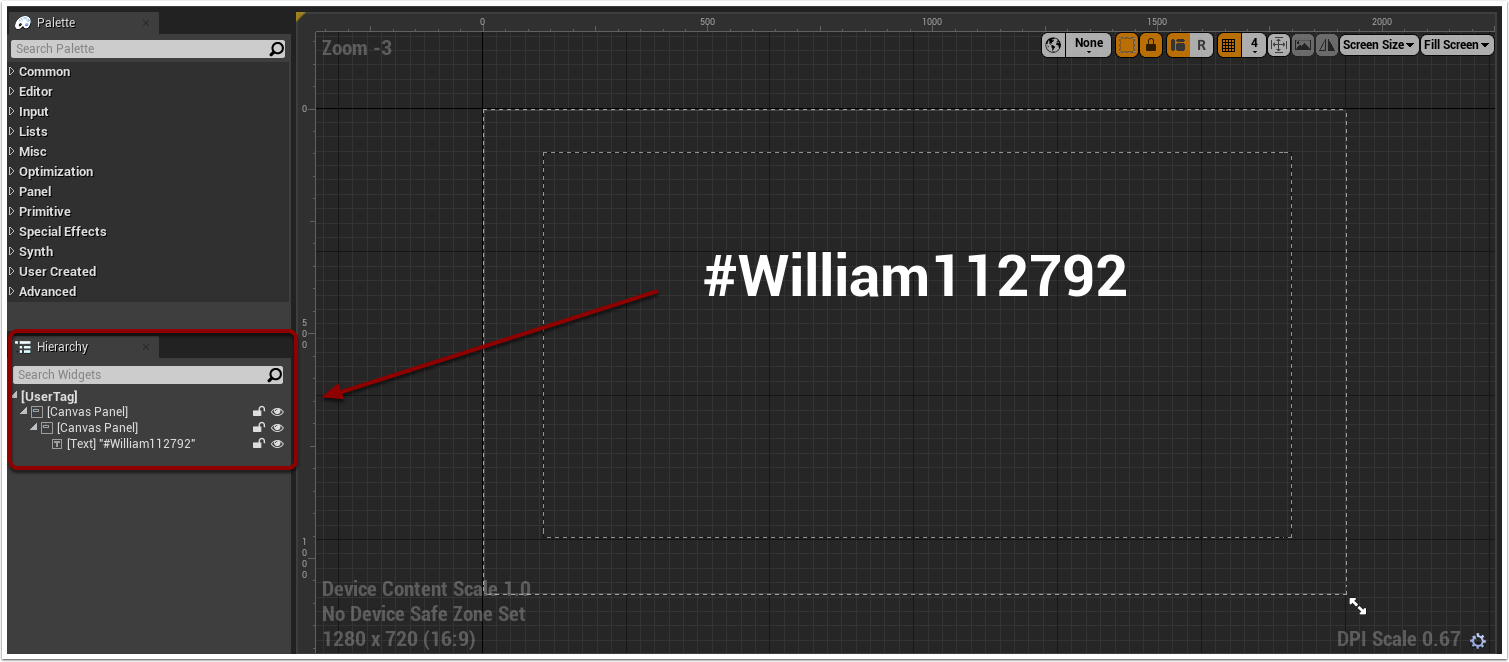
Within your Widget you will add 2 pieces:
Create another Canvas to act as your anchor
Create some text within the Canvas so we know it is working


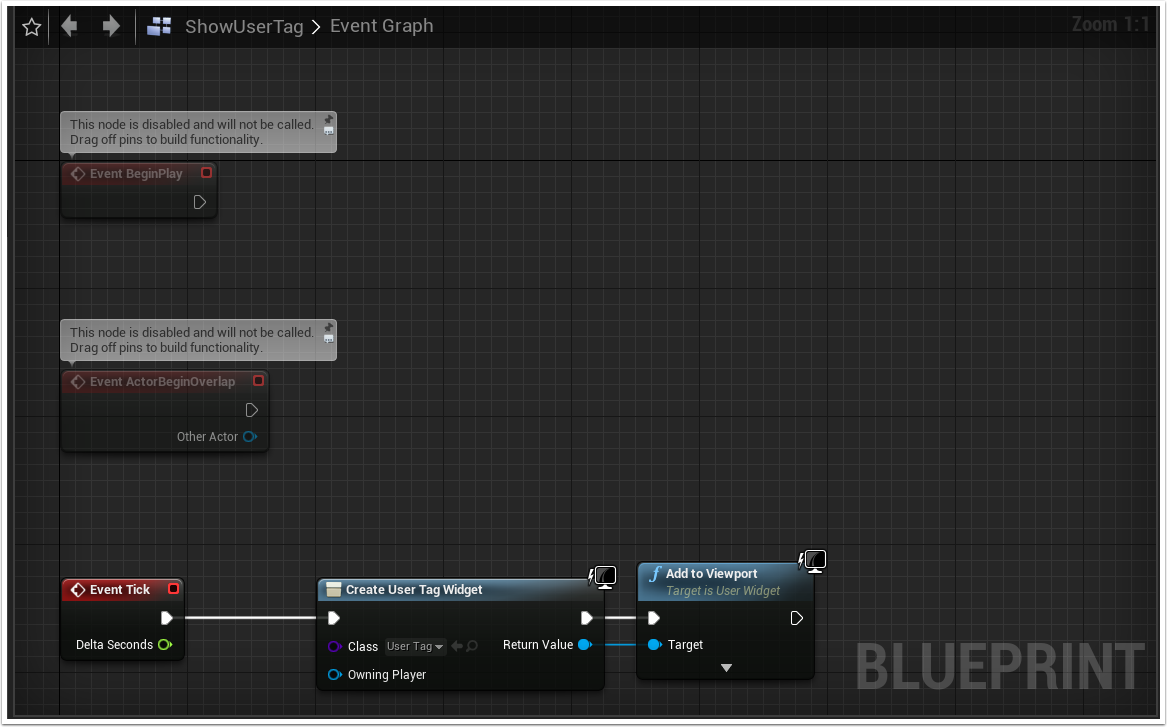
¶ Custom Blueprint
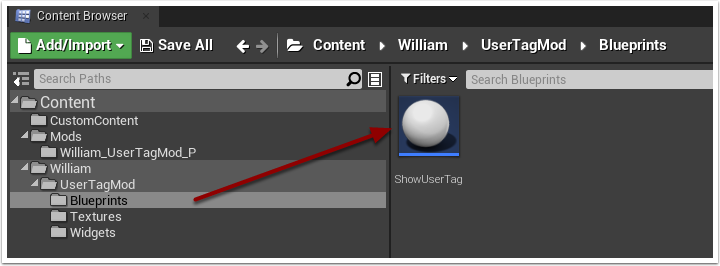
Create your custom blueprint just like the ModActor
TIP: This will house all your custom logic for the mod


¶ Custom Blue Print Logic
This piece will change from Mod to Mod as you add different functionality to the mod.
In this example we will just be loading our Widget "UserTag" to the Viewport on the screen


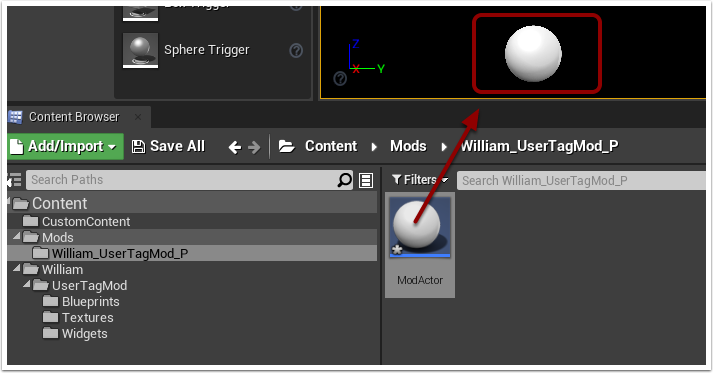
¶ Add ModActor to Level
Simply drag the ModActor into the Level we created earlier.
TIP: This creates a common entry point for both UE4SS and Apparate Modloader


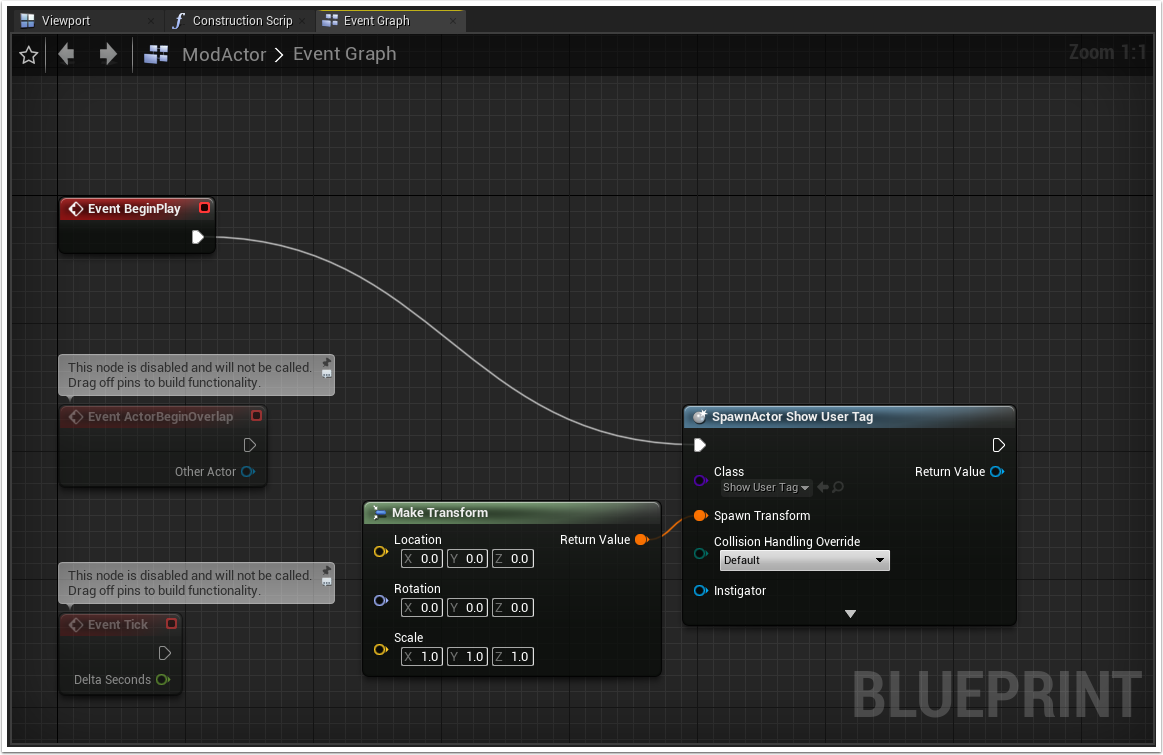
¶ Open ModActor for Basic Blueprint logic
Build the ModActor to look like below using Event BeginPlay


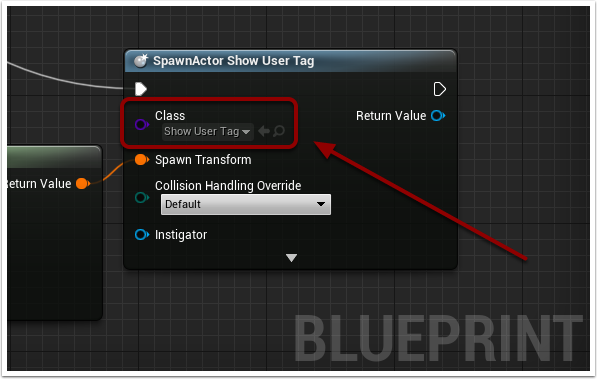
¶ Class for Custom Blueprint
Make sure to set the Class to match your Custom Blueprint


¶ Assign a ChunkID to each File
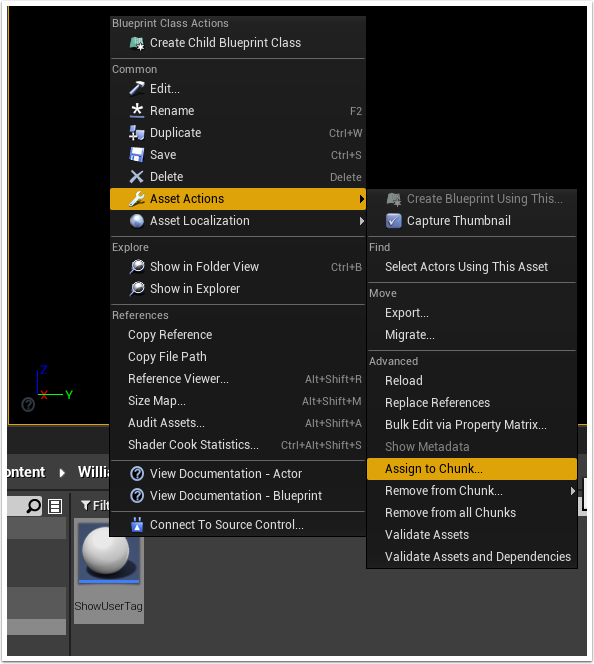
For each file in your Mod:
Right click the file and go to Asset Actions > Assign to Chunk
TIP: This is needed on each files used such as the Level, ModActor, Wdigets, Blueprints, etc...


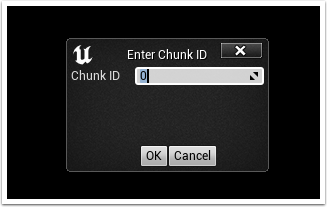
¶ Assign a ChunkID Window
Select a ChunkID from 30 to 300
In this example we will use 300 for each of our mod files


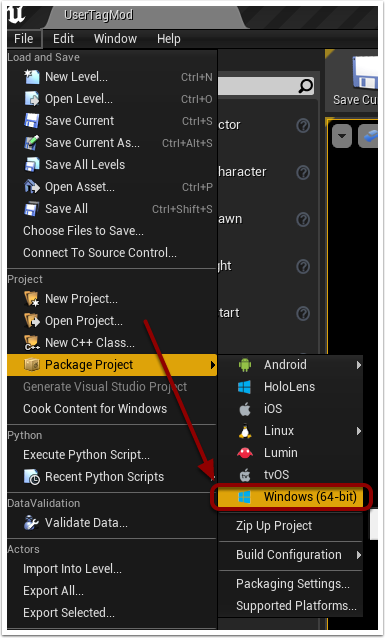
¶ Build your Package


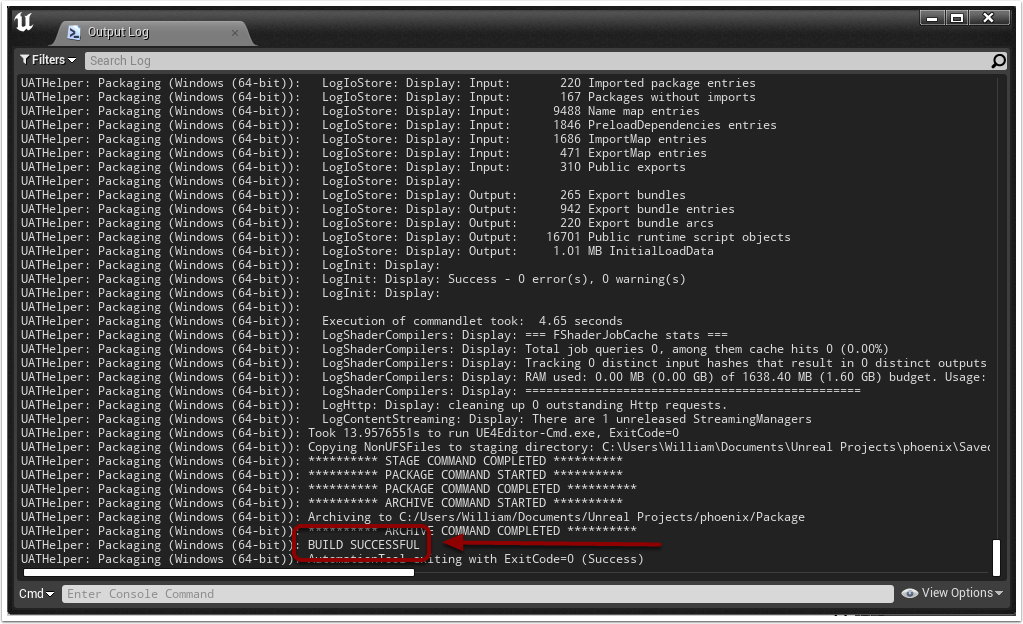
¶ Package Build Complete


¶ Example Output from a Successful Build


¶ Rename Packaged Files to Mod Name
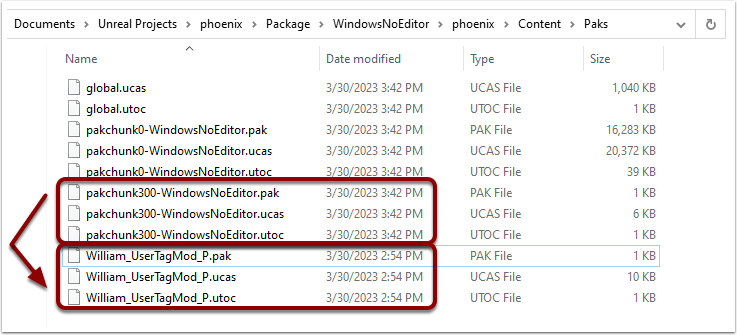
In this example we used ChunkID 300 so it created the files as pakchunk300
Rename your files to match the name of the mod used for the folder earlier.
We used William_UserTagMod_P so we renamed the packchunk300 files to this name.


¶ Preview of this Mod
