¶ Synopsis
In this guide I'll walk you though the process of uploading your mod to Nexus.
I've written it for Hogwarts Legacy mods, but the process is largely the same for all games.
¶ Prerequisites
I'm going to assume that you:
- Have an account on Nexus.
- Are logged-in to that account.
¶ Start the Process
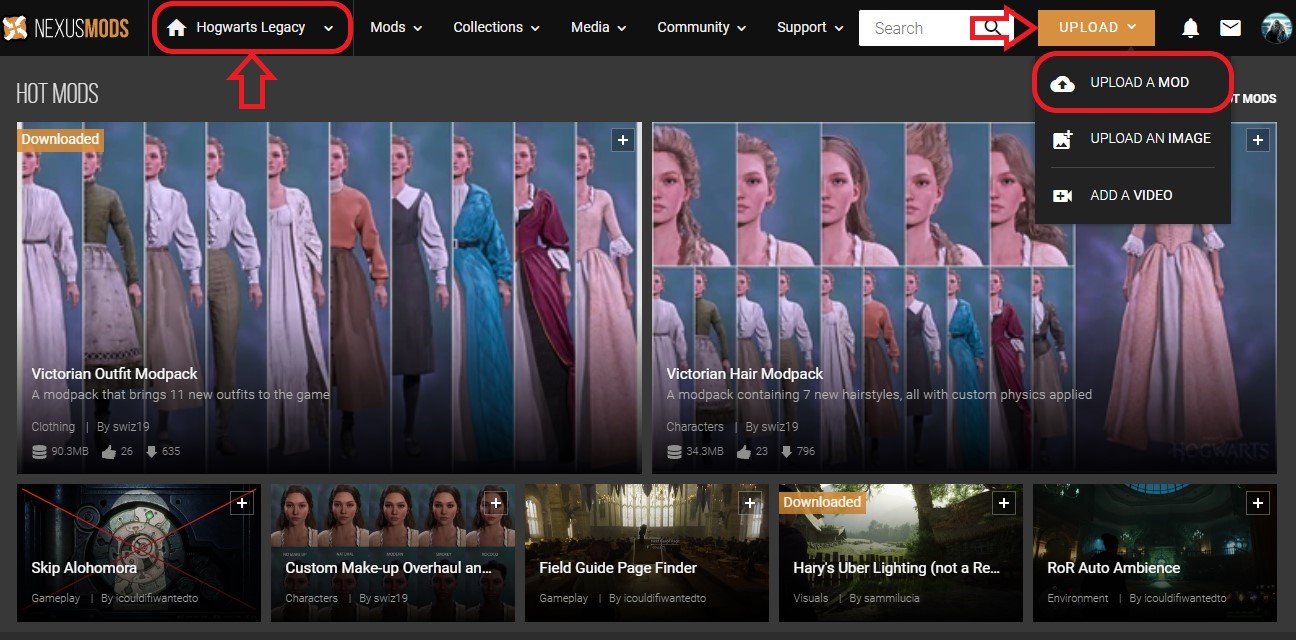
To get started, go to the Nexus Hogwarts Legacy webpage, click on the Upload button at the top, then select Upload a Mod:
¶ Mod Details Form
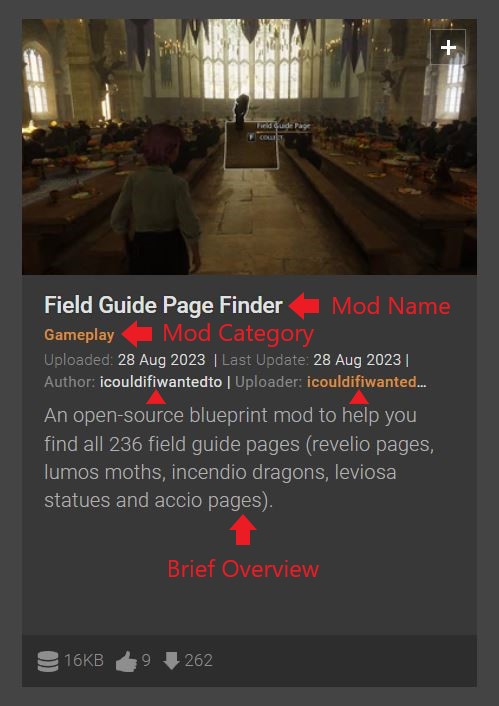
The Mod Details form will appear. Here's how the information you put in this form will affect your “Mod Advert” when you publish:
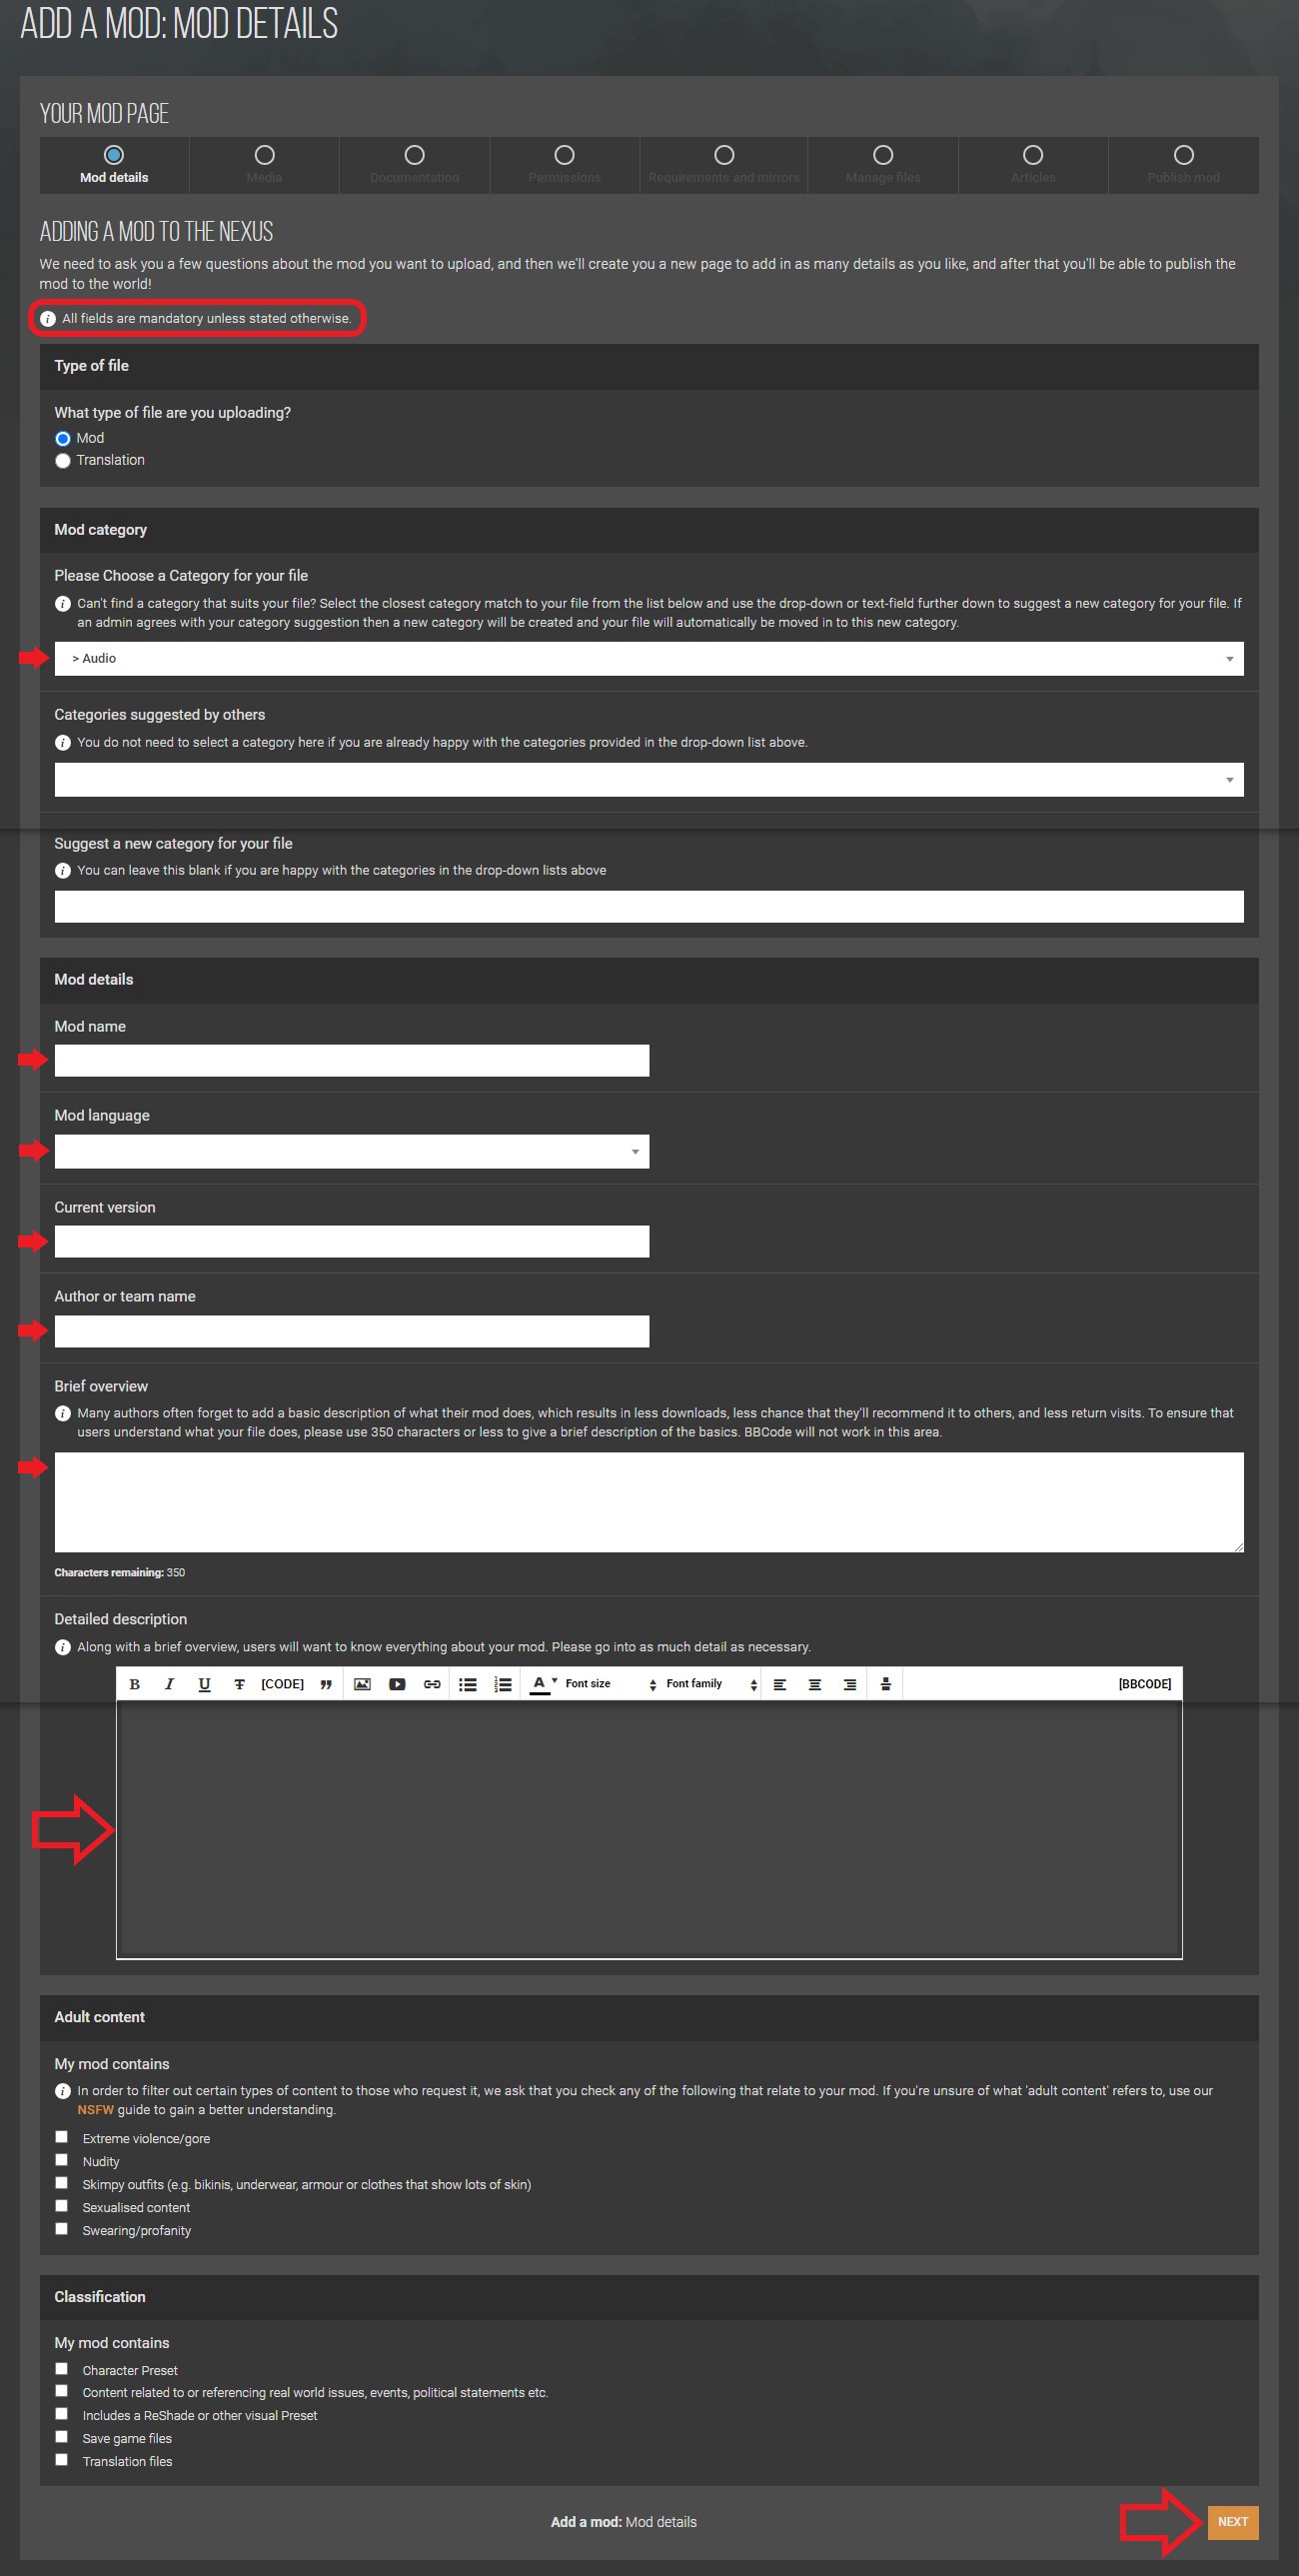
Instructions for the form:
- At the top of this forms it says “All fields are mandatory unless stated otherwise." Ignore that. Just fill in the sections I've marked with red arrows.
- Note that anything you input on this form (or any other form) can be changed later, so don't worry about it too much.
Mod Category- choose the one most appropriate to your mod. If not sure, look at what other people with similar mods used.Mod Name- what Nexus will call your mod. Choose something that users will find if they search for a mod that does what yours does.Mod Language- usuallyEnglish.Current Version- usually1.0for your first version but it can be whatever you want.Author or Team Name- usually your Nexus username but could be something else if you're publishing a mod for someone else or on behalf of a team.Brief Overview- is what will appear underneath your mod name. This is important! Write something that will draw users to your mod.Detailed Description- see the “Detailed Description” section of this wiki.- When you're done hit
Next.
¶ Detailed Description
There are no rules for what you put in the Detailed Description, but the following are advisable:
- Some sort of
Introductionto tell users what your mod actually does. - An
Installationsection to tell users how to install it. - If it's a logic mod, a
How to Usesection with key bindings, etc. - A
How to Uninstallsection to tell users how to remove it. - A
Possible Conflictssection to tell users whether your mod might conflict with others. If your mod is cooked you should include thePakChunknumber. If your mod affects thePhoenixShipData.sqlitefile, you should tell users to use Hogwarts Mod Merger to merge it with any others that do the same. - A
BugsorKnown Issuessection if there are bugs or issues that users need to be aware of.
¶ If you accidentally close the webpage
Don't panic! All the pages you've saved (hit Next on) will still exist. Just go to the following webpage and you should see your draft mod:
https://www.nexusmods.com/hogwartslegacy/users/myaccount?tab=my+files
¶ Edit Media
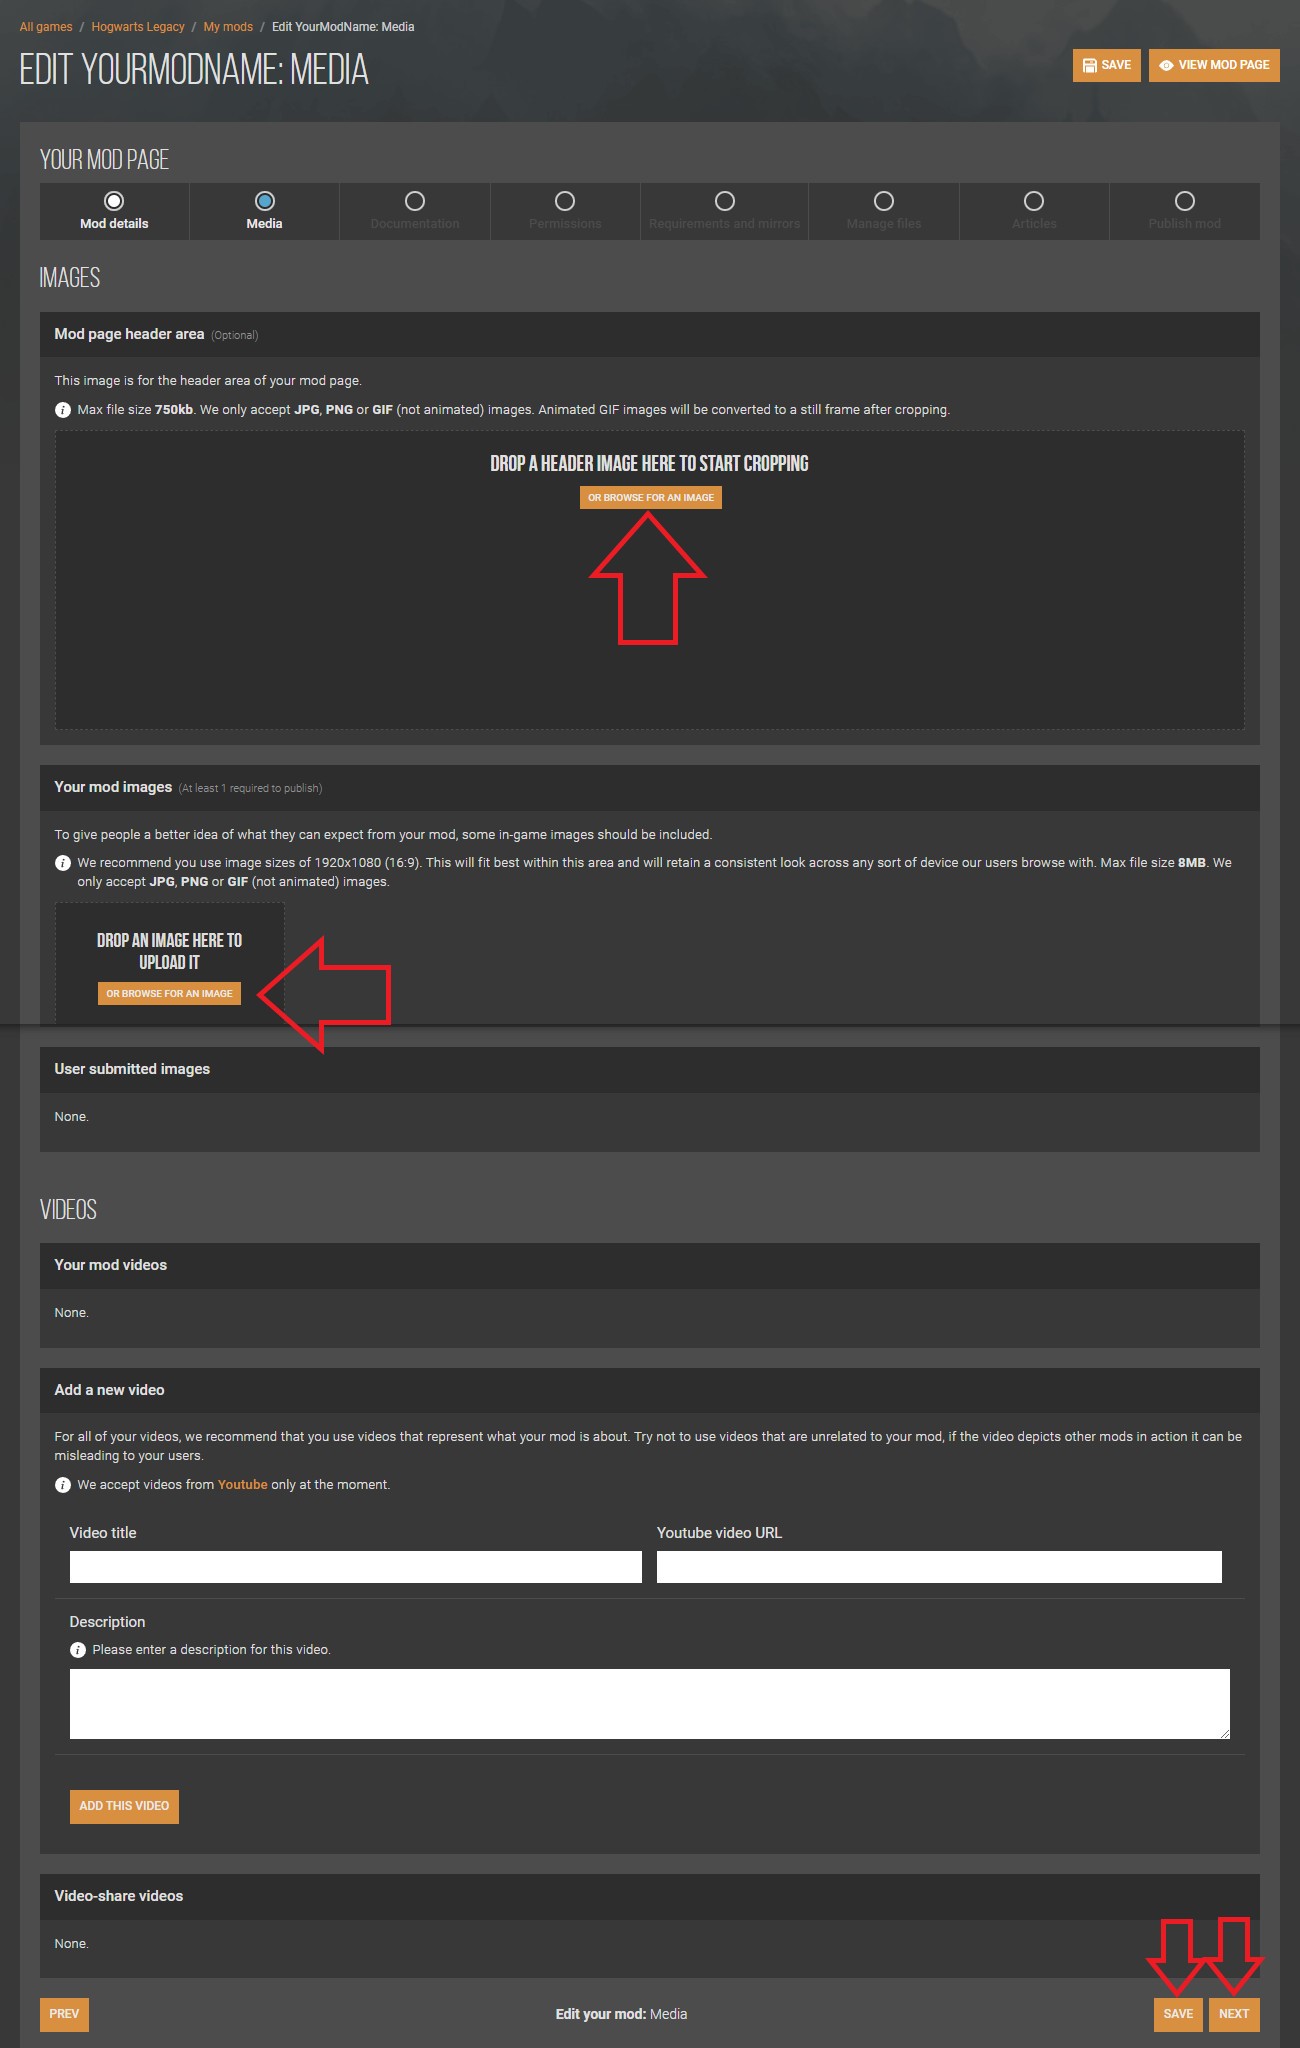
This is where you add images and videos. Notes:
- You must have at at least one image to publish a mod, but videos are optional.
- Images should ideally be 16:9 to fit with the Nexus design.
Instructions:
- Drop/Browse then crop a rectangular “header image” which will appear at the top of your mod page - see next section.
- Upload one or more images to illustrate what your mod does. Your first image (though you can change this by hitting the star icon) will be used on your mod "advert".
- Add a video if you like, but this is optional.
- Hit
SavethenNext.
¶ Header Image
When you crop your rectangular header image, try to crop your image such that anything important isn't hidden by the buttons and text overlaid by Nexus:

¶ Documentation
You don't need this until you have more versions. Just hit Next.
¶ Permissions
Read and change this as you see fit. The standard permissions are usually fine though. Hit Next when you're done.
¶ Requirements
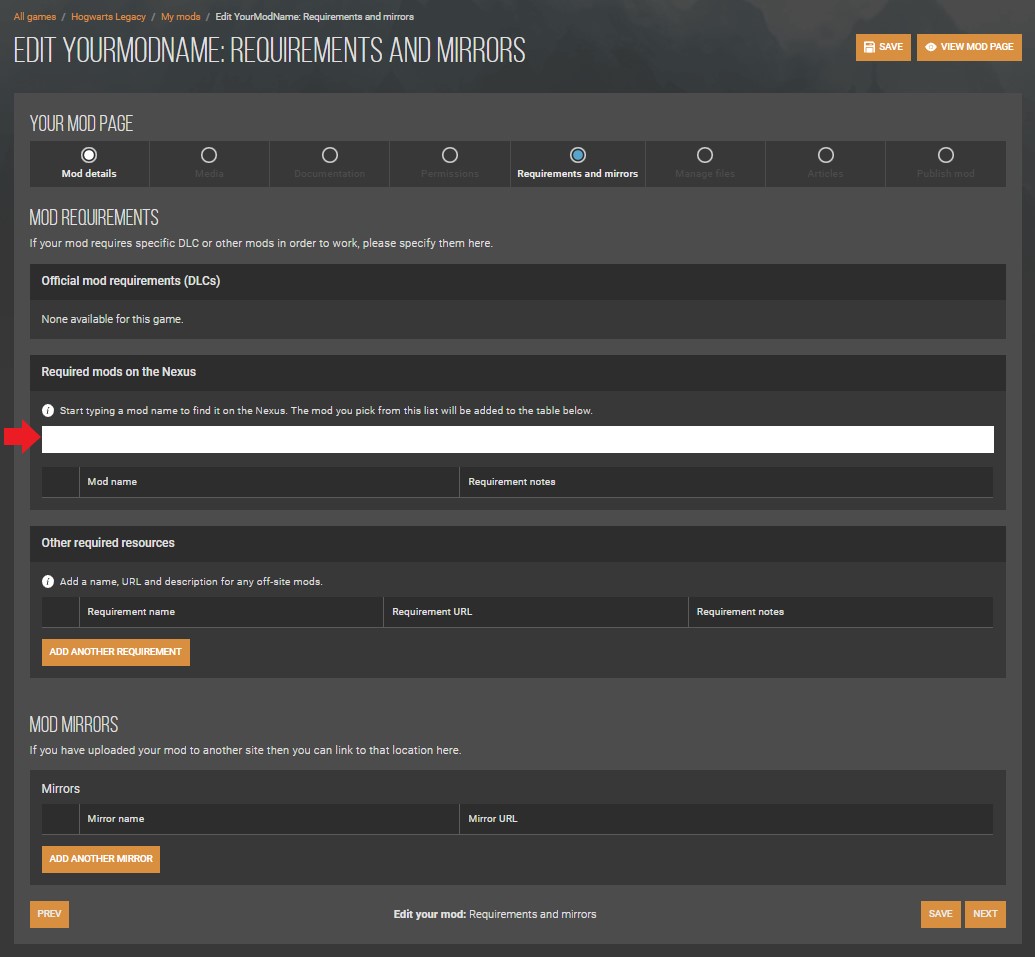
If your mod requires any other mods in order to function (like Blueprint Apparate Modloader or UE4SS):
- Start typing the name of the mod next to the red arrow.
- When the mod you need comes up, select it.
- Repeat as required.
- Hit
Nextwhen you're done.
¶ Manage Files
This is where you upload and manage your mod files. Here's how your mod's Files tab will look when you're done:

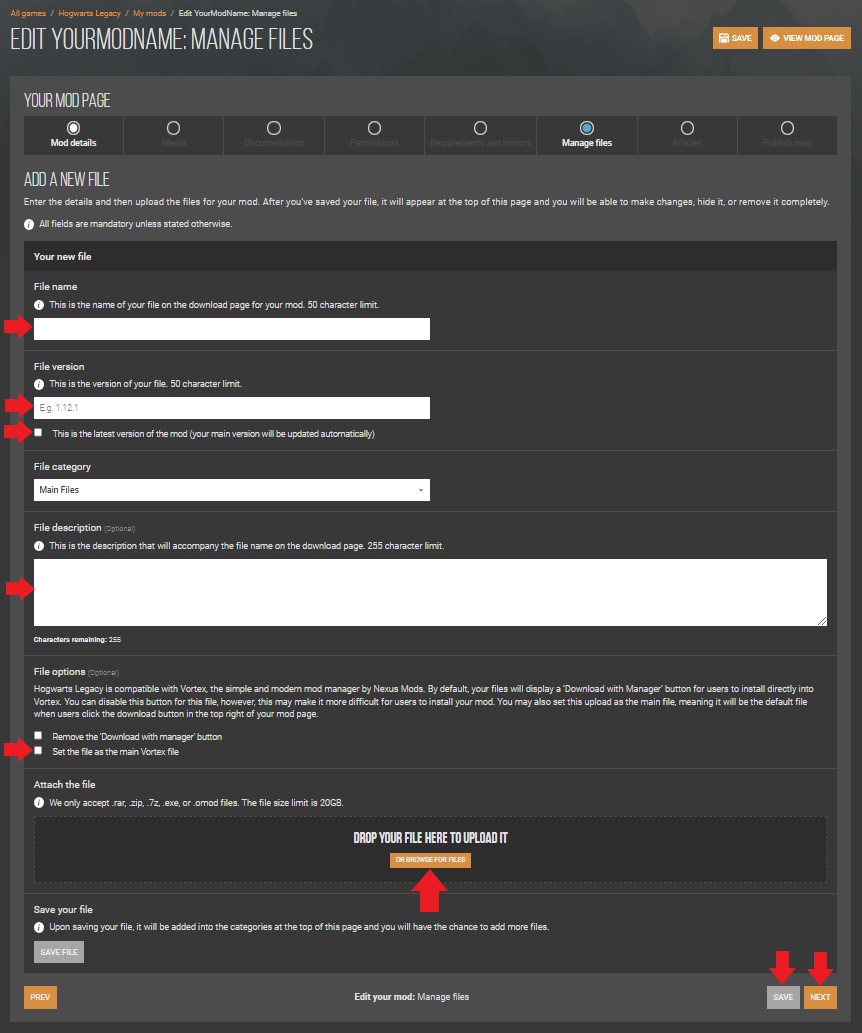
Instructions for the form:
File nameis what will appear in yourFilestab. (It's not used anywhere else, and it's not the name of the file that you intend to upload.)File versionshould be the same as what you typed on theMod Detailspage, probably1.0. (TheMod Detailspage will automatically update in future.)- Tick
This is the latest version of the mod. - Leave
File CategoryasMain Files. - Put whatever you want in
File Description. I usually just put “The original version”. This field doesn't really have a useful purpose for the first version. With future versions you can describe how the new version differs from the old. - Tick
Set the file as the main Vortex file. - Drop or browse for your mod file. This should be a
ziporraror7zcompressed archive of all your mod files. Ideally you should package them in the same folder structure as they will have in the game, to help Vortex figure out where they should go (but if you don't Vortex will probably figure it out anyway). For example, if your mod is cooked (i.e. has a .pak, a .ucas and a .utoc file) then it will need to go inPhoenix\Content\Paks\~modsso create that folder structure somewhere, put your mod files in the~modsfolder, zip up thePhoenixfolder, then rename the zip file. The name of the zip file doesn't matter too much - just something to uniquely identify it as your mod so users know what it is after they've downloaded it. - Hit
SavethenNext.
¶ Articles
Nobody uses this. Just hit Next.
¶ Publish Mod
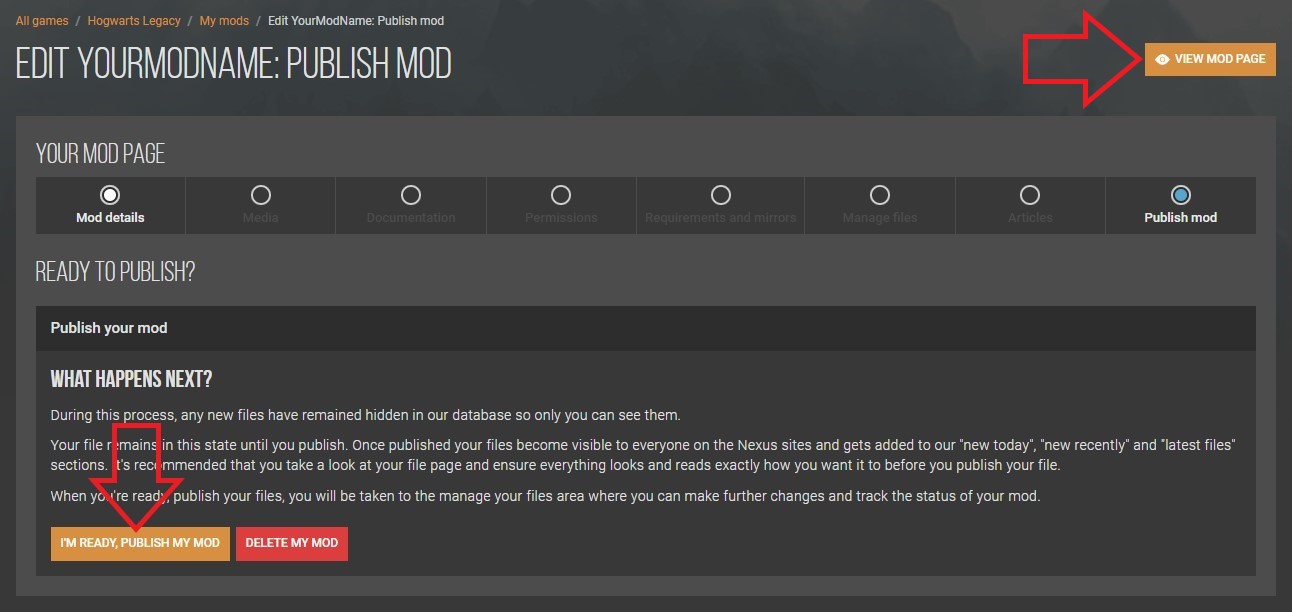
Before you publish I'd recommend hitting Ctrl-View Mod Page. This will open a mock-up of how your mod will look in another browser tab. Read through it and make sure everything looks the way you want it to. If not, click on the relevant section (in your previous browser tab) to make changes:

When you're ready to publish your mod, hit I'm Ready Publish My Mod.
¶ Final Thoughts
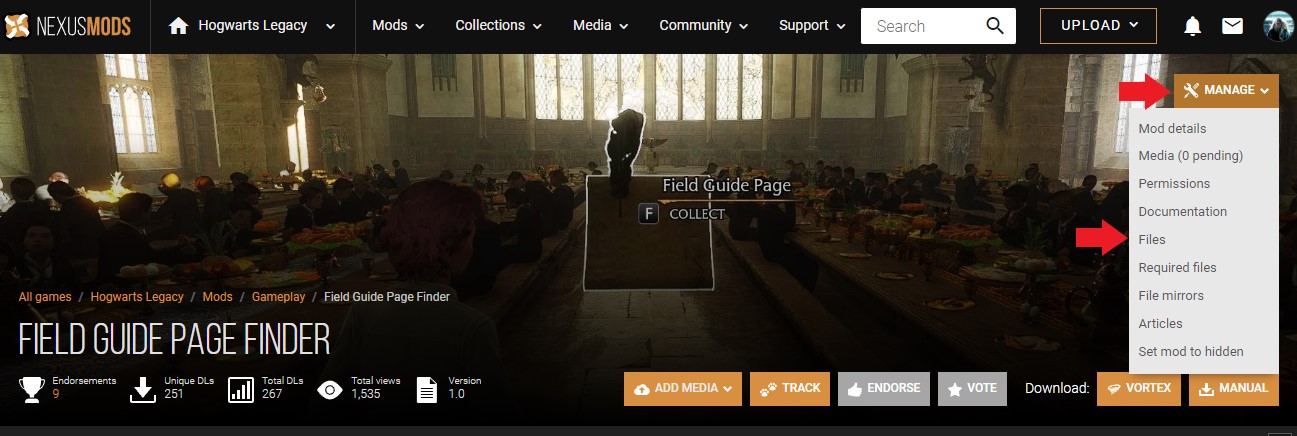
That's it! If you need to make changes after you've published (correct typos, add images, add new versions etc), just select the Manage button in the top-right of your mod's page and then choose the section you want to edit from the drop-down list:
