¶ Getting Started/Disclaimer
Welcome to this weird and wonderful page. Please note this is not specific for beginers, but just a general dump of my current worflows, and explanations of textures for the game. Ensure you do your own exploring and research to build upon this knowledge.
This page will cover:
- KCD2's texture workflow & texture types
- Tools
- Essential
- Optional
- Working with DDS files.
- General information
- Exporting back to DDS
- Substance Painter specific workflow
- Material (MTL) Files
- Manual editing
- Editor approach
¶ KCD2 Texture Workflow & Types
In it's most simple form, the games engine uses a texture workflow known as PBR specular gloss.
Essentially the game uses multiple texture files together to present the final form to the player. These textures are as follows:
| Texture Type | Use | Suffix | Colour Space |
|---|---|---|---|
| Diffuse | Tells the game what colours to apply to the item (for textiles, clothes etc - different for metalic surfaces). Does have alpha/transparency support. | _diff | sRGB8 |
| DDNA | A single file that combines the normal map (bump/height details) and the glossmap (how shiny or smooth items are). Gloss goes into the alpha channel. | _ddna | RGB16F+L8 |
| Specular | Defines the colour and strength of the reflections. | _spec | sRGB8 |
| BGS | Three distinct layers that defines: Blood (R), Mud (G), Damage/Dirt. (B). | _bgs | RGB8 |
| ID Map | Uses strict colour codes to asign “slots” to the texture, tells the game where to asign materials. Heavily used for clothing , shields etc. | _id | Linear |
| Weapon Mask | Only used for weapons. Uses the RGBA channels: Dirt (R), Blood (G), Sharp Edges (B), Grey Zone (A). Each channel is greyscale. | _mask | Linear |
| Emissive | Used to have light/glow. Greyscale texture, black for no glow, white for full glow. | _emissive | Linear |
These are the core texture type available to the game. For examples of how to produce these in Subtance see further down. Can be done in Photoshop but its a lot more manual work.
¶ Tools
¶ Mandatory Tools
- Kingdom Come Deliverance II Modding Tools - Search the name in Steam library, make sure you have the Tools option ticked first.
- The tool contains the latest resource compiler tool - used for both textures & models. Hence this is essential.
- KCD Texture Exporter (by Kamzik123)
- Texture editing tool of your choice, some examples:
- PhotoShop
- GIMP
- Substance Painter
- Text editor of your choice, such as Visual Studio Code, Subline, Notepad++
- PAK Tools
- Use WinRar or 7-ZIP to open a .pak.
- Use KCD2 PAK (by 7H3LaughingMan) to create a PAK - GitHub
¶ Optional Tools
- Casey's Lazy Tool Collection - GitHub
- RC Context Menu - Adds a right click option on TIF to send stuff to RC.
- Mod Folder Creation Bat - Generates mod folders for you to save time.
- Casey's Substance Painter DDS Exporter - GitHub
- Lune's Blender Toolkit - GitHub
¶ Working with DDS Files
¶ General Information
The base game DDS files a “streamed” files - essentially this means they files is broken down into multiple seperate sub-files for a mix of compression & other reasons.
As such, a base game file will look this this:
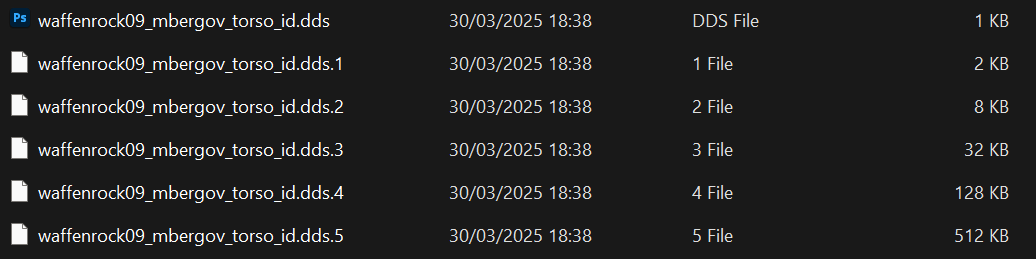
As a result of this, you can't open the texture without a bit of work to put them back together. To fix this, we will use the KCD Texture Exporter (by Kamzik123).
Once you've downlaoded the tool, open the exe and set the input path to whereever you extracted the base game texures to. Set the output path as wherever you want the corrected file to be saved.
Brief explanation of the settings:
- Seperate Gloss Map - Splits the DDNA texture to create a seperate glossmap tif for editing. You will need to re-combine for your export.
- Save Raw DDS - Saves a combined DDS copy alongside the TIF version.
- Remember Paths - Remebers the path of the input/output
- Delete source files - Deletes the original split DDS file from the input folder after its finished converting.
- Inclusde sub-folders - Will parse sub-folders in the path you set when converting.
Once you've set the paths and clicked convert, this tool will generate a combined TIF file for you. This is the version of the texture you can open in PhotoShop, GIMP, Substance etc.

¶ Exporting back to DDS
Once you have edited the texture files as you desire, you will need to covert the TIF back to a DDS format that the game can read correctly.
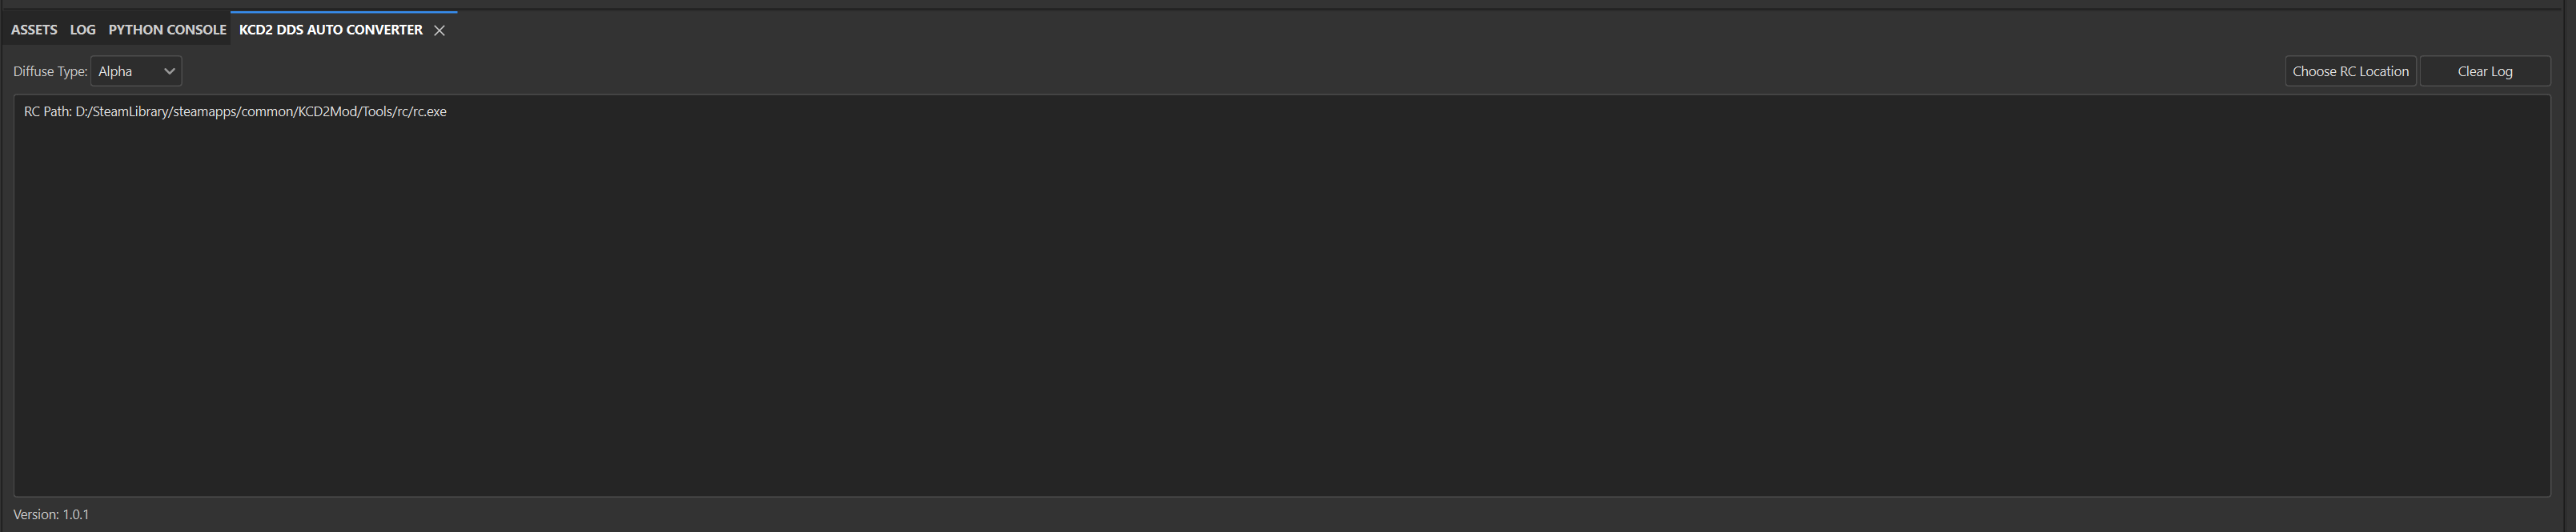
The easiest way to do this is to use the Resourcr Compiler (RC) from the official modding tools.
To use RC, go to wherever you installed it, e.g in my case this is:
D:\SteamLibrary\steamapps\common\KCD2Mod\
Inside this folder open Tool > rc
The RC tool can function either by command line instructions, or by dragging and dropping your files onto it.
WARNING: RC relies on the file suffix (e.g _diff, spec, _ddna) to determine how it needs to process the DDS for you. Make sure your files are named correctly prior to putting them through RC if you decide to do the drag and drop approach.
If you choose, you can also use my lazy tool (linked in optional tools above) to add a right click option to send stuff to RC for you.
If you wish to run at command line, seek an exorcism then come back to me.
Once you have ran the TIF through RC you will have game-ready files available to put into your mods.
IMPORTANT NOTE: There is currently a known bug with ID Map textures and RC. If you drag and drop it isn't correctly coverting them as it should. Devs are aware and looking to fix.
To work around this issue with ID maps, you must use command line and specify the preset & colour space. For example:
rc.exe /preset=IDMask /colorspace=linear waffenrock09_mbergov_torso_id.tif
¶ Substance Painter Specific Workflow
Personally I chose to create my textures in 3D using Substance Painter.
To start this process, if you are working with a base game 3D model, you will need to extract the model using Lune's Blender toolkit. Once it's in blender export it to FBX for use in Substance Painter.
I'd heavily advise using my Substance Painter plugin & templates linked in the optional tools. This will do most of the heavy lifting for you. Follow the installation guides in the GitHub to get set up.
Once you have the plugin and templates all fully installed, open Substance and create a new project. The settings and template you want to use will depend on the nature of the model you are working with.
For most assets you can use the standard KCD2_Project_Template:
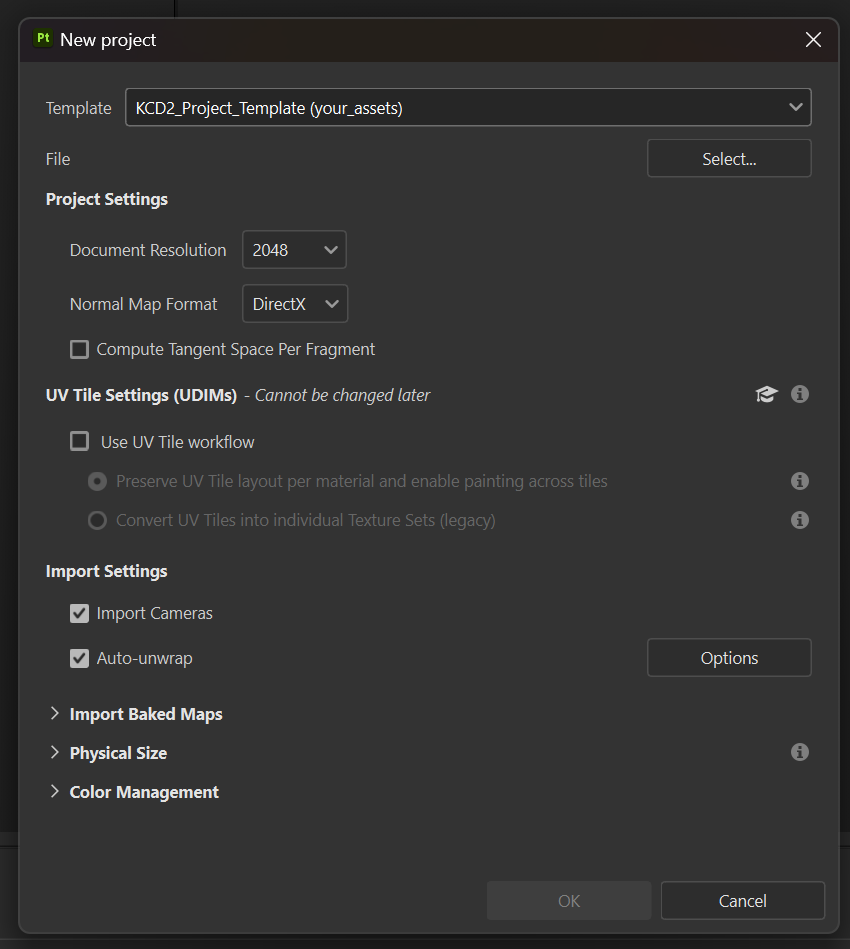
For texture size, you can use whatever suits, just try to optimise and don't use 4k unless you really need to maintain a lot of detail such as engravings.
Use DirectX for NormalMaps then click OK to create the project.
Once you create the project, you will notice that it has set up all the correct texture channels for you:

They will also appear the same way when you add layers:
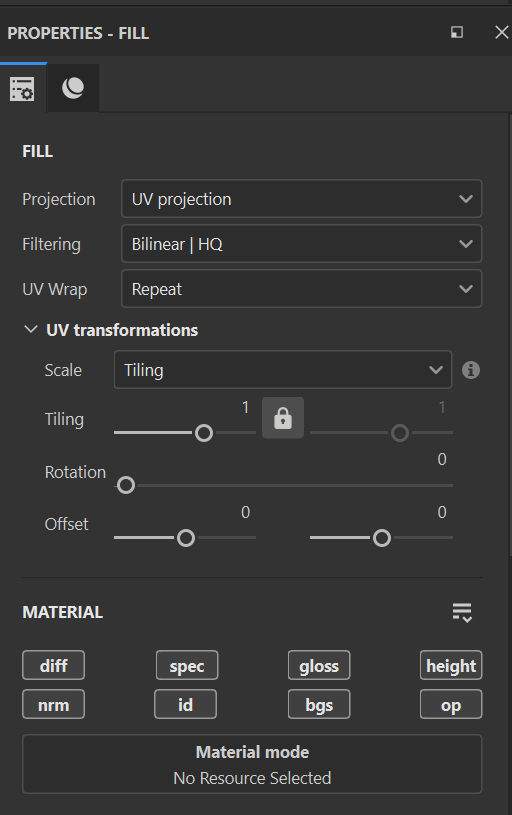
So long as you only add layers to the channels you wish to effect, they will correctly export the same way at the end.
If you are working with base game assets, i'd advise adding a base layer and adding each of the assets original textures to modify ontop of those.
Please refer to the many many many videos and guides online to learn how to texture in Substane if you are new to this tool.
If you are working with a weapon:
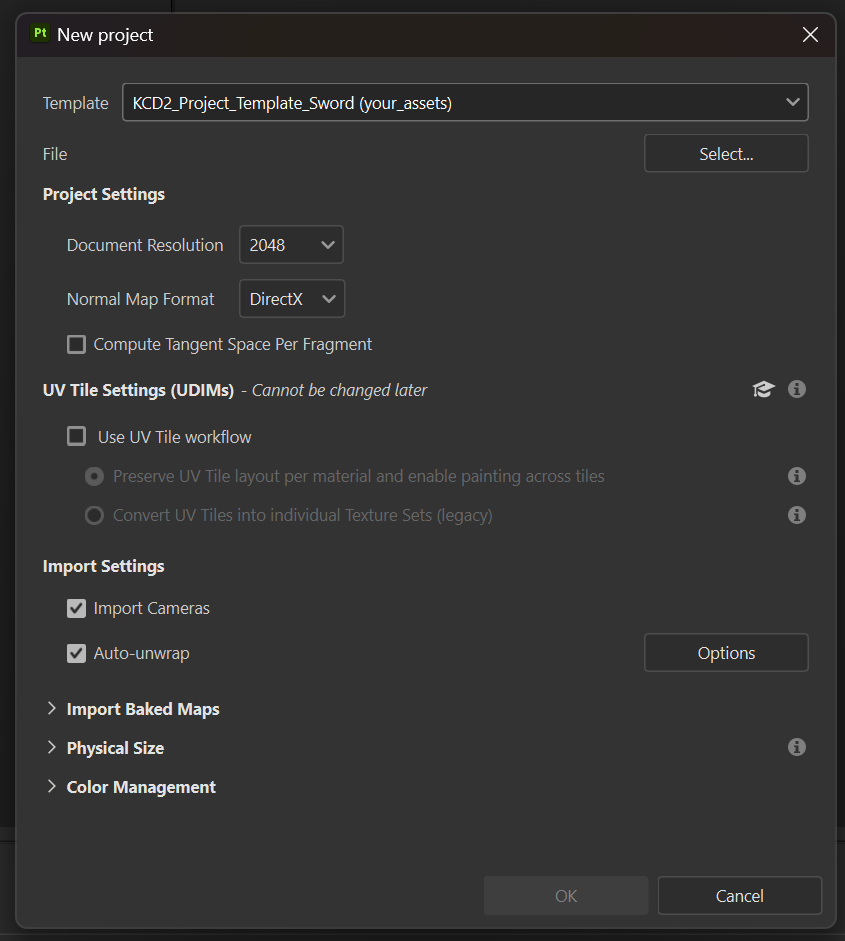
Use the sword specfic project template and again use DirectX normals.
Important Note: For the diffuse layer of any metalic item like a sword, ensure all metal elements just have a black diffuse. This avoids it conflicting with the spec/gloss later.
For more information on weapon textures, refer to Major's weapon tutorial.
¶ Exporting from Substance
Once you've got your textures ready to go in Substance, the export process is made very easy with my plugin.
To get started, there's some key details to keep in mind.
If you wish to maintain an alpha/transparency on your diffuse texture, you must change the “Diffuse Type” as below:
Once that is set correctly, go to File > Export textures.
For the output template, pick either the normal or weapon template depending on what you are working with.
For the file type use TIFF.
Note: If you are working with an ID map texture, make sure to only export that at 1k. Larger sizes can cause some issues with the game engine.
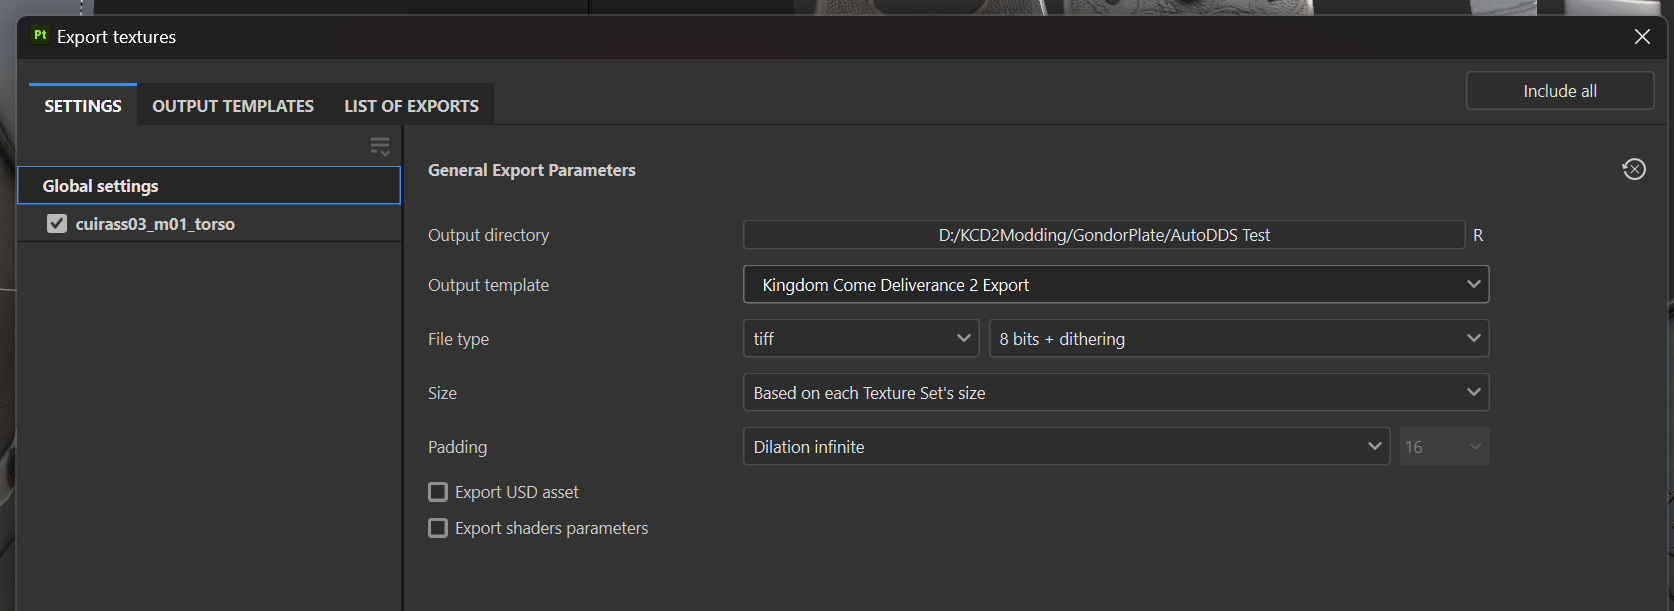
Click on your material on the list on the left, this will then let you select which ones you wish to export.
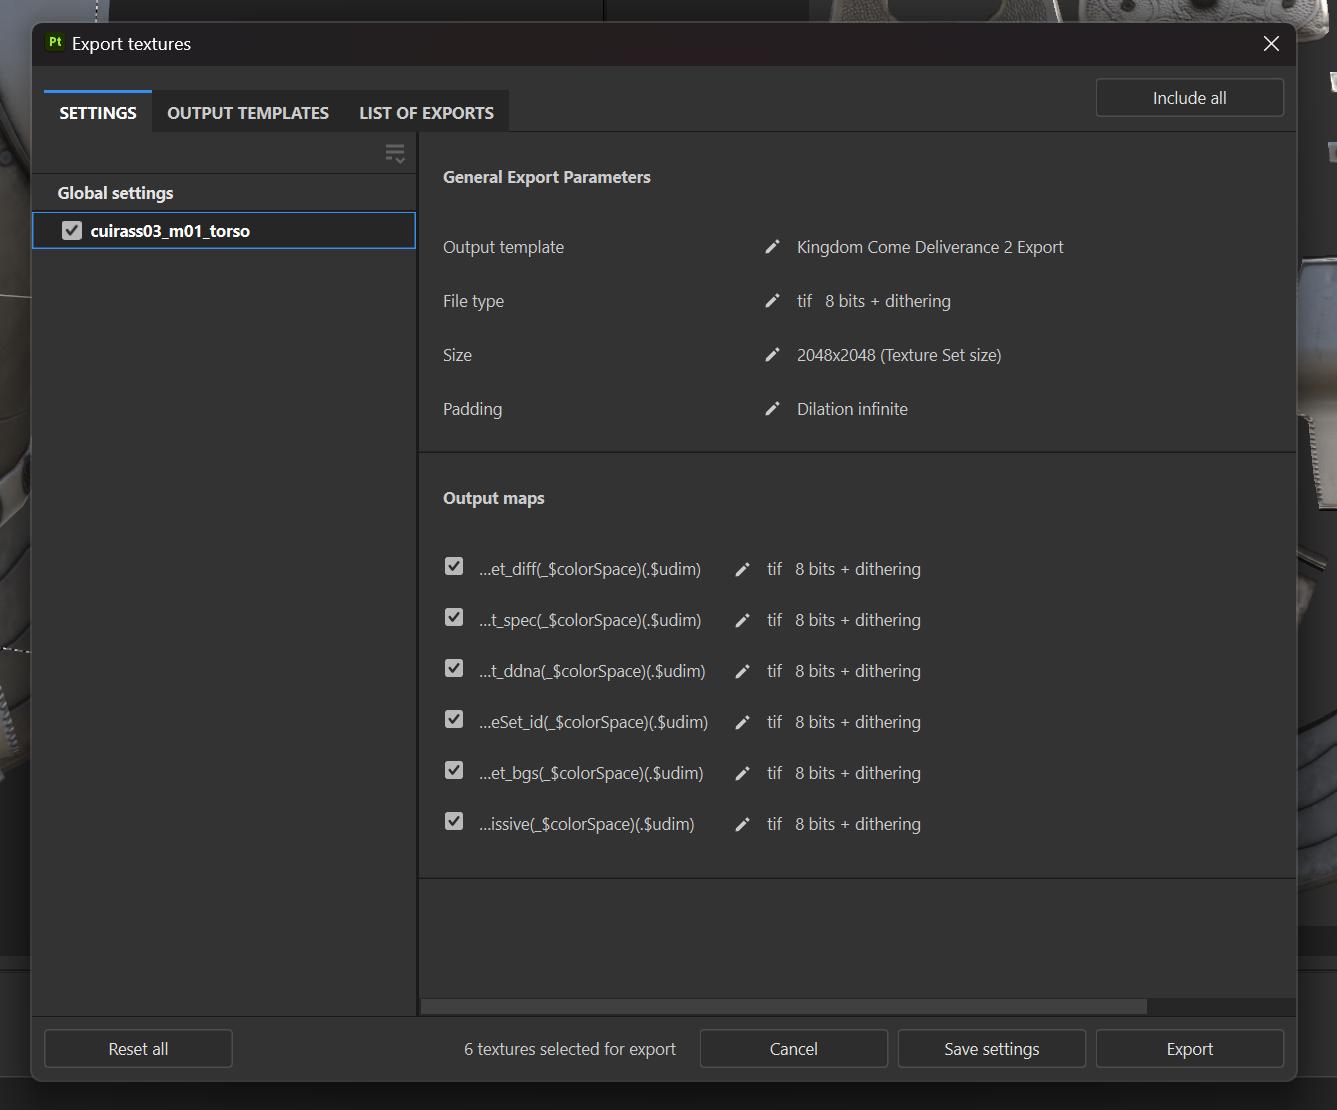
Once ready, click on Export. As long as my plugin is enabled it will then automatically convert the TIFF files to the required DDS formats for you using RC.
¶ Material (MTL) Files
In order to tell the game to load your new textures, you need to tell the game to do this in the material file. This can be done either by manually editing the .mtl file in your code editor of your choice, VS Code, NotePad++ etc, or by doing it in the Editor from the mod tools.
¶ Manual Editing
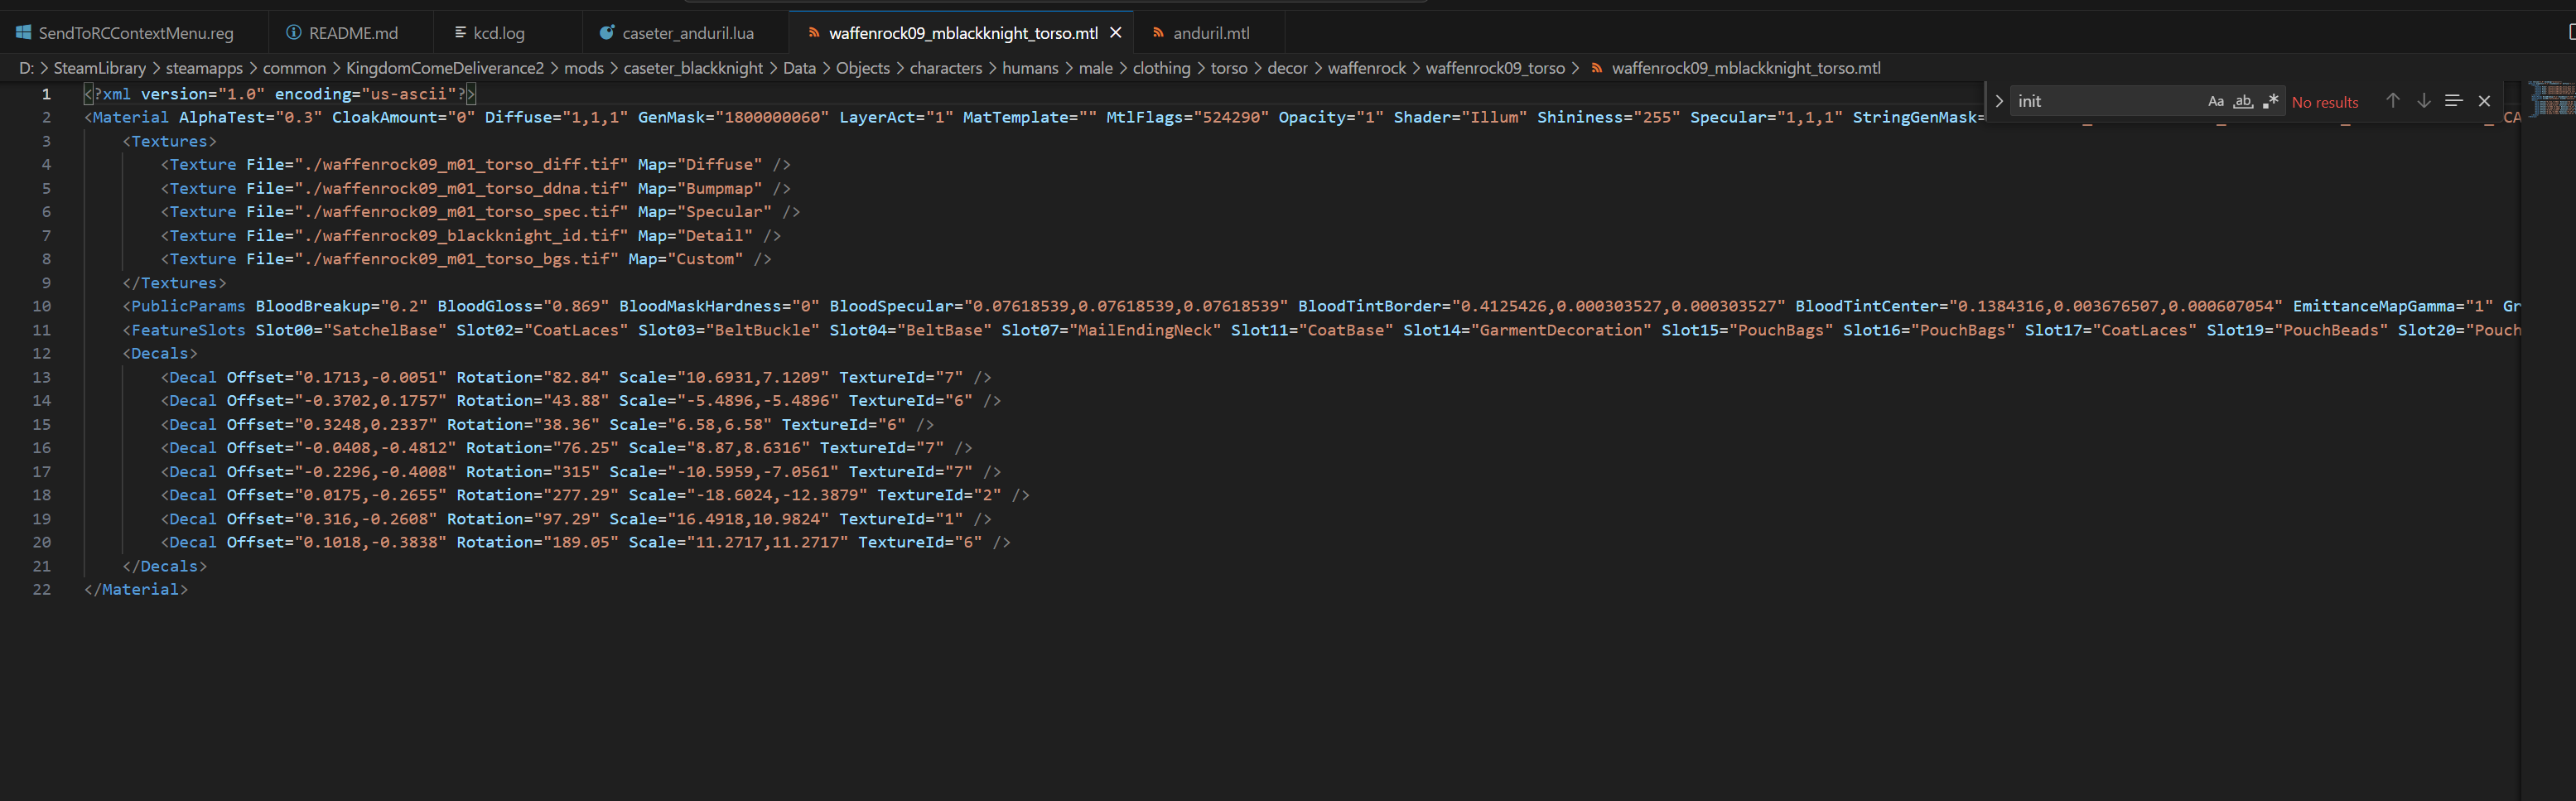
In order to manually edit the .mtl file, open the file in your code editor. In my case I use VS Code to edit the file.
Once you open this file you should see something similar to this:
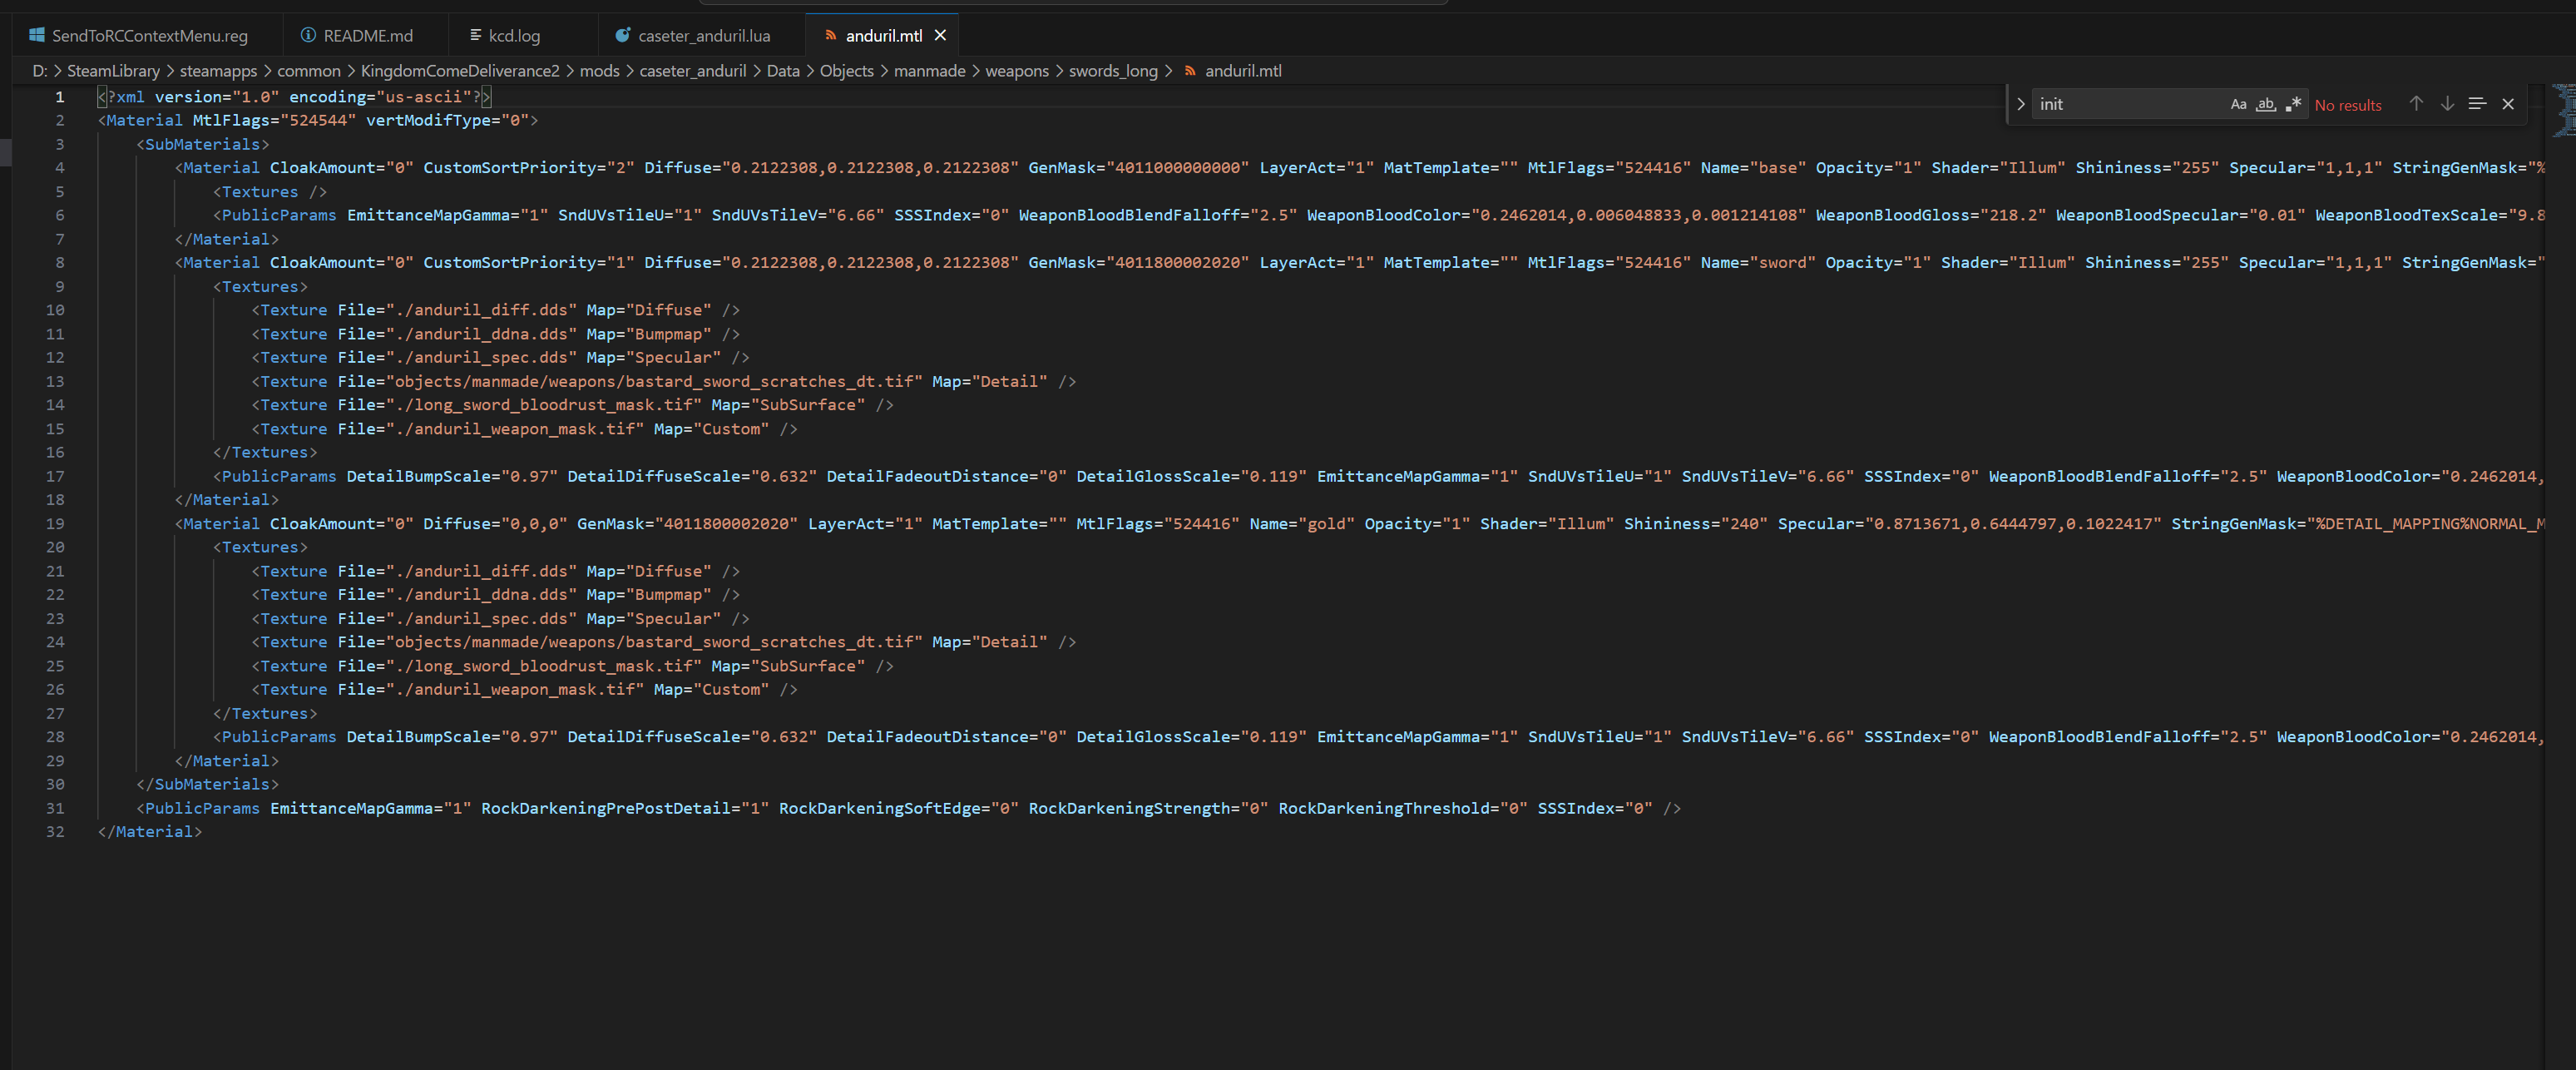
In this specific example from my sword, this is what the game would consider a “multi-material". This essentially just means that the MTL can load multiple seperate textures on the same model. So long as the same number of materials are present on the model.
The mtl file uses a mixture of your texture files and manual values to determine how to render the assets in-game.
A more simple singe slot mtl would look like this:
At is core an mtl file will consist of:
- A material (or multiple if multi-material).
- Paths on each material to the textures used, alongside the type of materail defined under “Map”.
- Plain/manual values set such as Diffuse="1,1,1"
- Feature Slots - This tells the game which feature to asign to the slots (from the ID map texture).
To keep things simple, I'd always suggest copying a base game mtl file for a similar item to the one you wish to mod, and modifying to suit.
If you're getting weird results with spec, gloss etc on your models in-game, balance the text values of spec & gloss to ensure they aren't overwriting your textures.
Important note: If a path for the texture is “./texture_diff”, it will only look for the file inside the same folder the mtl is in. If it is located in another folder you need to specify the full root directory or it wont find it.
¶ Editor approach
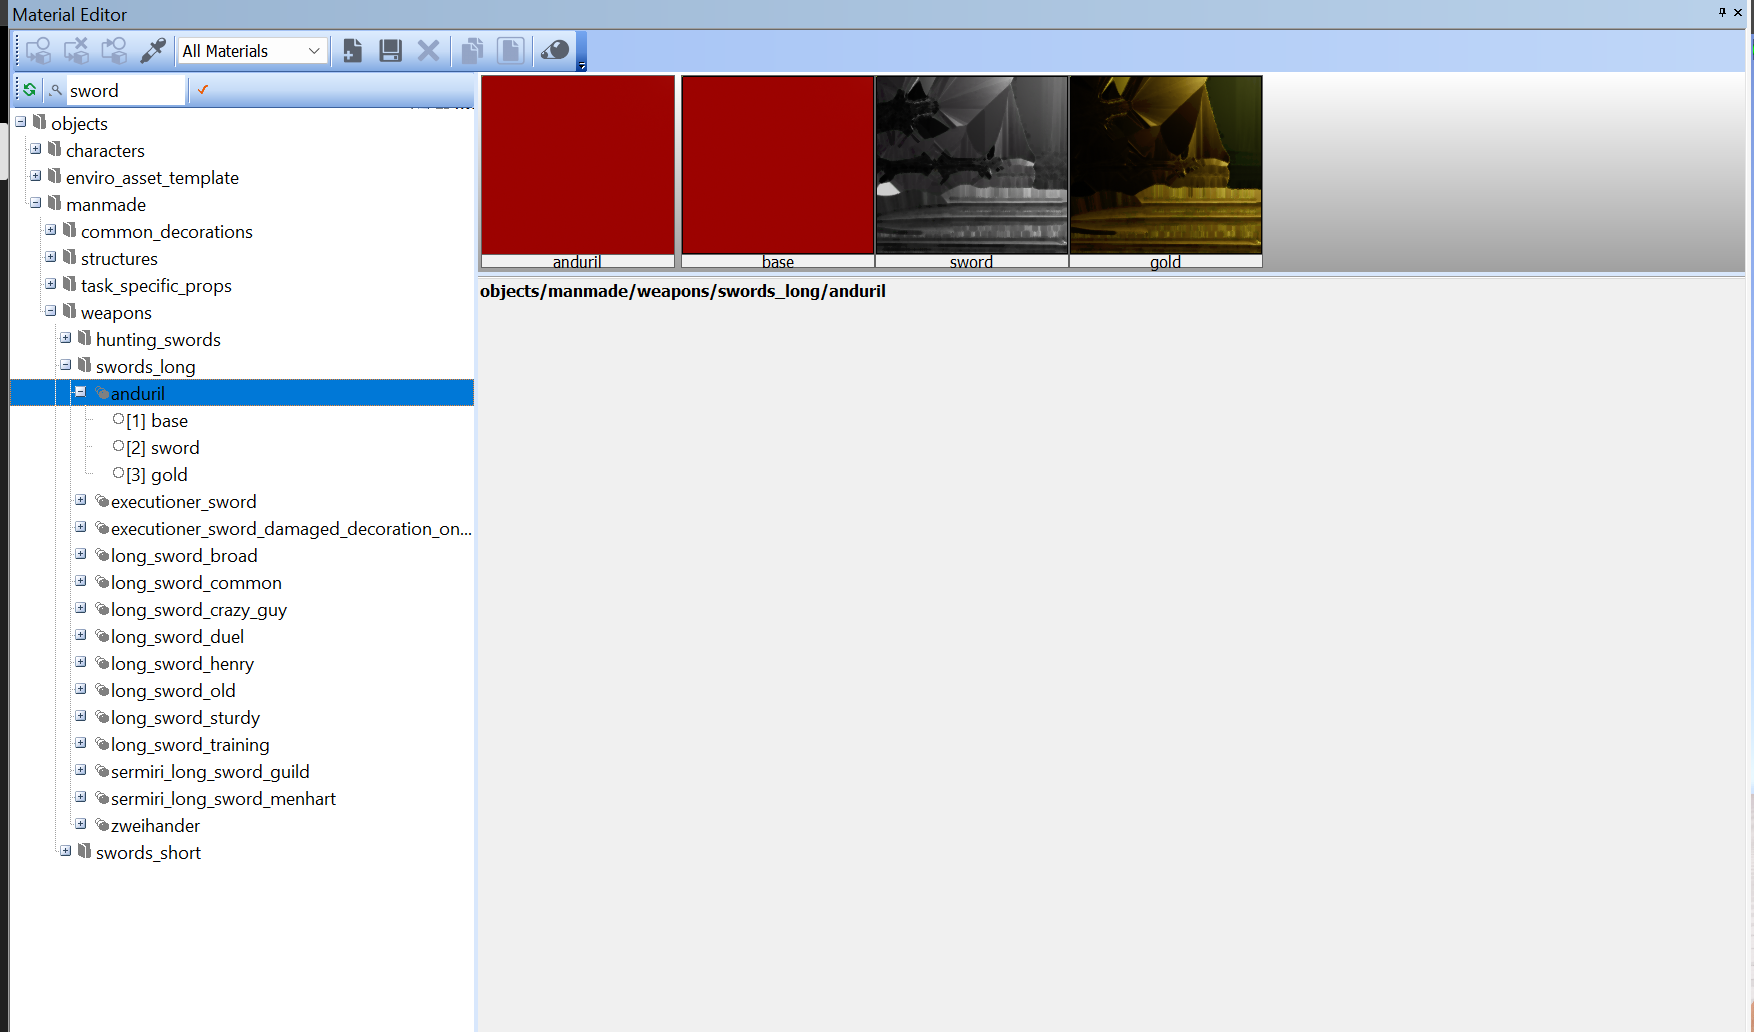
An alternative and more friendly way to work with mtl file is to use the Editor from the modding tools. Once you've run the basic tools set up and have your editor working, create a new test level, add in your item, NPC or whatever you wish to test.
At the top of the editor go to View > Open View Pane > Material Editor.
With the new window that has opened, on the far left you can navigate existing mtl files from the game, and once you find a similar one right click it to duplicate it. I'd advise renaming it as well to keep track.
Once thats done, click on your material and you should see this:
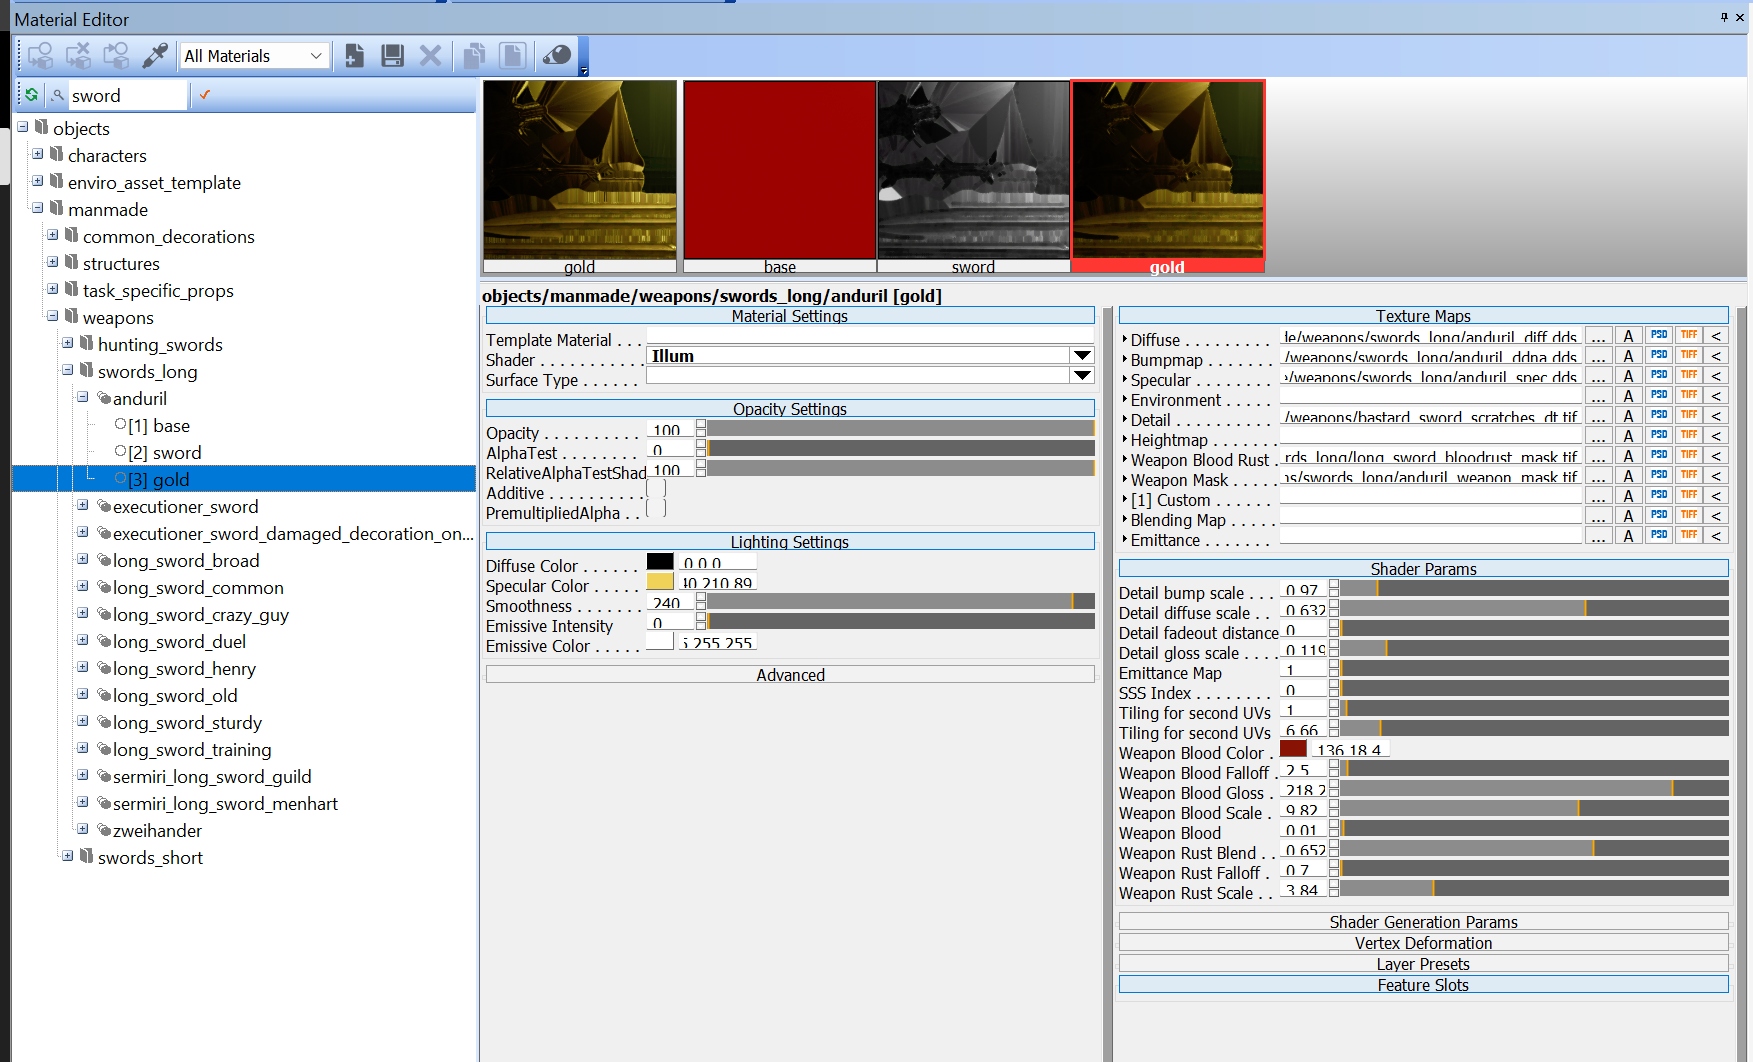
In this instance you can see this mtl has three sub-materials in use. If you click on one of these sub-materials on the list on the far left, it will show you more details:
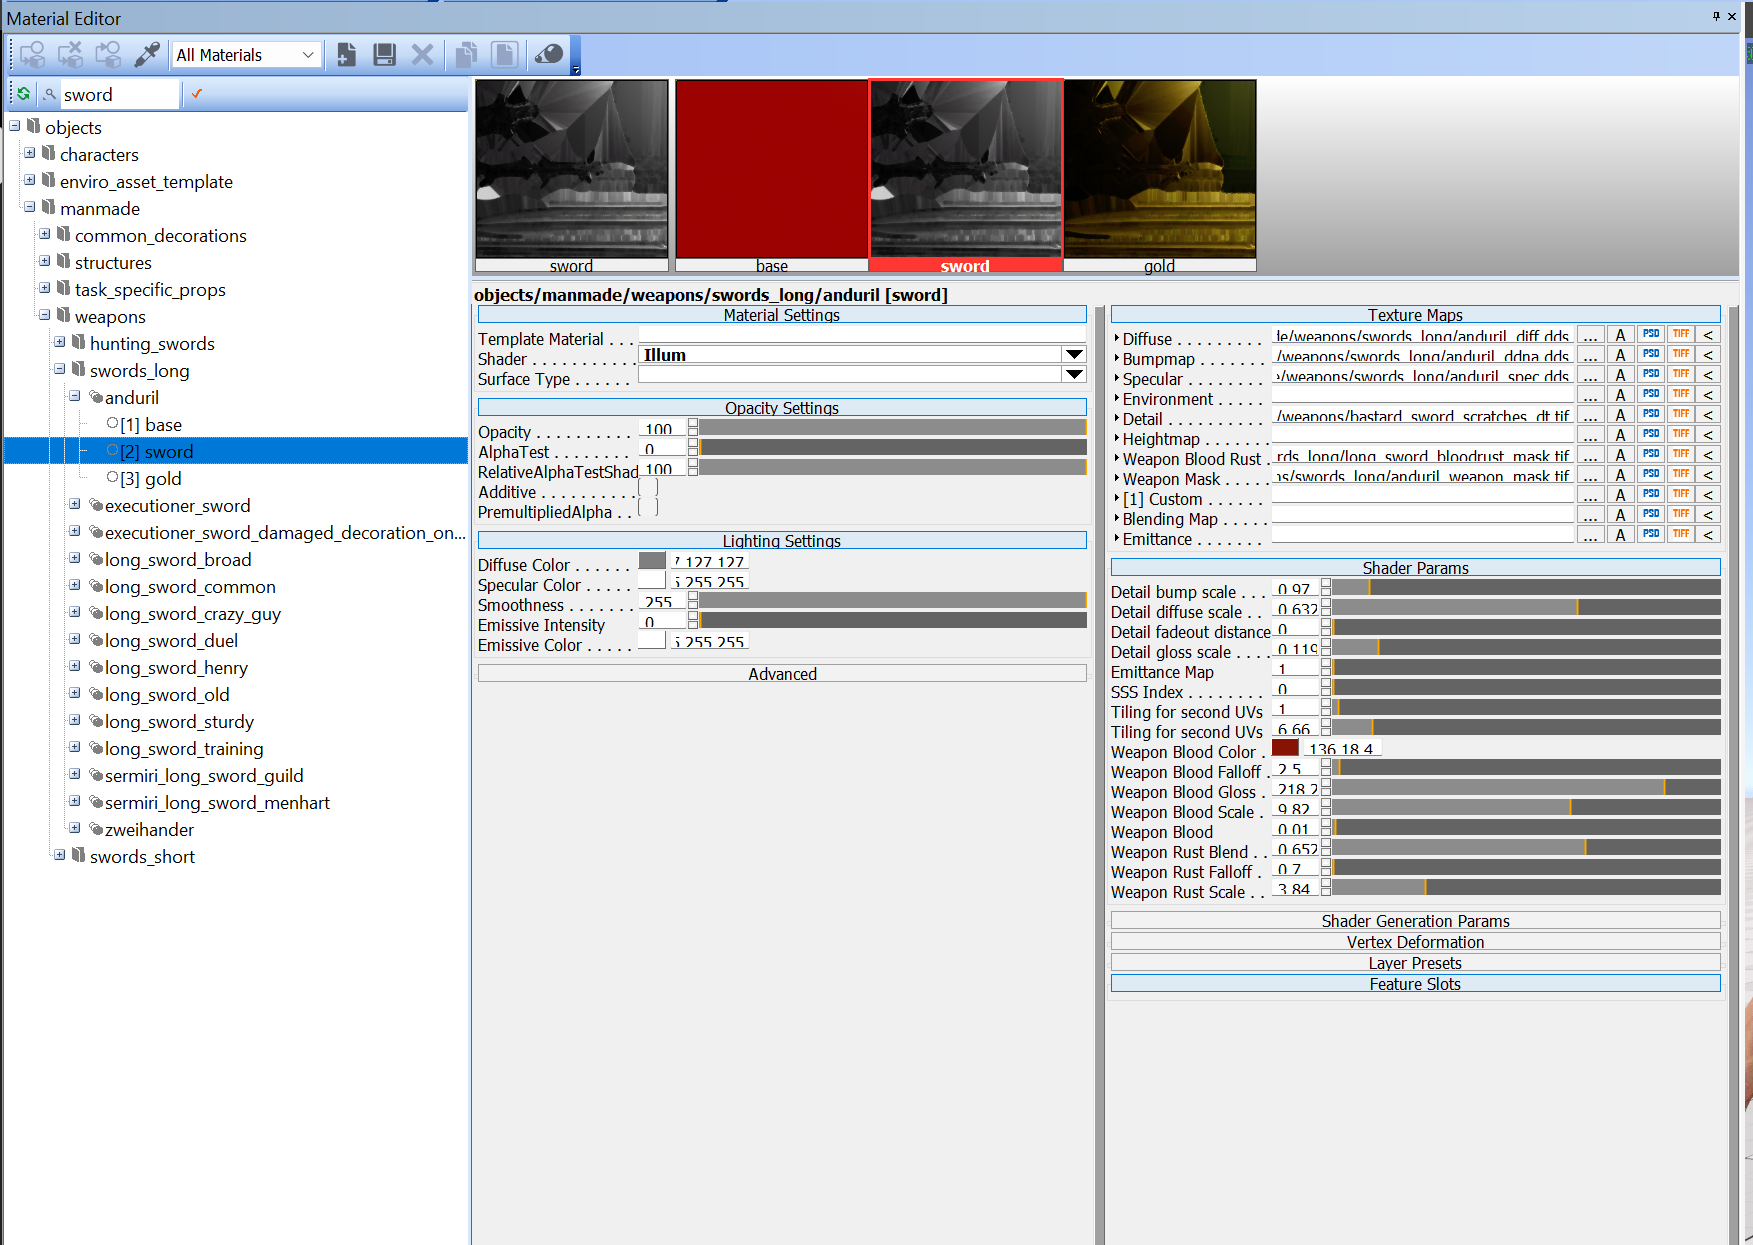
For my sword i use three layers:
- Base/Proxy - Just a blank layer used by the game in some specific instances.
- Sword - This is my main set of textures. As you can see the paths are completed for each texture.
- Gold - This layer is specifically used for the gold elements of my sword and it uses a flat spec colour value to force the game to make it look gold:
Using the editor to make these changes allows you to preview them in real time on characters, weapons etc without needing to re-load your game each time.
Once you are happy with your material file, you'll need to copy it over to your mod. By default the material browser will save the mtl file inside your “KCD2Mod\Data\objects” folder in the relevant path for whichever mtl you copied it from.