¶ Creating new ship parts.
This tutorial aims to guide the user in creating a new ship part from Blender to ingame.
Note that most of the Nif stuff applies to all hard body models.
Clothes have extra steps not covered here.
¶ Tool setup
To get started, download and install the following:
Blender for 3d modelling
https://www.blender.org/
Geo bridge for exporting from blender into starfield format
https://www.nexusmods.com/starfield/mods/4360
Nifskope for making/editing Nif models, currently I use:
https://www.nexusmods.com/starfield/mods/9234
xEdit for ESM editing
https://www.nexusmods.com/starfield/mods/239
Creation Kit
https://store.steampowered.com/app/2722710/Starfield_Creation_Kit/
¶ Exporting a model to work on.
We will be editing a pre existing model so that our scaling and collisions work.
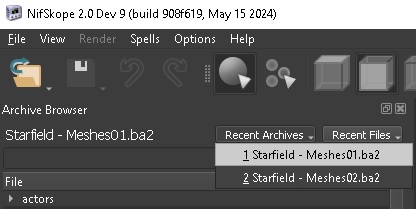
First load the Meshes01 archive in Nifskope:
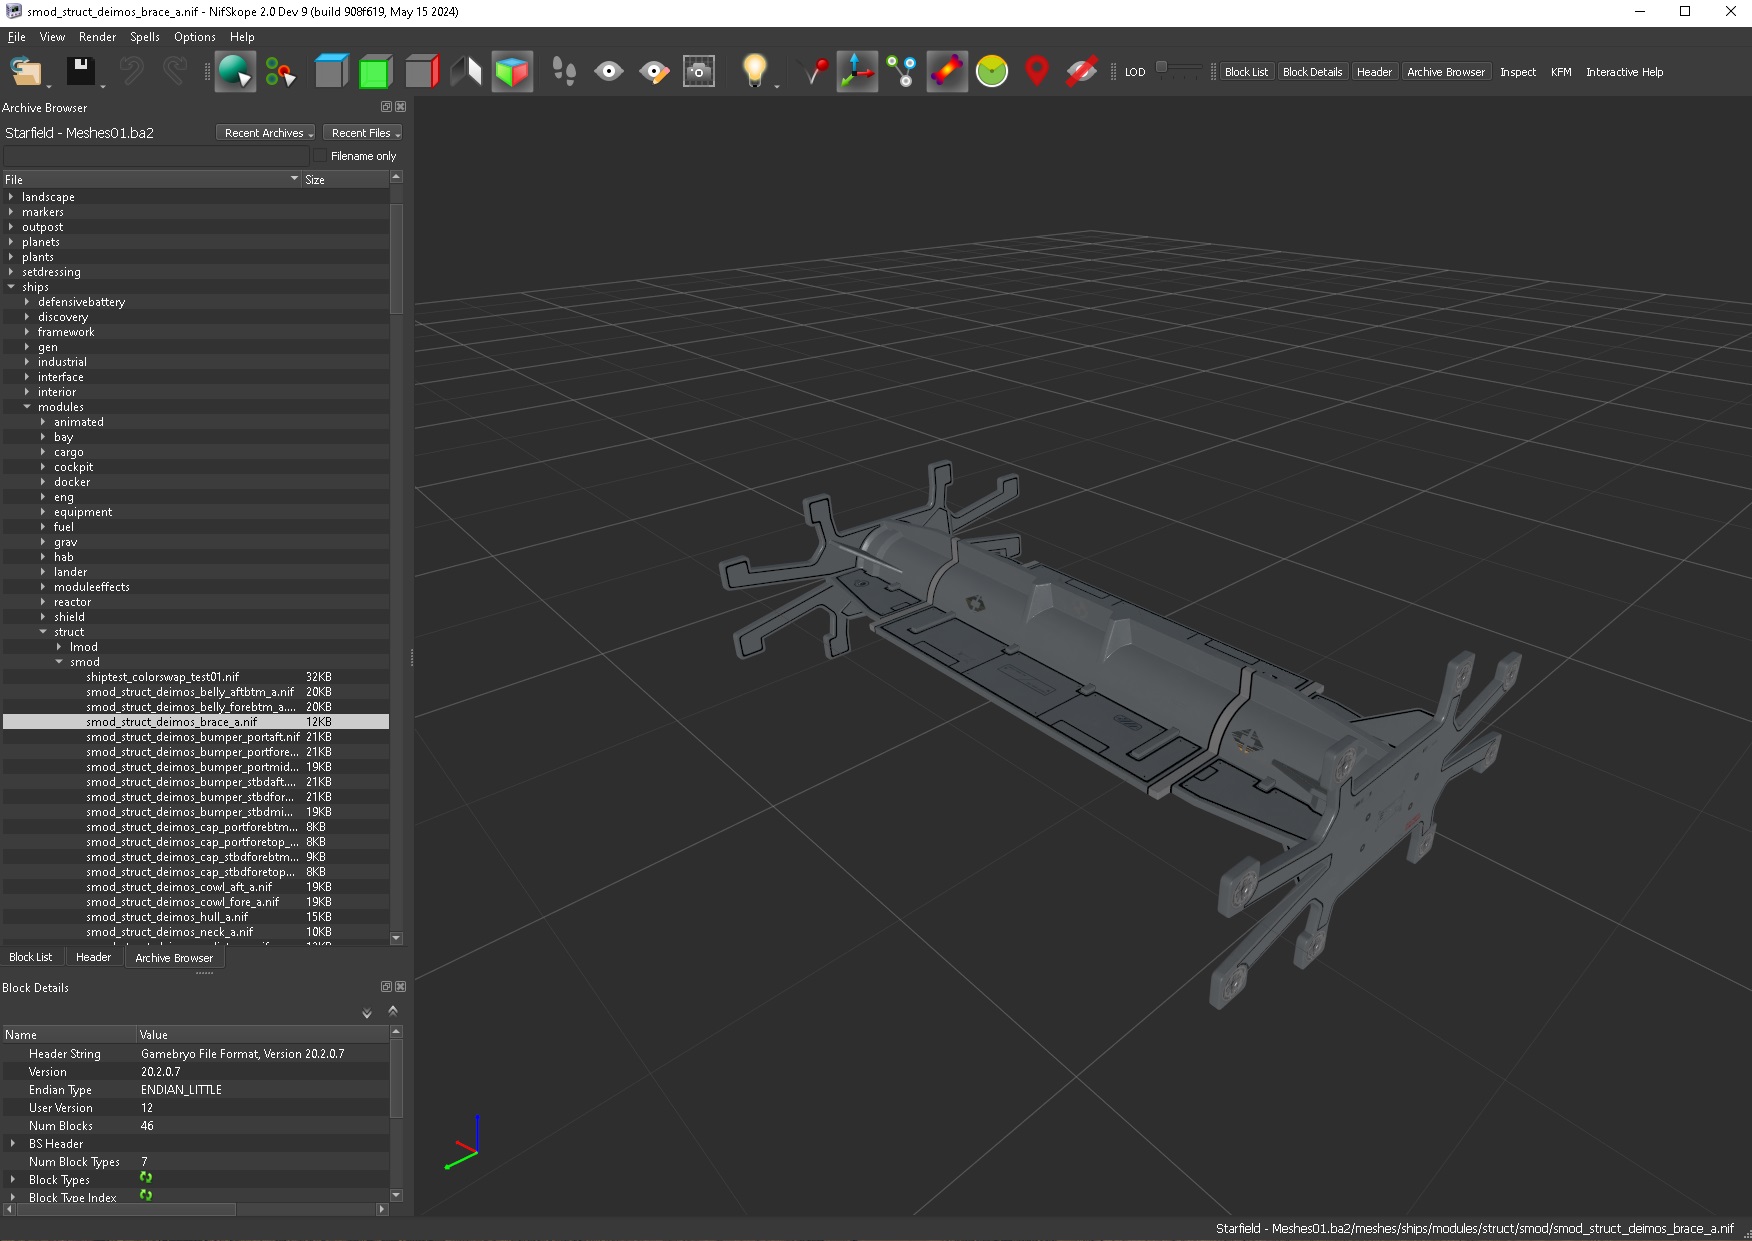
Next open the Deimos Strut:
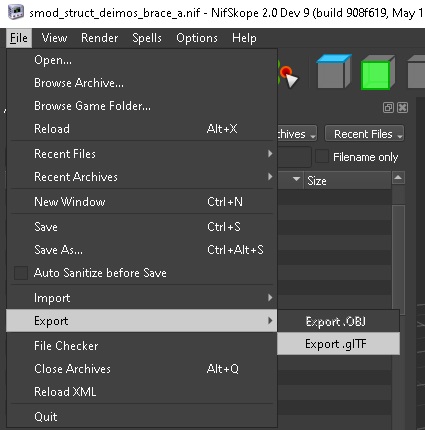
Finally we'll export this model to glTF format so we can import it to blender. There are other ways of doing this but I found this works for me.
Next we open blender and import our glTF:
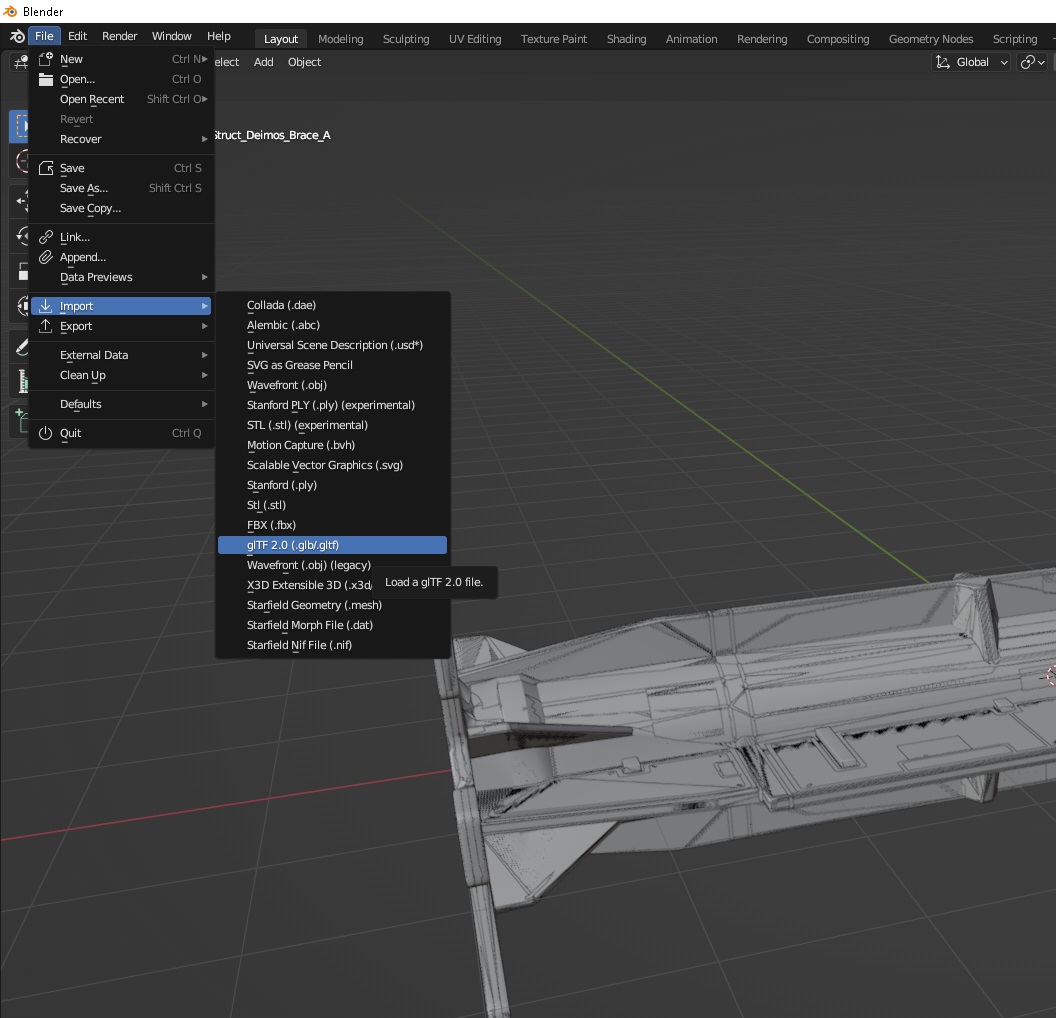
We now have the mesh in Blender and we can mess around with it.
¶ Modelling
We won't go into detail here, there are plenty of blender tutorials out there.
¶ Creating the Mesh files
Once you've created the models you wish to export, click the Export .mesh button on the Geo Bridge plugin:
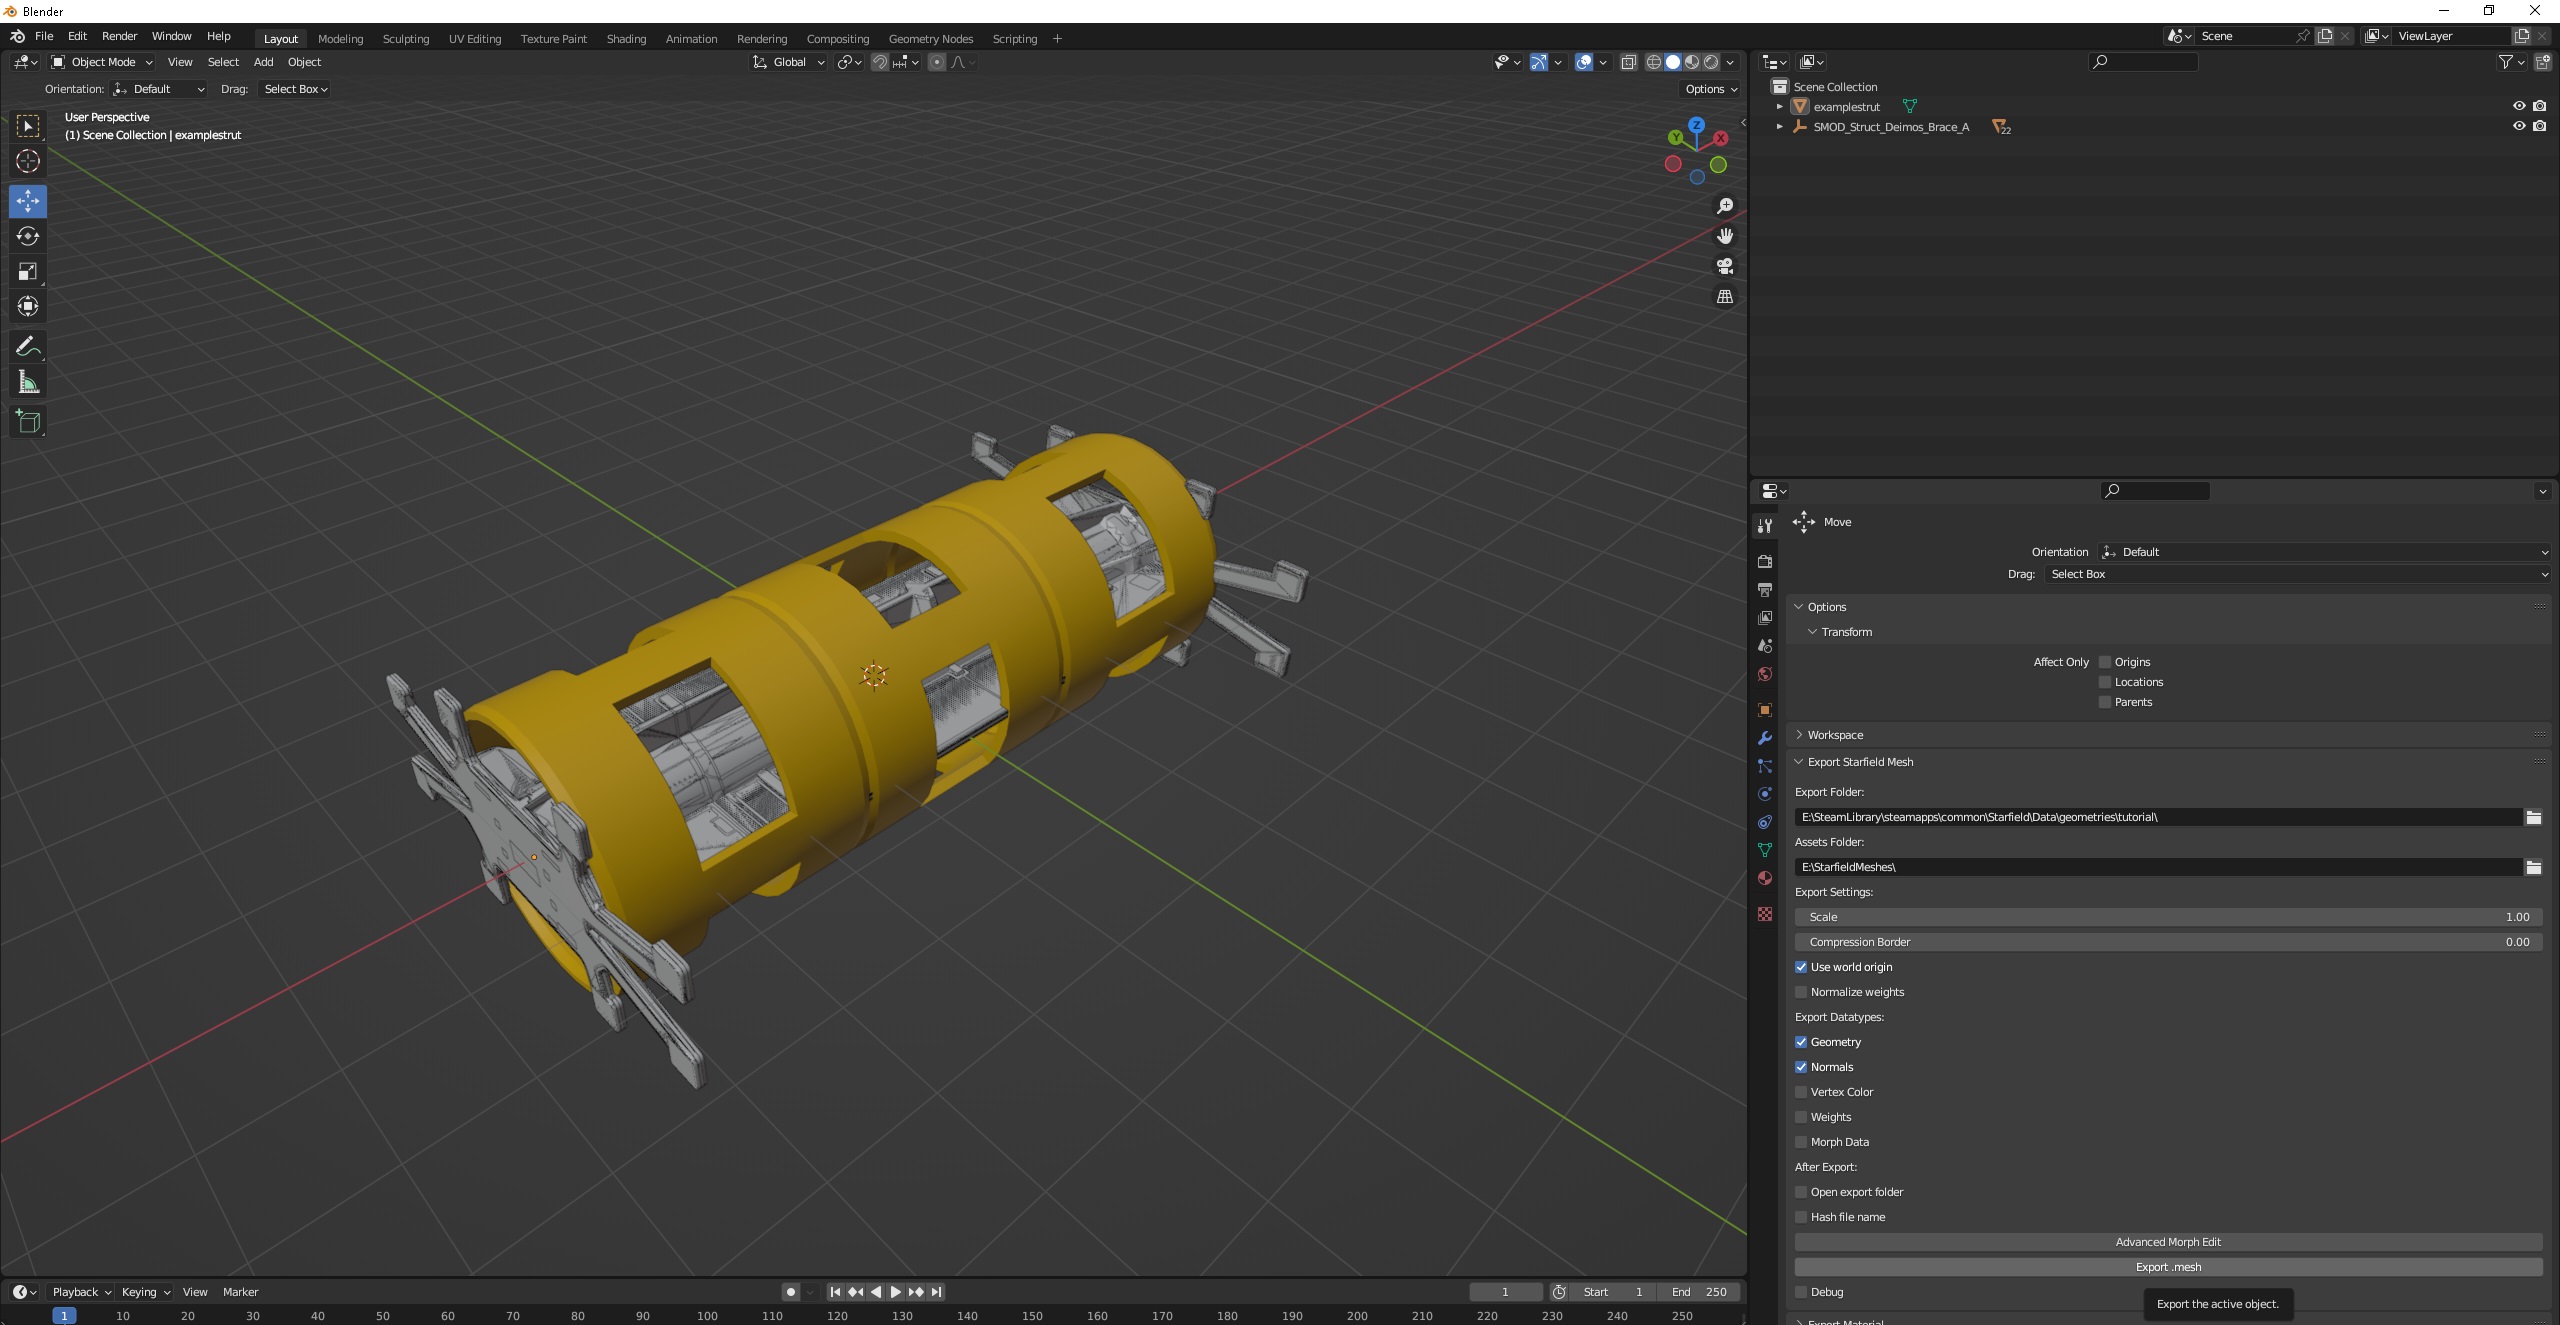
This should create a .mesh file in the folder configured in the plugin

Note down this path and filename, we will need it to build the NIF.
¶ Building the Nif
Now that we have a new mesh file we need to create a nif model that uses it.
Close all copies of Nifskope running and then reopen it. The version above seems to have some caching and will not load new meshes until it is restarted.
Next we'll create a copy of the Diemos Strut to use as a base. Load it up in Nifskope and hit save as.
It must be saved in your starfield directory.
We'll be using Starfield\Data\meshes\tutorial\examplepart.nif
To add out new mesh to the existing model we will need to copy one of the existing BSGeometry nodes. Select node 40 which is the main part of the Strut and hit Ctrl + C.
Then we need to add it to the NiNode at 0. So select that node and hit Ctrl + V.
We should now have a new node at 46 which we can edit.
Each BSGeometry node has a reference to up to 4 meshes:
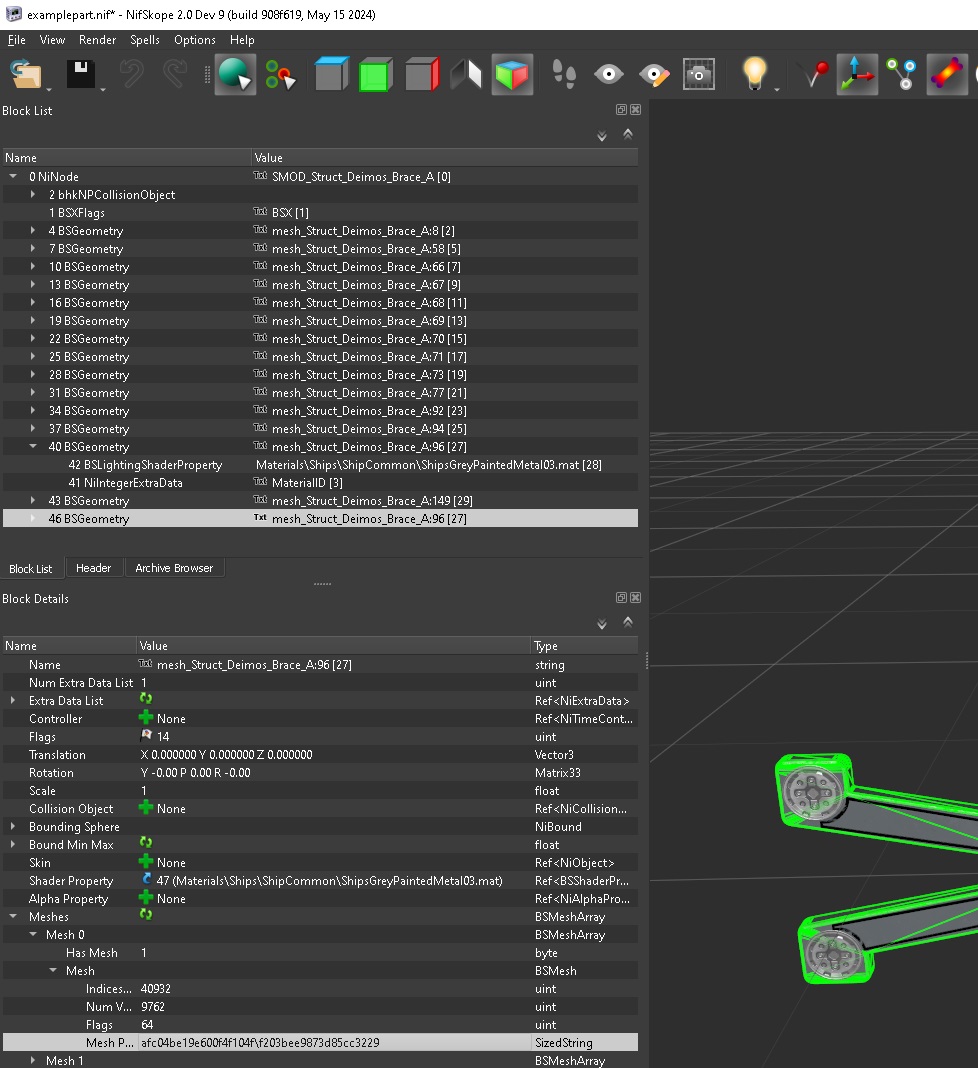
These 4 are the Level of Details for the model, we'll just use a single LOD for this example.
We will update each of these mesh paths to match the location of our mesh file.
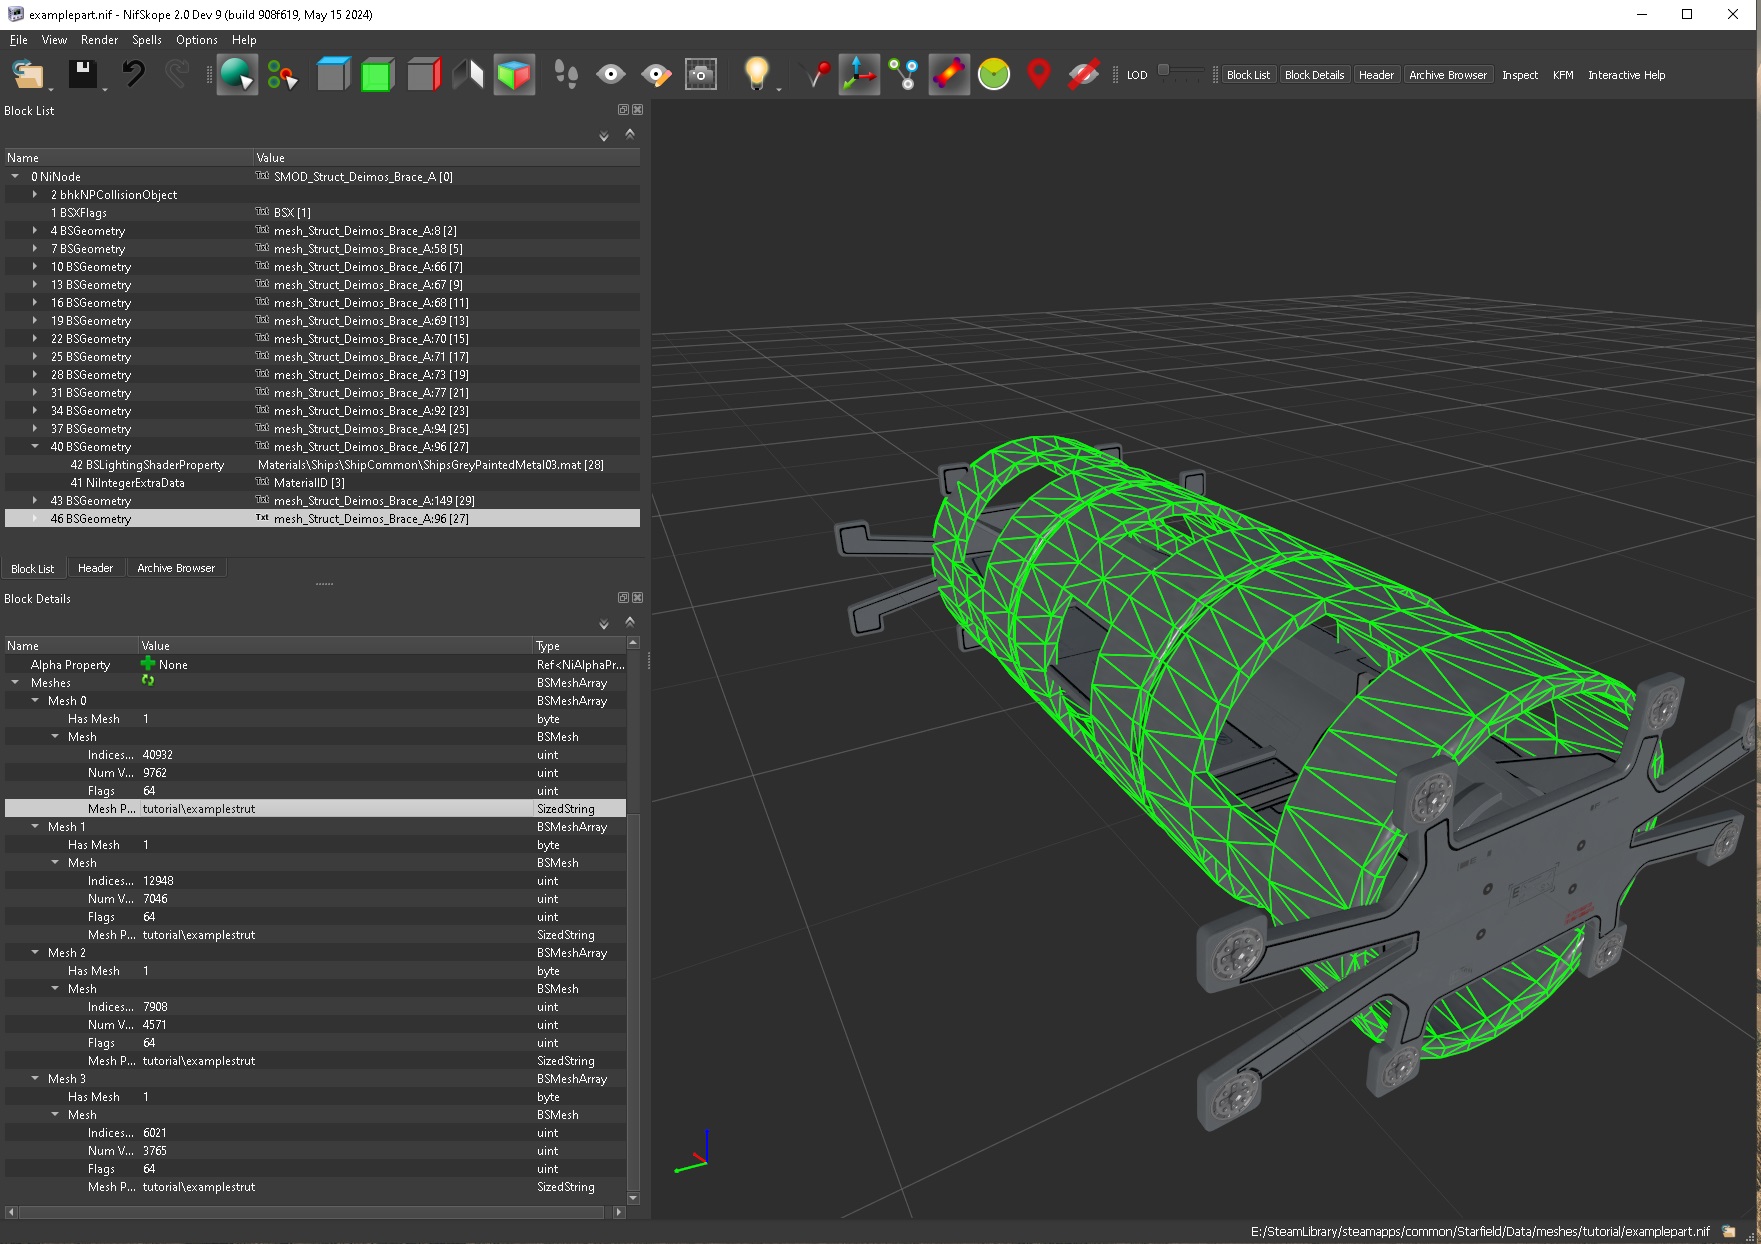
Note how we don't need the file type and we've changed it in all four locations.
Not all models have 4 LODs, you can just match what's there.
Save this file and open the Creation Kit.
¶ Creation Kit
There are a few forms that we will need to create in order for our part to work, these are:
- CO (Constructable object) - The workshop listing such as price, description and menu positions
- GBFM (Generic Base Form) - The parts stats and PKIN links
- PKIN - The packin that points to the CELL
- MSTT (Moveable Static) - The mesh, material and snapping information
Thankfully with the Creation Kit we can copy the existing versions of these.
¶ Moveable Static
First part to deal with is the Moveable static, this is the actual model and the snap points it has.
Find the original brace in the WorldObjects->MoveableStatic section of the Creation Kit and filter by SMOD_St
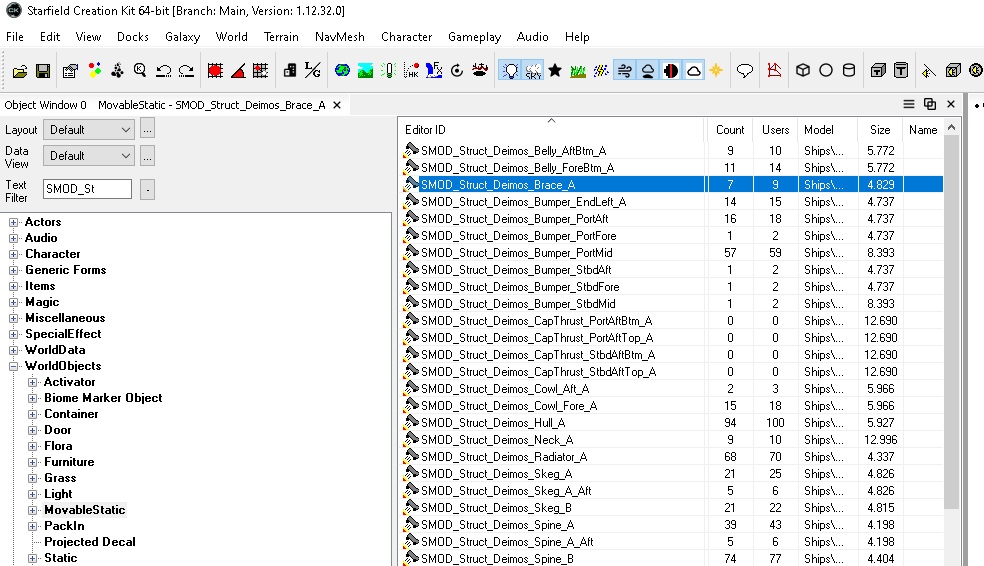
Right click the existing part and hit duplicate. Then hit edit on the duplicate and give it the name AA_SMOD_Struct_Tut. It's good practice to prefix all your editorid forms with a short abveation, this allows you to find them quicker and stops conflicts between mods.
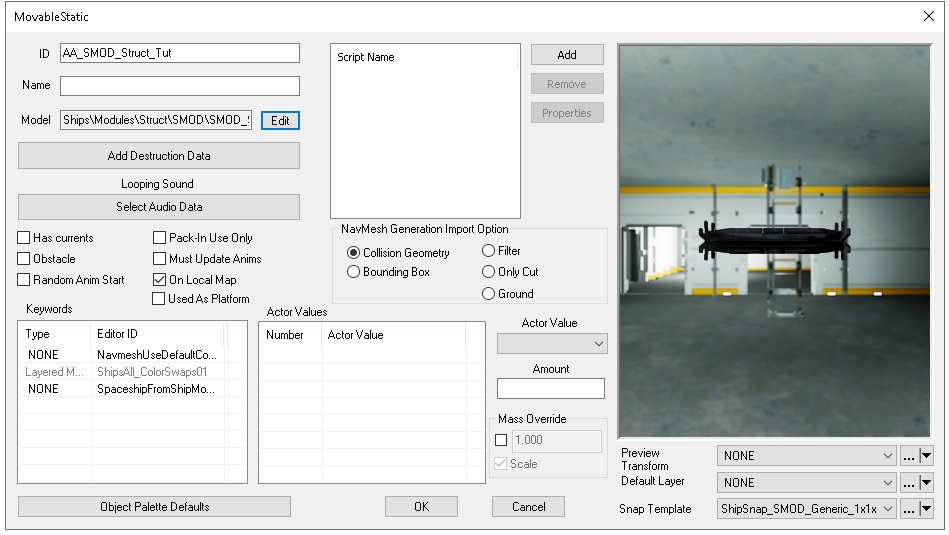
Next hit the Edit button by the Model field and find our new NIF.
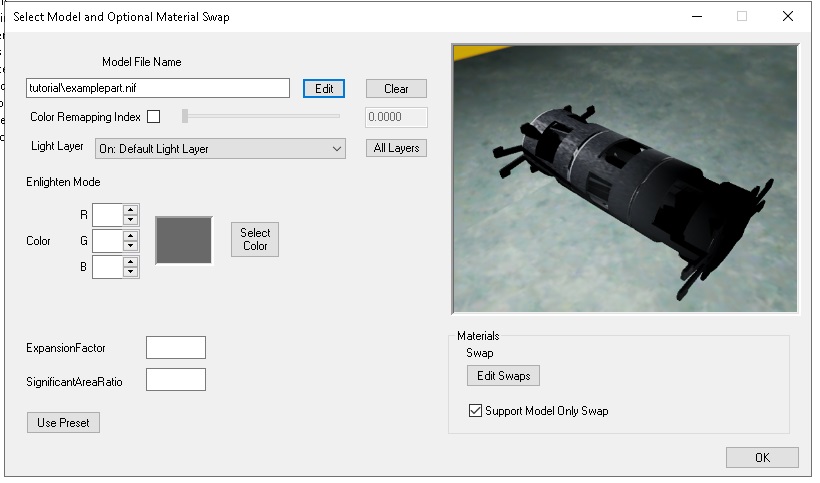
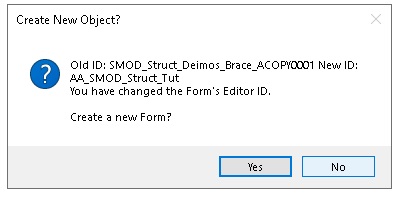
Press OK on both the model and edit windows, you'll be prompted if you want to create a new form.
As we've duplicated we're happy to just use the form we're editing, so hit no:
¶ The Packin
Packins are basically collections of objects that can be used together.
In the same way we duplicated the Moveable Static we can Duplicate the Packin:
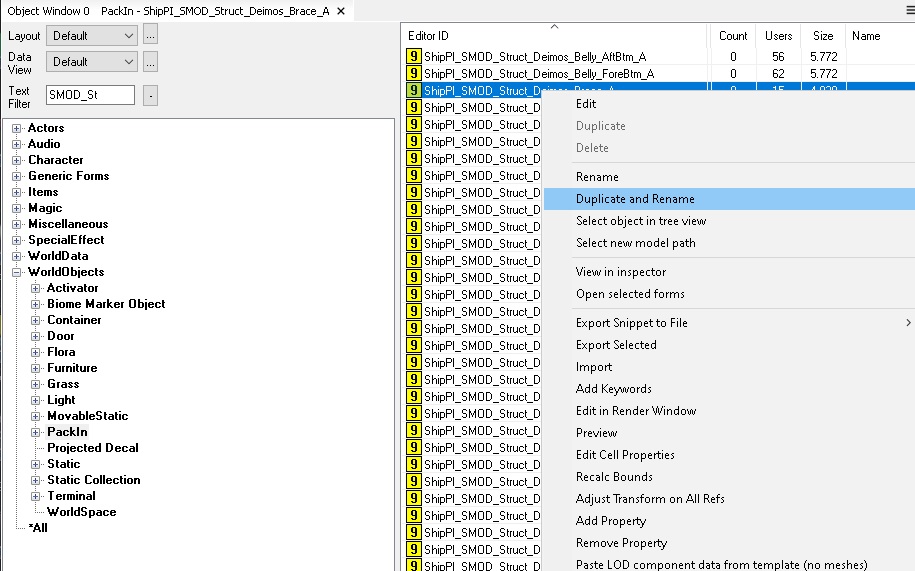
Rename the packin to AA_packin_Struct_Tut and hit the button Edit in Render Window:
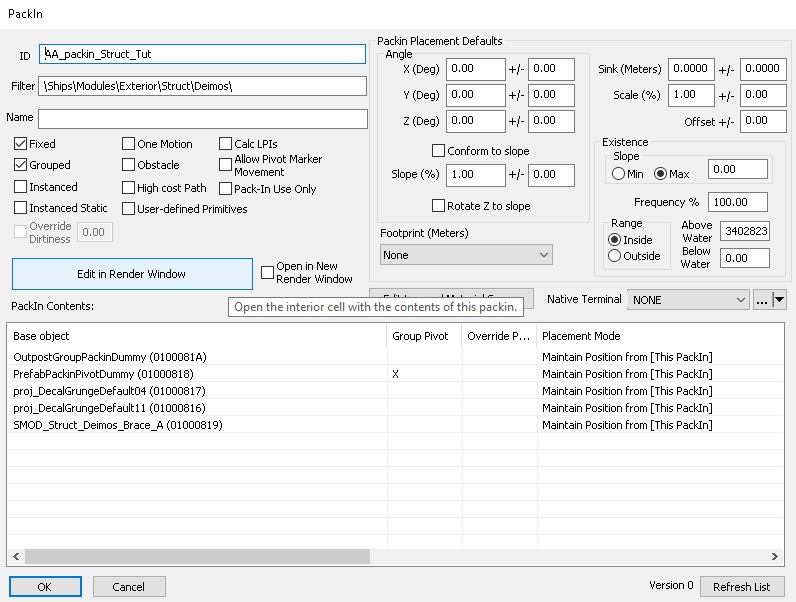
You should now see the part in the render view. Make sure the Cell view is also open.
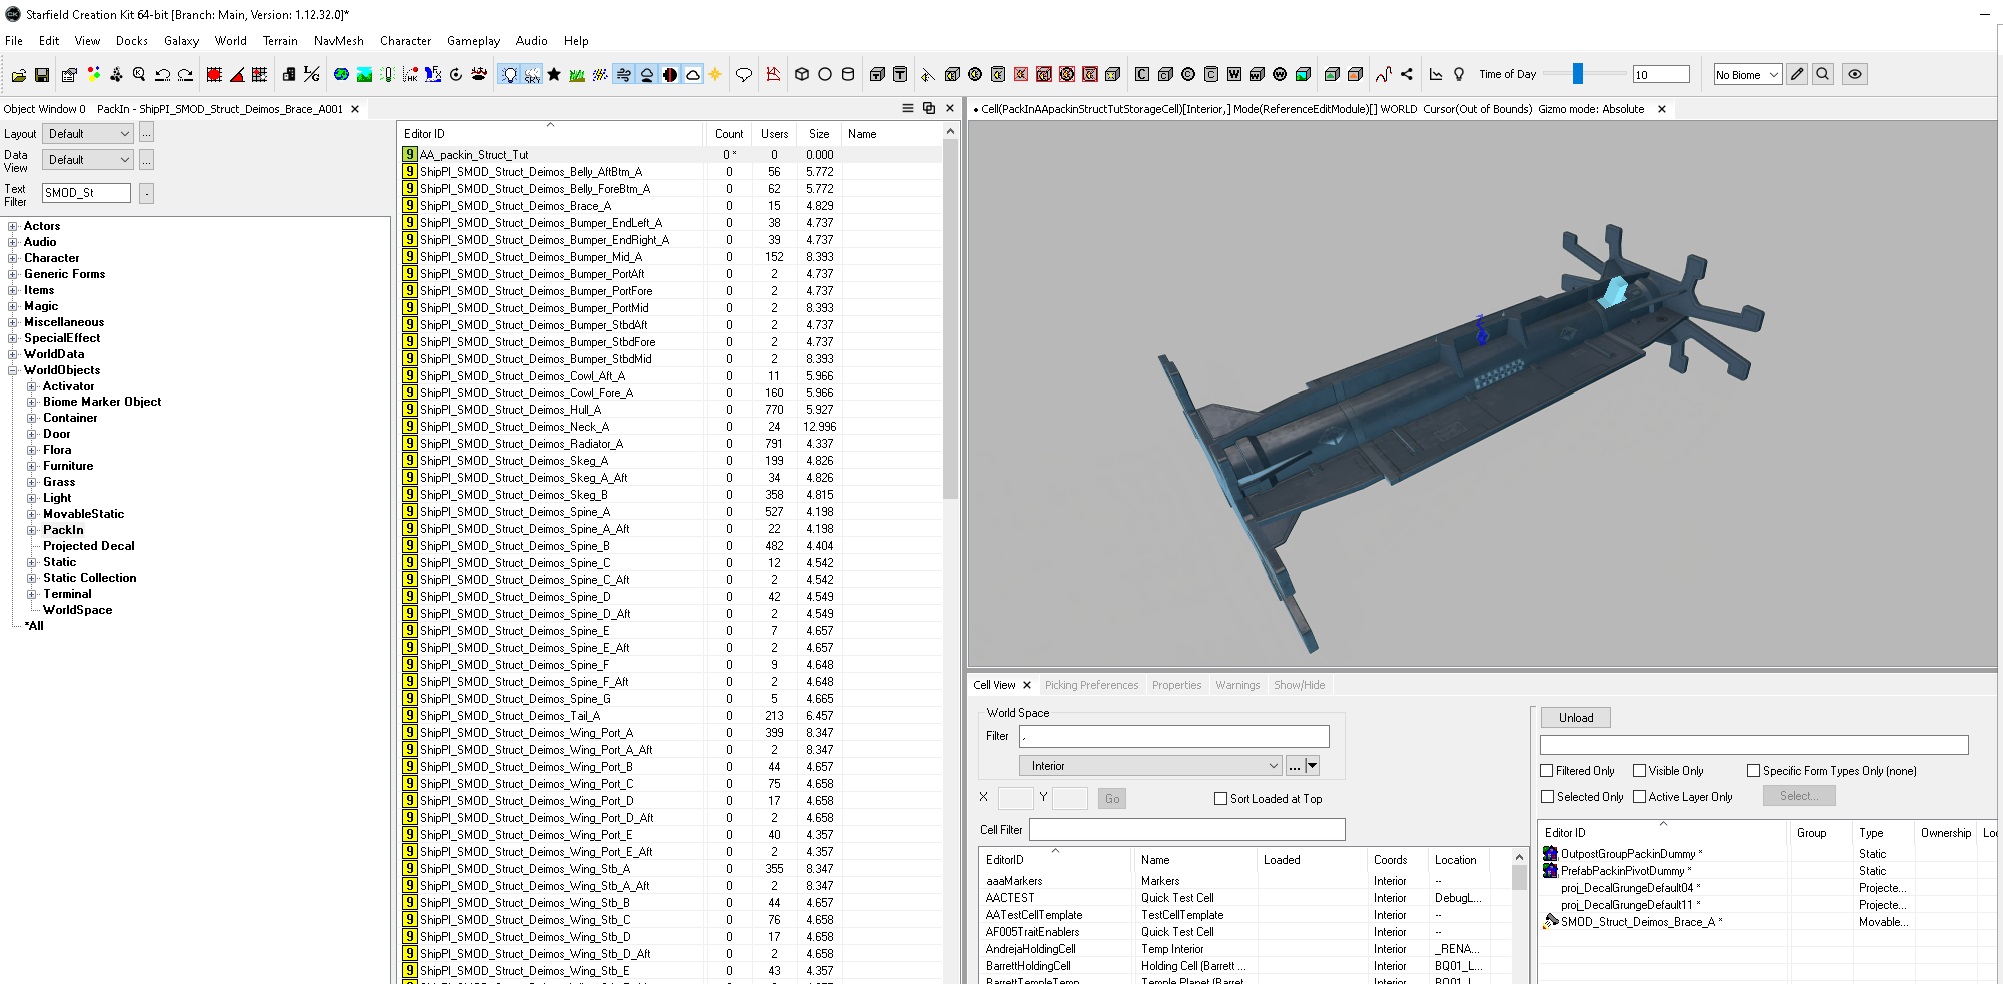
We now need to swap out the old moveable static in this packin for our new shiny one. To do this drag and drop the moveable static from the object window to the render view
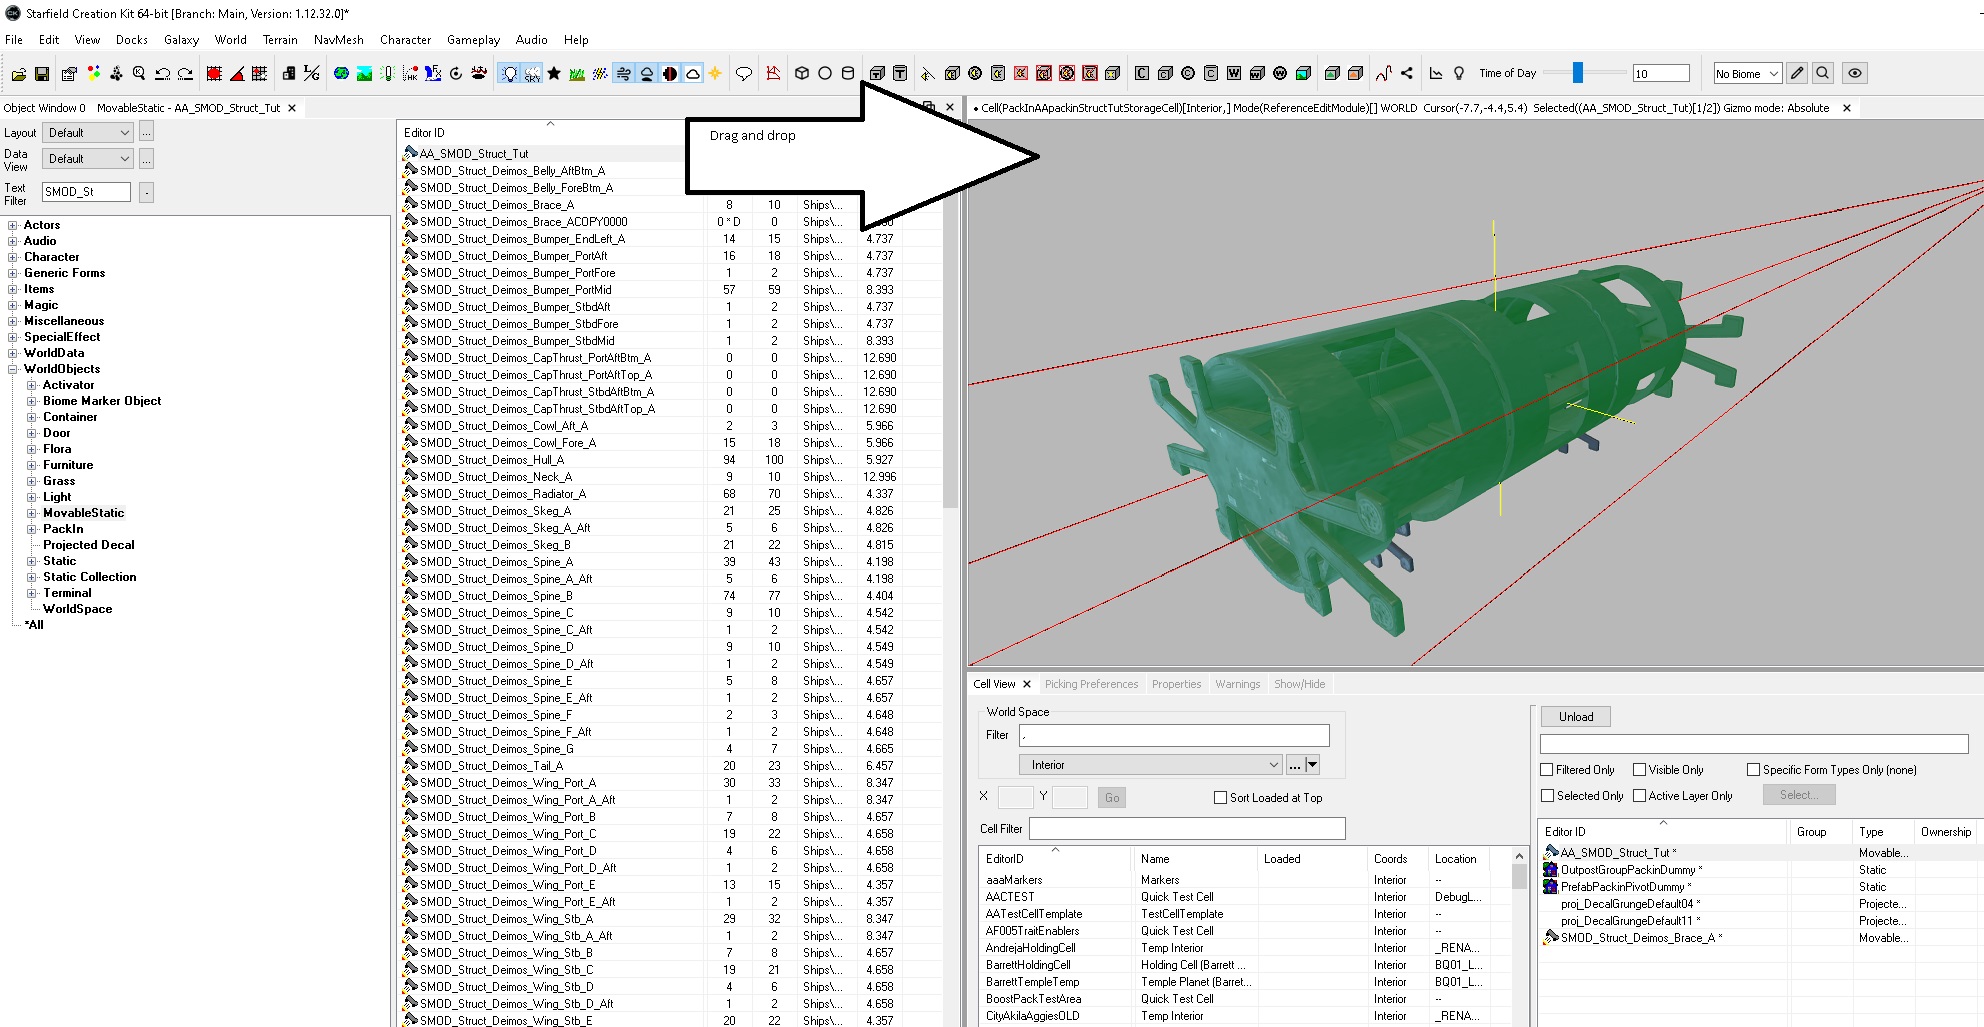
In the cell view you'll see our new part has appeared, next we need to move it into place.
Right click the new part and hit Edit
We'll set the X Y and Z position to 0 and hit OK.
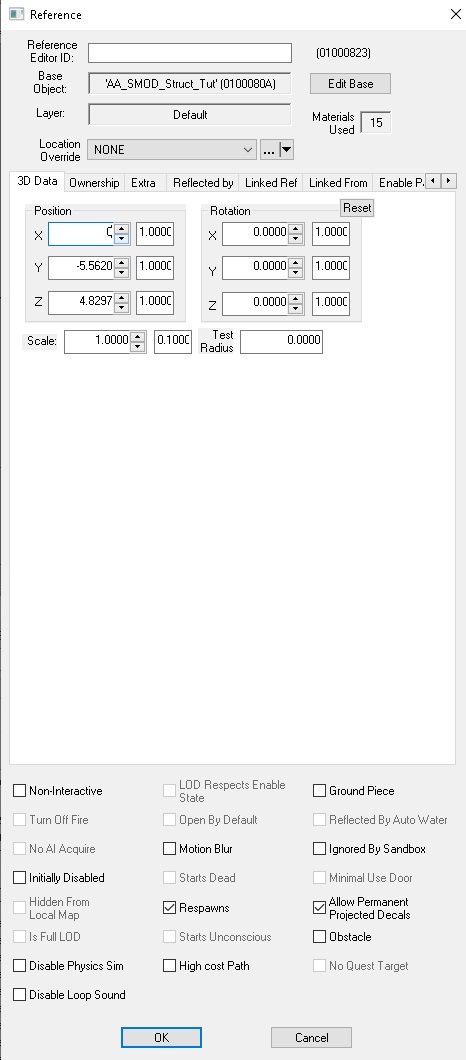
Finally we remove the old part from the packin.
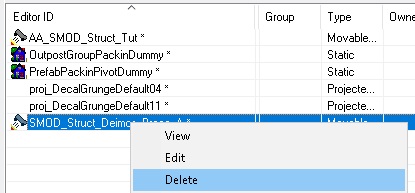
Hit Ctrl + S to save.
¶ The Generic Base Form
This form is basically just data storage about the ship part.
Duplicate the brace GBFM like before:
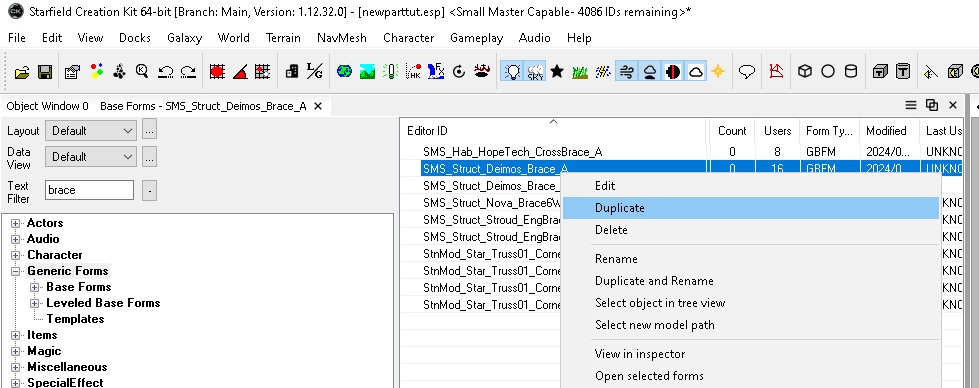
Rename it to AA_SMS_Struct_tut. You can also change the ingame name here.
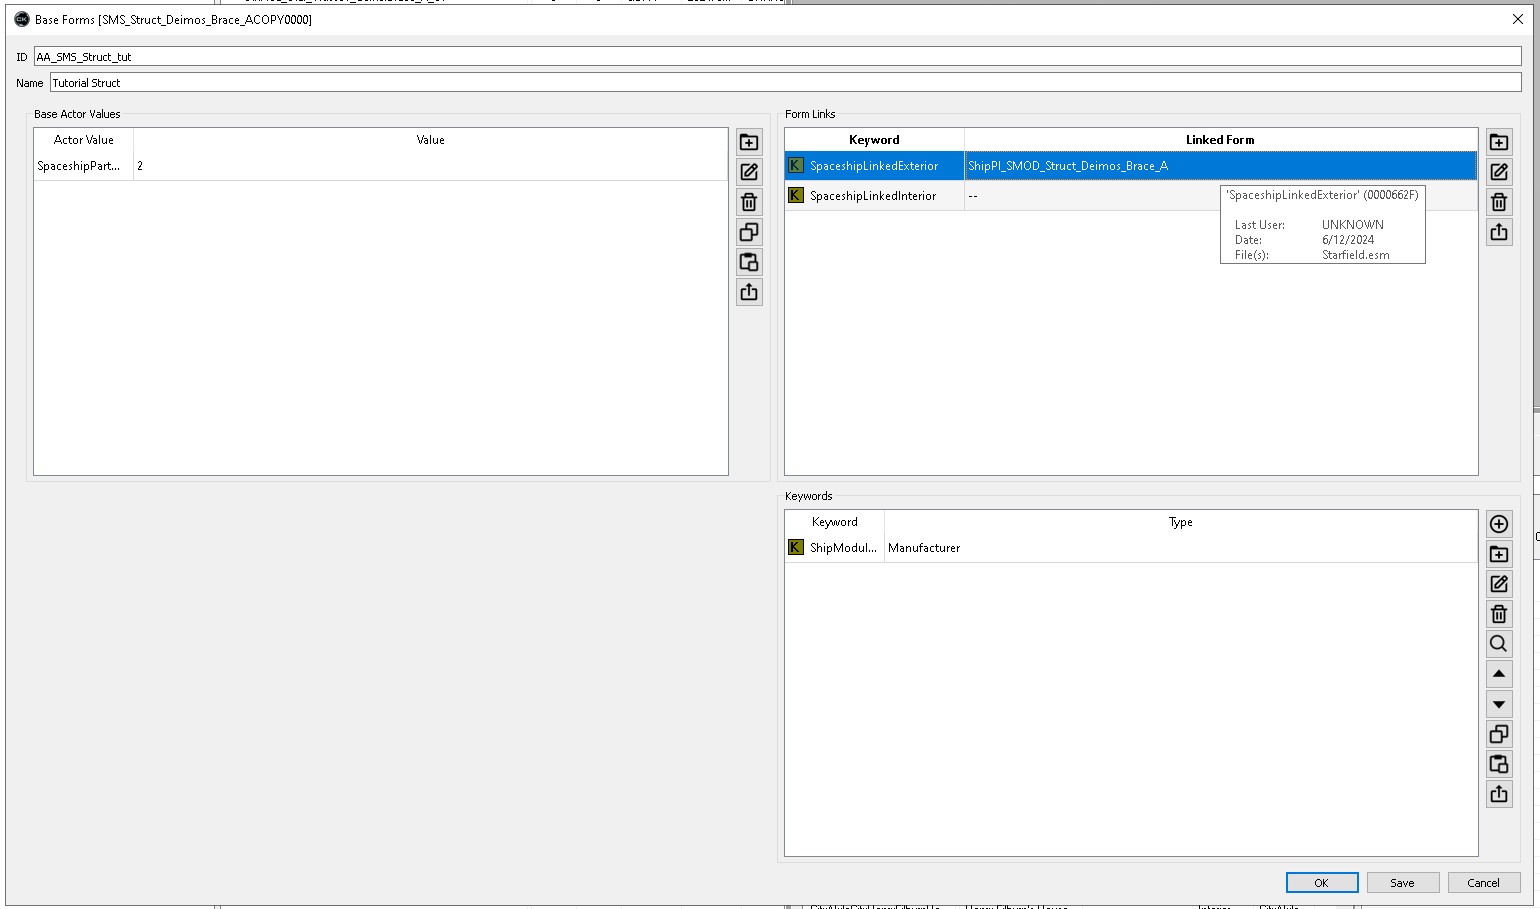
The final part here is changing the SpaceshipLinkedExterior. This is a reference to the Packin that we need to set to the one we've just created.
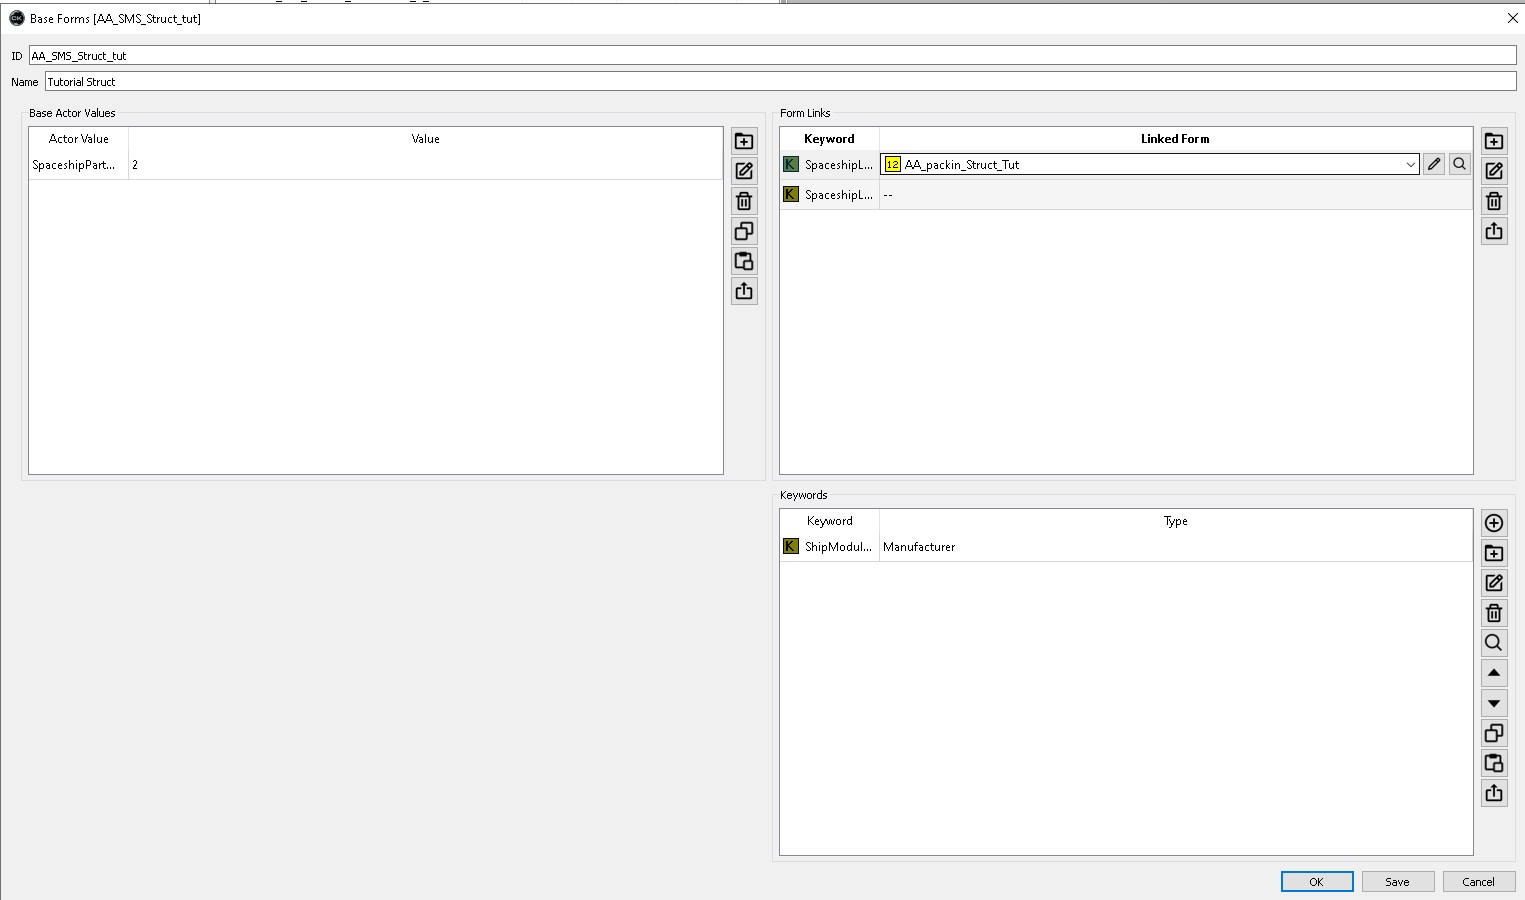
Save this and hit OK.
¶ Constructable Object
The final part is the Constructable Object. This is basically the recipe for the ship part and determines the cost, level reqs and other conditional stuff.
Duplicate the Constructable Object co_SMS_Struct_Deimos_Brace_A and rename it to AA_co_SMS_Struct_tut.
Next we set the Created Object to the Generic Base Form we just created:
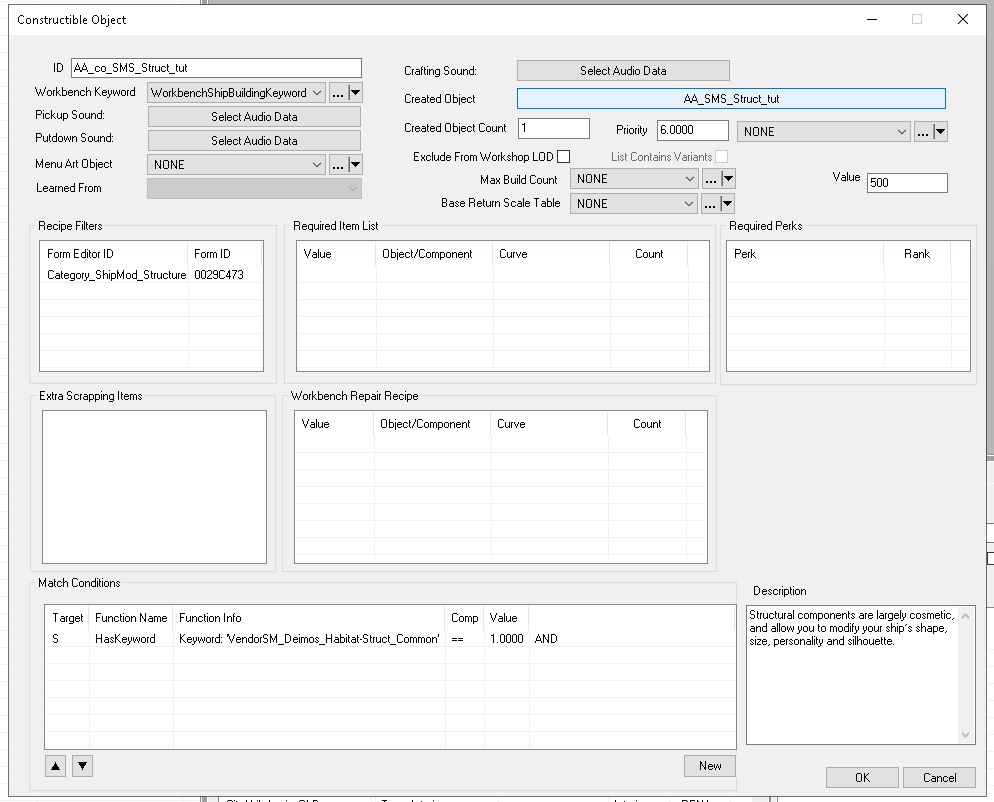
We can also remove the Match Condictions so every ship builder has it
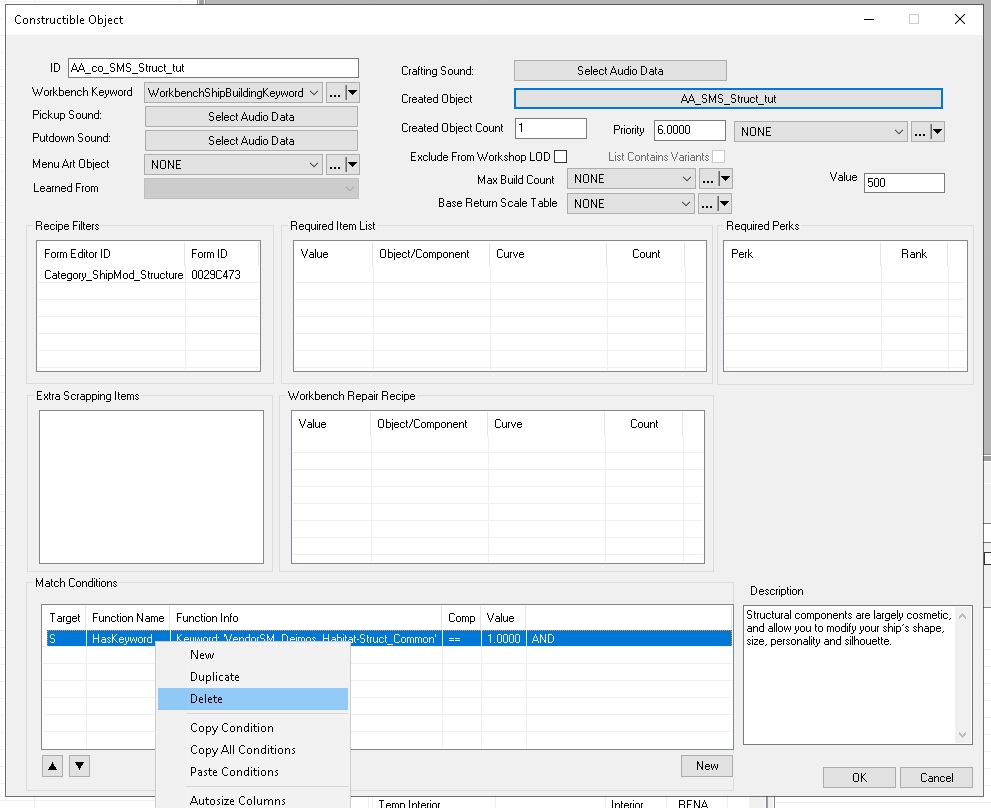
Save you plugin and add it to your load order.
¶ Conclusion
Your part should now be in the game!
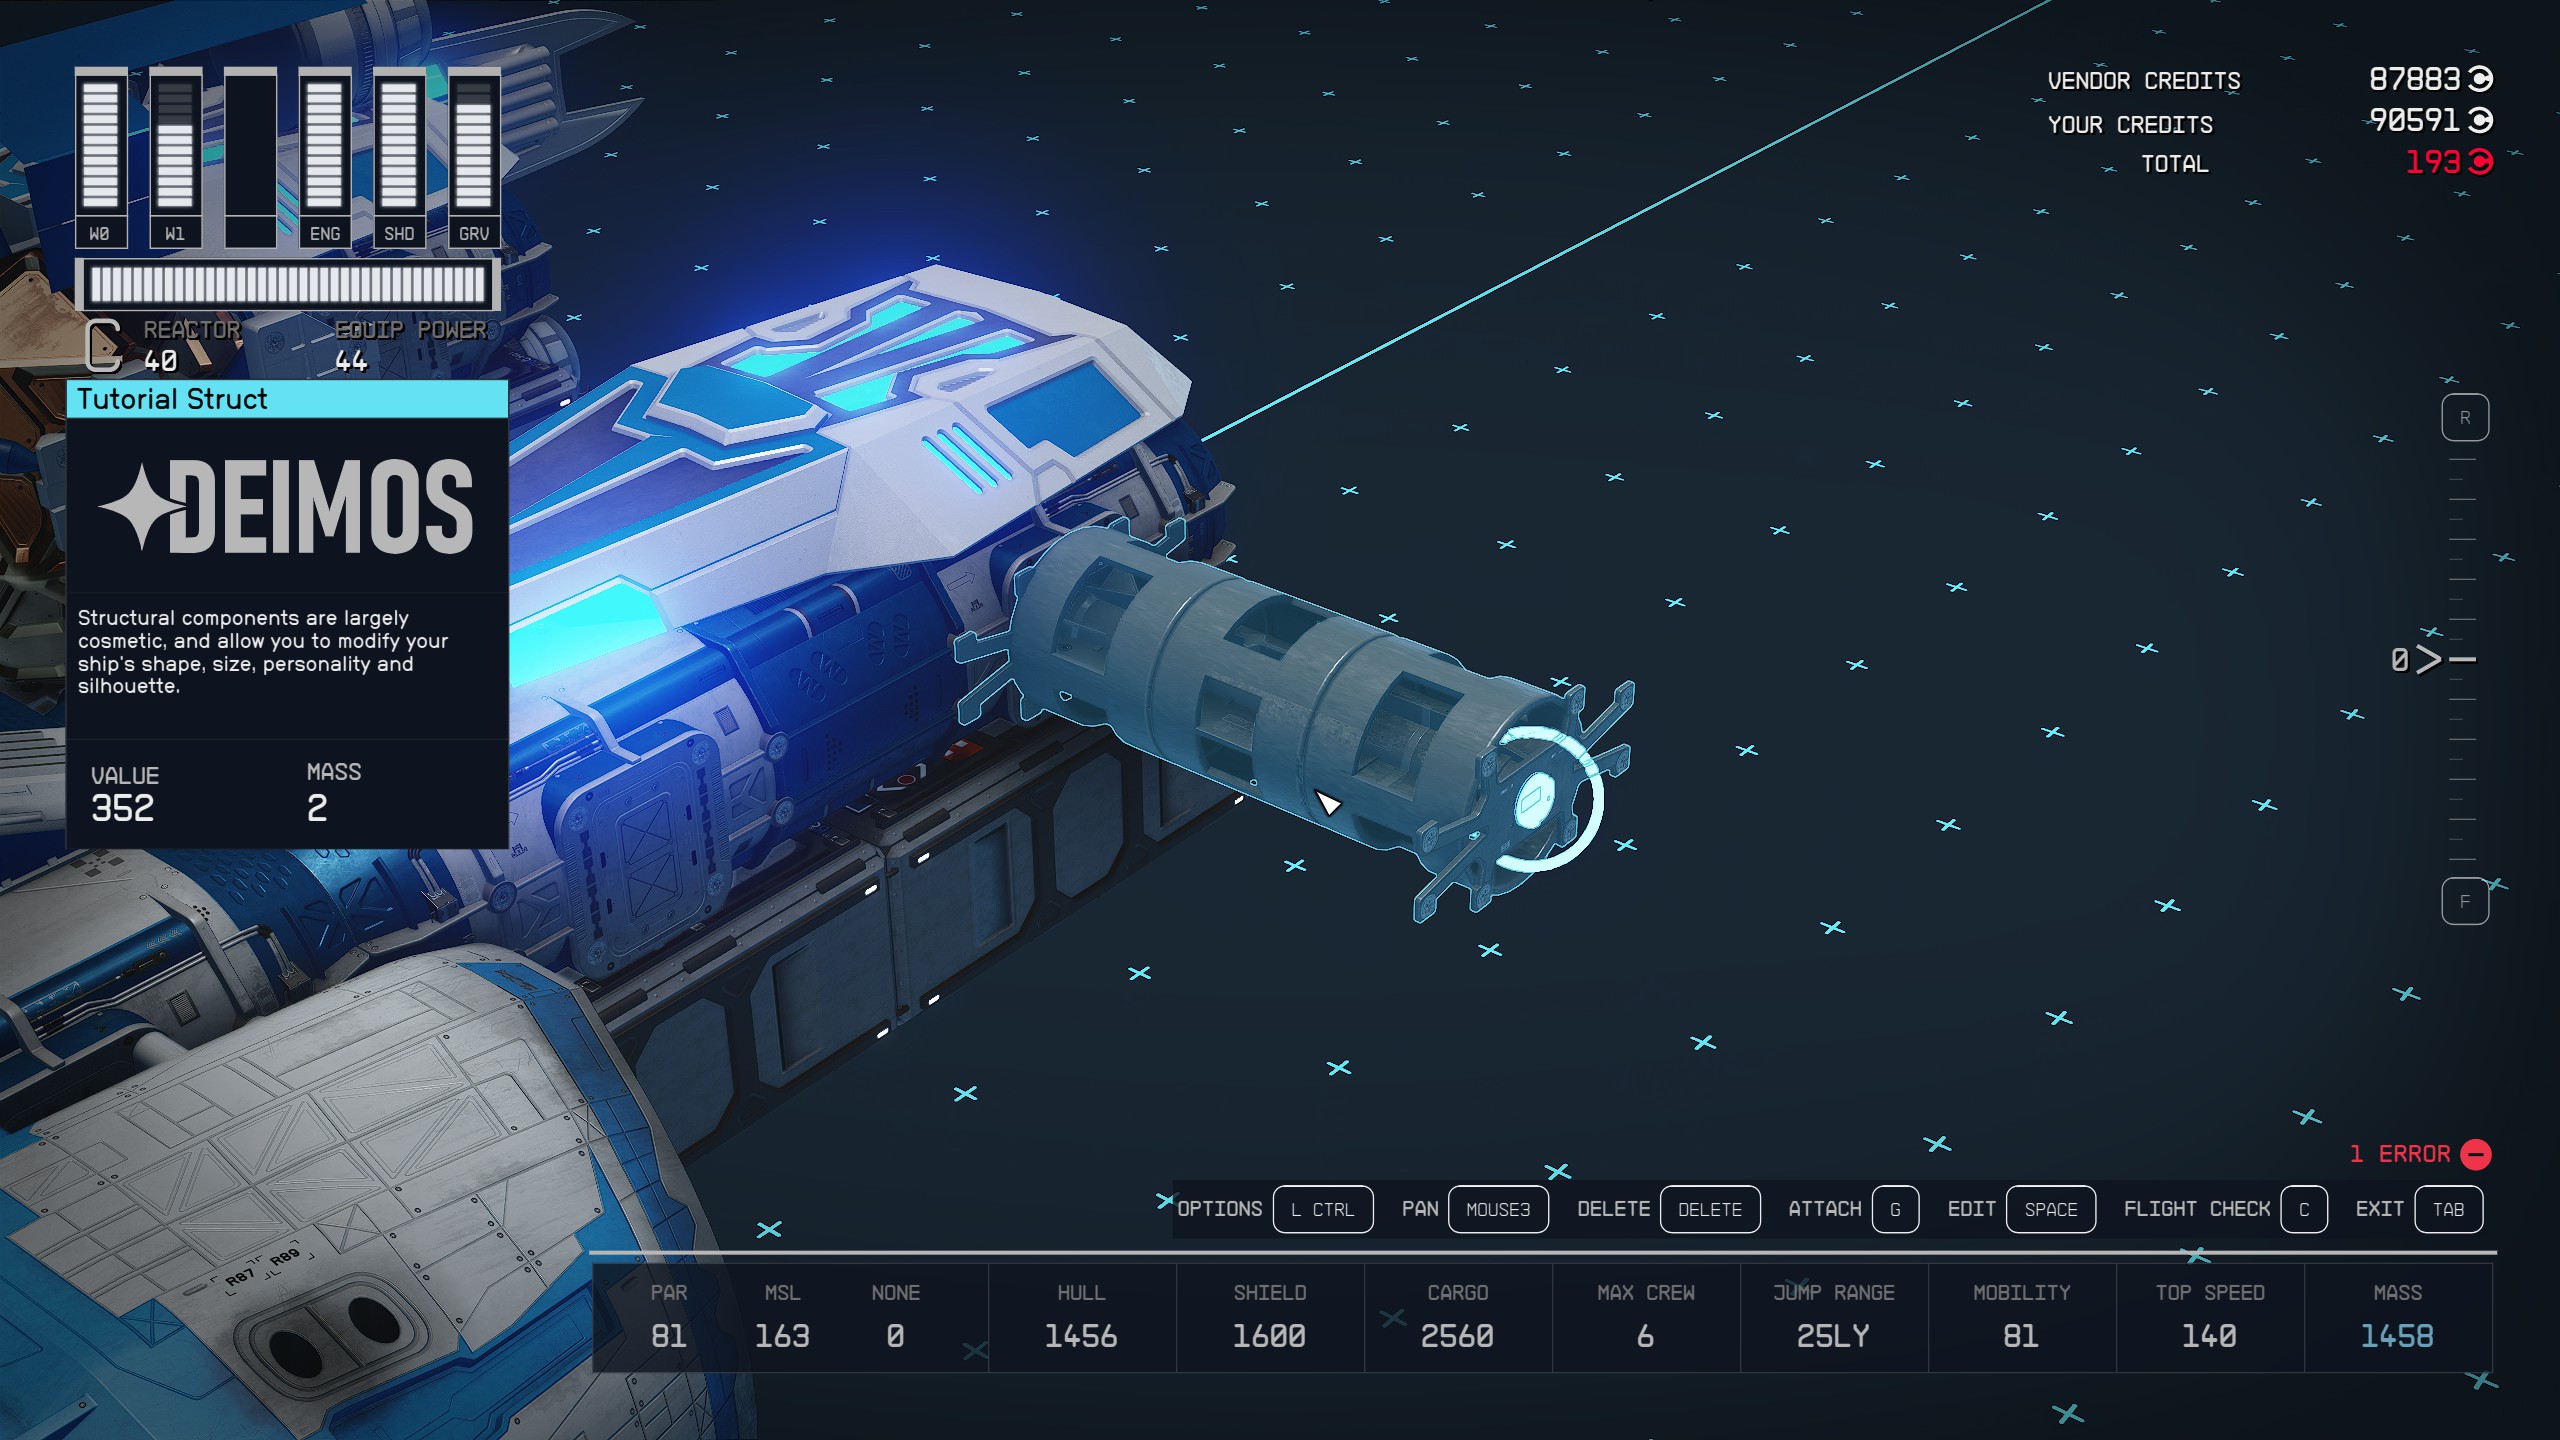
This is the basic workflow for getting from blender into the game.