¶ Basic UProject setup
The absolute bare minimum requirements for building a mod with Unreal involve setting up a UProject to work with. They also require that you configure a number of game-specific options that otherwise would be provided for you by using a custom uproject. Many of the settings covered in this tutorial are already handled for you by instead setting up Sprite's custom UProject, but for various reasons you may want to have complete control over the environment and not rely on any of the resources provided by an external third-party.
Be warned though, any attempt you make at modding resources in the game might require dummied materials, structs or enums that are provided by a custom uproject, so we recommend you start there instead.
¶ Requirements
- Unreal Engine 4.27
- ~200 gigs hard drive space
- Unreal Engine 4.27 is 54 gigs, more if you include documentation or sample projects
- You will need scratch space to work with assets, and Unreal needs scratch space as well.
- If you have multiple project directories for different purposes, or follow other tutorials for different mod types like audio or video swaps, you will likely consume even more space.
- Sticklers might say "that's only 60 gigs and an undefined float, I should be fine", but you will find your free space shrinking rapidly, and running out of drive space on Windows is a bad time. Avoid it if you can.
¶ Unreal Engine setup
Obtain and install Unreal Engine 4.27.
Note that the Epic Games Launcher is necessary to manage your Unreal Engine installations.
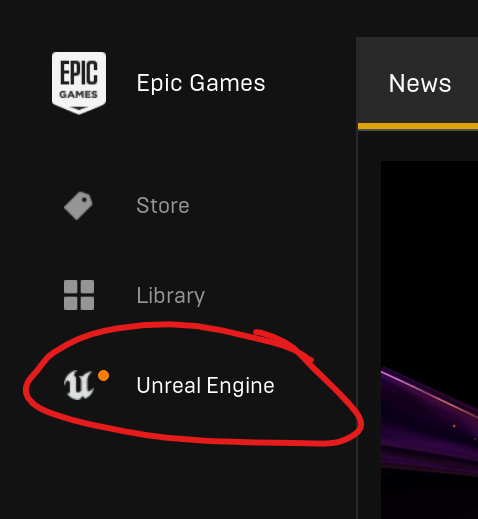
Within Epic Games Launcher, find the Unreal Engine tab on the left:
Newer versions of Unreal Engine will not work for this game. Only 4.27 will work. You can have multiple Unreal installs simultaneously though, if you are modding multiple games or work with the engine otherwise. Each version takes up a varying amount of drive space, usually about 50 gigs apiece.
Click the Plus shown below, select 4.27.2 from the dropdown that appears inside the little box shown below, then click Install. Once it is installed, it will become a Launch button instead.

¶ Creating your project
Clicking Launch should, if this is your first time working with Unreal Engine, open a New Project window. If it instead opens a project because you already have one, click File > New Project.
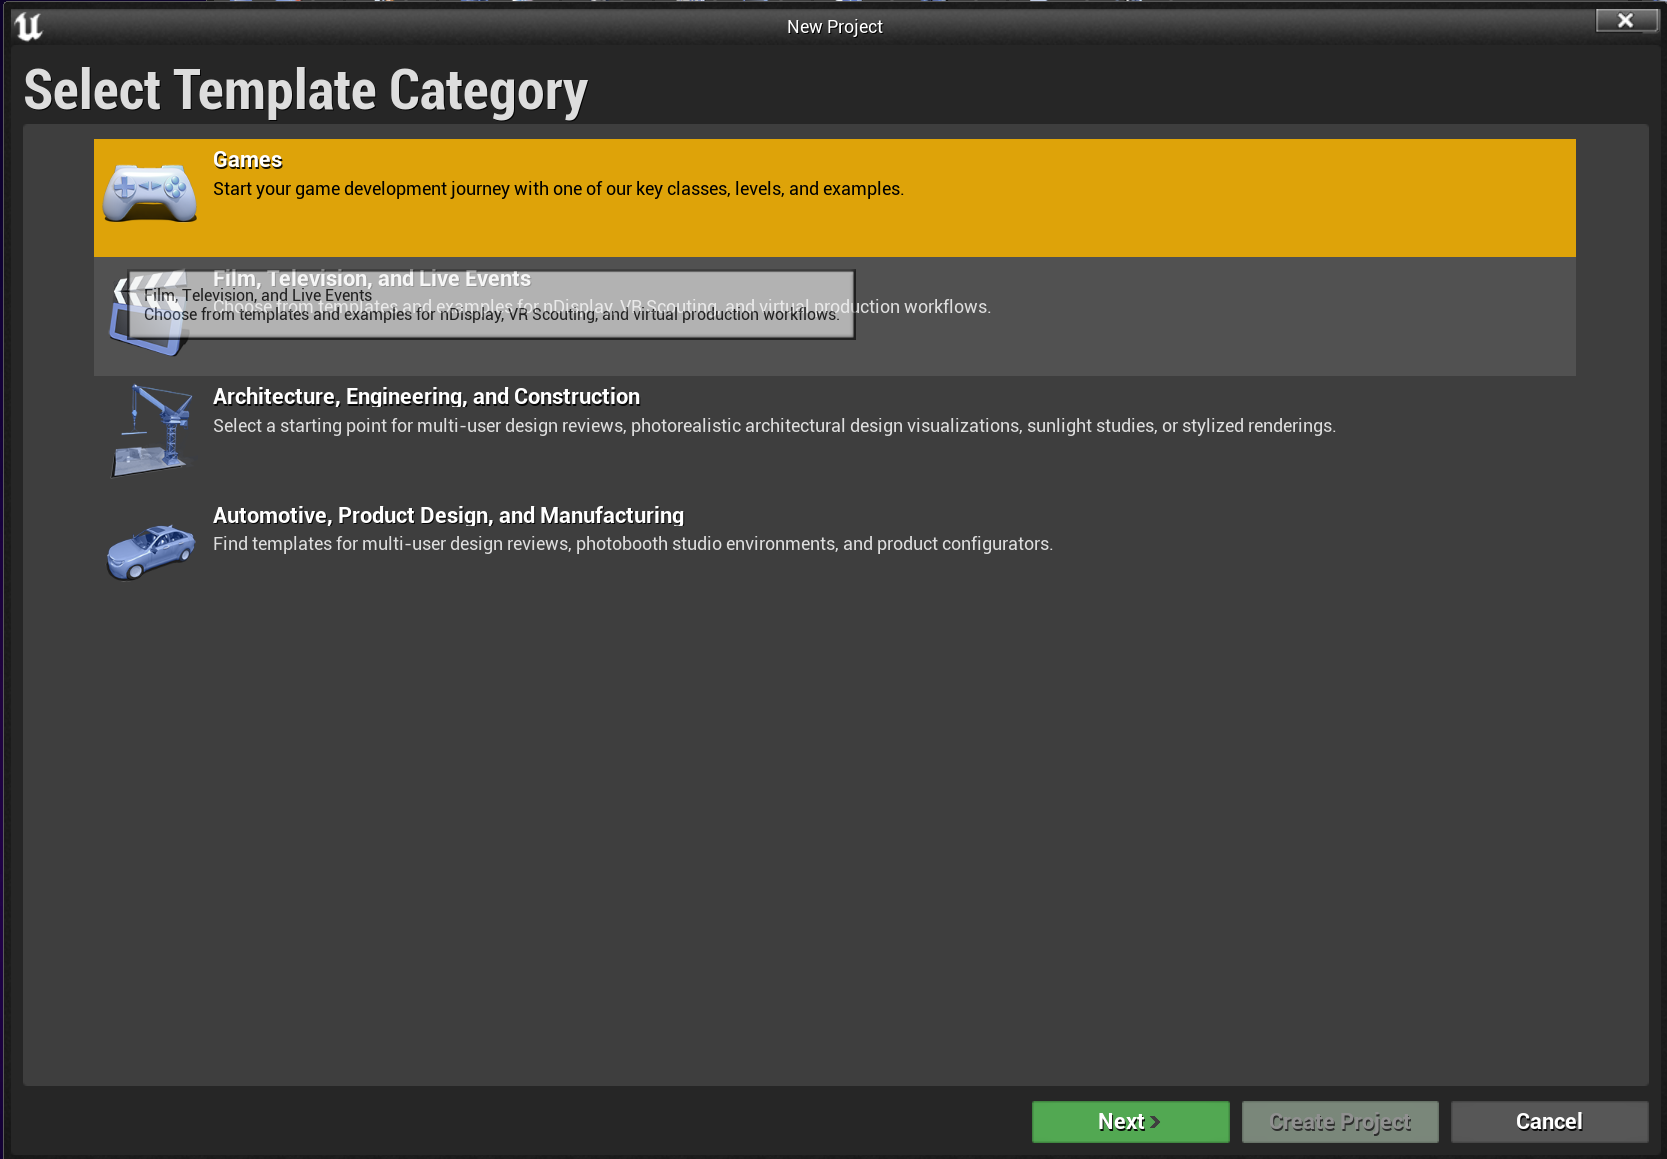
The following window appears. Select Games and click Next.
A new window appears providing a number of templates -- we won't use any of these. Select Blank and press Next.

Now you're given the project's options -- the defaults on this window are appropriate for now. Set the project location and name the project AEWFightForever.
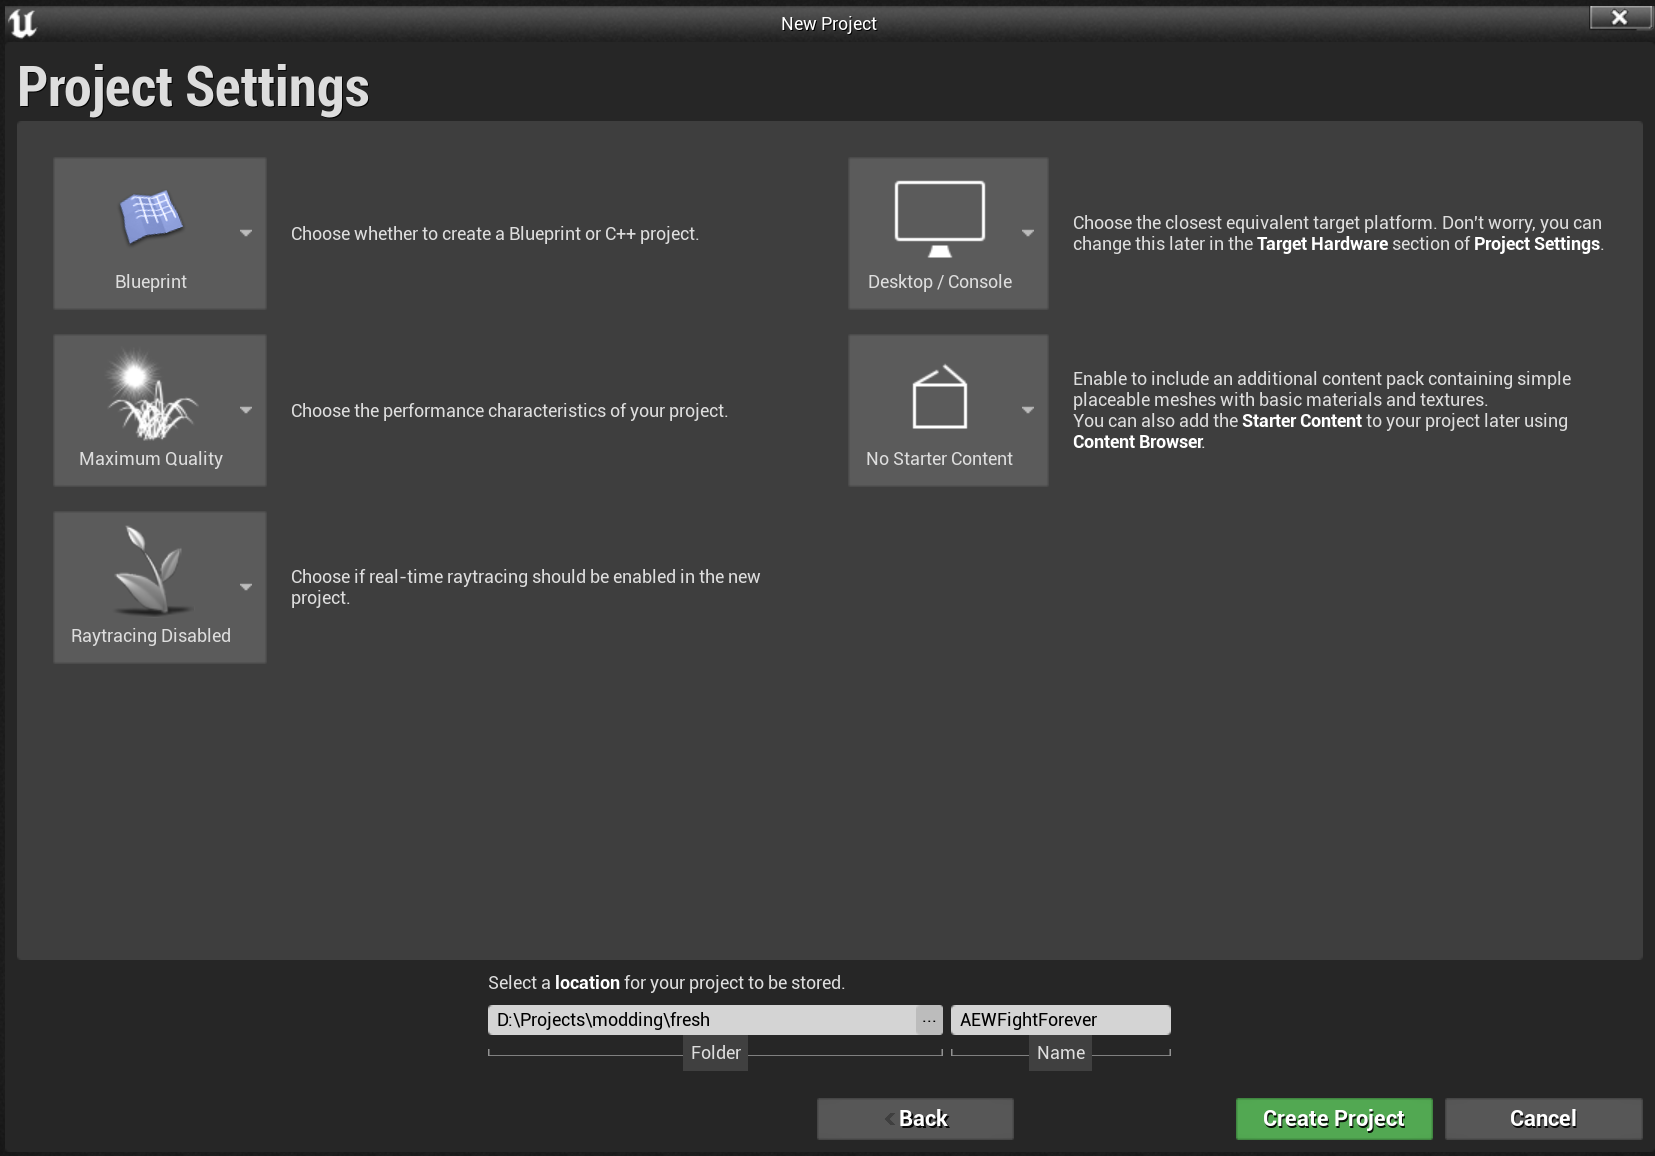
Important: Note that the name of your project is difficult to alter later, so make sure to name it
AEWFightForeveras in this example window.If you have to rename your project, tools are available, or you can manually edit the uproject, .c and .h files, but it's much easier to set it right the first time.
After the project is named, it's actually possible to rename the folder it was created in without repercussions. The important thing is, the name entered here gets populated in the files that are created in the empty project.
¶ Configuring the project
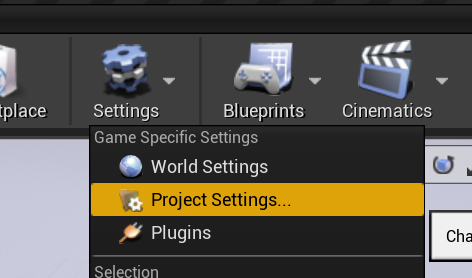
In the Unreal interface, click on Settings on the toolbar > Project Settings, or click the Edit menu and choose Project Settings.
The following basic settings MUST be configured to successfully package mods for AEW: Fight Forever. They are game-specific for whatever game you're planning to mod.
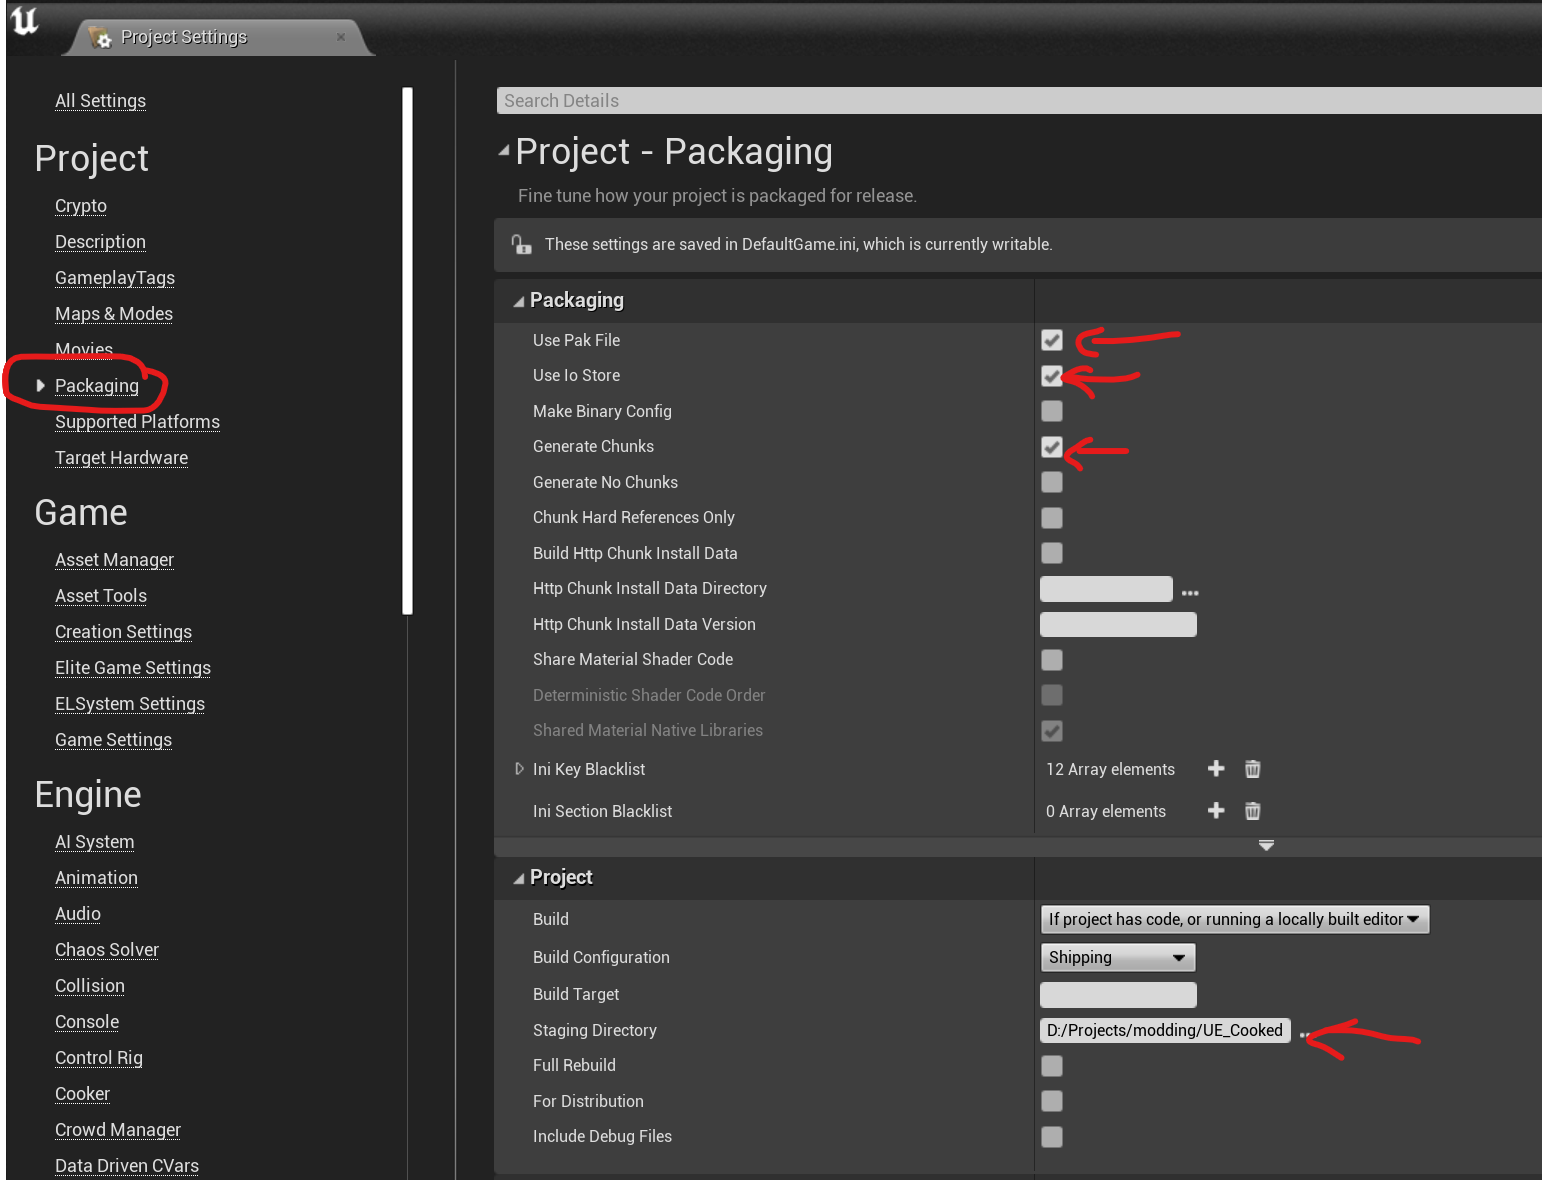
Under Packaging, ensure the following are ticked:
- Use Pak File
- Use Io Store
- Generate Chunks
Also, set your Staging Directory here, if you'd like the engine to compile pak files someplace specific for your convenience later. Note that there is no "save" button on this screen, and anything you edit should remain after closing the window.
Next, we go to Edit > Engine Preferences:
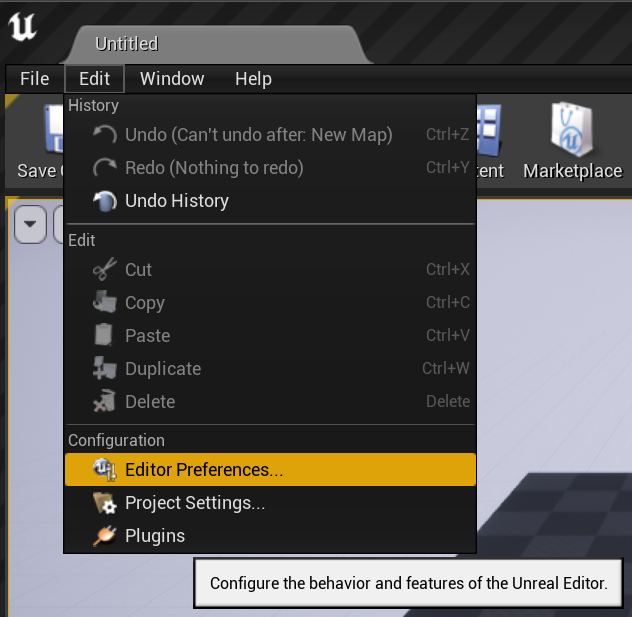
This screen appears, with a wide array of options pertaining to how the Unreal editor itself behaves.
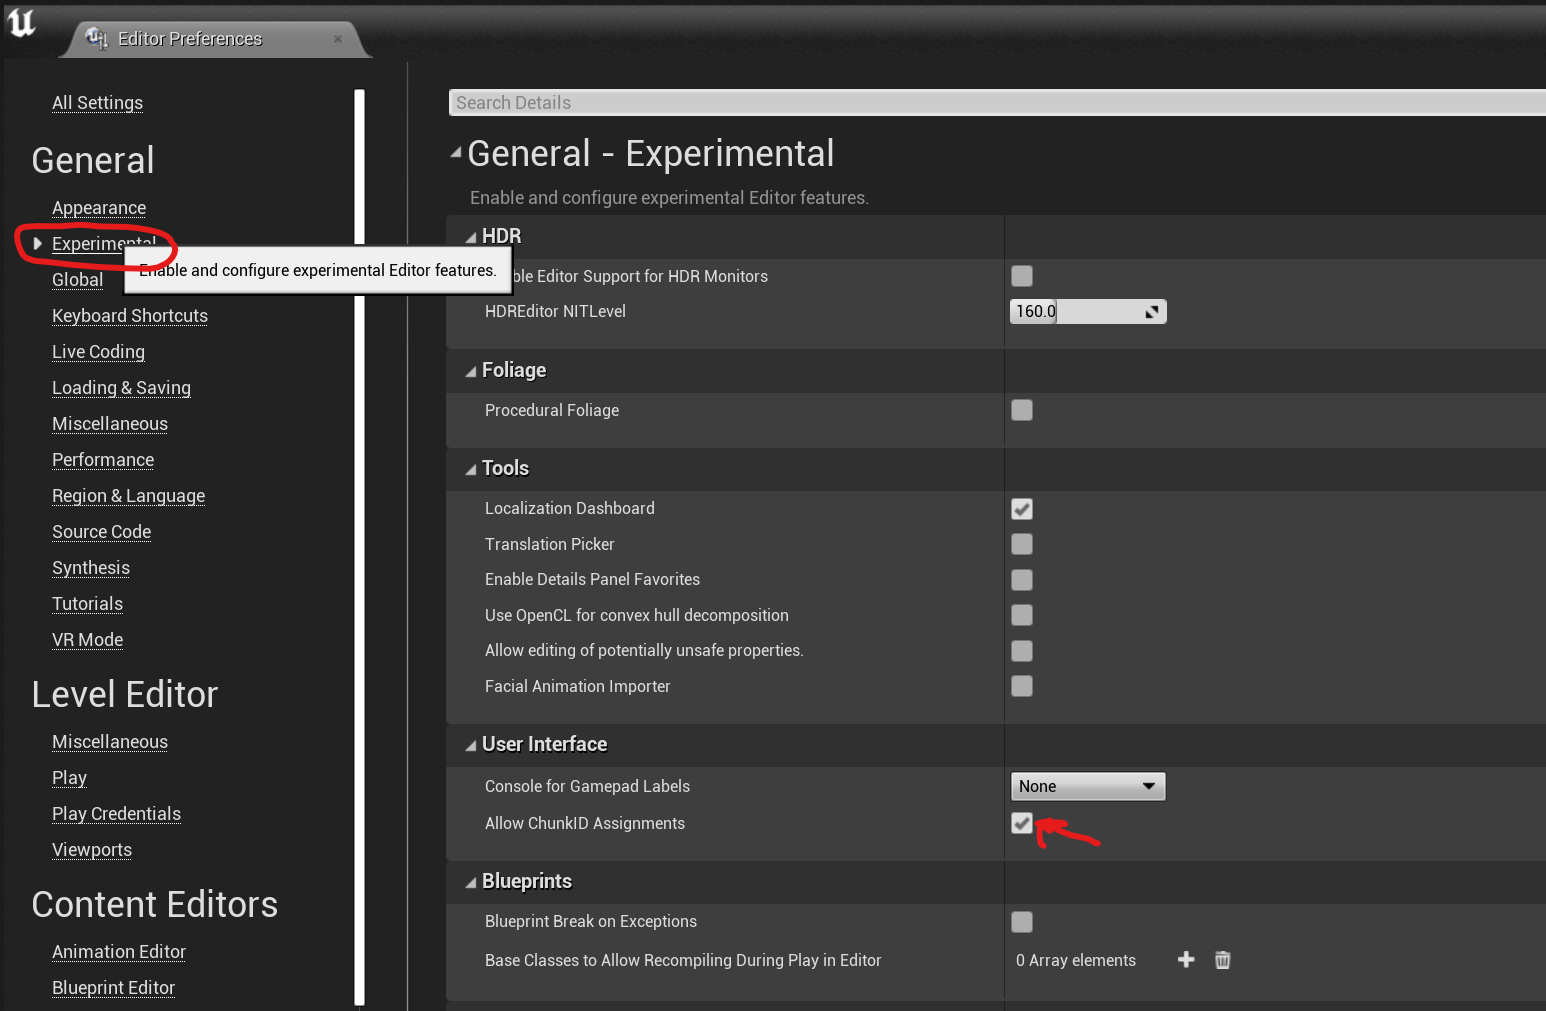
Here, we need to enable the "experimental" feature of being able to assign pakchunk IDs to assets. Ensure that Allow ChunkID Assignments is ticked.
Your project should now be configured with the bare minimum needed to successfully package an Unreal mod and have it be compatible with AEW: Fight Forever.
Remember, if you want to edit anything beyond textures and models, you will likely need a custom UProject built for the job. Sprite's Uproject is used for most other sorts of mods, although others exist, including Lynch's Create an Arena UProject.
¶ troubleshooting common issues
todo pending packaging tutorial
¶ What's next?
With this project, you could build a texture swap mod, or a model swap, but that's honestly about it. For more advanced uses, seek out the appropriate custom UProject.