¶ Synopsis
In Hogwarts Legacy most elements of a character's appearance (face, hair, clothing etc) are controlled via a Data Asset. If you want to change how a character looks, you need to edit that character's Data Asset. Unfortunately, as with most assets in this game, the Data Assets that shipped with the game have been “cooked”. Cooked assets can't be edited. To edit a Data Asset you must therefore recreate it from scratch, and then edit the one you created. The good news is that (unlike most cooked assets) all the information we need to recreate the Data Asset still exists in the cooked file. We can view this information using FModel and import it into a blank Data Asset using JSON2DA. This guide will walk you through that process. I'll be changing the way Poppy Sweeting looks, as an example.
¶ Install the Custom Engine
You'll need this later. Detailed installation instructions can be found here. If I'm honest, installing this is probably the hardest part of the whole process. Tips:
- Installation takes several hours. Be prepared for that.
- Follow the instructions exactly, making sure you choose the EXACT correct versions of everything.
- DO NOT stray from the instructions, even if you know what you're doing! Because if anything goes wrong you will almost certainly have to start again.
¶ Install FModel
We'll need FModel. If you don't have it, install it as follows:
- Download FModel-HL_2.0.0.0.zip, the special Hogwarts Legacy version of
FModel. This version is compatible post-Jan-2025 versions of the game. If you're running a version from before 2025 you need to use HWFModel.zip instead. - Unzip it to wherever you want
FModel.exeto reside. Anywhere is fine. - Double-click
FModel.exeto run it. - A
Directory Selector / Instructionwindow should appear:
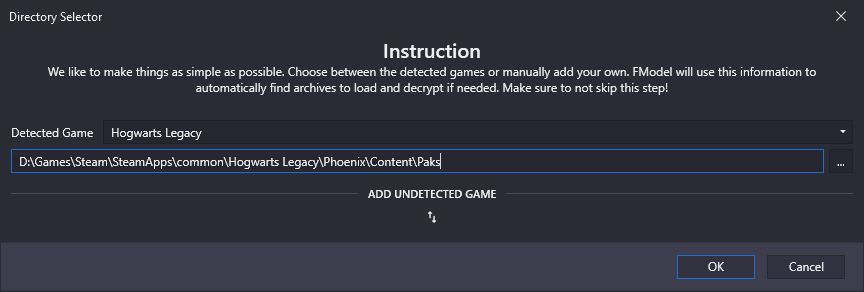
- Specify the game as “Hogwarts Legacy” if it's not auto-detected.
- Specify the full path to your
Steam\SteamApps\commmon\Hogwarts Legacy\Phoenix\Content\Paksfolder. Mine's inD:\Gamesbut yours may be elsewhere. - Hit “OK".
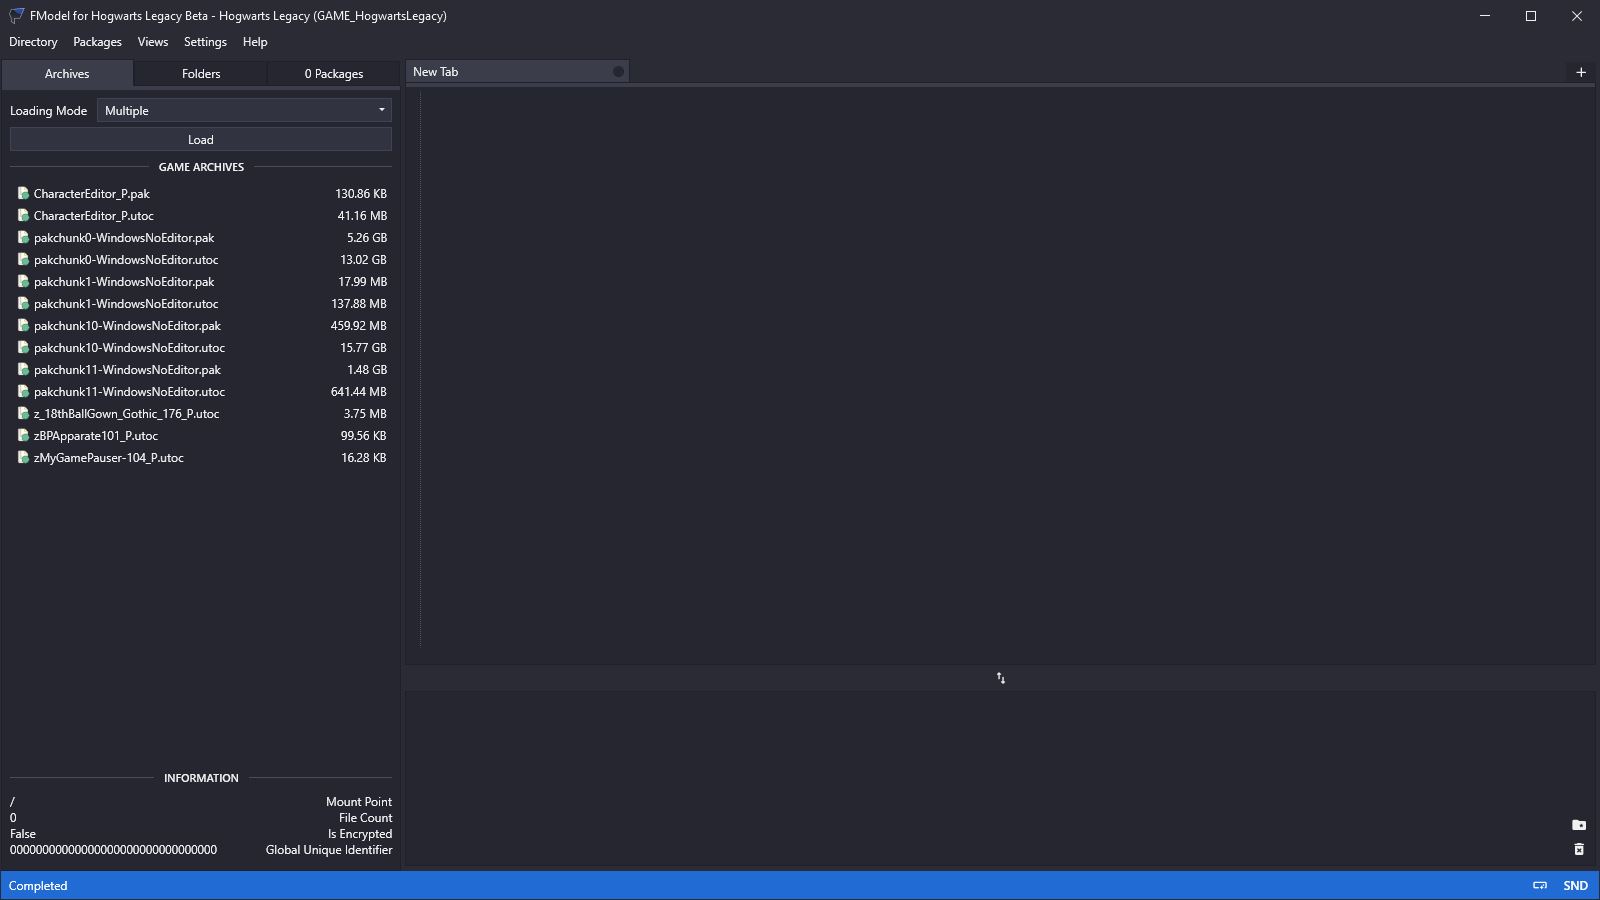
FModelshould open. Thepakchunk-*files are the game files. The others are mods. Note that only cooked mods (the ones with a.pak,.utocand.ucasfile) can be examined withFModel.
- Open
Settings > General > MapStructTypes. - Replace the contents with: MapStructTypes JSON.
If you get the following error (or the English version of it) while using FModel:

Fix it by placing the following file in your Fmodel\Output\.data\ folder:
¶ Install JSON2DA
You'll need the Custom Engine installed before you do this. Then:
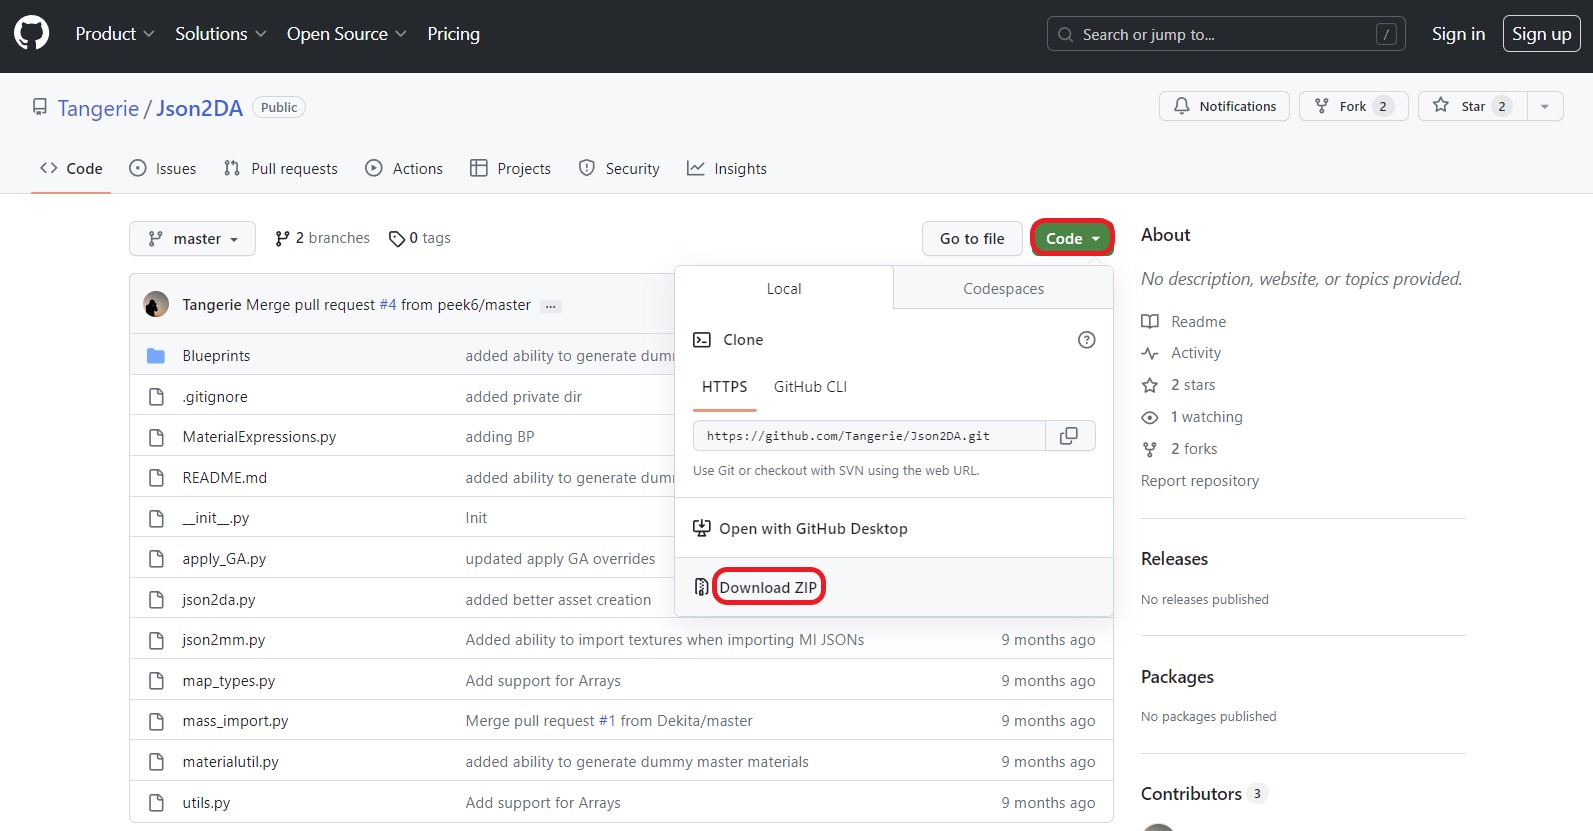
- Go to https://github.com/Tangerie/Json2DA, select
CodethenDownload ZIP:
- Unzip it into your Custom Engine's
PhoenixUProj\Content\folder. - Rename
Json2DA-mastertoPython(or move the contents to thePythonfolder if it already exists). - That's it. It's installed. 🙂
¶ Finding Data Assets
Data Assets are stored in various places within the game folders, depending on what they are. Here's how to find them:
- Open
FModel. - Select
Loading Mode=ALLand hitLoad. You should now see:
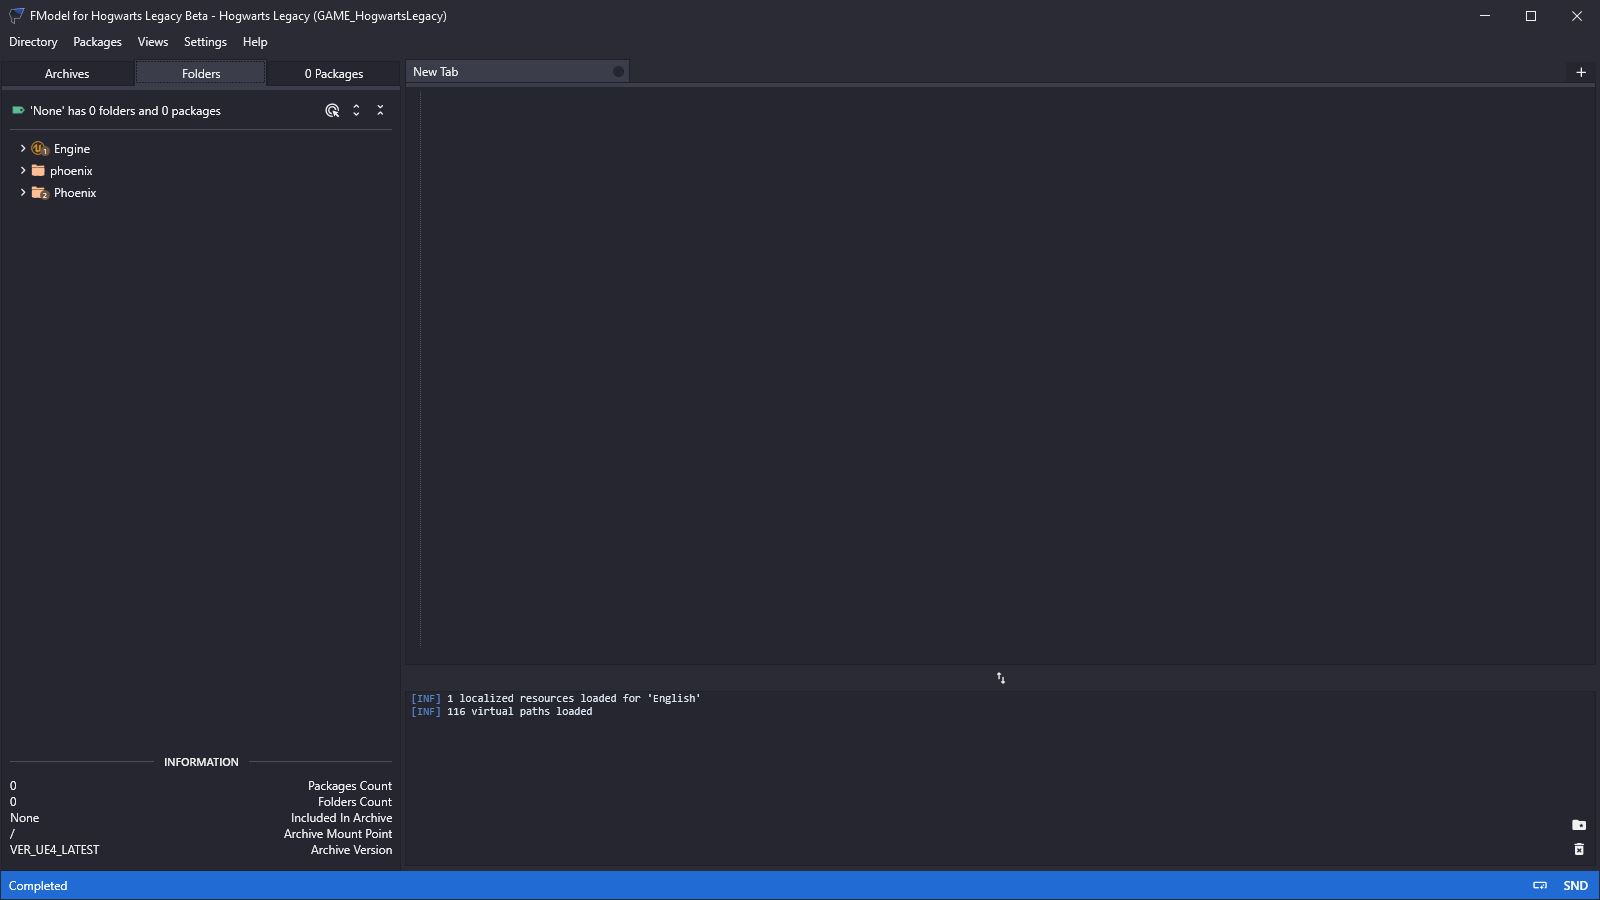
- The
Phoenixfolder is the original game folder. Thephoenixfolder is where some mods end up. Consider them to be the same. It doesn't seem to make any difference to how the game runs. The>symbol means that each folder contains sub-folders. The tiny numbers on the icons indicate that this particular folder contains some assets. Assets in sub-folders are not included in this number. - Hit
SHIFT-CTRL-F. - A
Search Viewwindow will appear. This is how you search for assets. (Note that you must have theFolderstab in the top left selected for this search to work.) - All
Data Assetsstart withDA_so typeDA_and hit return. You should see:
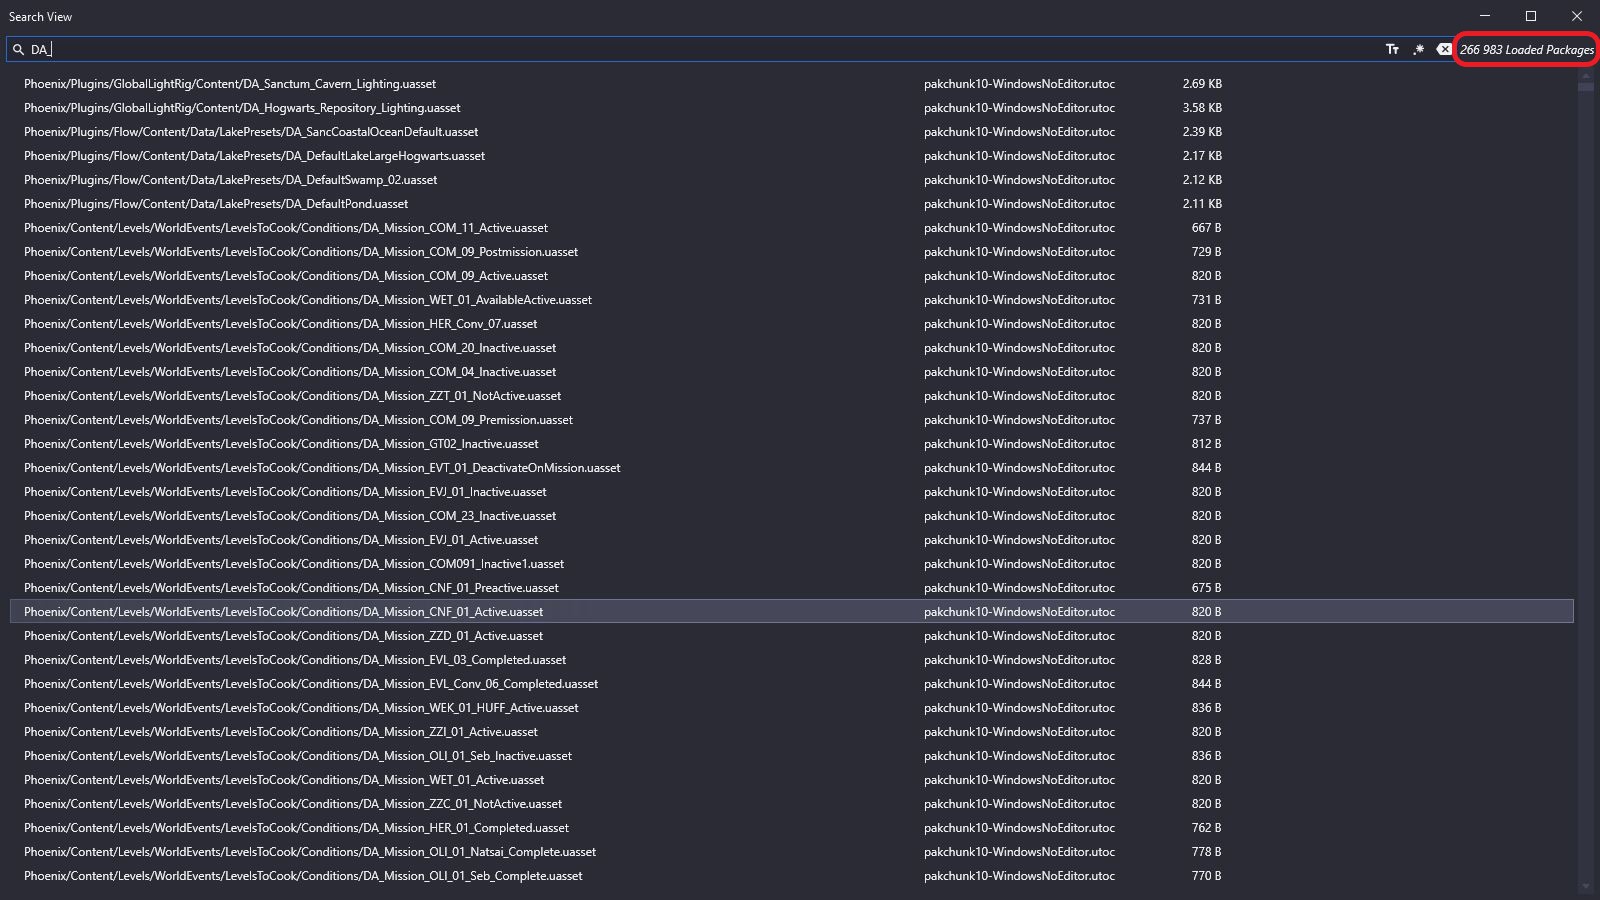
- In the top right you can see 266,983 Loaded Packages. That's not the number of matches. That's all the assets. But it still found a lot that match
DA_. - Since I'm planning to edit Poppy Sweeting's DA let's look for that using
DA_ PoppySweeting:
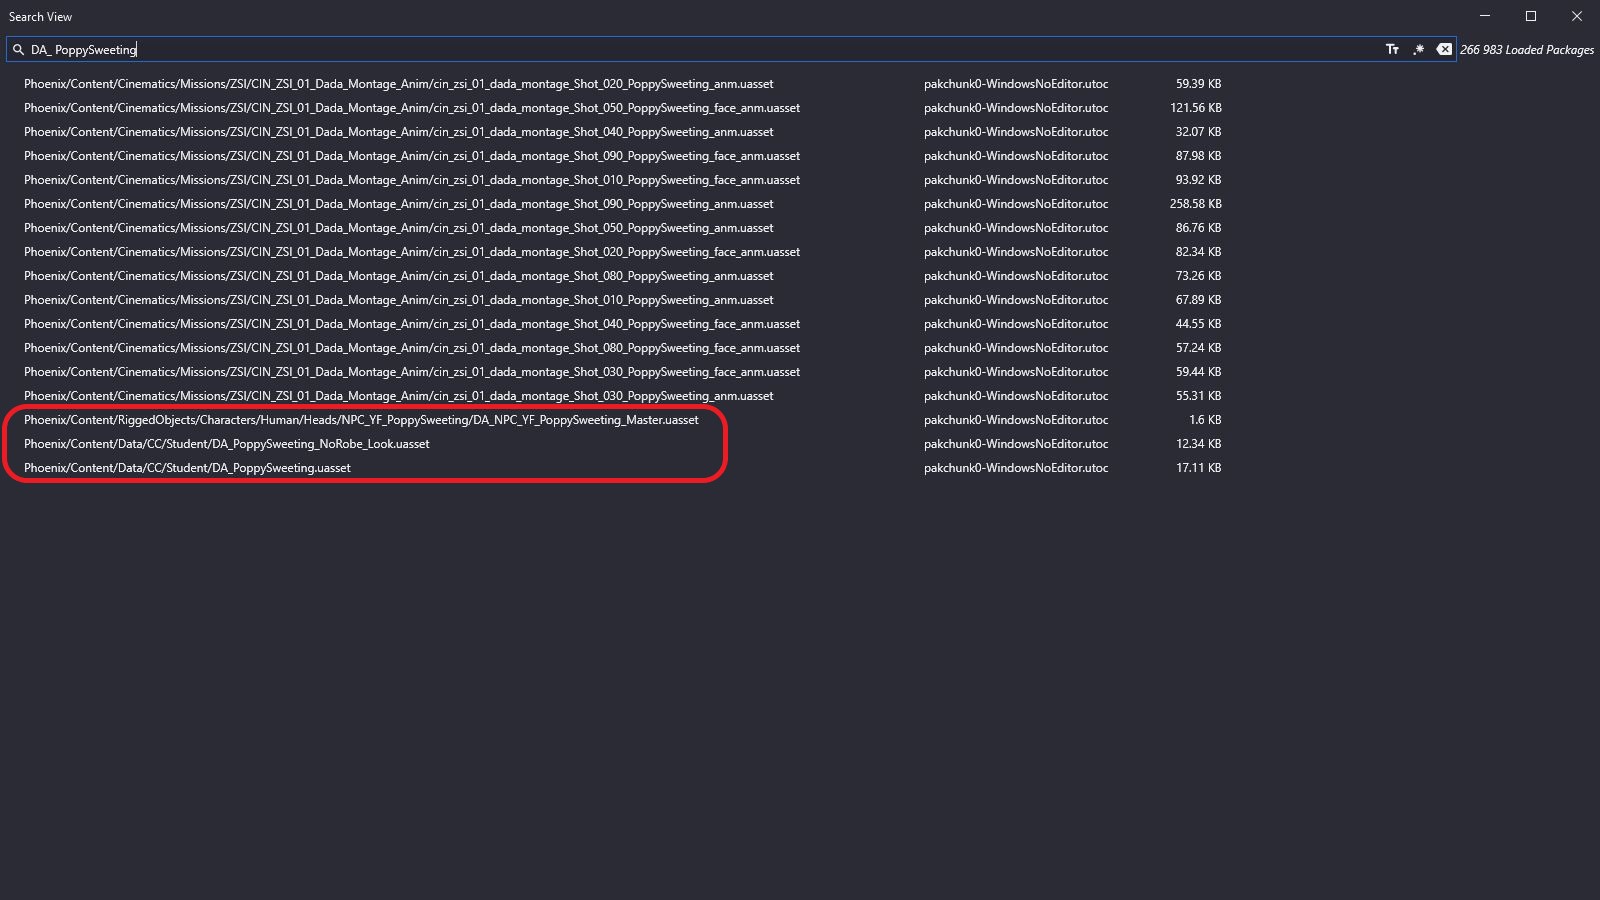
- Most of those are something to do with Cinematics, which we're not interested in. But the last three look interesting.
- Double-click on the first one and you should see this:
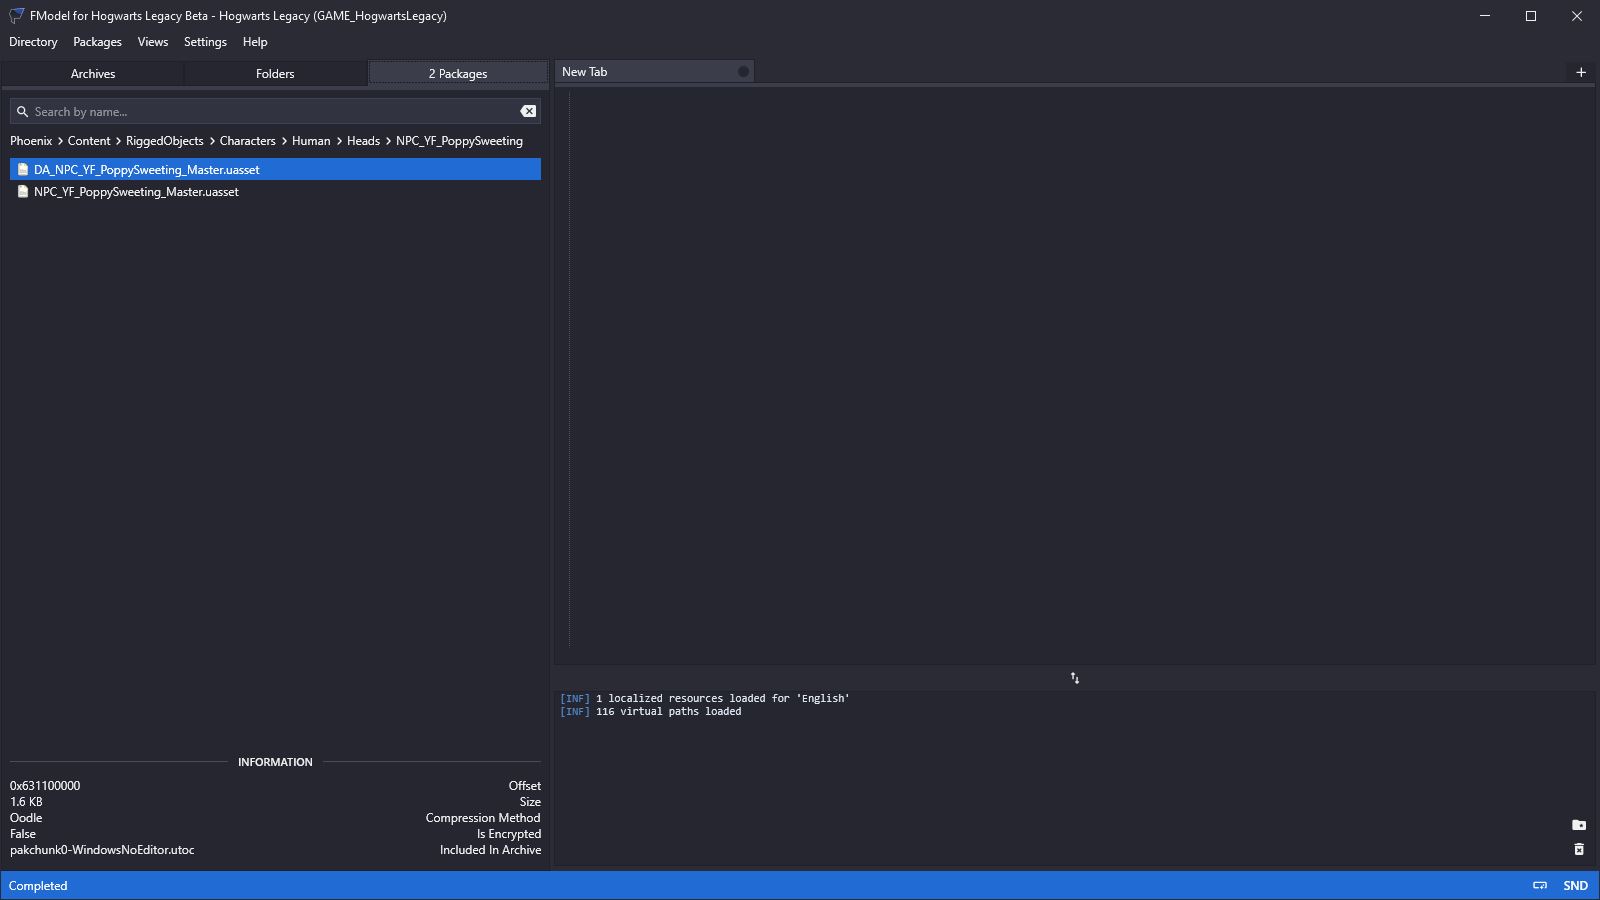
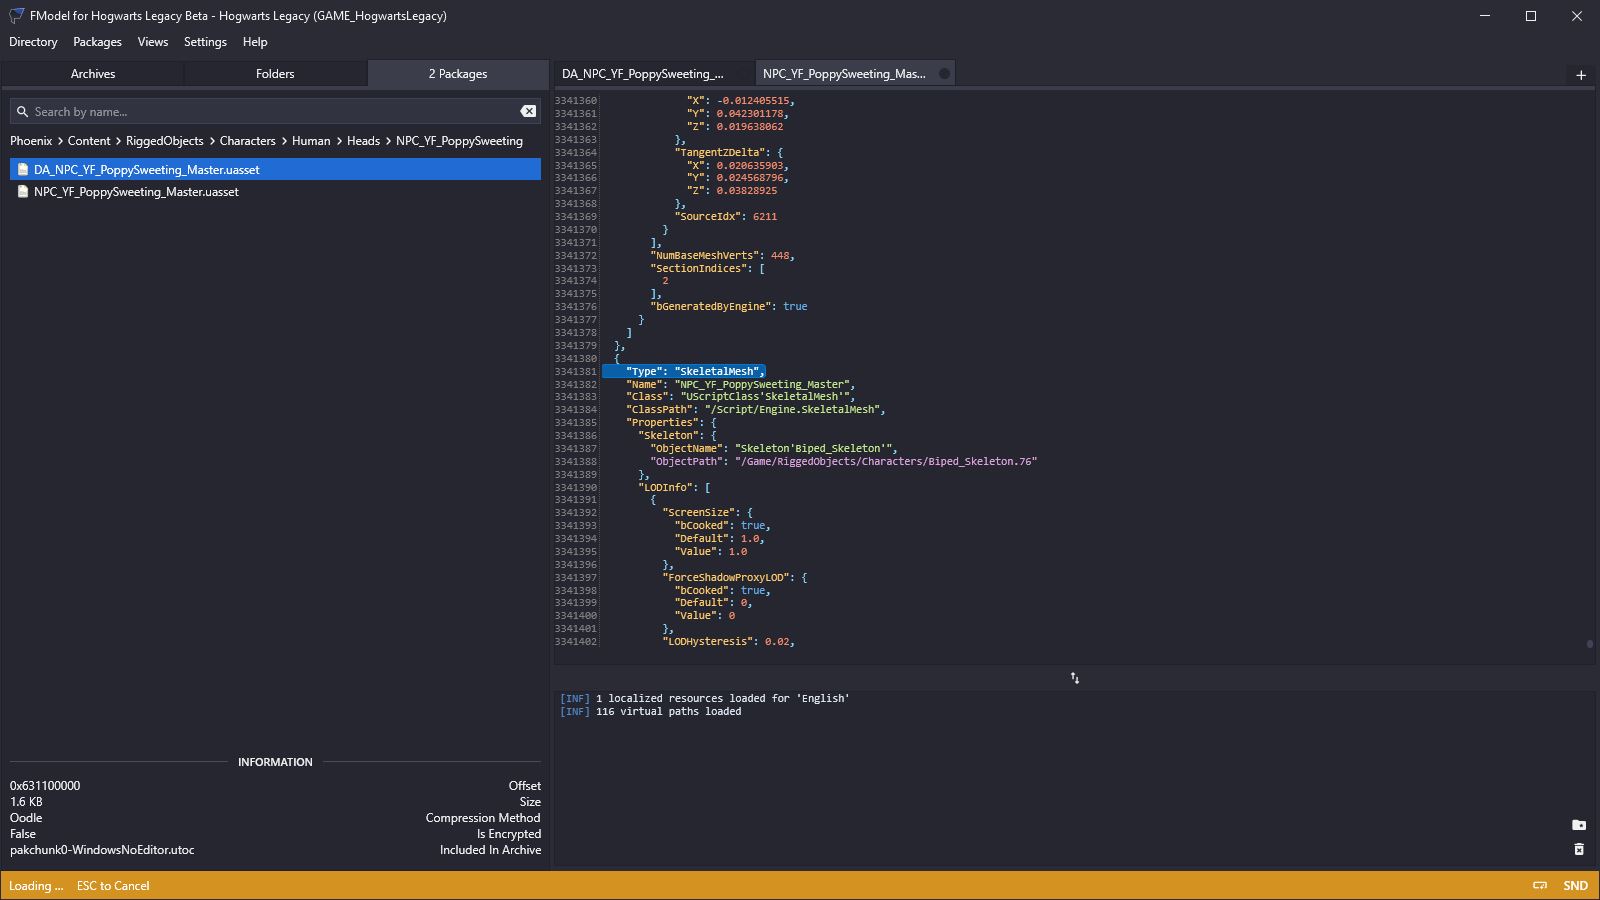
- Now double-click on
DA_NPC_YF_PoppySweeting_Master.uasset:
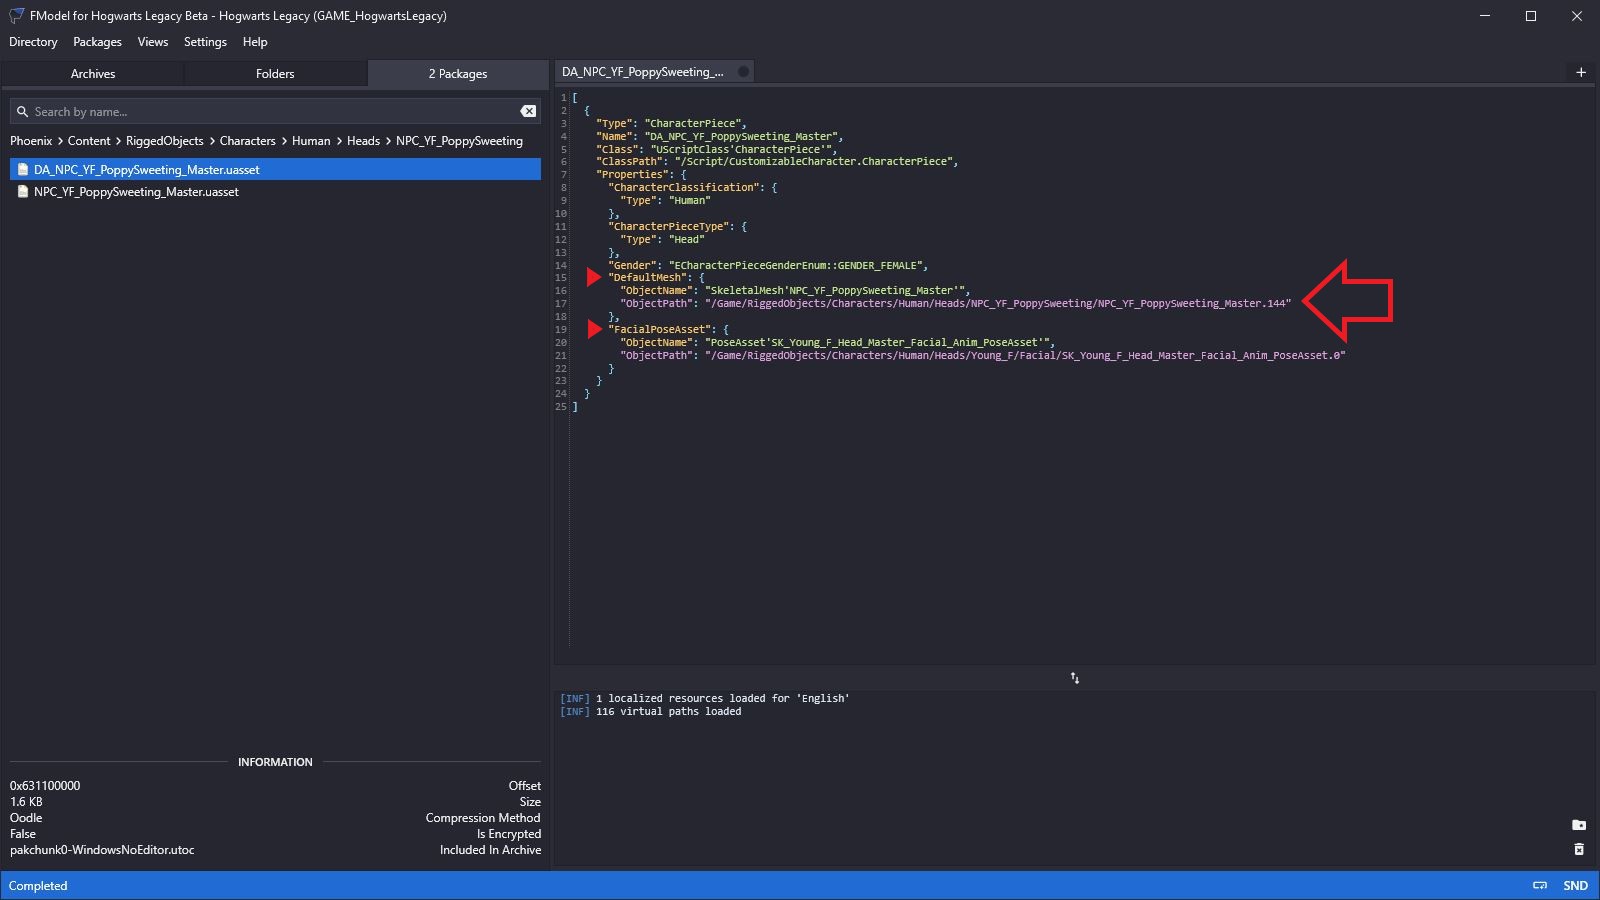
FModelhas displayed the information available from inside the asset. It's not much. But there are entries forDefaultMeshandFacialPoseAsset.- Both of these have links displayed in purple. Any link in purple can be clicked, so click the top one… and then wait…
- First we see this:
- And then (eventually) a
3D Viewerwindow will appear:
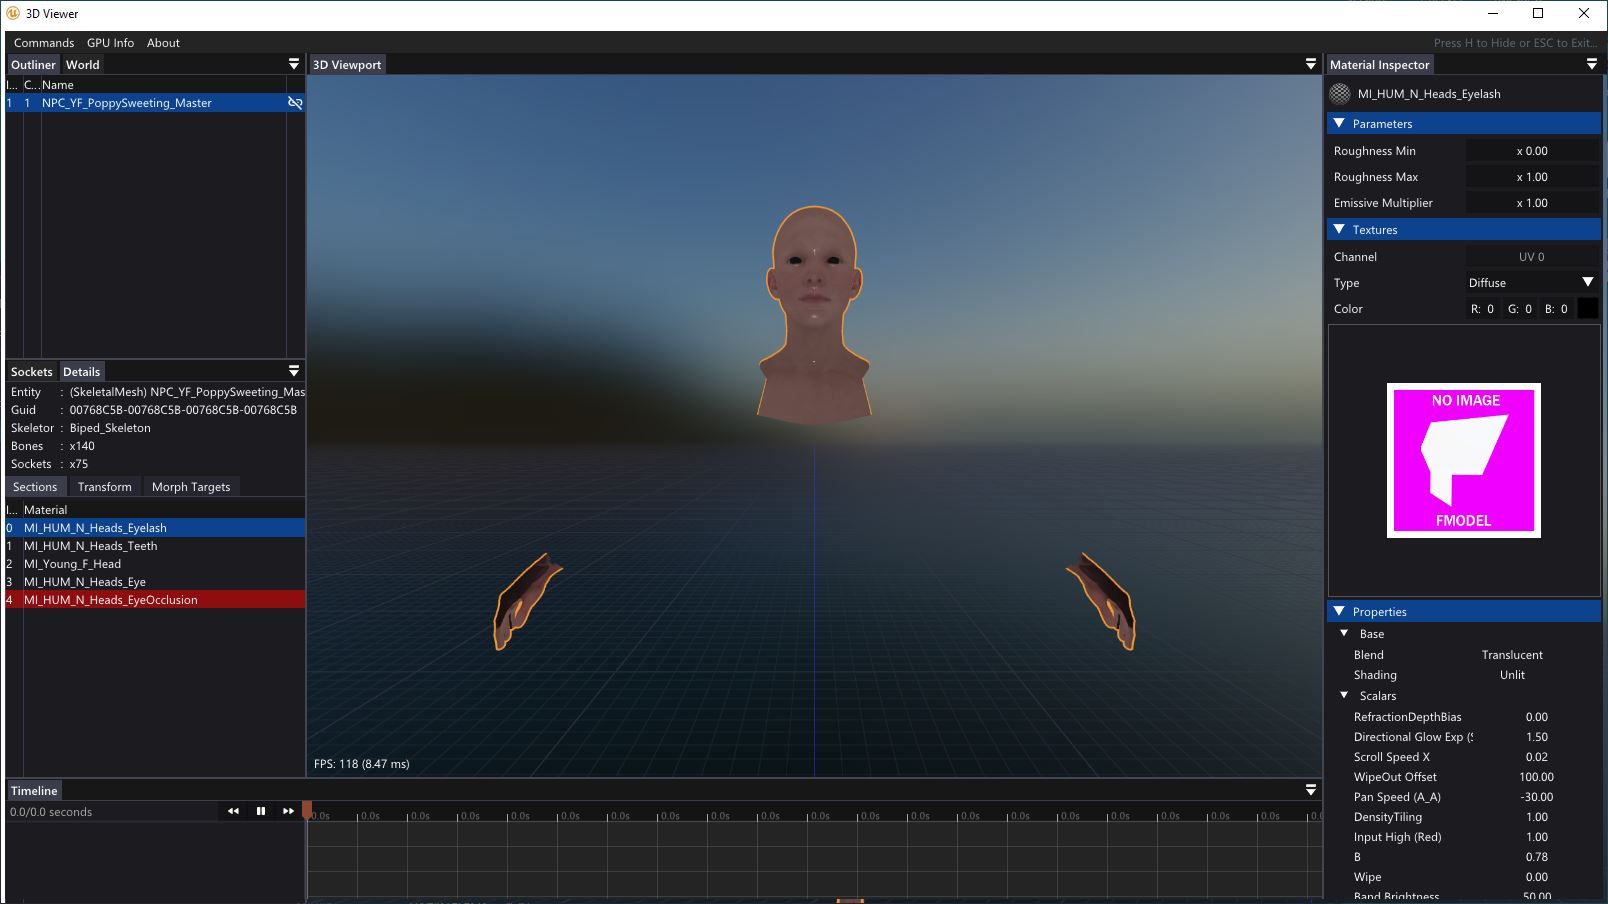
- Sure enough it's a skeletal mesh of a head. Poppy's head, in fact. But also her hands, which might seem weird, but NPC's head and hands often come together because they're often the only bits of skin showing. It's easier to match skin-tone if they're part of the same asset. If you replace Poppy's head with a skeletal mesh that doesn't include hands (some don't) you'll need to add hands or Poppy's will become invisible in the game.
- Less obvious, because they're hidden by default, is the fact that eyes, eyelashes and teeth are also included.
- But we're not interested in changing Poppy's face in this tutorial so this asset is of no interest to us. Let's look at the other two.
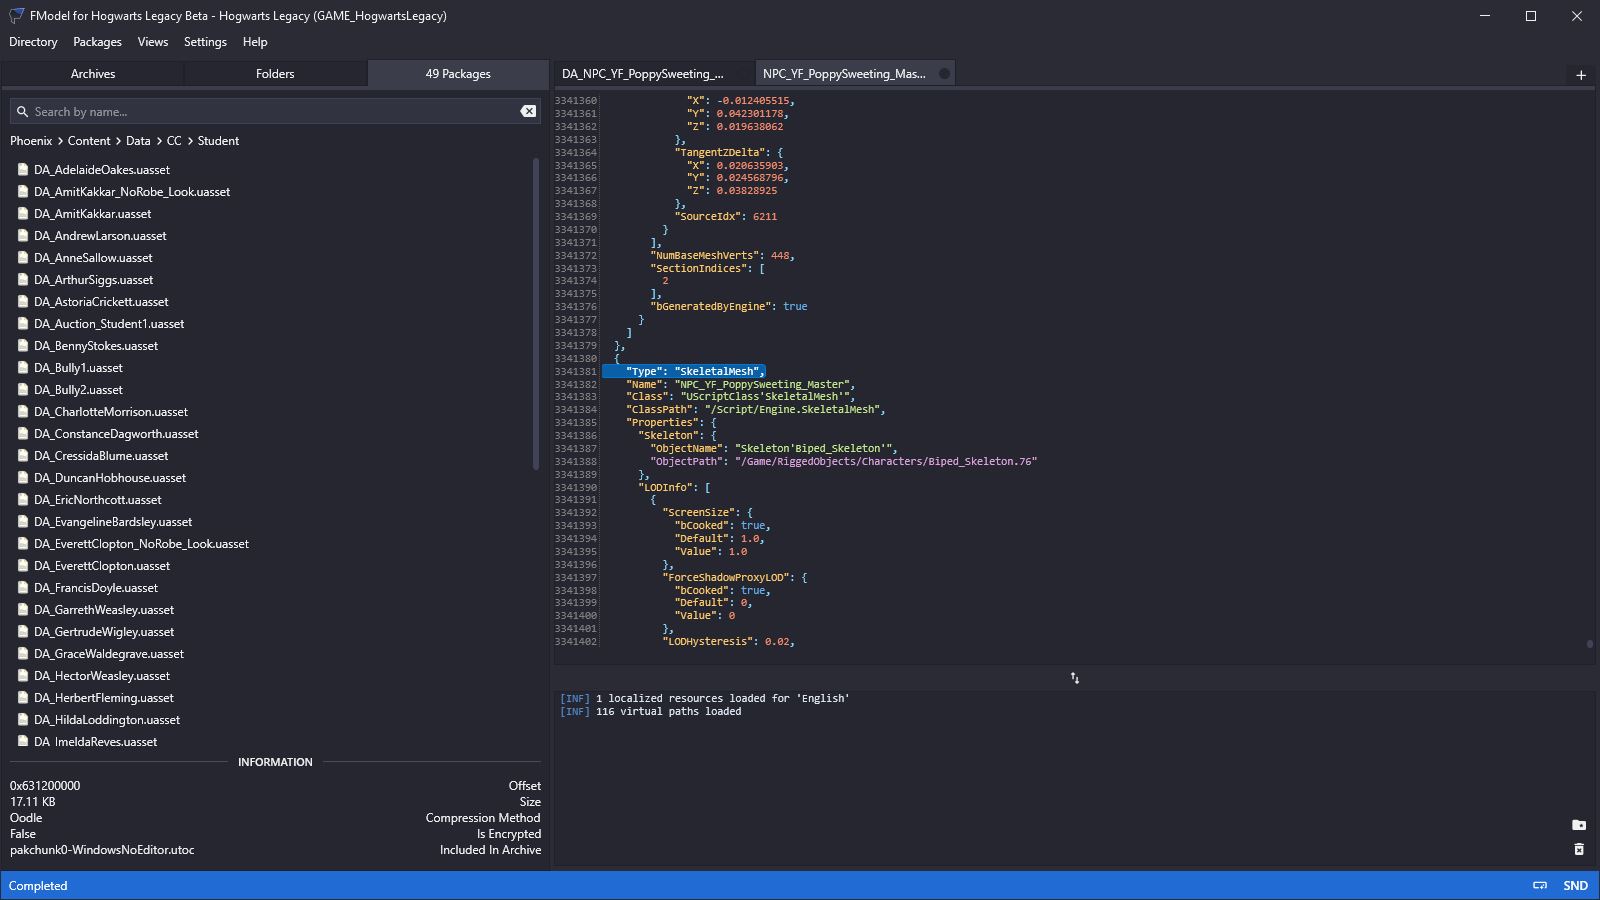
- Close the
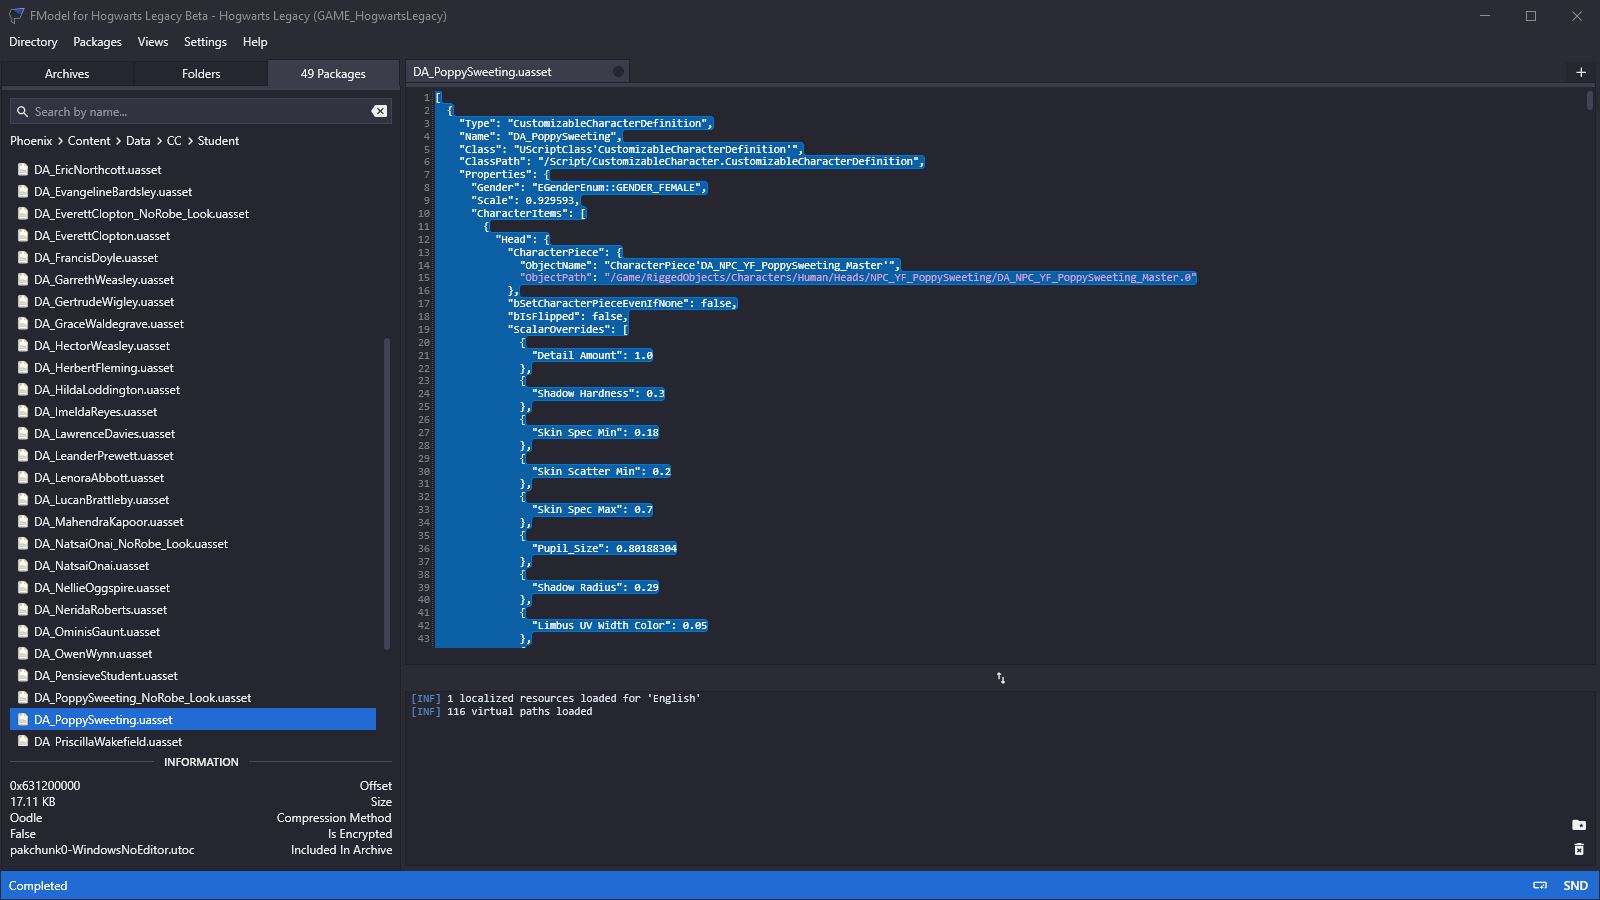
3D Viewerwindow, click theFolderstab, and hitSHIFT-CTRL-Fagain. Our previous search results should reappear. Double click on the bottom one,Phoenix/Content/Data/CC/Student/DA_PoppySweeting.uasset, this time. You should see:
- This looks more promising! A load of NPC names are shown on the left. Poppy isn't there but if you scroll down you'll find her:
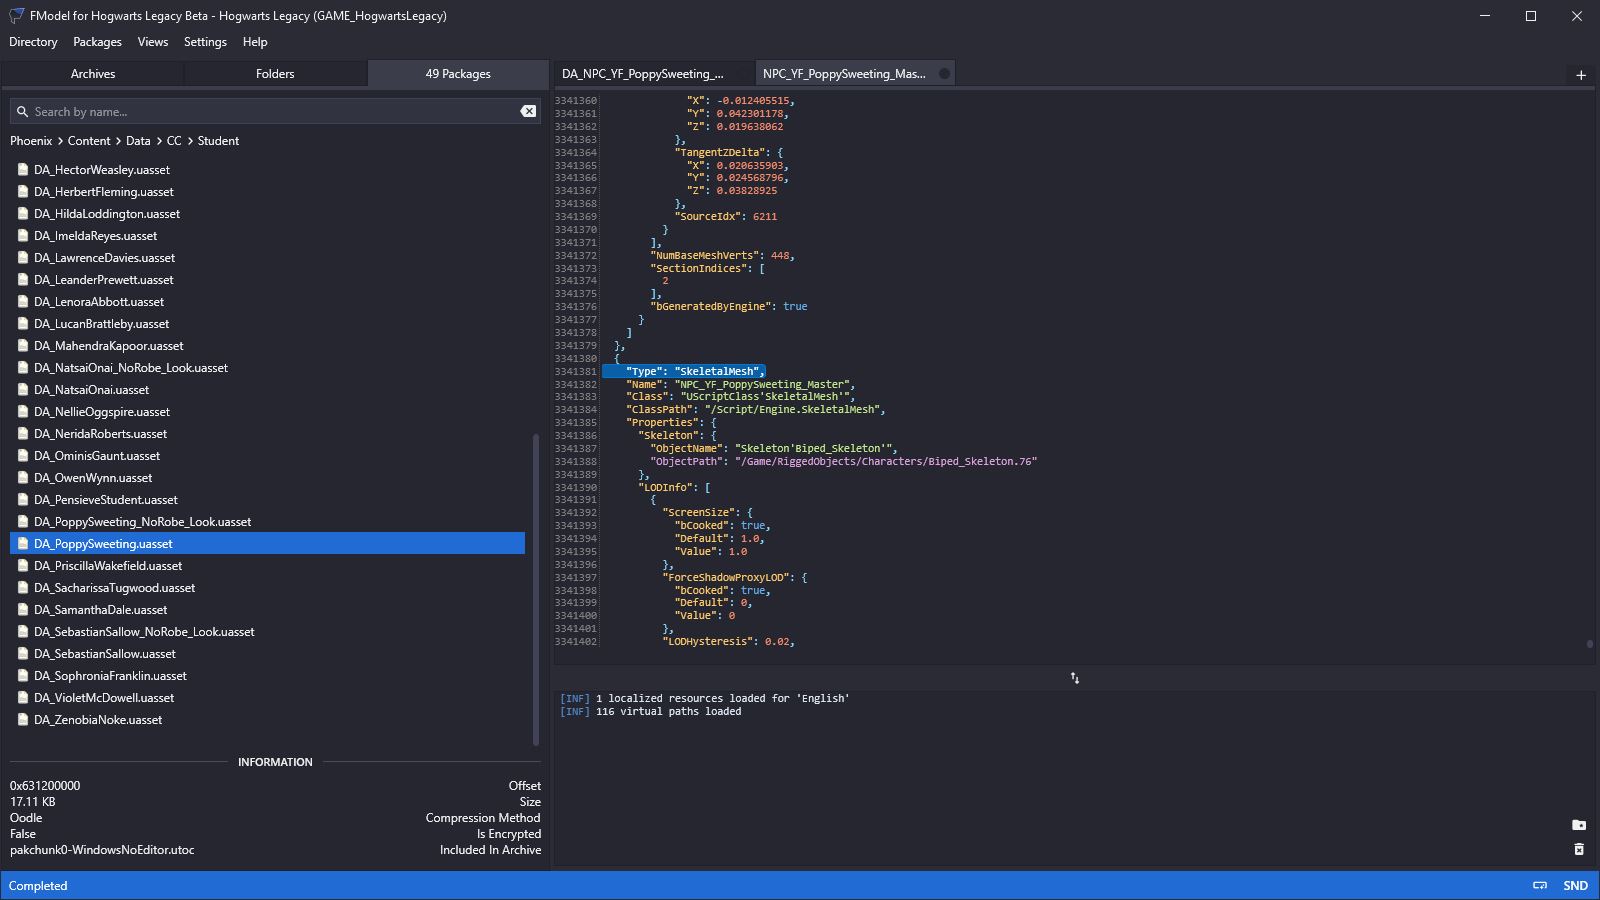
- Note that the panel on the right hasn't changed. It's still showing the skeletal mesh asset from earlier. To see the contents of
DA_PoppySweeting.uassetwe need to double-click it:
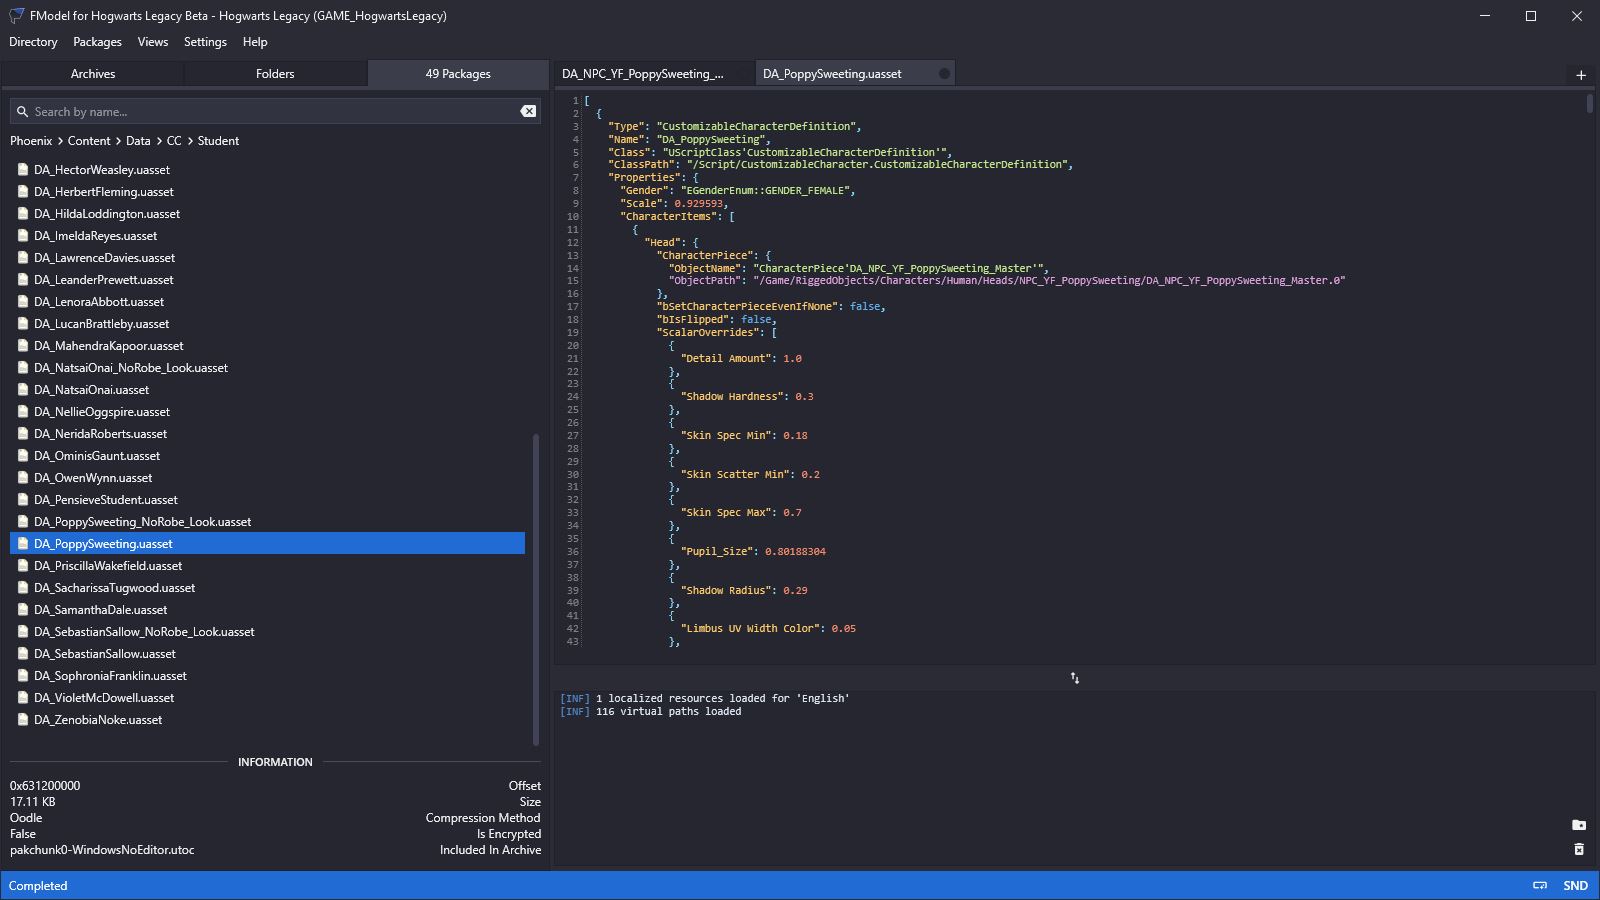
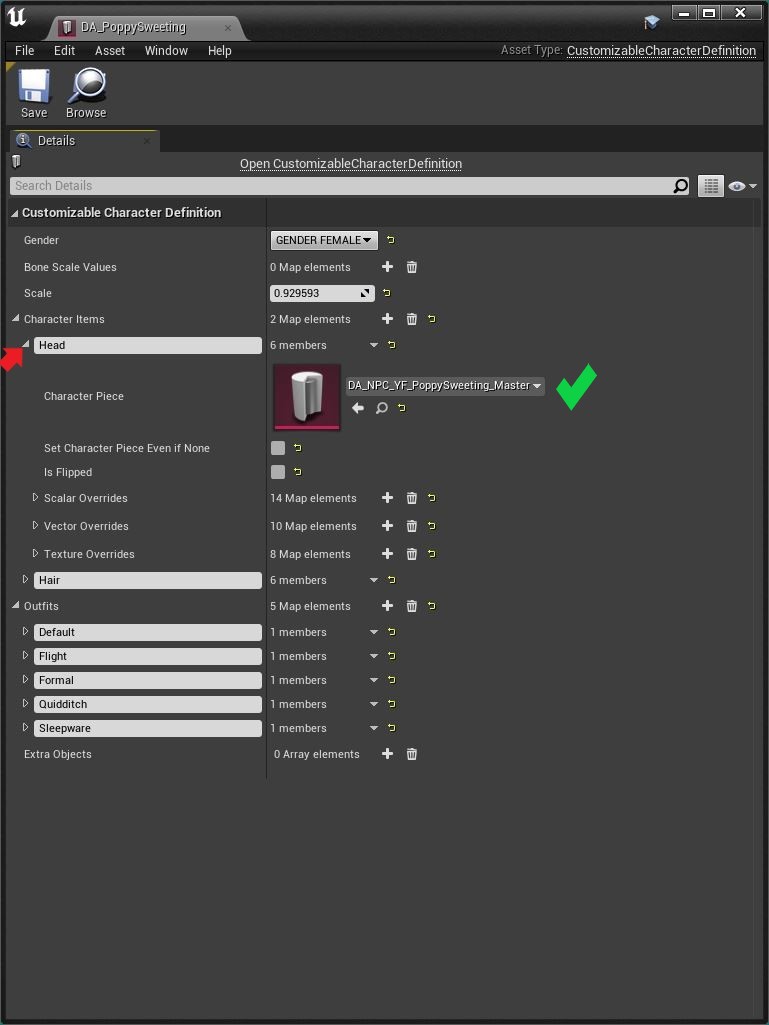
- This is what we're looking for!
- It's an asset whose
ClassisCustomizable Character Definition. (Remember that we'll need it later.) - Straight away we can see that it defines Poppy's gender to be
FEMALE, and herScale(i.e. height compared to the average for people her age) as 0.929593. So she's petite. You can change that later if you like. 🙂 - It also defines her
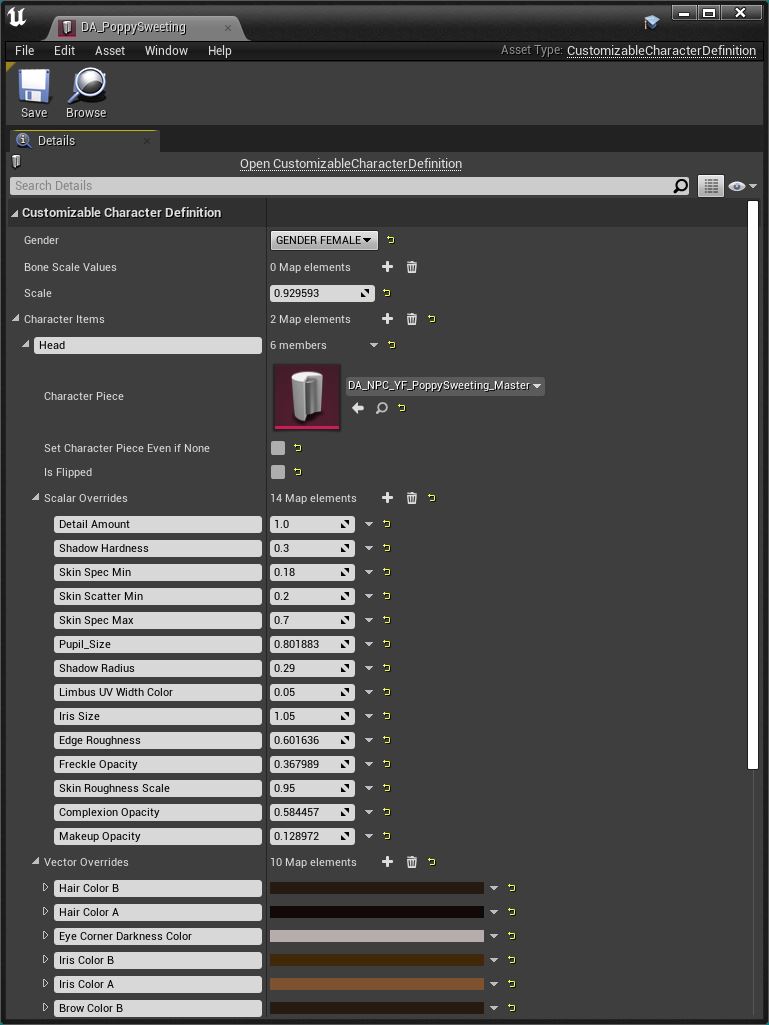
HeadCharacter Pieceto be the skeletal meshData Assetwhich we were just looking at, followed by someScalar Overridesto do with skin surface properties and eye size. - If we scroll down we find
Vector Overrides(i.e. colours) for hair, eyes and makeup. - Then we find a
HairCharacter Pieceand anOutfitUpperCharacter Piece. (There's noLowerbecause Poppy is wearing a full-lengthUpperoutfit.) - So this is the
Data Assetwe'll need to recreate and edit, if we want to change the way Poppy looks. - This
Data Assetis in folderPhoenix/Content/Data/CC/Student. - Similarly,
Data Assetsfor the professors are inPhoenix/Content/Data/CC/Professor, prefects are inPhoenix/Content/Data/CC/Prefects, un-named students are inPhoenix/Content/Data/CC/T3Student, etc.
¶ Create an Empty Data Asset
The process to re-create Poppy's Data Asset will be as follows:
- Create an empty
Data Assetin the Custom Engine. - Use JSON2DA to import all the actual data into the empty
Data Asset.
Let's do it!
- Open the Custom Engine by double-clicking
phoenix.uproject:
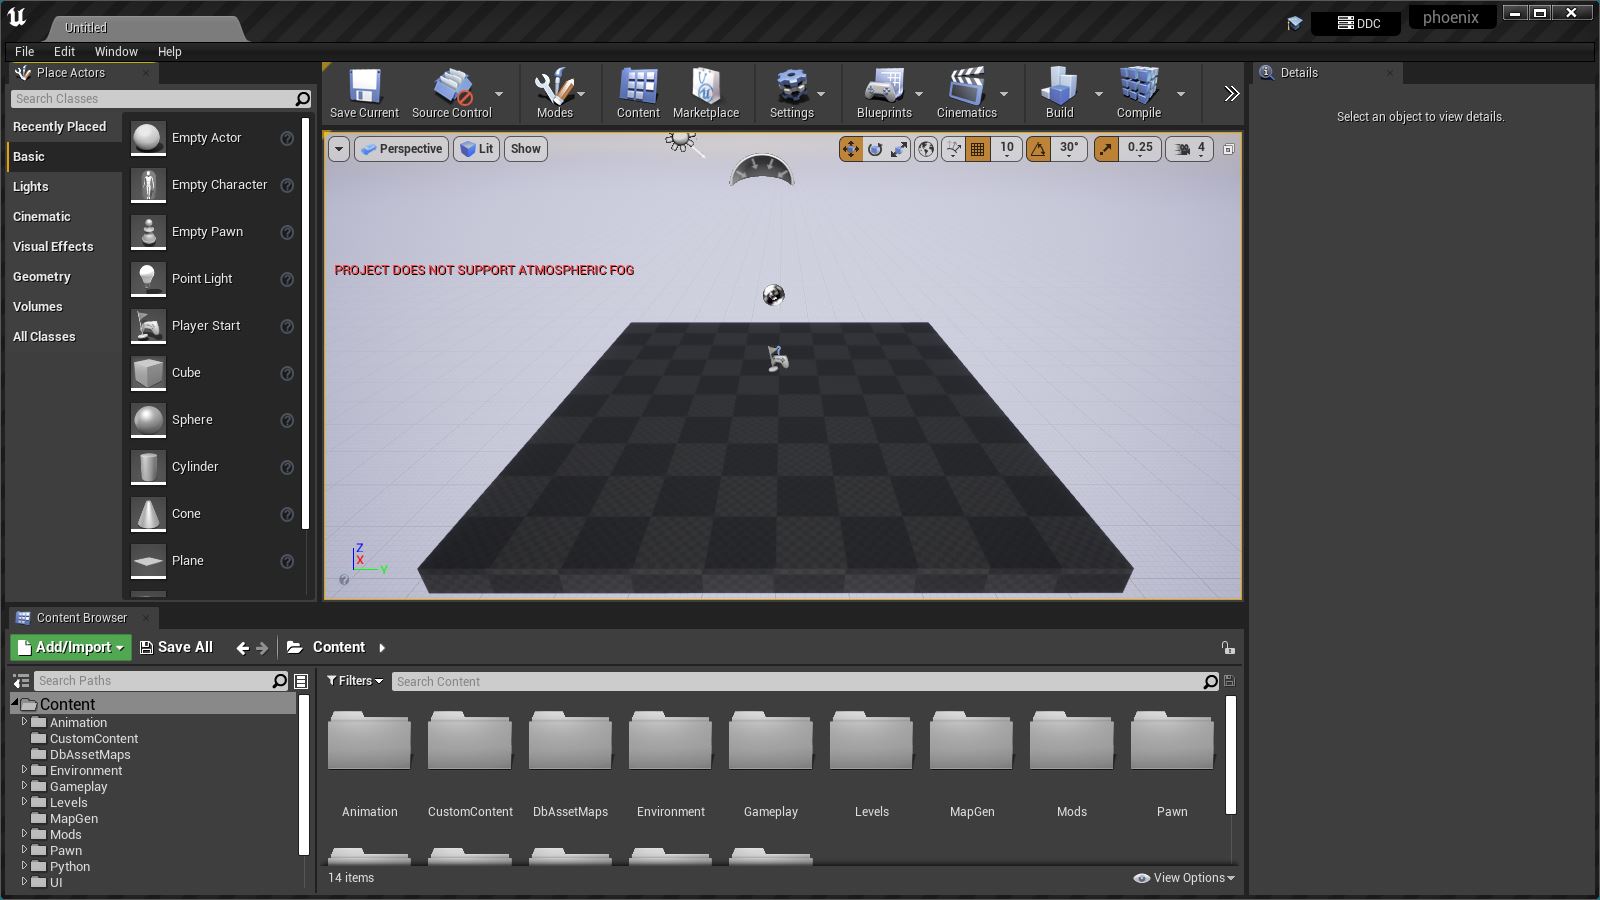
- Don't worry if you have a slightly different folder structure. Yours is a new installation whereas mine is not.
- We know from
Fmodelthat we need to create an emptyData AssetcalledDA_PoppySweeting(don't worry about the.uassetpart - the game will add that) in folderData/CC/Student. - But there is no
Datafolder, so we'll need to create it. Right click on theContentfolder and selectNew Folder:
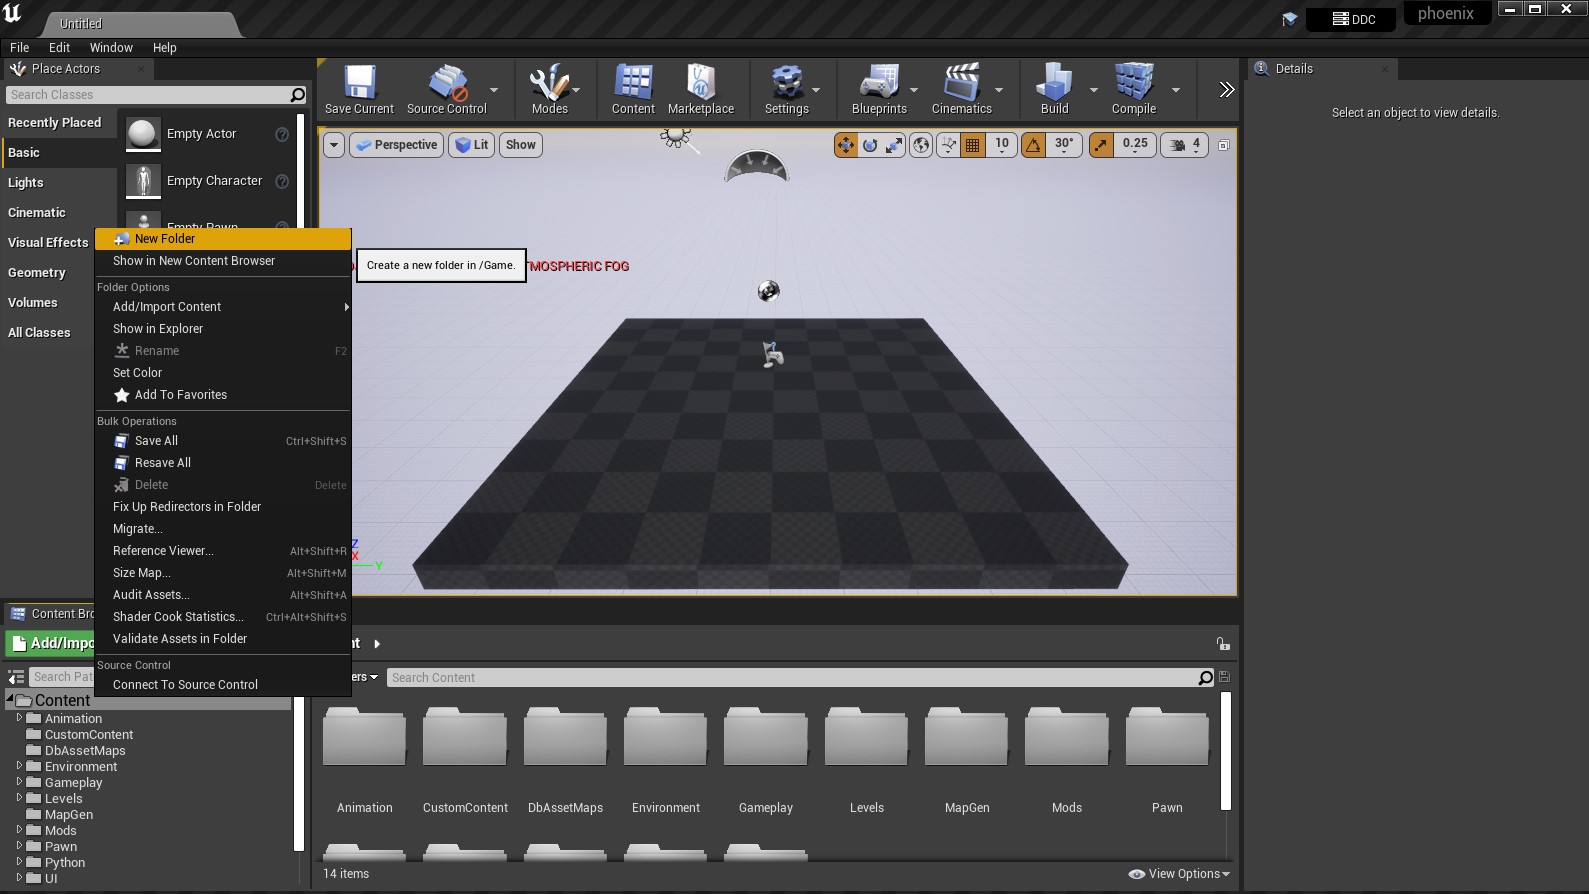
- Call the folder
Data. Inside there create another folder calledCCand inside there another calledStudent. - Now right click on the empty browser area, select
Miscellaneous>Data Asset:
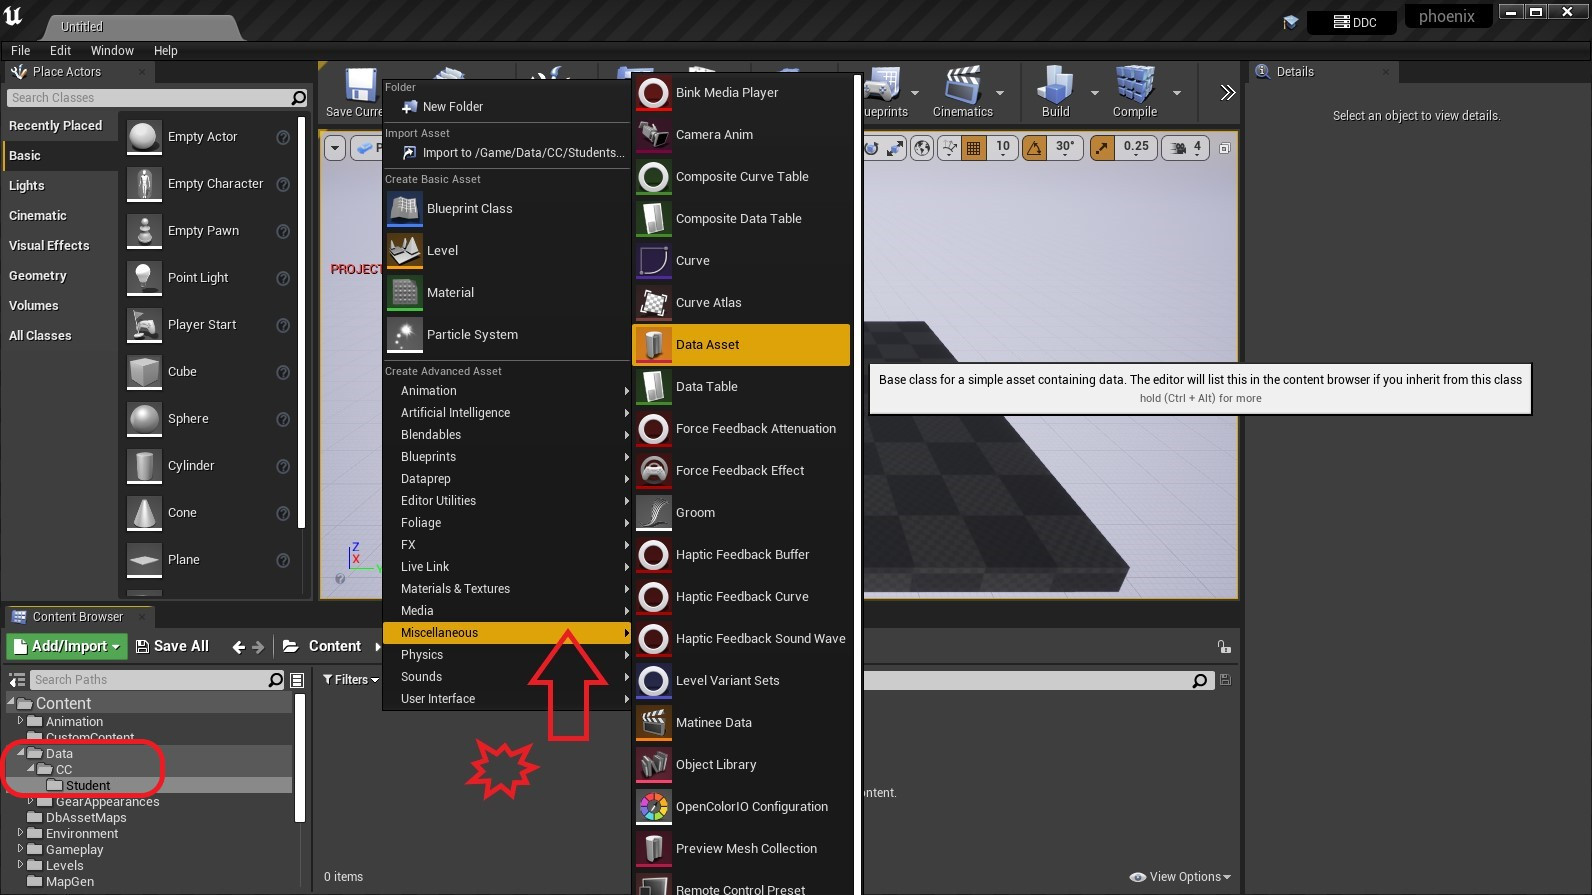
- In the little window that appears type
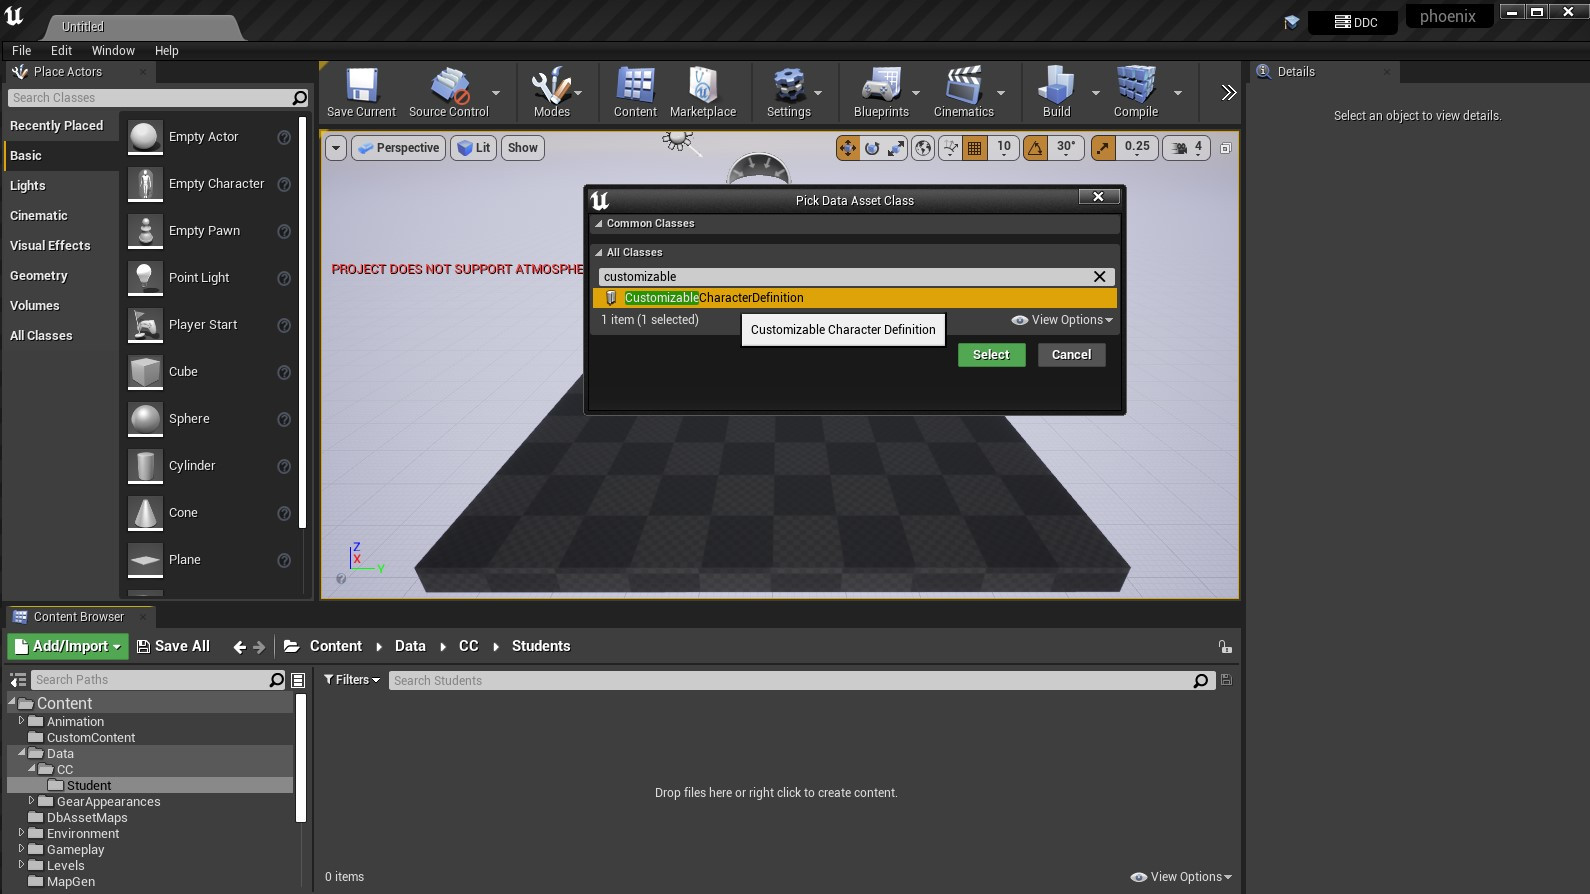
Customizablein the search field, chooseCustomizable Character Definition(theClasswe remember from earlier), and hitSelect:
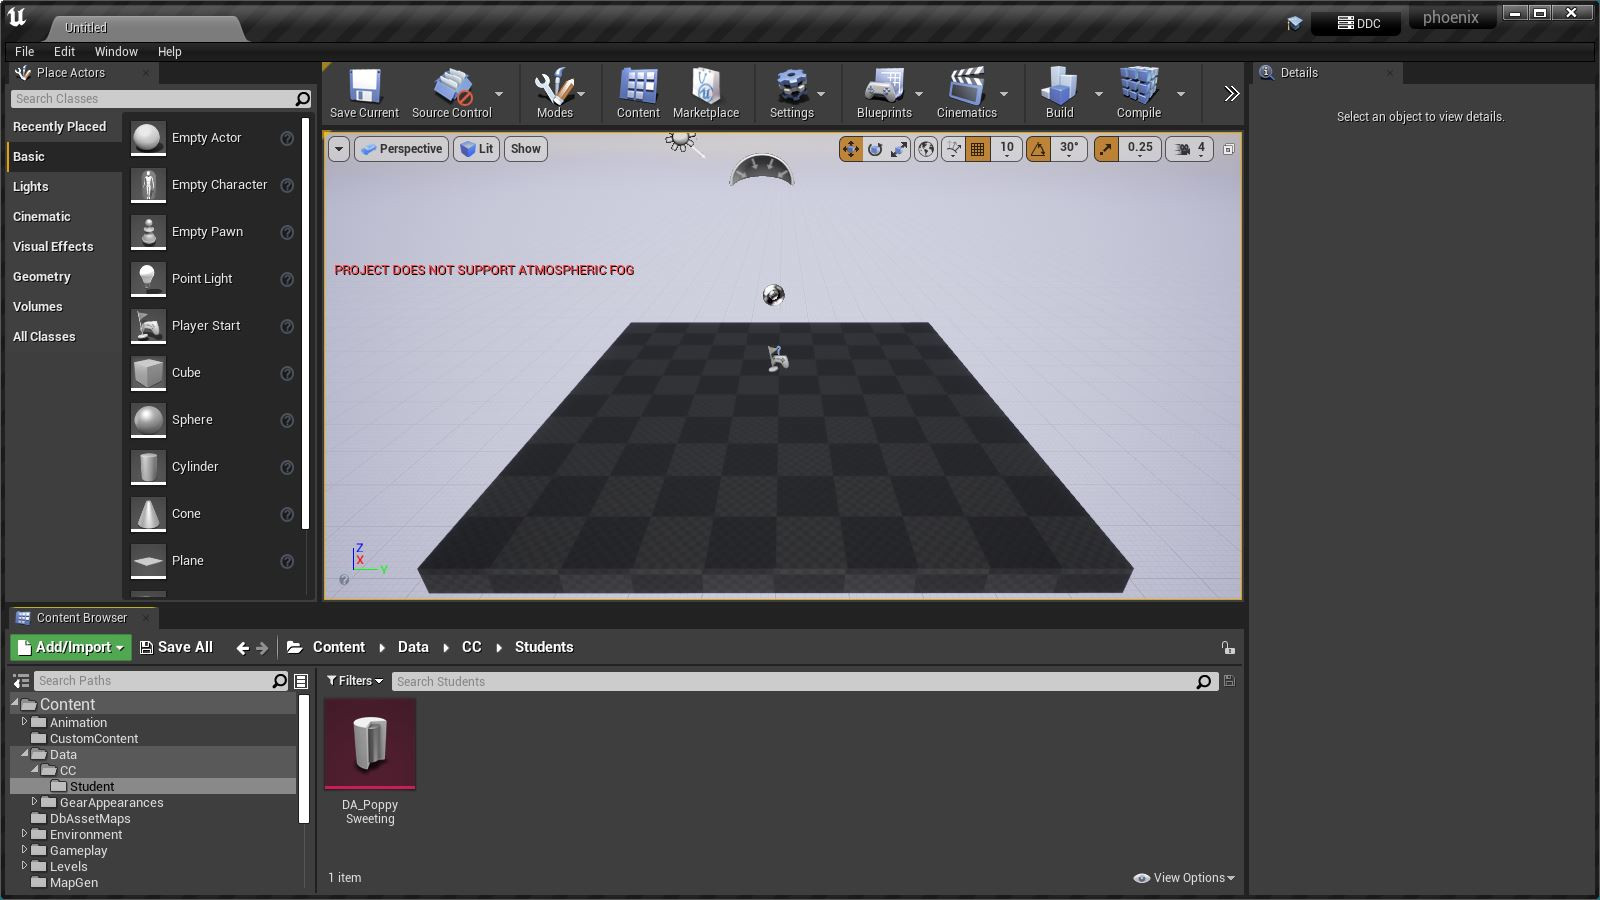
- When the asset appears rename it to
DA_PoppySweeting:
- Double-click on the new asset to see what it looks like:
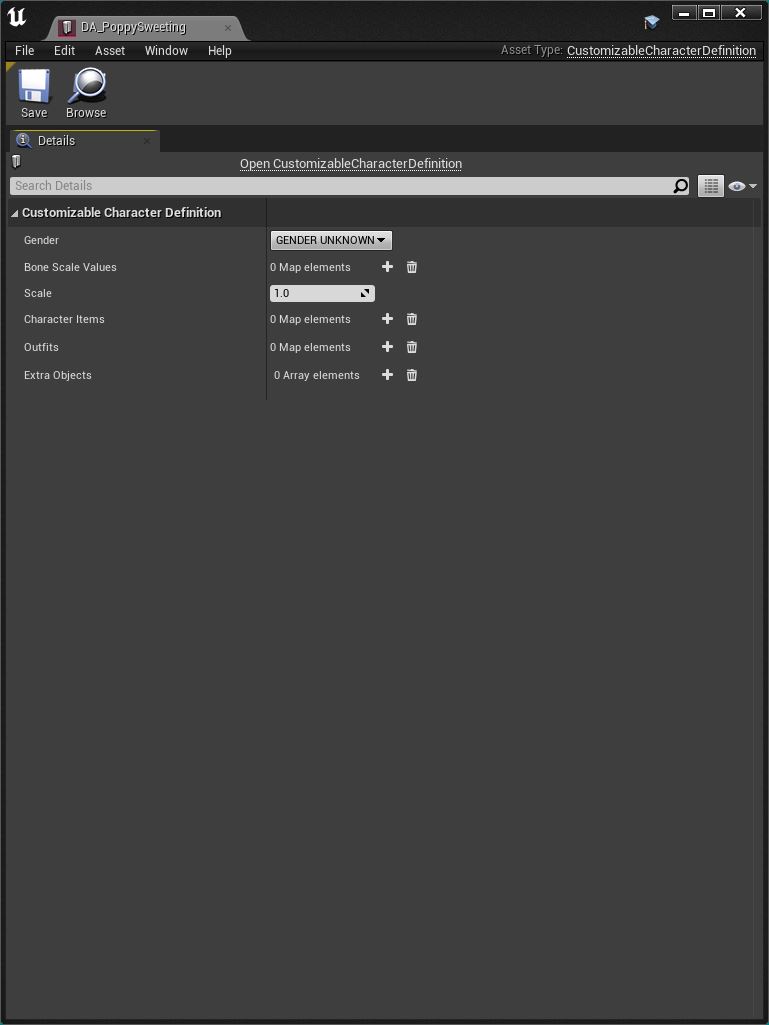
- As expected, it's empty. Close that window.
¶ Use JSON2DA to fill-in the Data Asset
This is the clever bit. Proceed as follows:
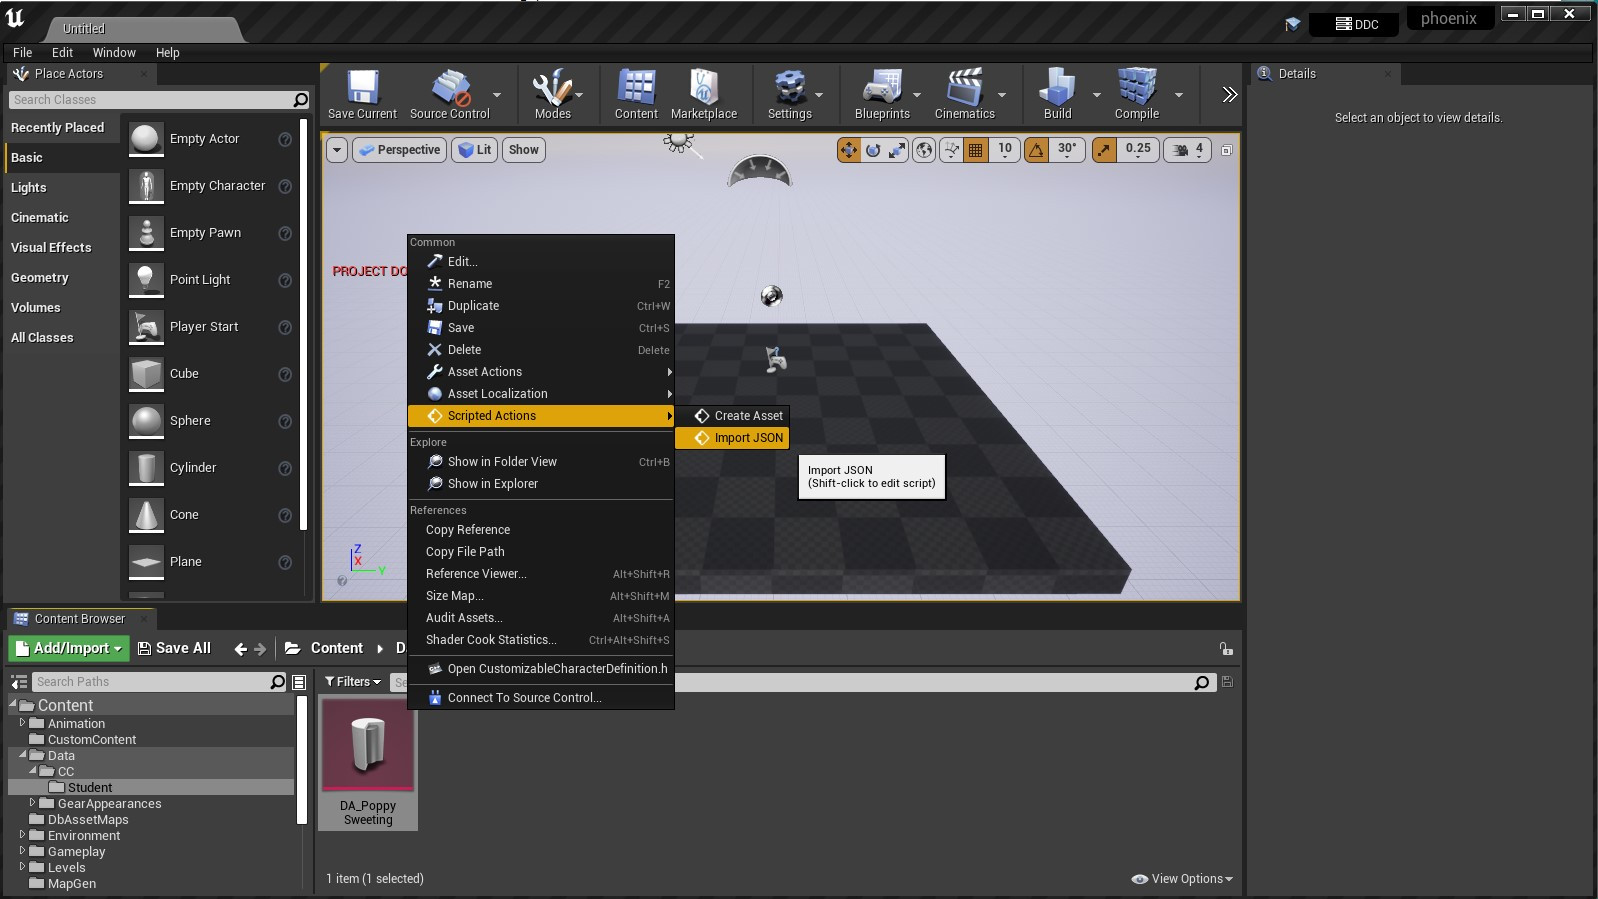
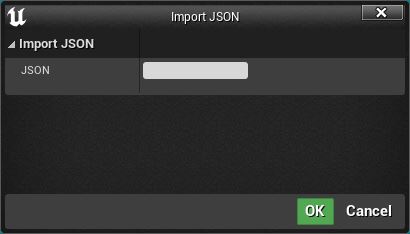
- Right click on the new asset and select
Scripted Actions>Import JSON:
- A little window will appear:
- Now go back to
FModelwhich should still be showing ourDA_PoppySweetingData Asset: - Left-click anywhere in the text on the right, then hit
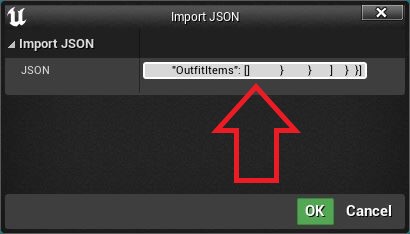
CTRL-ato select all the text andCTRL-cto copy it:
- Now paste all of that text into the little white box with JSON written next to it. Only the last few character will be visible, but that's fine. Hit
OK.
- And here's the REALLY clever bit: Not only will JSON2DA fill the
Data Asset, but it will also createDummiesof all the assets that theData Assetdepends on! Brilliant! Thanks, Tangerie! - Open up the
Data Assetto see how it looks now:
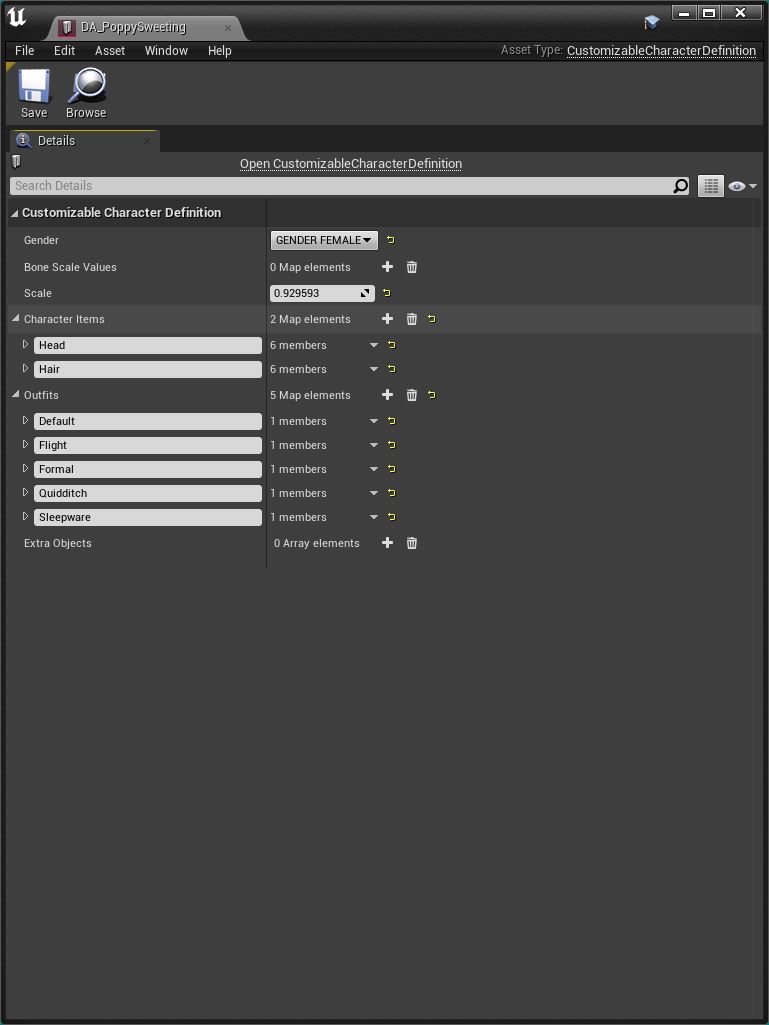
- There's now some stuff in there. Click on the triangle next to
Headto expand that heading:
- On the right we can see that the
HeadCharacter Piecehas been filled-in and points to a newDummy AssetcalledDA_NPC_YF_PoppySweeting_Master. - If the burgundy icon was white and said
Nonethat would mean that something went wrong, theDummy Assetis missing and yourData Assetwon't work. Go back and review what you did. - We can also expand the other headings. For example the
Hairheading:
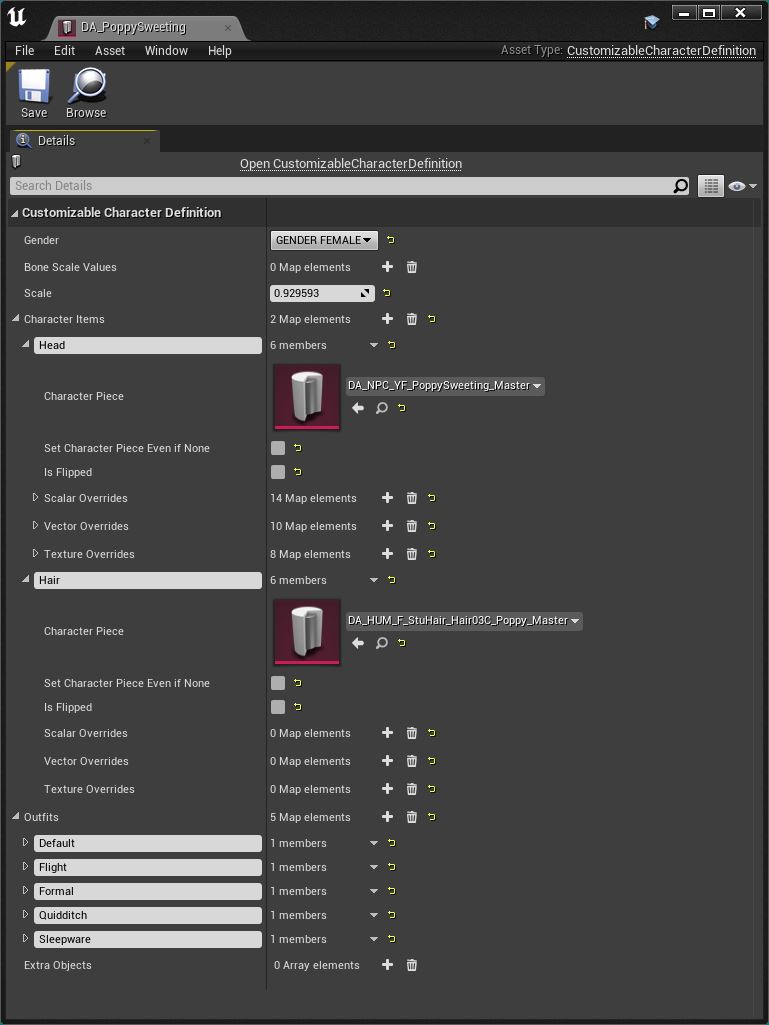
- Or we can expand the
Head'sScalar OverridesorVector Overrides:
- It all looks good.
¶ CharacterPiece Data Assets
Please note that at present JSON2DA DOES NOT WORK with CharacterPiece Data Asset's.
This is because JSON2DA is not able to create dummy assets for Skeletal Meshes, so it fails at that point in the DA and the rest of the DA will be missing.
In general this will not be a problem because you'll be using the DA that refers to the CharacterPiece as a dummy asset, so it doesn't matter what's inside it. But if you need to make any changes to it (like changing the Head mesh in a Head DA) then you need the contents to be correct because you'll have to pakchunk it.
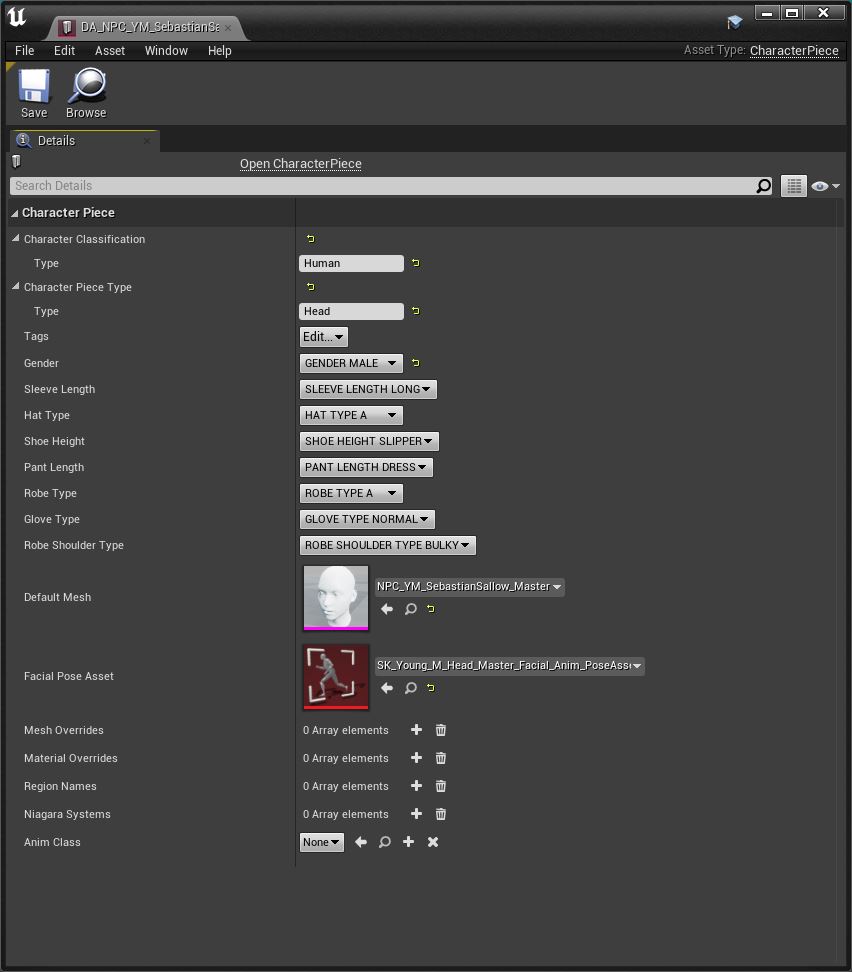
For example, if you run JSON2DA on a Head DA (e.g. Sebastian's head: DA_NPC_YM_SebastianSallow_Master) you'll get:

The items in green are correct. The two in red are not. These must be set manually. Check the original DA using FModel to see what you need to put in there. In Seb's case:
- Default mesh =
RiggedObjects/Characters/Human/Heads/NPC_YM_SebastianSallow/NPC_YM_SebastienSallow_Master. - Facial Pose Asset =
RiggedObjects/Characters/Human/Heads/Young_M/Facial/SK_Young_M_Head_Master_Facial_Anim_PoseAsset.
If you've edited the skeletal mesh for the head (because you're doing a face mod or you've removed the hands) you should use that as the Default Mesh. If not you need to create a dummy. I don't know how to do that for skeletal meshes so just use the one below and rename it as required. You'll be using it as a dummy asset so it should not be given a pakchunk.
For the Facial Pose Asset use the one below (which also should not be pakchunked):
The final Head DA should look like this:
¶ Tags
Please note that at present JSON2DA DOES NOT WORK if the Data Asset contains TAGs.
If the Data Asset you are trying to recreate has TAGs you will need to paste the JSON into a file, edit the JSON to remove the TAGs, paste the edited JSON into your DA, then add the TAG's to your DA manually by double-clicking the DA to edit it in the Custom Engine.
¶ Conclusions
So that's it. That's how you use JSON2DA to create a Data Asset. You're now ready to start changing it. But we'll cover that in a separate tutorial.