¶ Introduction
In this tutorial we'll be taking a look at how we can make modifications and adjustments to the base game textures. Our aim is to take a simple and commonly found item within the world, and alter its appearance by adjusting its textures. The principles you will learn can then be applied to any in-game object, from character clothing to weapons and armour.
If you're looking for a more concise version of this tutorial which simply tells you what to do, check out this Quick Guide
¶ What We'll Cover?
1 Locating & Extracting textures from the game files.
2 Converting texture files into a format we can work with. ( .dds → .tif )
3 Making Texture Adjustments
4 Getting textures back into the game with our own custom mod
¶ Tools
Before we get started, let's take a look at the tools we'll be using.
- An Archive extraction tool (WinRar or 7zip will do)
- KCD Texture Exporter
- Affinity Photo 2 (Any photo editing software will do, like Gimp or Photoshop)
- Nvidia Texture Tools
- KCD PAK Builder
Don't worry about these yet. We'll be looking at how to download and install them when needed.
¶ Getting Started
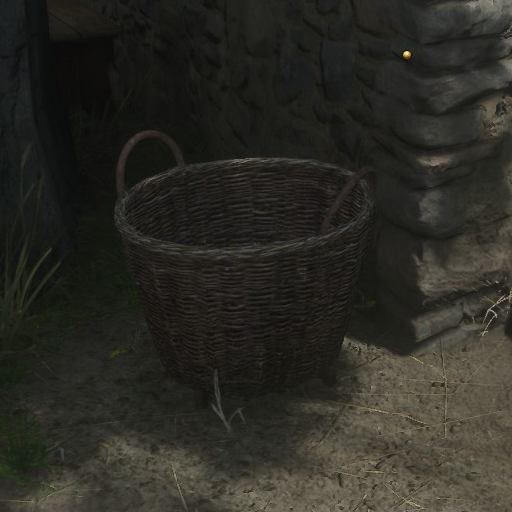
To get started, we need to find an item to modify. Because of its prevalence in the game world, we'll go with the trusty basket. You should be able to find one these quite easily in your travels. Here's what it looks like by default.
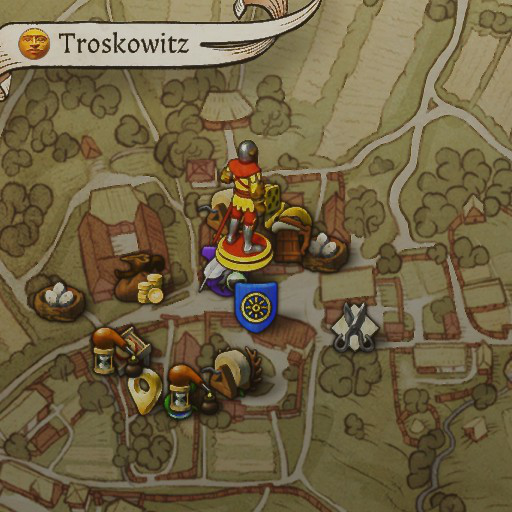
This particular basket was found in the Rathaus compound in Troskowitz, here:
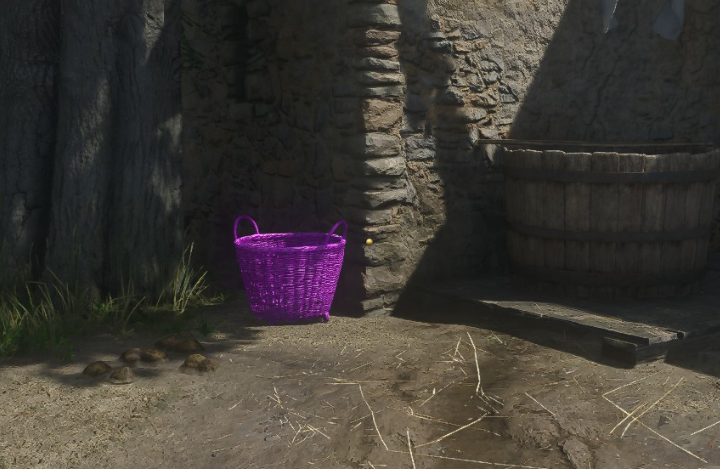
In this tutorial we'll make some very simple changes to the textures of this item. More specifically, we'll change the color of the item's diffuse texture. By the end of this tutorial, the basket will look like this:
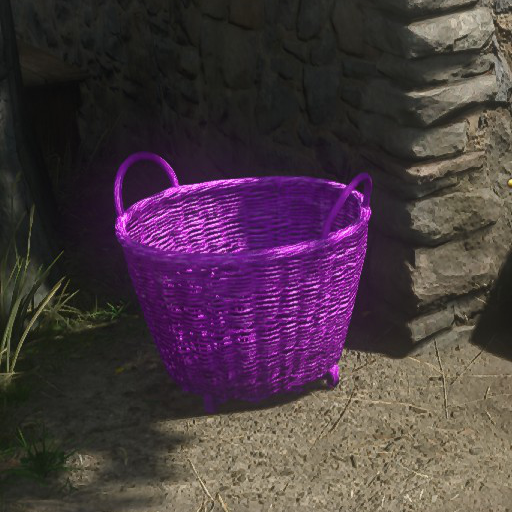
While only a trivial change, our focus here is on understanding the workflow. Once you have this understanding, the same process can be used to adjust any and all textures that an object uses.
So let's get started!
¶ Locating & Extracting Object Textures
First things first, we need to find the textures for this particular object. To do this, we'll need to take a look at some of the game's .pak files. These files are archives containing all of the game's data, such as object meshes, terrain information, quests and more. You'll need an archiving tool like 7-Zip or WinRAR here in order to open them.
These .pak files can be found in the Data folder of your KCD2 installation. In our case, this is:
E:\SteamLibrary\steamapps\common\KingdomComeDeliverance2\DataBut yours may be in a different location depending on where you installed the game.
The best approach here is to open one of the following .pak files and look through the folders that seem relevant to your item.
- IPL_Objects-part0.pak
- IPL_Objects-part1.pak
- IPL_Objects-part2.pak
Depending on the item you want to modify this may require some searching on your part, as it may be in a .pak file not listed above.
Update: The KCD Asset Finder tool is now available and can help with the process of finding and extracting game assets, such as textures
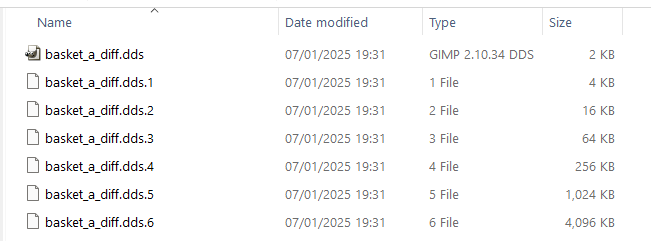
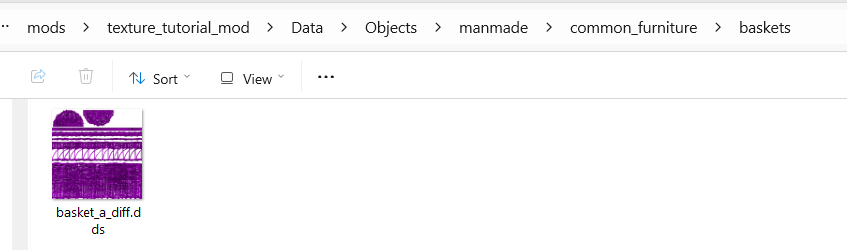
In this instance, we know that the textures for this basket are in IPLObjects-part0.pak. We've opened up this archive in WinRAR, and found the textures we're interested in inside the folder at Objects/manmade/common_furniture/baskets. Because we're going to be making adjustments to the Basket's diffuse texture, we want the texture files ending in the _diff suffix, as shown

Create a folder somewhere on your computer and extract these texture files to it. Make sure to extract the .dds file and all of the numbered .dds files too. In our case we end up with a total of 7 files as shown.
¶ Converting Textures (.DDS to .TIF)
Unfortunately for us, these texture files are not yet ready to use. If you try to open these in an image editor/viewer that supports Direct Draw Surface image files (.dds), you'll get an error like this:
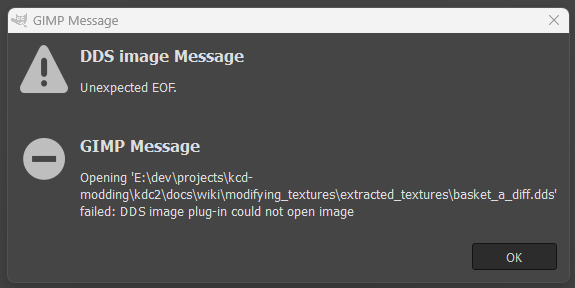
This is because of the way in which KCD2 splits up these texture files, and it means that we'll need to rebuild them to a format we can use. This is where KCD Texture Exporter comes in. This utility allows us to convert this set of DDS files into a single TIF file that we can open. Download this utility from here, and then extract the contents to any folder.
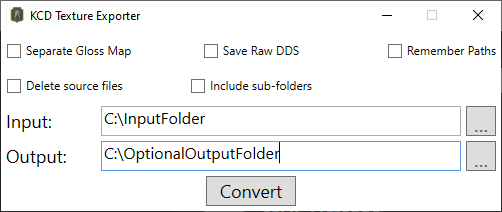
With the files extracted, simply double-click the KCDTextureExporter.exe file to run it. Then drag and drop the folder containing your split files onto the Input text box in the KCD Texture Exporter window and click Convert. This will convert all of the files in the input folder into TIF files and save them in the same folder. If you want the TIF files to be saved into a different folder, you can drag and drop an output folder onto the Output text box in the KCD Texture Exporter window and then click Convert.
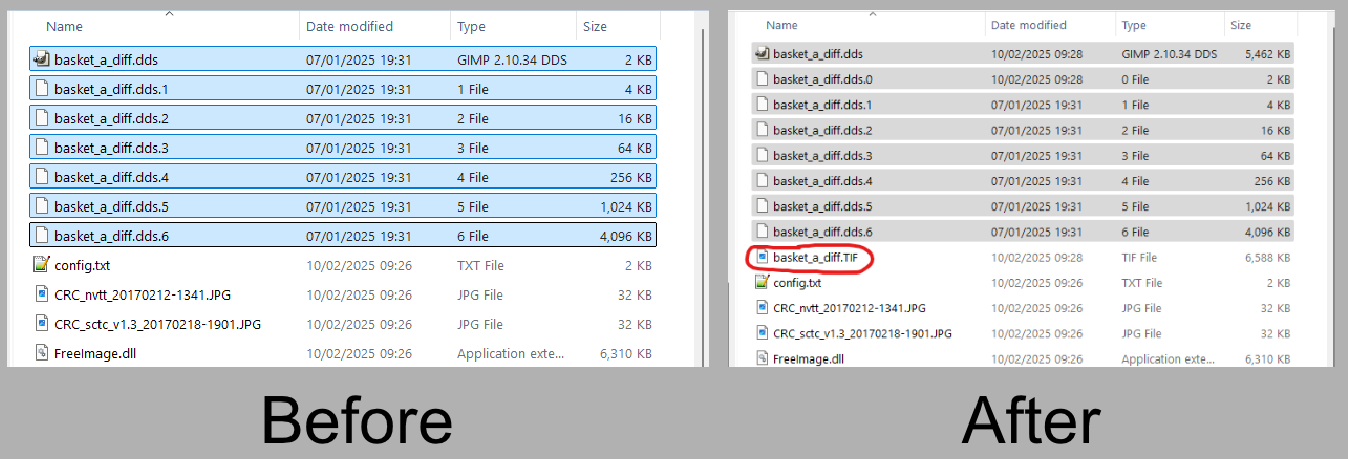
That's the texture conversion process complete. We now have an image we can open in an image editor. Once we've made our changes we'll be converting this file back into a format that the game can understand.
¶ Modifying Textures
Let's now make some adjustments!
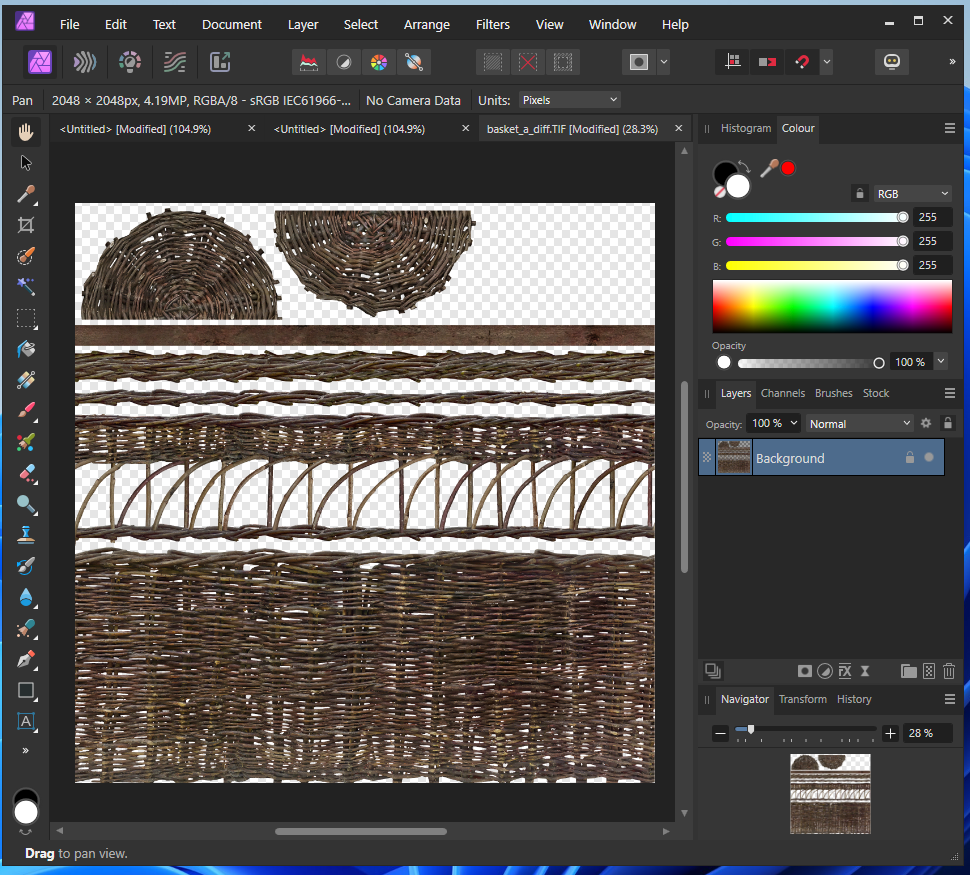
Open the basket_a_diff.TIF file in an image editor of your choice. In this tutorial we'll be using Affinity Photo 2, which is paid-for software, but you can always use another tool such as Gimp (freeware) or Photoshop. The exact steps followed in this section will depend on the software of choice, so you may need to consult the relevant documentation for that tool. However, the changes we're going to be making are extremely simple, and should be very easy to achieve in any image editing application.
Here's what the texture looks like inside Affinity Photo 2
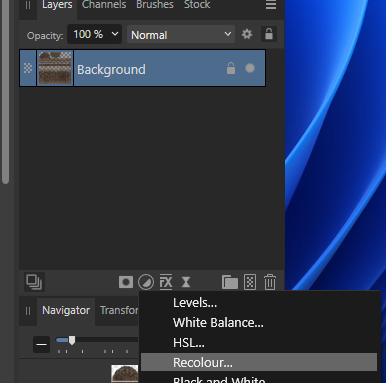
We're going to add a very simple Recolour adjustment to change the diffuse color of the texture, by selecting the layer, clicking the Adjustments button and then clicking Recolour.
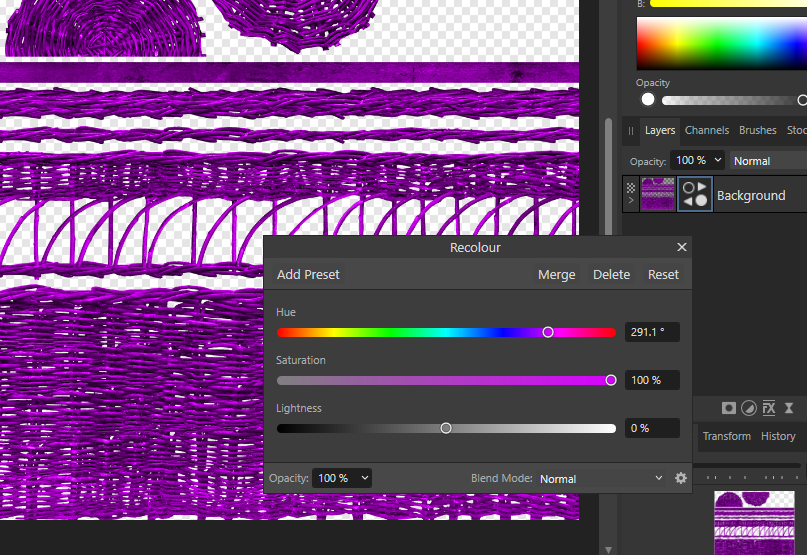
Select a color for your new basket. We've gone for something that will easily stand out
With your color selected, simply save the image.
¶ Converting Textures Back to DDS
With our adjustments made, we'll now convert the TIF texture back into a format that the game can understand. More specifically, into a .dds file. To do this, We'll first need to download and install NVIDIA Texture Tools Exporter, which you can find Here.
Once installed, open Nvidia Texture Tools and then drag and drop the basket_a_diff.TIF into the area of the application that says Drag Image Here. At this point, you should have something that looks like this. We can see our basket texture with our custom color adjustment applied.

Before we export, change the Format in the top left from BC7 to BC3, like so:

Note here that the exact compression format may differ depending on which texture you're modifying (diffuse, normal, etc.). More information will come on this, but in the meantime it may require some experimentation if you're modifying something other than diffuse.
Anyway, now click Save As, give your image the name basket_a_diff.dds, and save it into a new, empty folder called modified_textures.
¶ Import Textures Into The Game
Our texture changes are complete and we're now ready to get the adjustment into the game! To do this, we'll be making our own custom mod.
¶ Creating a Mod
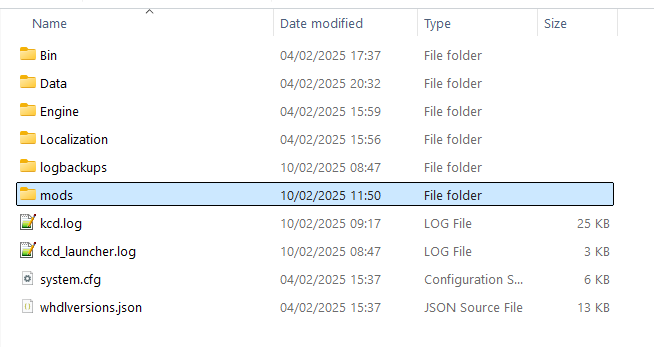
First, open Windows Explorer and navigate to the KCD2 installation directory. If you don't already have one, create a folder in here called mods so that your folder structure looks like so:
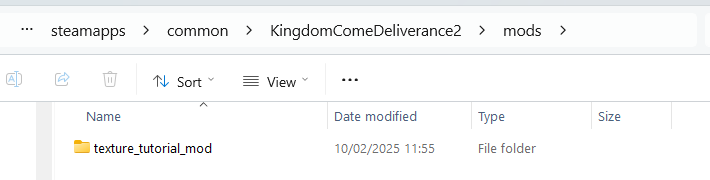
Now open the mods folder and let's create a folder for our own mod. You can give it any name you want, but make sure it doesn't contain any spaces, special characters etc. To be safe, it's best to keep it reasonably short and stick to using underscores to separate words. In our case, we'll go with texture_tutorial_mod
Now open the mod folder. At this point we'll need to create a mod.manifest file to tell the game about our mod. Create this file in your mod directory and open it inside a text editor. This file needs to contain XML data with information on our Mod. Here's a template that you can copy and paste into your mod manifest. You can keep the contents exactly as they are, but you may want to update some of the properties, such as the created_on date, the author name, etc.
<?xml version="1.0" encoding="utf-8"?>
<kcd_mod>
  <info>
    <name>Texture Tutorial Mod</name>
    <description>A simple mod that adds a custom Basket texture to the game</description>
    <author>Altire</author>
    <version>1.0</version>
    <created_on>10.02.2025</created_on>
	<modid>texture_tutorial_mod</modid>
  </info>
  <supports>
    <kcd_version>1.1.*</kcd_version>
  </supports>
</kcd_mod>Great! Now we want to add our custom texture. To do this, we'll need to add a few folders first. Inside your mod folder, create the following folder structure:
| Data
	|-- Objects
		|-- manmade
			|-- common_furniture
				|-- baskets
Now from your modified_textures folder, copy the basket_a_diff.dds that we just created using Nvidia Texture Tools Exporter in the previous section, and paste it into Data/Objects/manmade/common_furniture/baskets. You should have the following folder structure:
We're almost there! Only one more step remains before we can test our changes in game.
¶ Packing Mod Data
Although we've created our folder structure with our custom texture inside, the game can't read this. Just like with the built-in game files, we need to create a .pak file. This is where KCD PAK Builder comes in.
Note here that you don't need to use KCD PAK Builder. It is simply a tool that makes the creation of valid .pak files for KCD2 very simple and straightforward. If you feel more comfortable doing so, you can use something like 7-Zip or WinRAR to create the .pak file instead, but be warned here that certain compression settings are required which are outside the scope of this tutorial.
Let's now pack our mod data with KCD PAK Builder. If you don't have it already, you can download it Here. Once downloaded, open the application and we'll run through how to use it. Once it does open, it should look something like this:
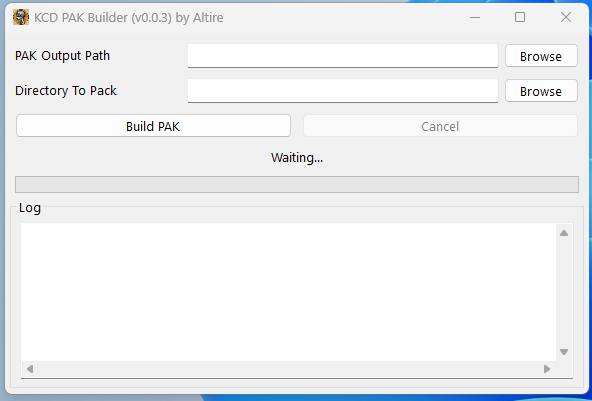
There are only two options we need to set, PAK Output Path and Directory To Pack. The PAK Output Path is the absolute full location (including the filename and extension) to which the .pak file will be written, while the Directory to Pack is… well.. the directory to create a .pak of, of course.
For KCD2 to correctly read our .pak file, we need to:
- Store it in the Data folder of our mod
- Pack everything that's inside of the Data folder
So in our case, the PAK Output Path points to KCD2/mods/texture_tutorial_mod/Data/texture_tutorial_mod.pak, while Directory to Pack points to KCD2/mods/texture_tutorial_mod/Data, as shown:
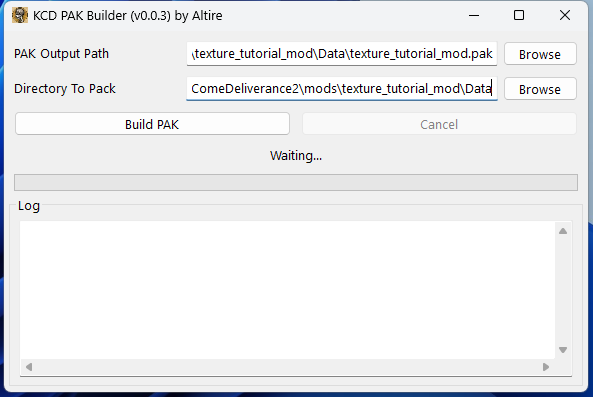
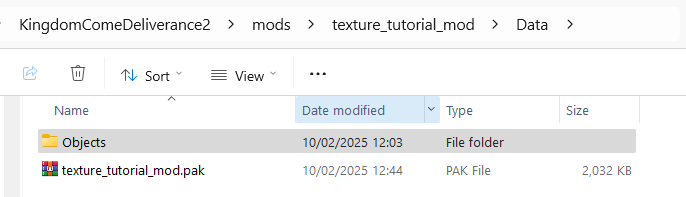
Now just hit Build PAK to build the .pak file! Once the progress bar fills completely and you see Build Finished! (100%), you should be able to find your .pak file in the Data folder of your mod, like so:
¶ Checking The .pak File
Let's open the .pak file with an archiving tool like 7-Zip, WinRAR etc. to make sure the correct structure exists. Notice here how the first folder we encounter inside the .pak is the Objects folder. This must be the case, or our texture will not correctly override the base texture.
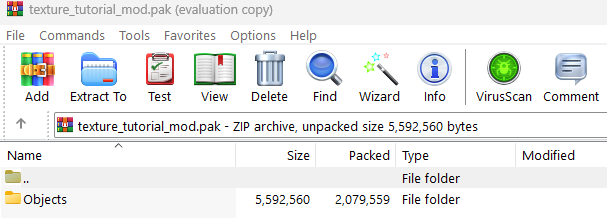
If your .pak file has been created and looks similar to that shown above then congratulations! Your texture change mod is now ready to be used by the game.
¶ Testing Our Changes In Game
After launching the game and heading to the Rathaus at Troskowitz, we can see that our texture changes have indeed worked!
¶ Conclusion
If you've made it to the end of the tutorial, then great job! Hopefully you've found the information useful, and that it enables you to enhance and customise textures in KCD2.
Please feel free to leave any comments, suggestions and feedback, and thank you for reading.
¶ Guide creators:
- Altire