¶ Hotkey Layouts
In this page we'll be providing you some resources and guidance on how to provide hotkey layouts for your users on your collection pages. For your convenience we are going to be using some online, free tools but you can always apply all these instructions on any other tools as well.
¶ Why Should You Feature A Hotkey Layout?
Don’t assume that all users will have experience with the base game before using your collection. Also, there may be some hidden new controls introduced to the game with your collection too. In either case, providing a hotkey layout for your users will be appreciated by all users.
Also, if your collection is big in size, users will have some time to kill while the installation process takes place. This is the perfect time and place to both showcase your collections features, and introduce players to your collection.
Here we’ll feature both Keyboard & Mouse Layouts, along with controller layouts.
¶ Keyboard & Mouse Layouts
Even though there are many different ways of doing this, we wanted to give you some ready to use options for your convenience.
¶ 1) Alternative 1 - Archie Adams Github - Easy, Fast To Edit Alternative
This is a very fast layout you can edit, thanks to a simple tool, however it has some drawbacks as well. It does not come with a Numpad or a mouse layout and the customization options are still there, but limited.
Here is how you can use it:
Open this link: https://archie-adams.github.io/keyboard-shortcut-map-maker/
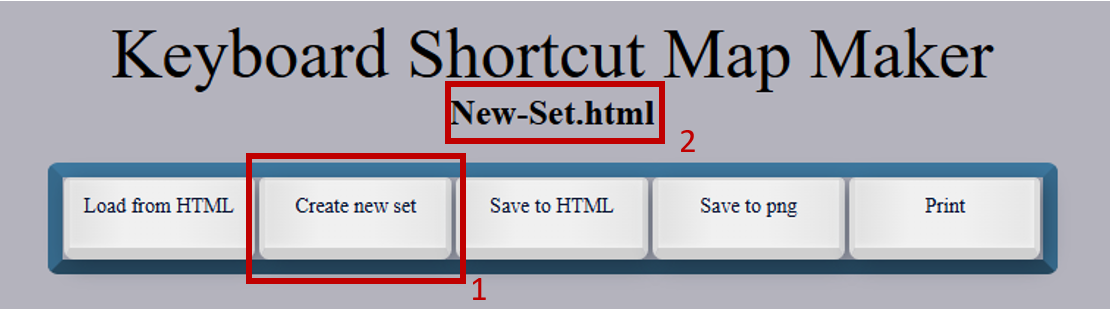
- Press “Create New Set”
- Rename your set to your liking
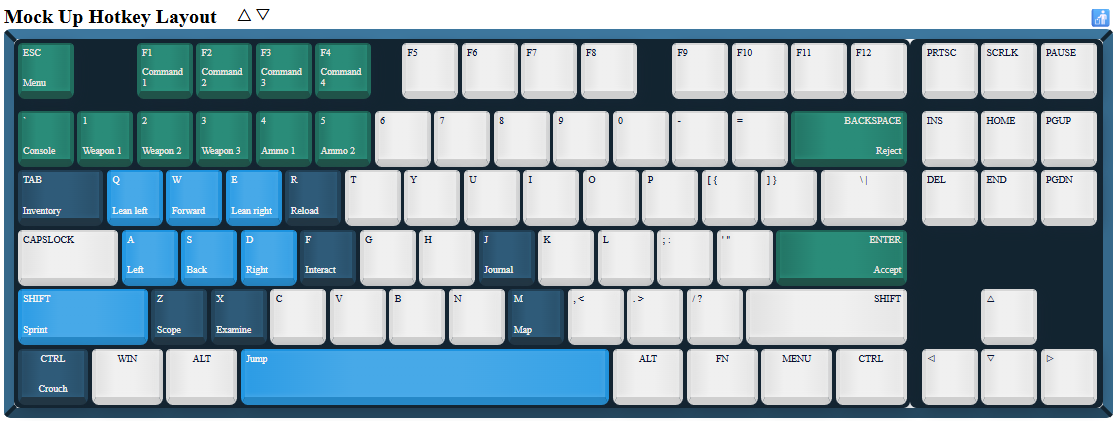
- Click on each button you want to edit. In this example, I simply press on spacebar and then enter the keybind I want to be shown, in this case “Jump”.

- Using the color options below, you can easily edit your keyboard layout to look like this. Notice how I have grouped different functions into different colours. You can also do a similar thing with grouping movement options to one color, inventory options to another etc.
To export, either just take a screenshot or simply use the buttons at the top to export it as a html, png or as a pdf file via the print option.
¶ 2) Alternative 2 - Keyboard Layout Editor - Fully Customizable Tool
This is a very good tool that is still pretty easy to use but without most of the drawbacks of the previous one like not having customizable buttons. If you have some basic HTML knowledge, you can even edit it even more but this is not needed at all for a basic layout.
Here is how you can use it:
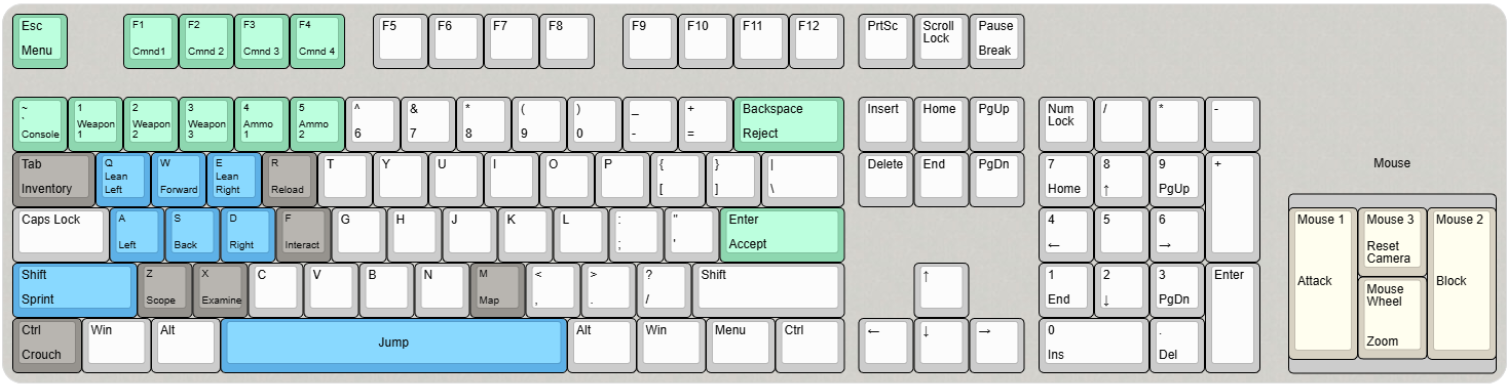
Open this link that i customized for you: Keyboard Layout Editor - Ready To Use
Or open this link that is not customized: Keyboard Layout Editor - Default
%2F%3B&$$hashKey=086%3B&radii=20px%3B&@_c=%238ed7b0%3B&=Esc%0AMenu&_x:1&f:2%3B&=F1%0ACmnd1&=F2%0ACmnd%202&=F3%0ACmnd%203&=F4%0ACmnd%204&_x:0.5&c=%23cccccc&f:3%3B&=F5&=F6&=F7&=F8&_x:0.5%3B&=F9&=F10&=F11&=F12&_x:0.25%3B&=PrtSc&=Scroll%20Lock&=Pause%0ABreak%3B&@_y:0.5&c=%238ed7b0&f:2%3B&=~%0AConsole%0A%0A%0A%0A%0A%60&=1%0AWeapon%201&=2%0AWeapon%202&=3%0AWeapon%203&=4%0AAmmo%201&=5%0AAmmo%202&_c=%23cccccc&f:3%3B&=%5E%0A6&=%2F&%0A7&=*%0A8&=(%0A9&=)%0A0&=%2F_%0A-&=+%0A%2F=&_c=%238ed7b0&w:2%3B&=Backspace%0AReject&_x:0.25&c=%23cccccc%3B&=Insert&=Home&=PgUp&_x:0.25%3B&=Num%20Lock&=%2F%2F&=*&=-%3B&@_y:-0.25&x:23&c=%23653c25&sm=alps&sb=alps&st=SKCL%2F%2FSKCM&a:7&w:3.75&d:true%3B&=Mouse%3B&@_y:-0.75&c=%2396938e&sm=&sb=&st=&a:4&w:1.5%3B&=Tab%0AInventory&_c=%235eb1e7&f:2%3B&=Q%0ALeft%0A%0A%0A%0A%0ALean&=W%0AForward&=E%0ARight%0A%0A%0A%0A%0ALean&_c=%2396938e%3B&=R%0AReload&_c=%23cccccc&f:3%3B&=T&=Y&=U&=I&=O&=P&=%7B%0A%5B&=%7D%0A%5D&_w:1.5%3B&=%7C%0A%5C&_x:0.25%3B&=Delete&=End&=PgDn&_x:0.25%3B&=7%0AHome&=8%0A%E2%86%91&=9%0APgUp&_h:2%3B&=+%3B&@_y:-0.25&x:23&g:true&a:7&w:3.75&h:3.25%3B&=%3B&@_y:-0.75&g:false&a:4&w:1.75%3B&=Caps%20Lock&_c=%235eb1e7&f:2%3B&=A%0ALeft&=S%0ABack&=D%0ARight&_c=%2396938e%3B&=F%0AInteract&_c=%23cccccc&f:3%3B&=G&=H&=J&=K&=L&=%2F:%0A%2F%3B&=%22%0A'&_c=%238ed7b0&w:2.25%3B&=Enter%0AAccept&_x:3.5&c=%23cccccc%3B&=4%0A%E2%86%90&=5&=6%0A%E2%86%92&_x:1.5&c=%23d8d2c3&sm=cherry&w:1.25&h:2.75%3B&=Mouse%201%0A%0A%0A%0A%0A%0AAttack&_sm=&w:1.25&h:1.25%3B&=Mouse%203%0AReset%20Camera&_sm=cherry&w:1.25&h:2.75%3B&=Mouse%202%0A%0A%0A%0A%0A%0ABlock%3B&@_c=%235eb1e7&sm=&w:2.25%3B&=Shift%0ASprint&_c=%2396938e&f:2%3B&=Z%0AScope&=X%0AExamine&_c=%23cccccc&f:3%3B&=C&=V&=B&=N&_c=%2396938e&f:2%3B&=M%0AMap&_c=%23cccccc&f:3%3B&=%3C%0A,&=%3E%0A.&=%3F%0A%2F%2F&_w:2.75%3B&=Shift&_x:1.25%3B&=%E2%86%91&_x:1.25%3B&=1%0AEnd&=2%0A%E2%86%93&=3%0APgDn&_h:2%3B&=Enter%3B&@_y:-0.75&x:24.25&c=%23d8d2c3&w:1.25&h:1.5%3B&=Mouse%20Wheel%0AZoom%3B&@_y:-0.25&c=%2396938e&w:1.25%3B&=Ctrl%0ACrouch&_c=%23cccccc&w:1.25%3B&=Win&_w:1.25%3B&=Alt&_c=%235eb1e7&a:7&w:6.25%3B&=Jump&_c=%23cccccc&a:4&w:1.25%3B&=Alt&_w:1.25%3B&=Win&_w:1.25%3B&=Menu&_w:1.25%3B&=Ctrl&_x:0.25%3B&=%E2%86%90&=%E2%86%93&=%E2%86%92&_x:0.25&w:2%3B&=0%0AIns&=.%0ADel)
-
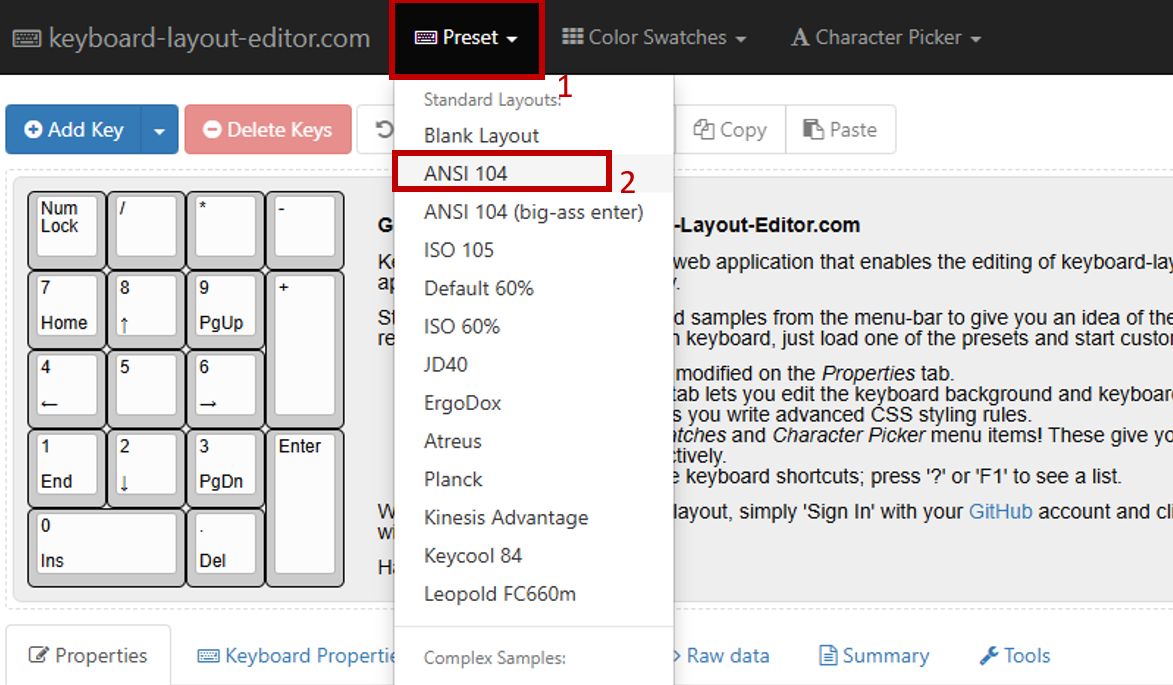
For this example, we’ll be using an ANSI 104 keyboard layout, but feel free to choose other ones like ISO 105 which are super common as well if you want. If you used my ready to use link, you don’t need to change anything here.
-
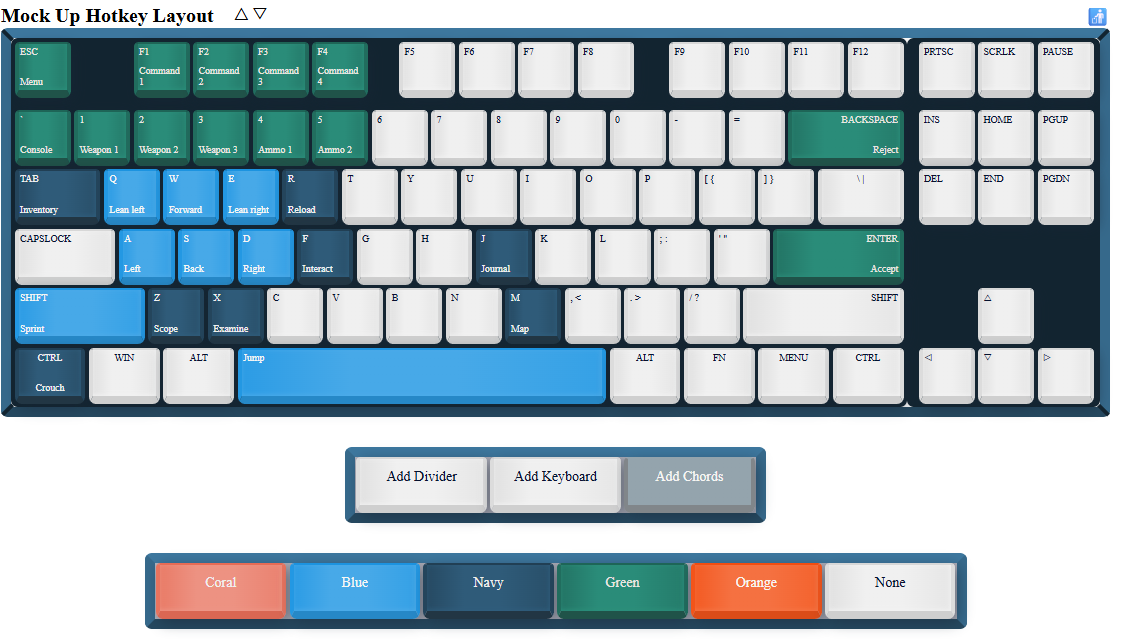
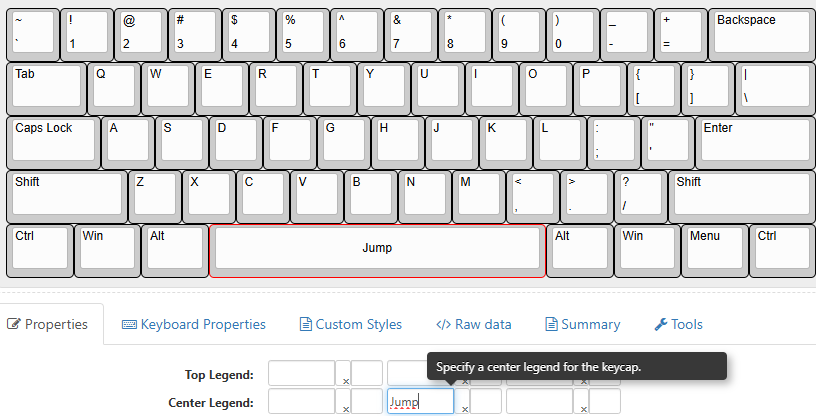
After clicking on any button, you’ll be able to customize it on the “Properties” part. Note that you’ll have the ability to align your text however you want, along with resizing it as well if it does not fit in the button itself. You can see how I edited the “Jump” button in this case.
-
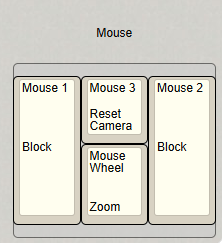
Normally, there is no mouse layout in this setup, but I created a mock up one for you. If you want to change it or if you want to add other instructions (for combos, for example) you can add a key and then move that key with arrow buttons & customize it however you want.
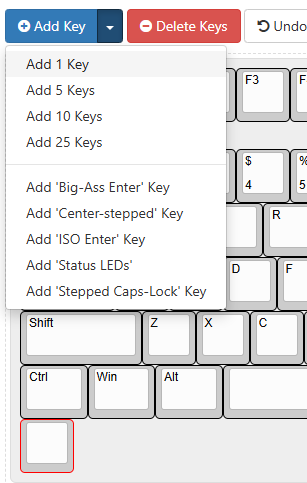
In this example, I simply added 4 buttons and then shaped them to my liking and added another button and turned it into a decal that simply says mouse at the top. Even though it is not looking like a mouse, it still gives the idea and it is ready for you to use.
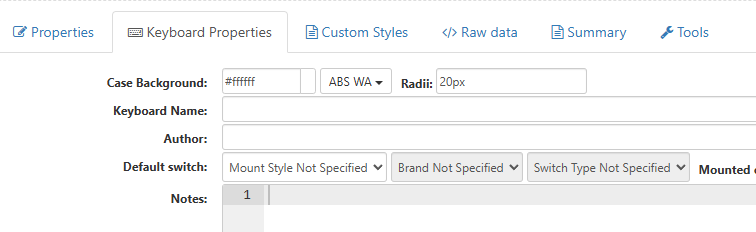
- There are many options to customize the keyboard even more to your liking under “Keyboard Properties” section. I simply changed the background color and edited the background to be more “rounded” on the corners but sky is the limit especially if you are using the custom styles or raw data parts to their full potential.
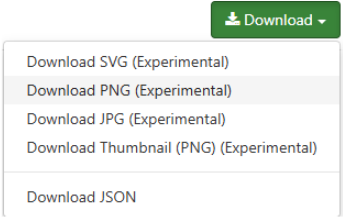
5 When exporting, either simply take a screenshot or use the big download button at the upper right side of the screen. For this document I simply exported it as PNG.
¶ Controller Layouts
Even though you may not use one, providing a controller scheme is super important. Luckily for us, since controllers are pretty standard, this part is more straightforward for the most part.
¶ 1) Alternative: Padcraft - Easy To Edit, Fast Tool
This is a great tool that is super fast but has few drawbacks. For some key combinations that require you to hold a certain key and then press another one, you won’t be able to use this one to its full effect, or you will need to create a separate scheme for each hold + press combination.
How to use:
Open this link: Padcrafter
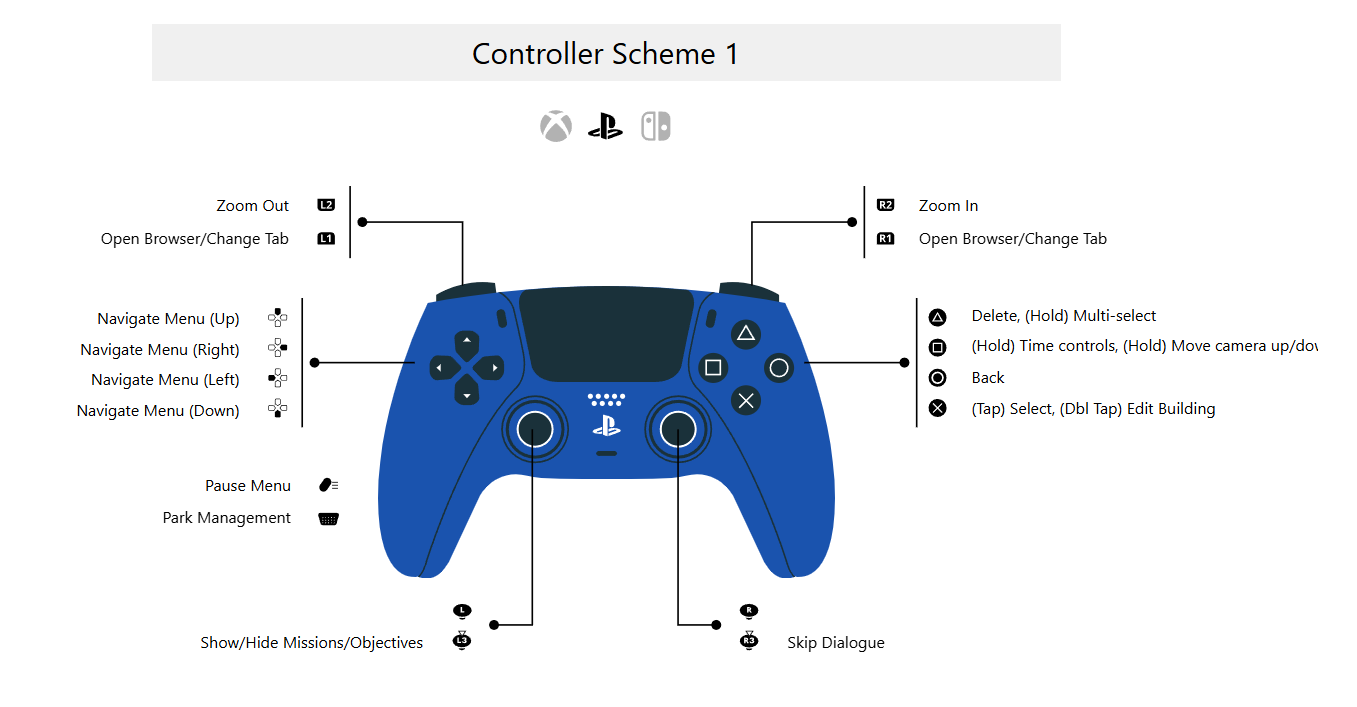
1 Simply choose which controller type you want to feature and then start writing the hotkeys.
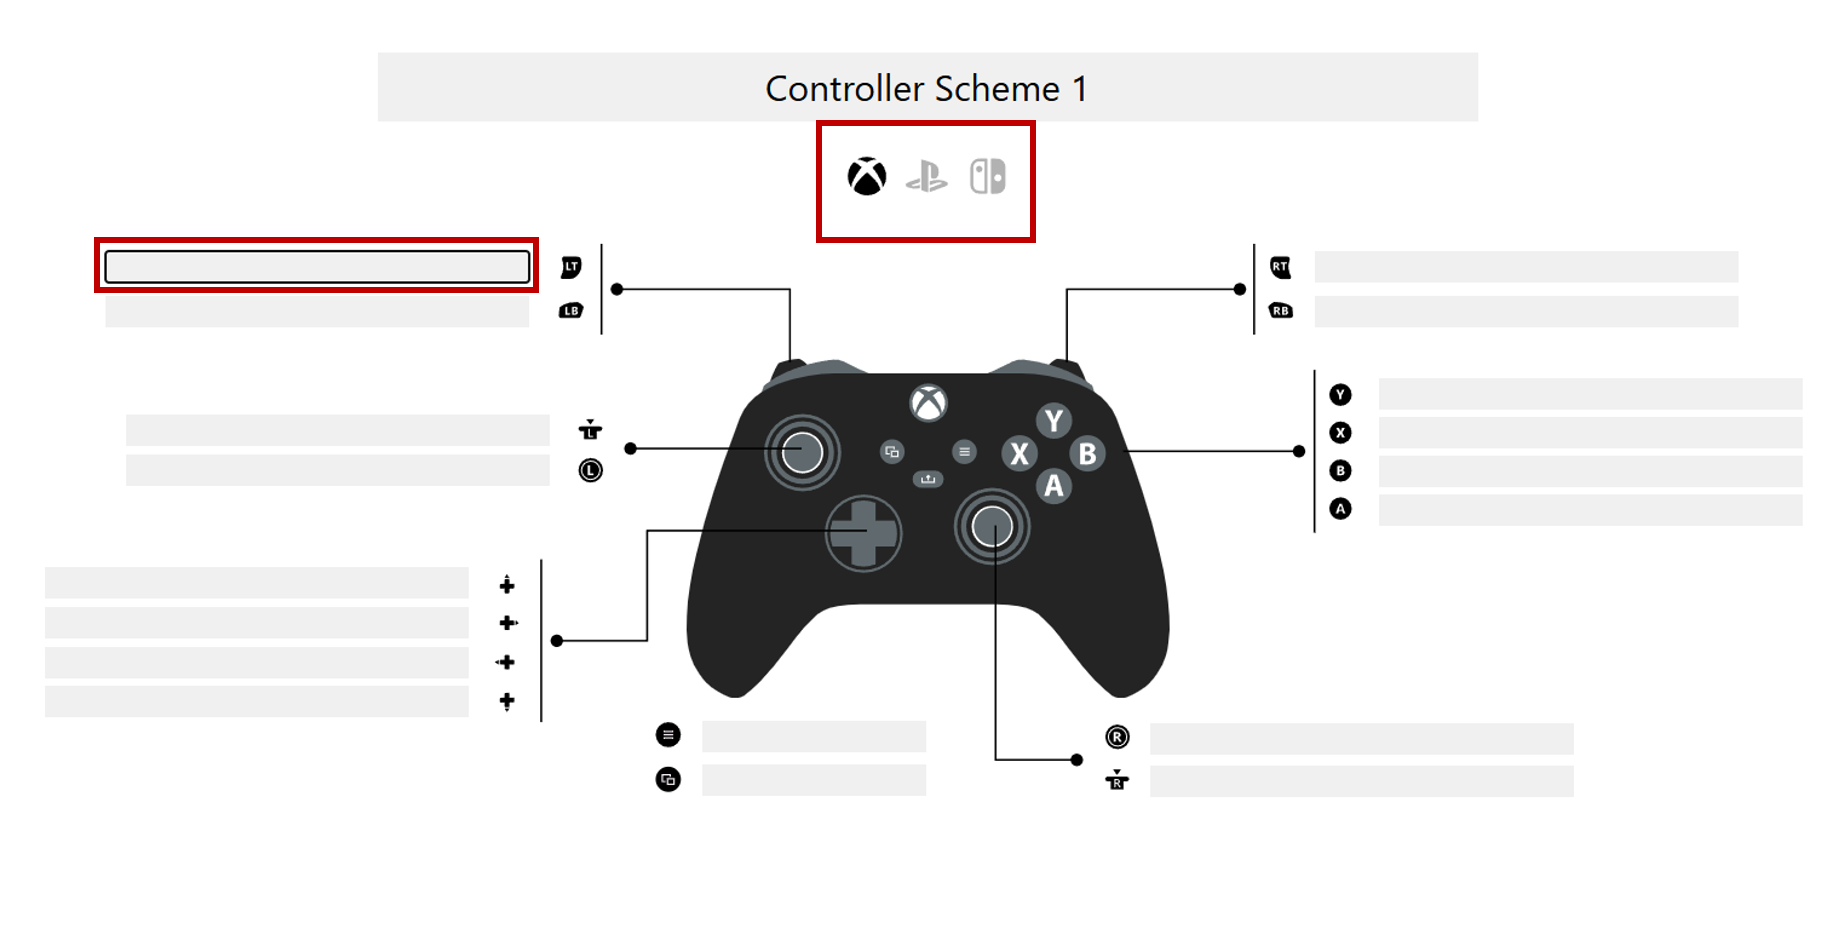
Feel free to check the already existing examples that uses all features of this tool to a great extent
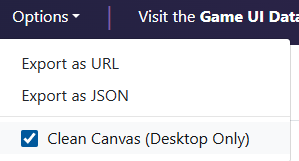
When exporting, either just take a screenshot (in this case don’t forget to click on “Clean Canvas (Desktop Only) option first) or just export it as an URL and share it with others via a link.