This tutorial assumes the steps in Getting Started and Creating an asset replacement mod have been followed up to this point.
¶ Chunk Assignment
If the "Assign to Chunk.." menu option does not appear, review the project and editor settings in Getting Started.
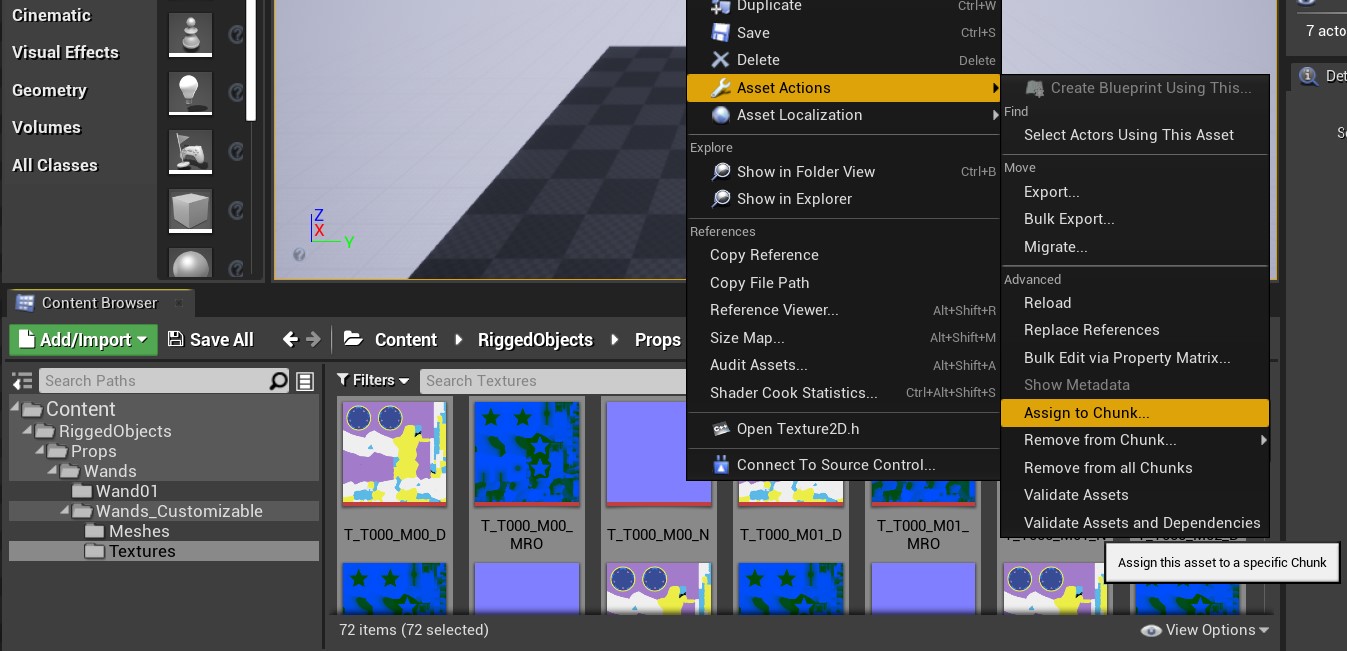
In order to "cook" our mod into a PAK file that is ready to be exported the new assets will be assigned to a custom "chunk". In very simply terms, this means they will be output to a PAK file using a specific number, rather than default PAK names that come with the game (e.g. pakchunk1-WindowsNoEditor.pak).
Select all the meshes and textures to be shipped with the mod. In the example mod, this in the contents of the Meshes and Textures folders. The material and skeleton files should not be assigned a chunk.

Right-click the with the assets selected and choose "Asset Actions" -> "Assign to Chunk...". When prompted to add the Chunk ID, enter 111.
(Hint: Use Shift + Click, Ctrl + Click, or Ctrl + A to select multiple assets).
Click "Save All" in the Content Browser to commit the Chunk assignments.
¶ Cooking the mod
At this point, the mod can be "cooked" by Unreal Engine to produce the PAK, UTOC and UCAS files required to install it to the game.
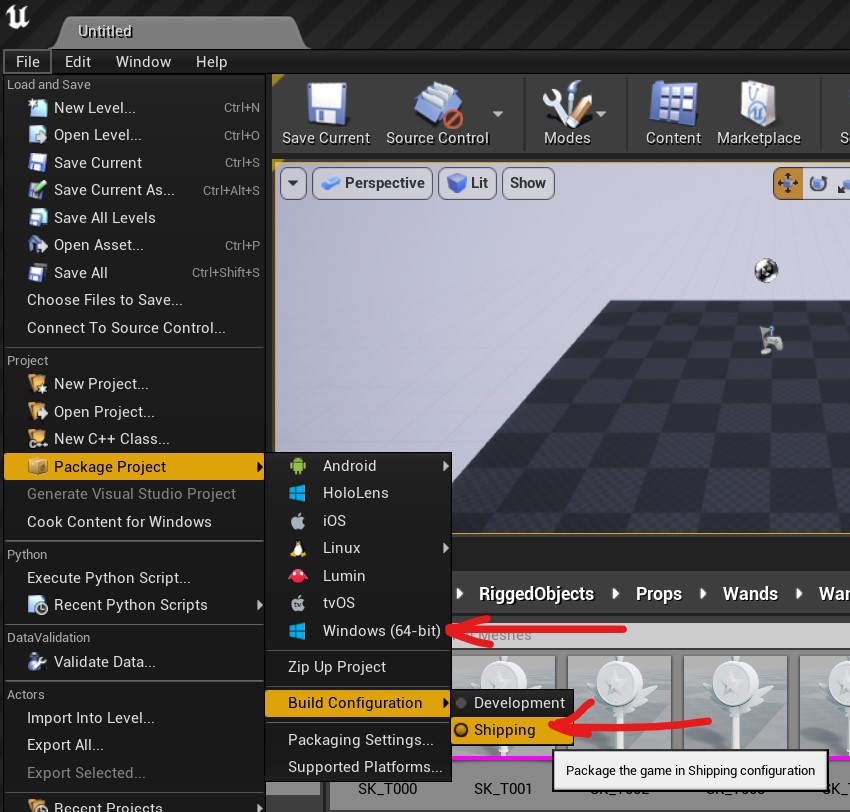
In Unreal Editor, select "File" -> "Package Project" -> "Build Configuration" -> "Shipping".

Then, select "File" -> "Package Project" -> "Windows (x64)" and select a folder in your working directory to begin the cooking process. This can take a few minutes to compelete depending on your PC specs.
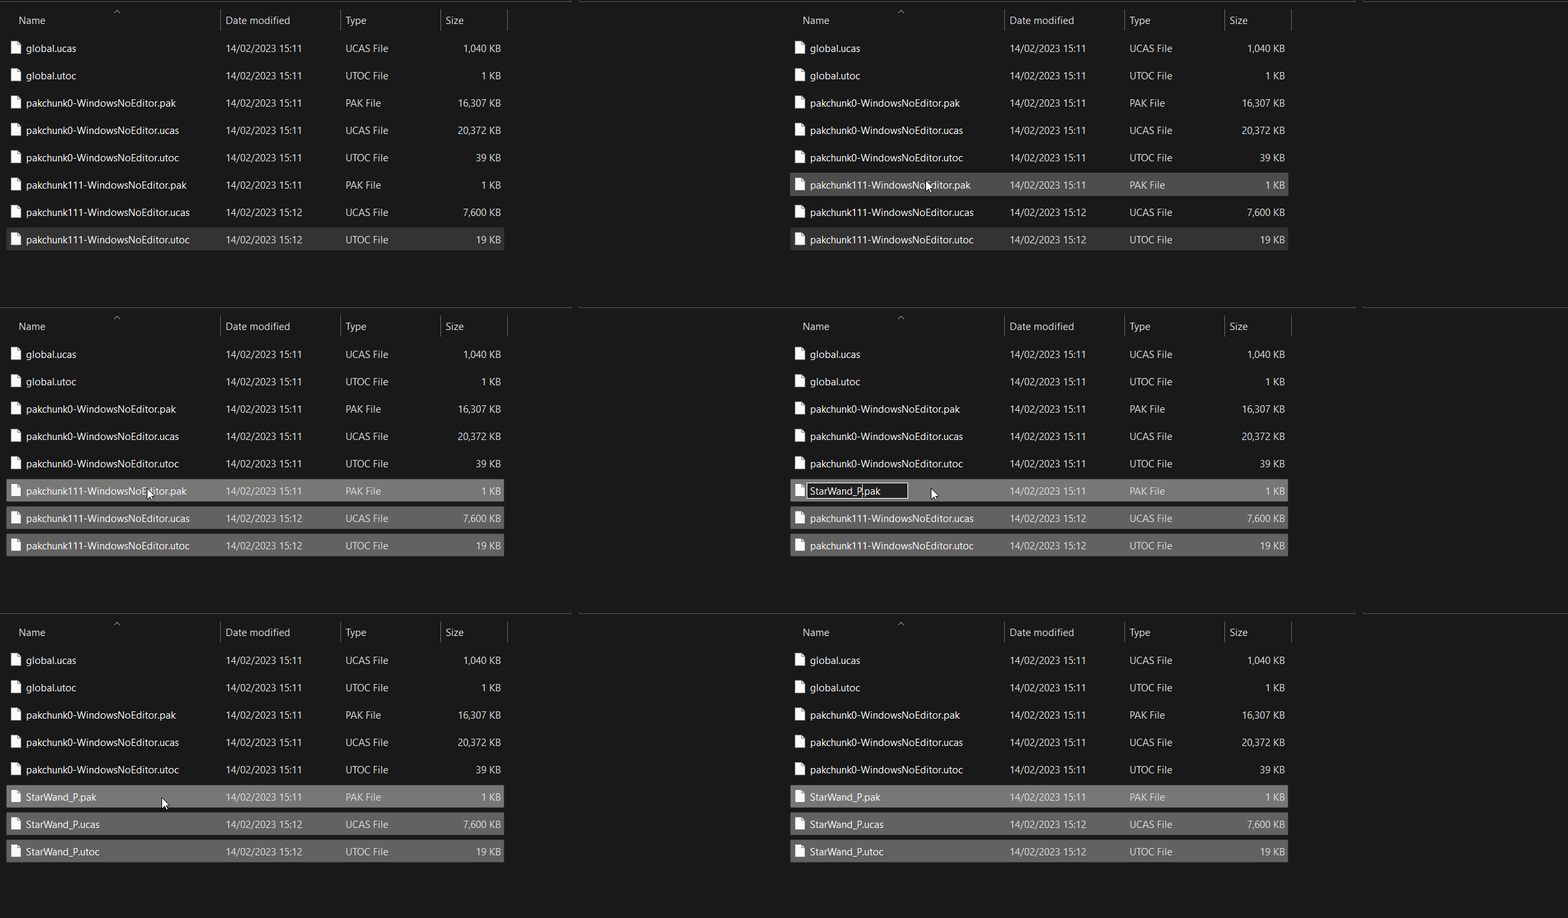
Once cooking is complete, the generated PAK files can be found under WindowsNoEditor\${NAME OF YOUR PROJECT}\Content\Paks. Notice that there are three files labelled pakchunk111-WindowsNoEditor in the folder, these files are used as part of the mod.
Select pakchunk111-WindowsNoEditor.pak, pakchunk111-WindowsNoEditor.ucas and pakchunk111-WindowsNoEditor.utoc and press F2 to renamed them. Give them a name that describes the mod and add _P to the end of the file (e.g. StarWand_P.pak). Pressing enter will rename all three files at once.

You're now ready to test the mod and share it with the world!
¶ Testing and sharing
To quickly test the new mod, copy the pak, ucas and utoc files into the mods folder located in the game installation folder at Hogwarts Legacy\Phoenix\Content\Paks\~mods. Creating the folder if it doesn't exist yet. Then simply start the game.
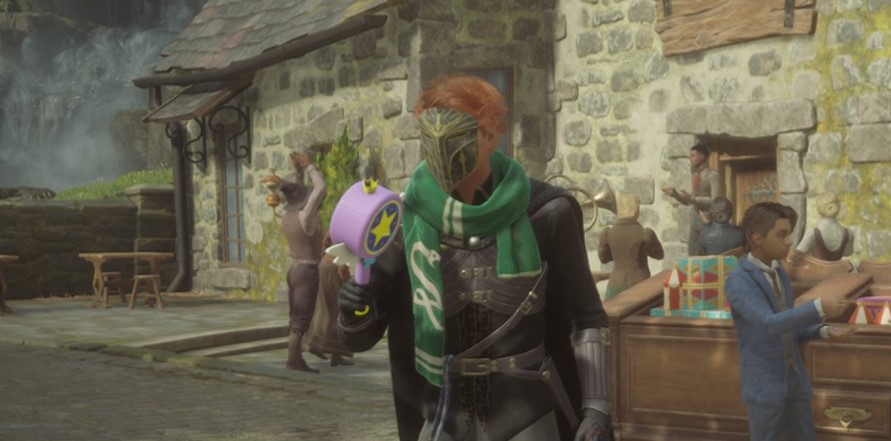
Start the game, load a save and equip a wand with no handle to see the result.

Now that the mods works, you can upload it to Nexus Mods here.