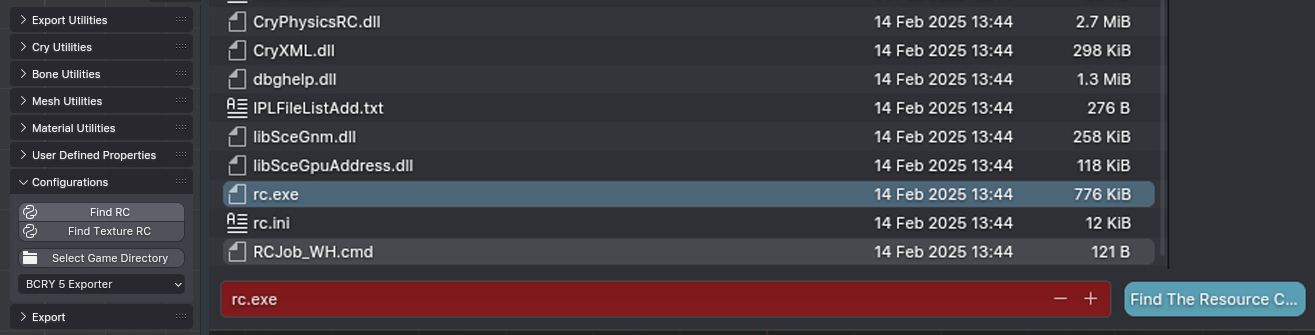
1. I think Some of the steps in this guide can be done differently, maybe even faster and better. But this is my personal guide.
2. In this guide I will not talk about the most trivial things that you can find in other guides. For example, about texture types or modeling basics. Therefore, this guide is most likely not suitable for absolute beginners.
1. .cgf & .skin files can only contain 1 mesh. You can't export your model without first merging all its elements into one mesh. 2. .cgf & .skin files can only contain 1 visible in game material. If you assign a second material to some vertexes - they will not be displayed in the game.
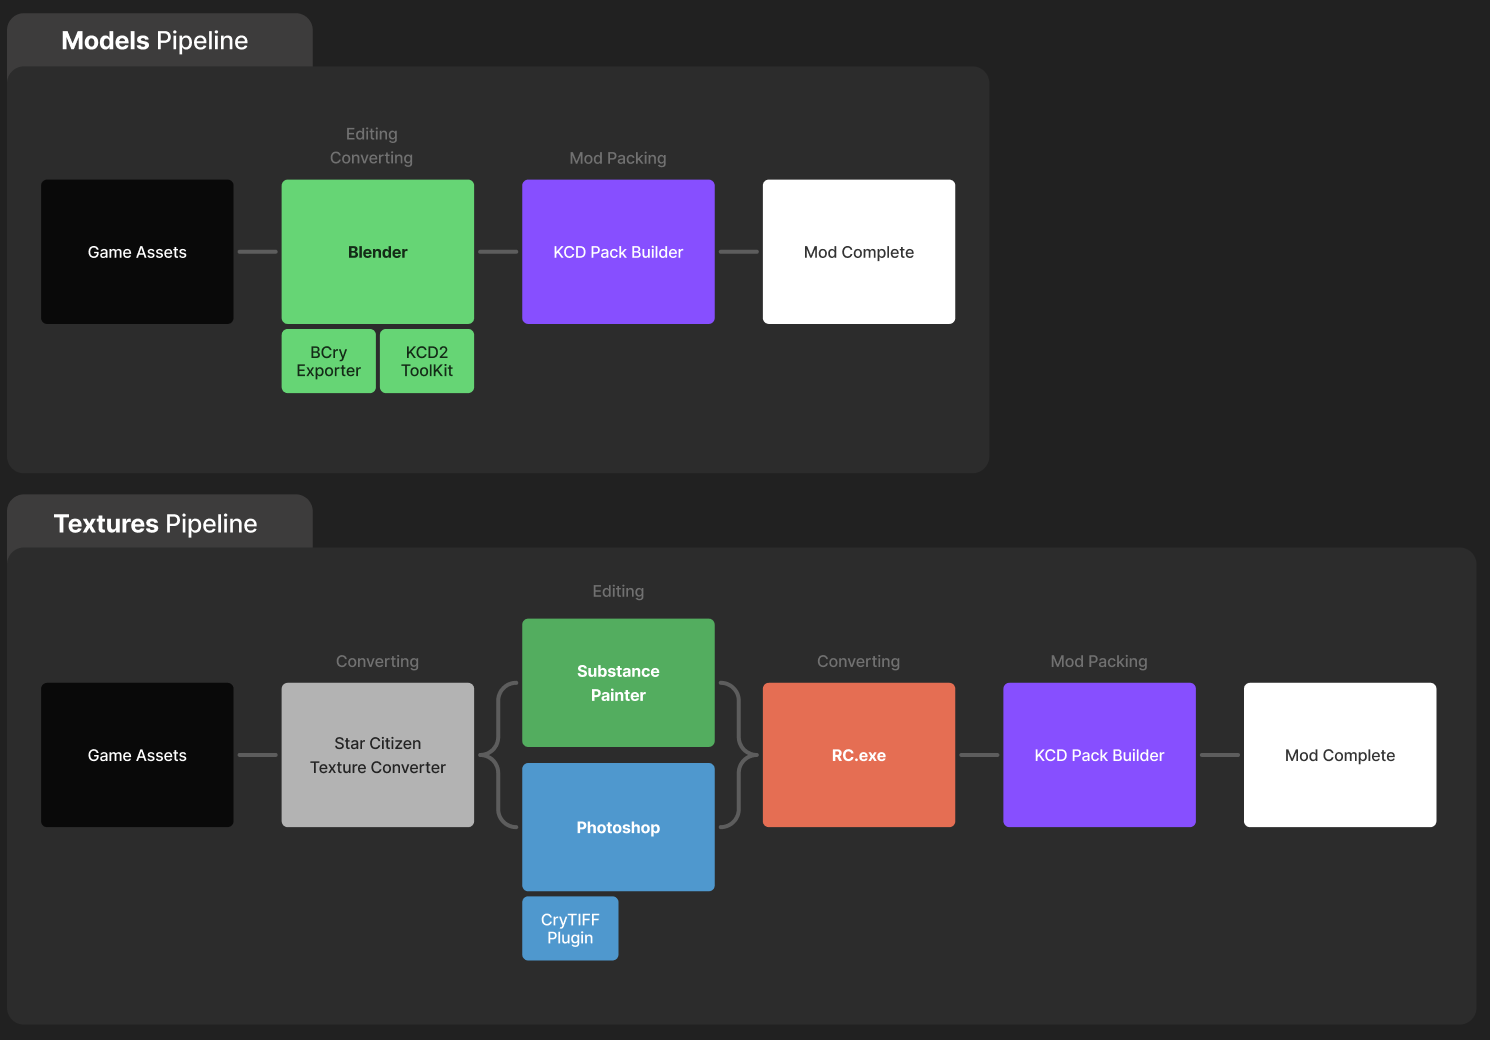
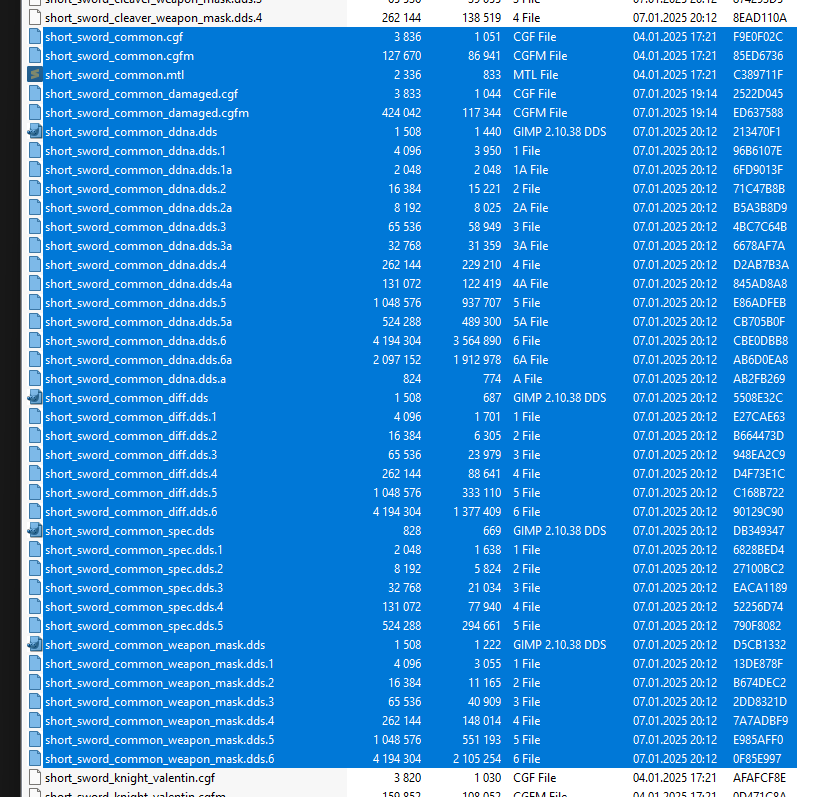
To create a mod as quickly and correctly as possible - we need to find an already existing item and use it as a basis for our mod. This will give us an example of a created developer model with all the necessary textures and other files. I'll take my short sword mod as an example.
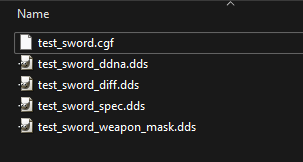
My Dragonborn Short Sword based it on short_sword_common. You can find it on this path:KingdomComeDeliverance2\Data\IPL_Objects-part4.pak\Objects\manmade\weapons\swords_short\
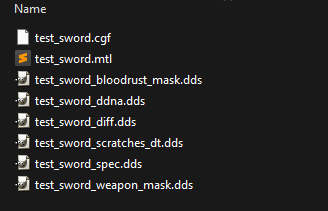
.cgf & .cgfm - 3d model .mtl - Material info .dds - Texture
Well. All these files can be exported to any convenient directory. Done. We have all the source materials to start working on our new weapon.
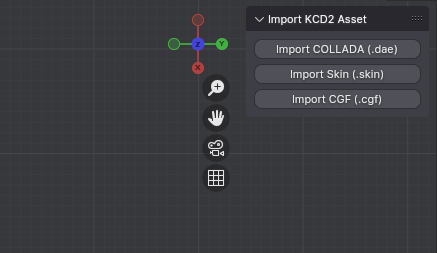
¶1. Importing a model with the KCD2 Toolkit addon for Blender (4.3+).
It is important that both .cgf and .cgfm files are in the same folder. They are linked.
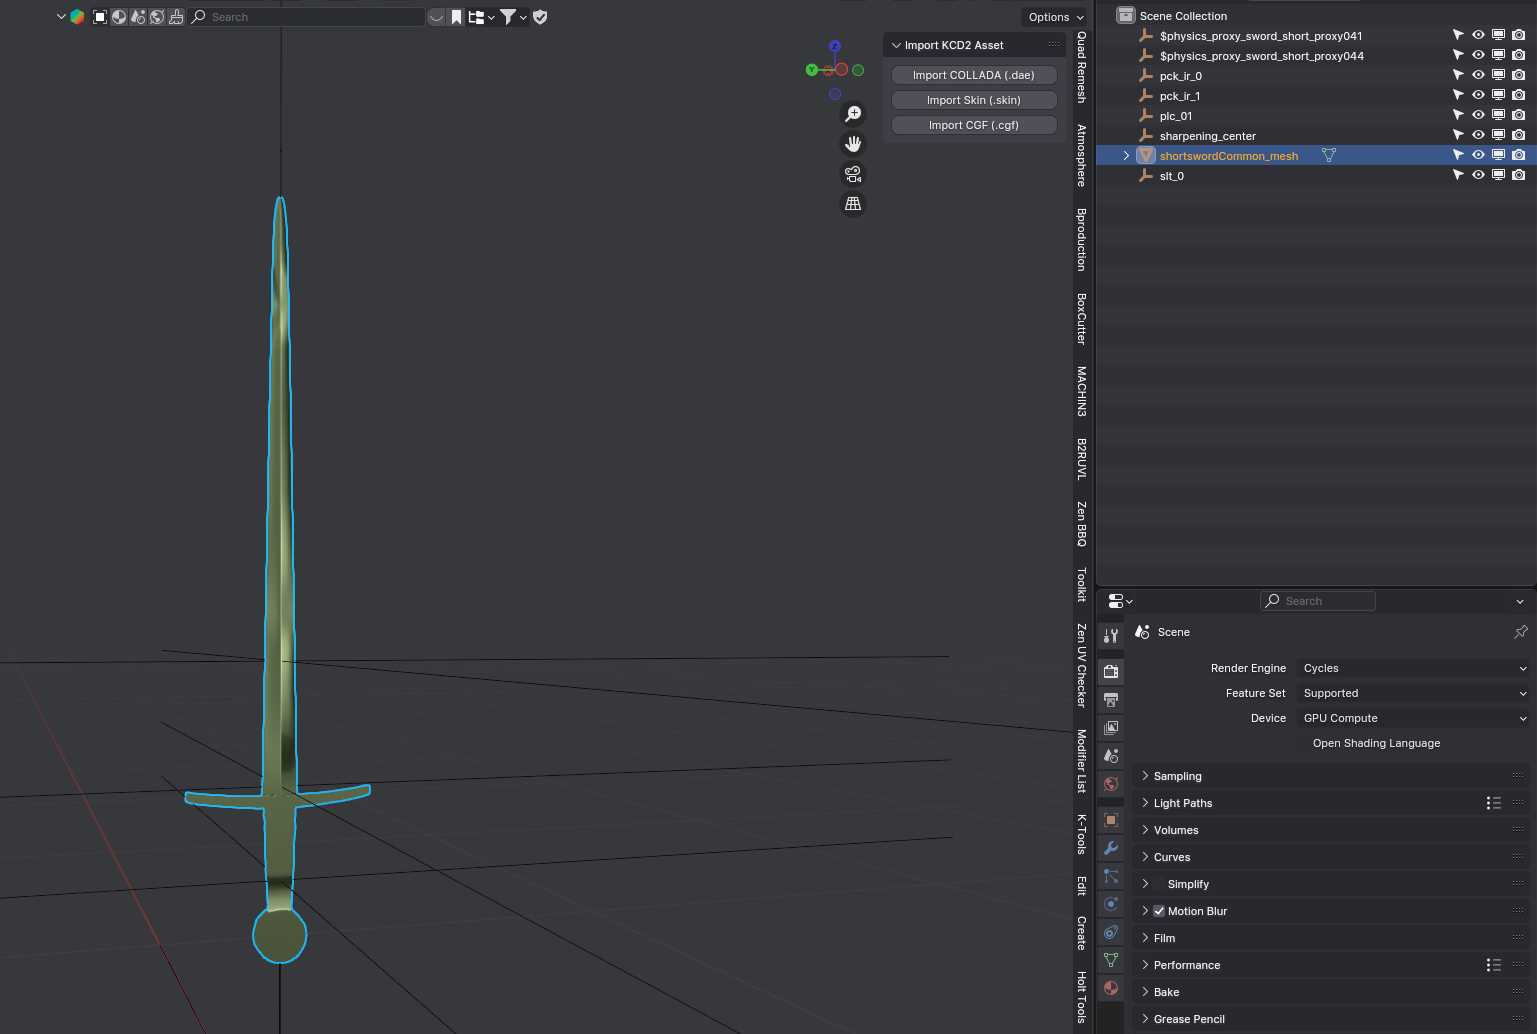
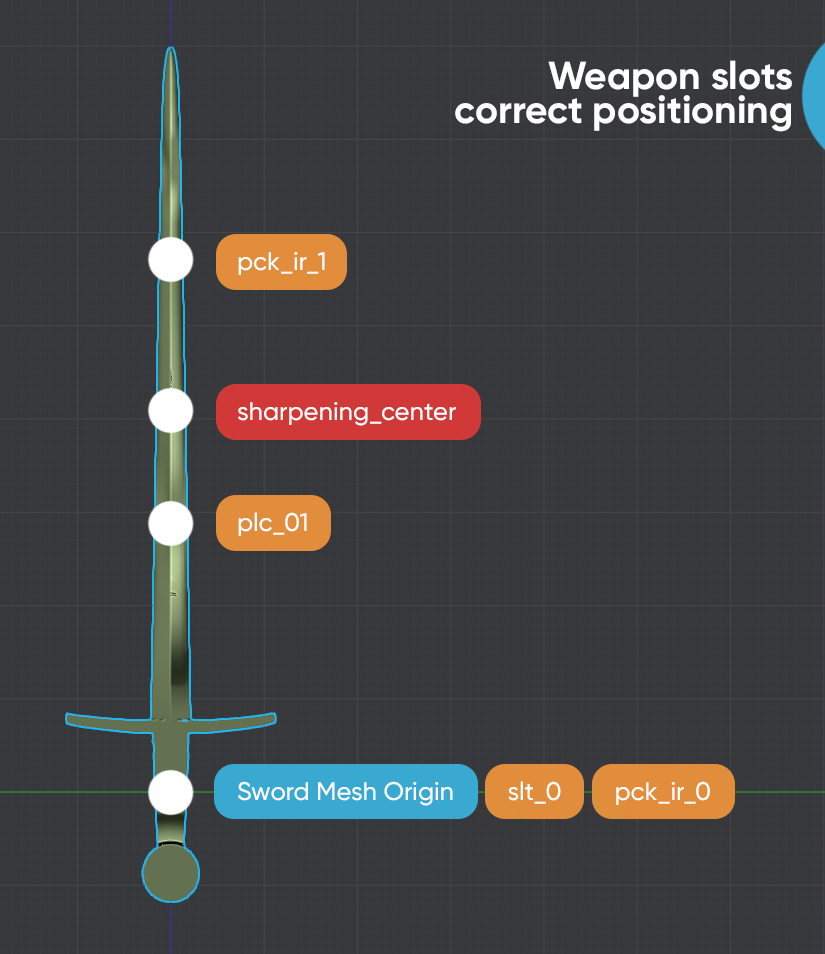
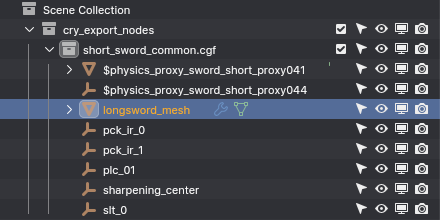
We see a mesh of our weapon and some game slots as Empty. But after importing, the arrangement of items breaks down. At least at the time of writing this tutorial. We need to fix the layout of all elements.
"slt_0" - is responsible for where the character picks up the weapon. And also for the location of the sword in the scabbard. “sharpening_center” - is responsible for sword location in weapons sharpening minigame. "pck_ir_0" and "pck_ir_1" - is responsible for location of the name of the item appears when you look at it.
"plc_01" - I think this slot is responsible for where the character will pick up the item when picking it up from the ground. Not sure
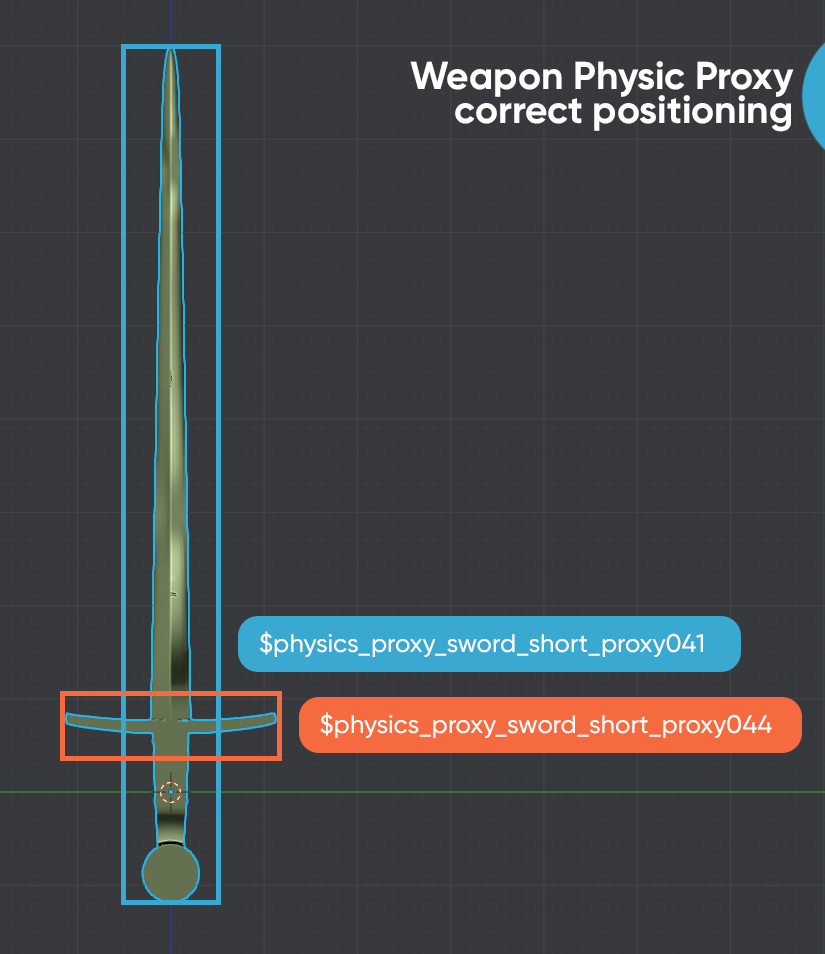
Physics proxies are responsible for 2 things: 1. Physics of the object as it falls to the ground. 2. Calculation of collision when hitting an enemy. If you make the collision too small, the hit will not do damage.
When we import our model in blender - the proxies turn into Empty. We need to fix that.
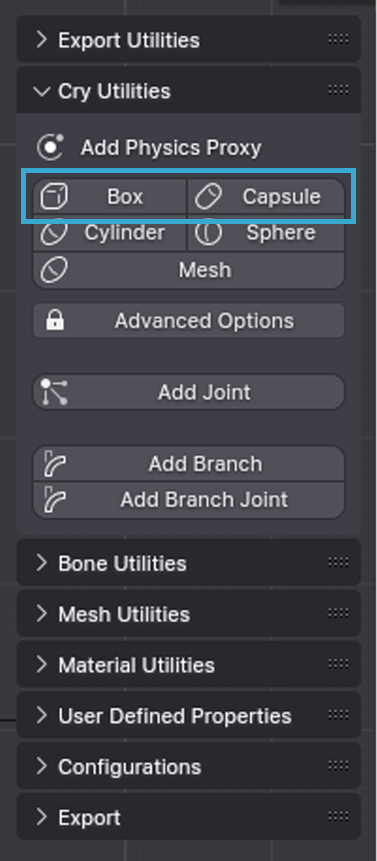
Just delete Empty Proxy and create new ones via BCRY Exporter Cry Utilites. (Included in KCD2 Tools) I'm not sure if the name of the proxies themselves affect anything, but I'm leaving them unchanged.
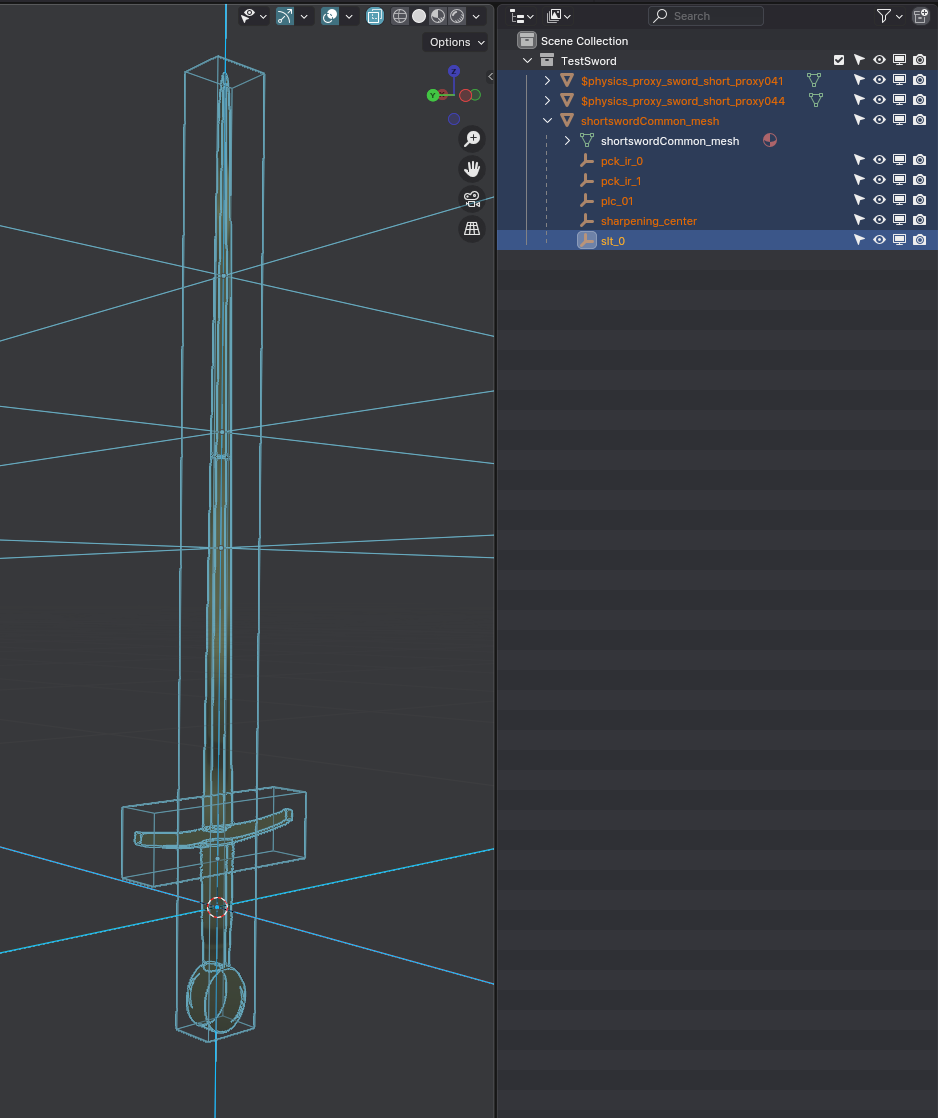
Final result
All set to replace the game model with our own. Just start modeling on top of the existing model and take into account the location of all slots. Yes, you can move them around, but be careful with the positioning of the character's grip.
There will only be a couple of tips here. I'm not an expert at building a good mesh grid, you may have noticed that in my models, hah. But I just try to make beautiful models.
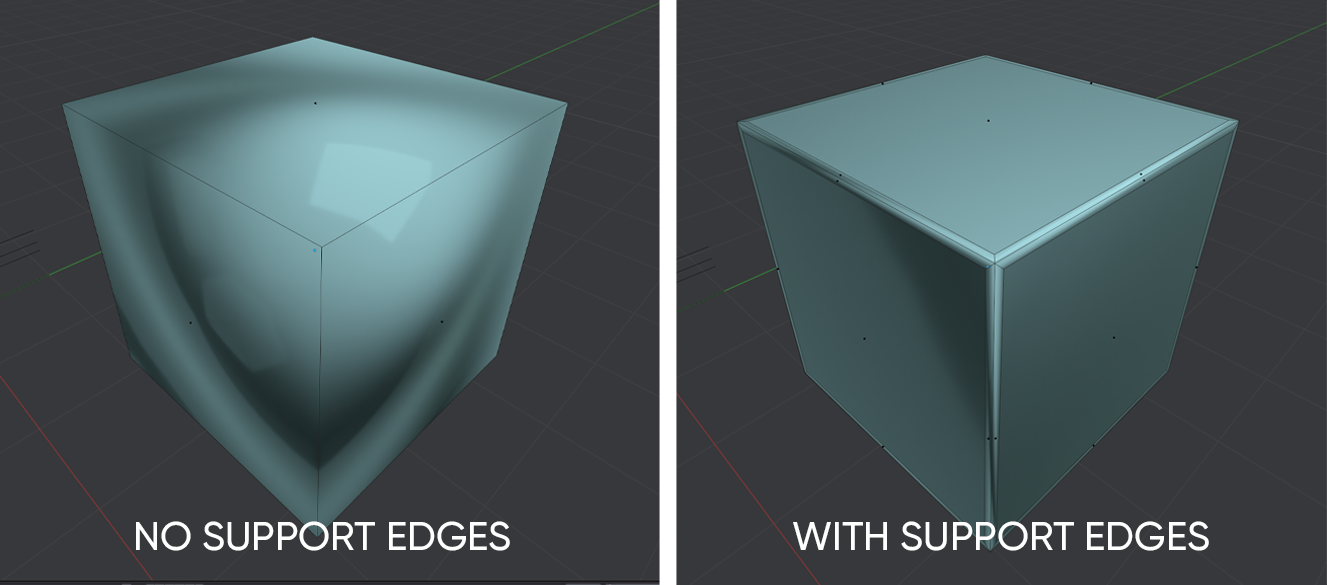
Tip #1 | How to avoid broken shading When exporting, information about sharp edges is lost. therefore, to avoid seeing artifacts in the game. I advise you to leave a lot of supporting edges, so that our shading does not break in the game.
Tip #2 | Just try to make a good model. Not perfect, just good.
Don't go overboard with the number of polygons. I think that a good sword will have at most 10-15k verts. You don't need more than that. Also try to make a good UV map. I advise the tool RisomUV. It has a convenient bridge between blender. And don't forget to triangulate the model after you have finished modeling.
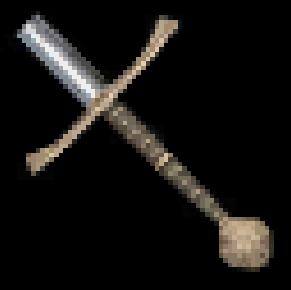
Ok. let's imagine you've created your own model. As you can see I have not cleaned the mesh at all. And in principle for a first-person game we can use weapons with such a large number of polygons. But you can do better. I believe in you :)
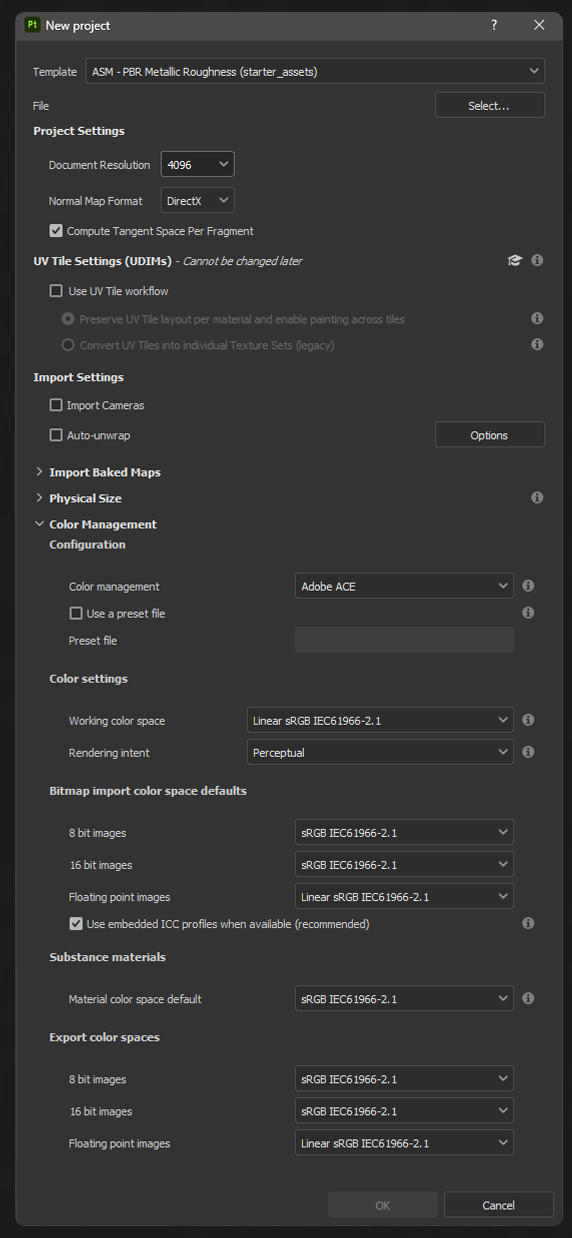
Once you have created your model and created a UV map for it, it's time for texturing. I'm going to talk about Substance Painter. This is where I'll be looking at creating new textures. This is important because the approach will be fundamentally different when editing game textures.
The game uses Specular PBR, but we will create the texture in Metallic PBR and convert when exporting. This is done because Substance Painter does not work well with Specular Workflow and has many bugs. And all the materials found on the Internet are based on Metallic Workflow. It's just more convenient.
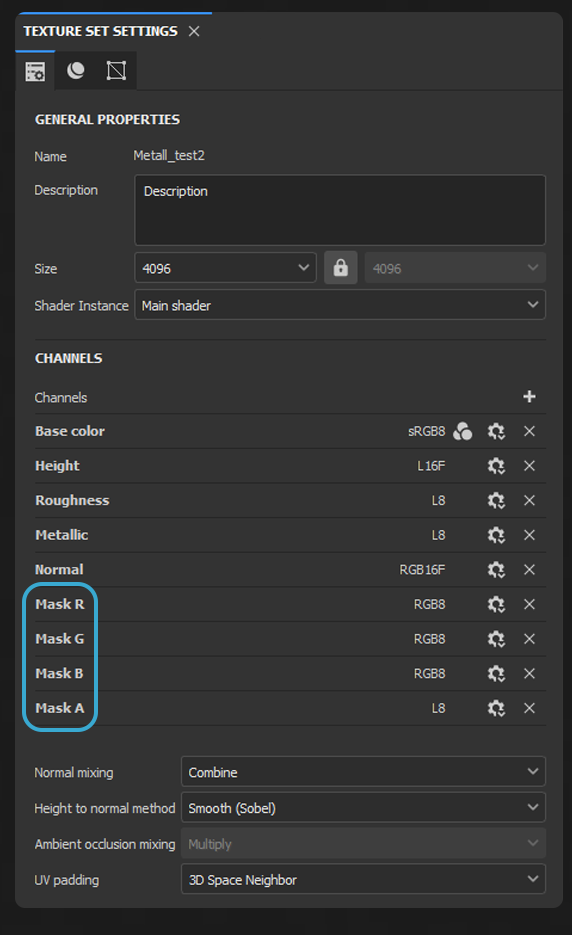
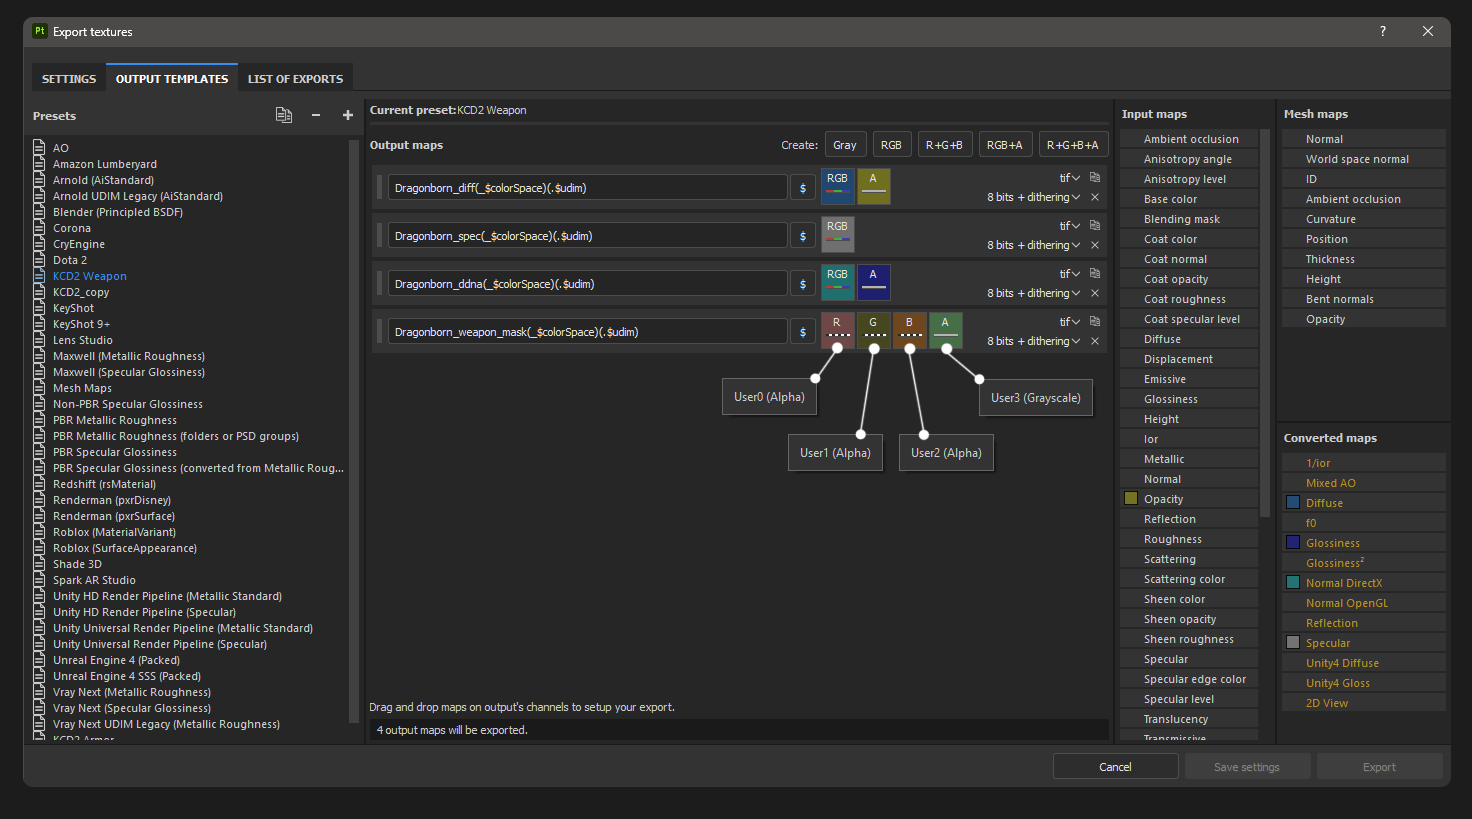
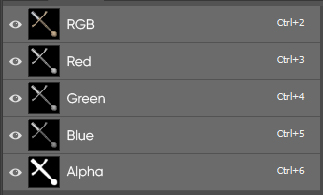
Given this data we need to create 4 custom channels (User0, User1, User2, User3). Then rename them as shown in the image below.
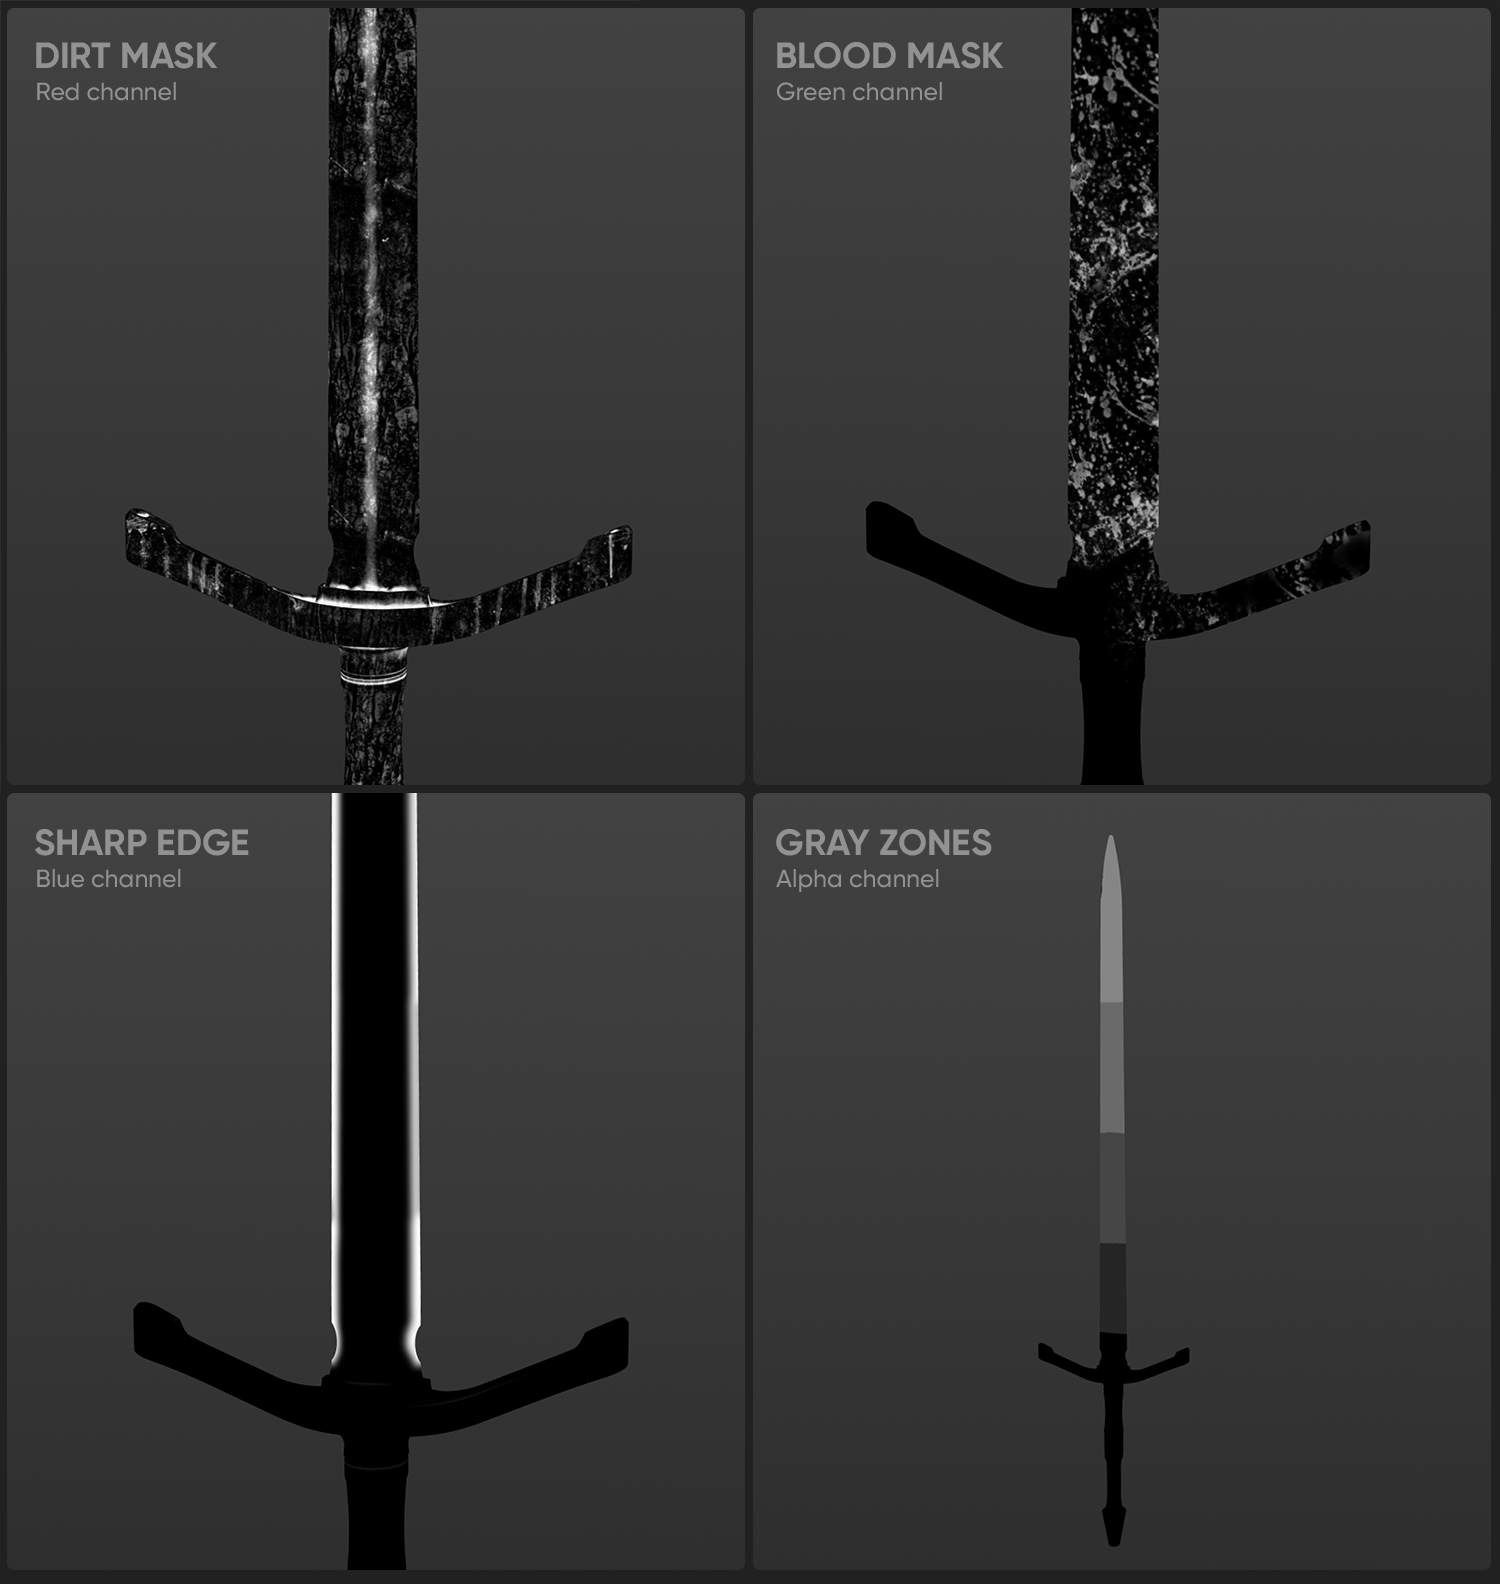
Each of these channels as you have already realized is responsible for a different mask. And when exporting each of them will be written to its own color channel:
Red - Dirt Green - Blood Blue - Sharp edge(?) Alpha - Gray zones(?)
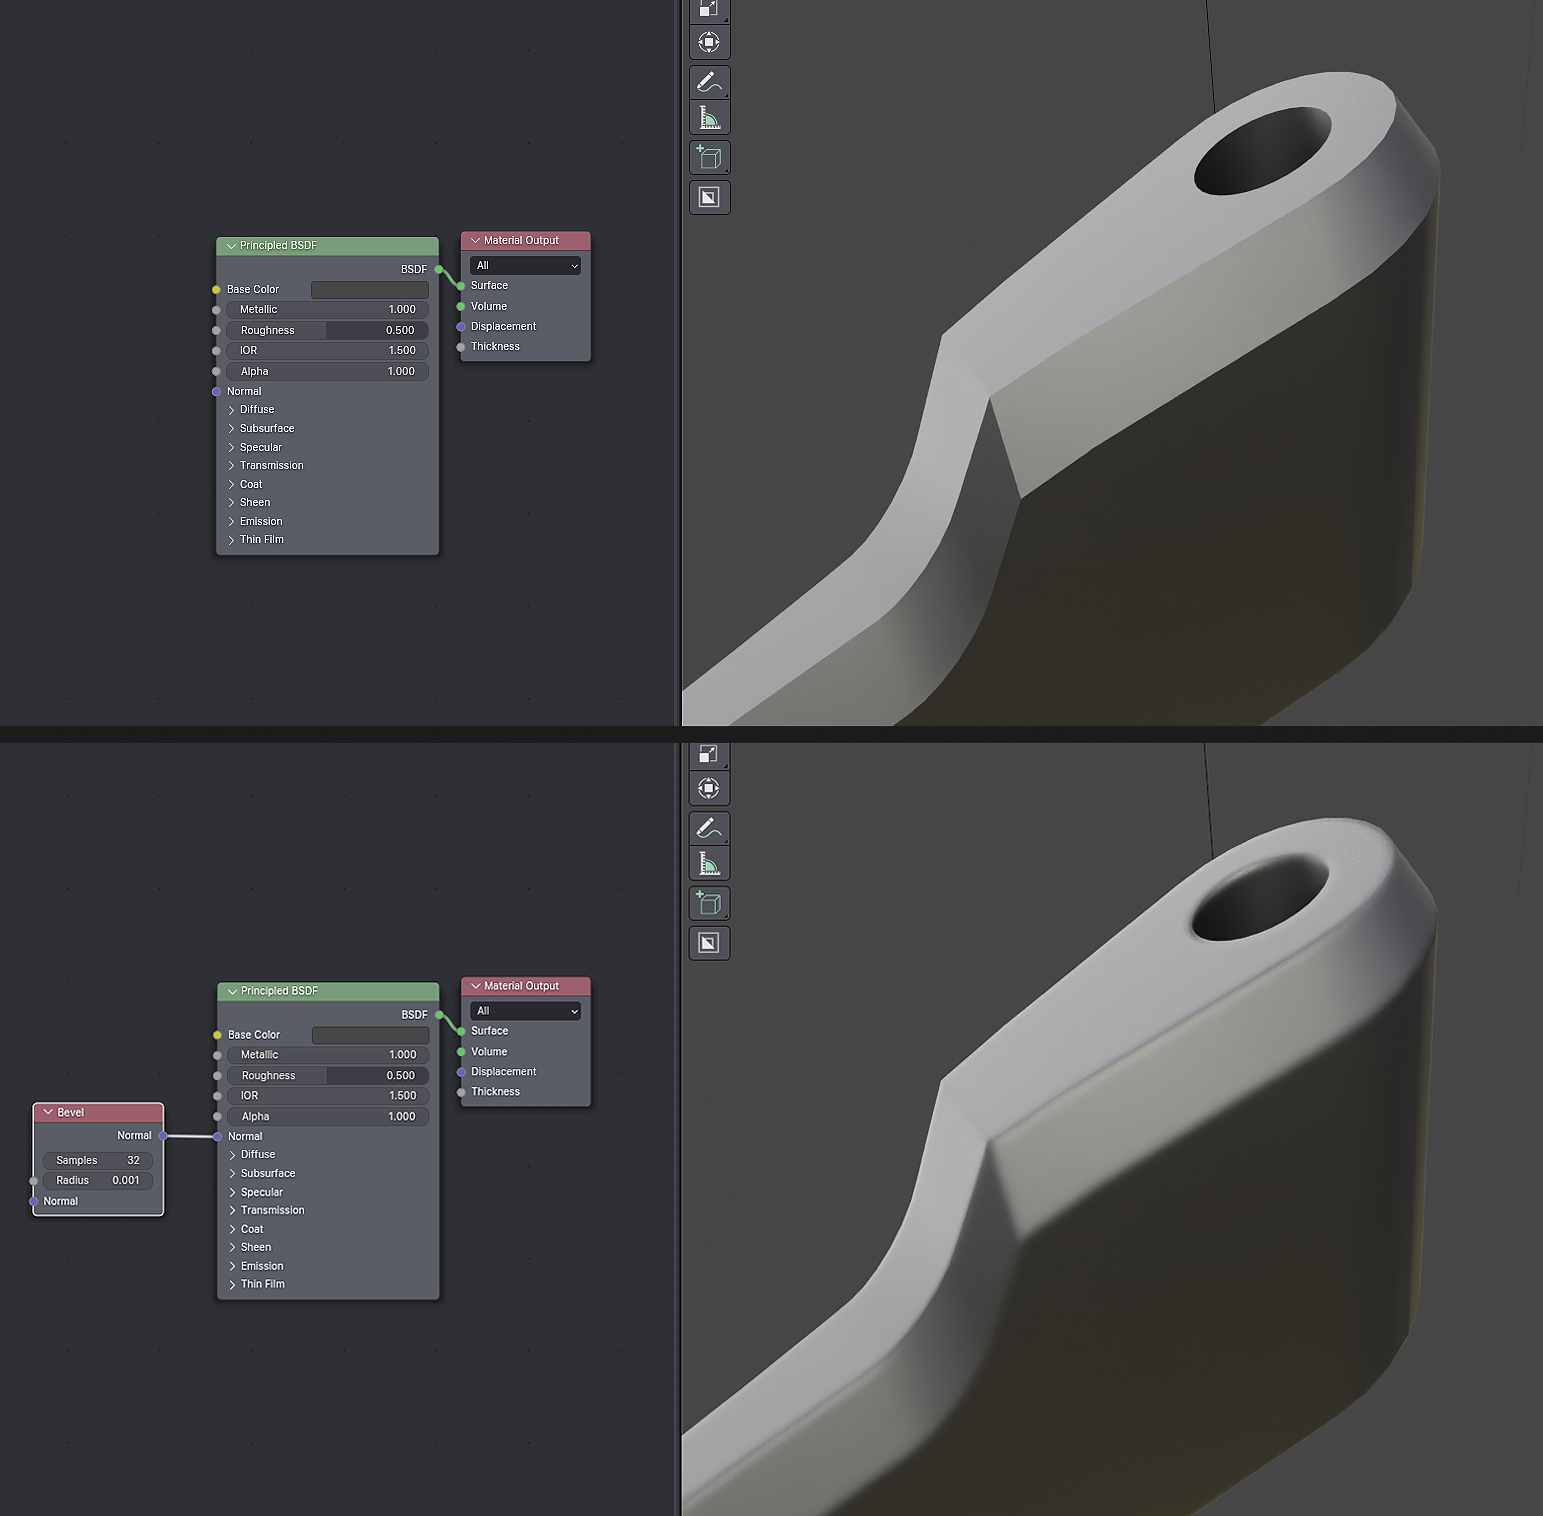
Tip #3 | Use Blender Bevel Node If you don't want to worry too much about creating a highly polygonal model and normal map, but you want to get good chamfers on the edges of the model you can use this lifehack.
The option is not perfect, but it is very fast! After that, just bake the normal map in Blender and import it into Substance Painter. You can find how to bake textures in blender on Youtube.
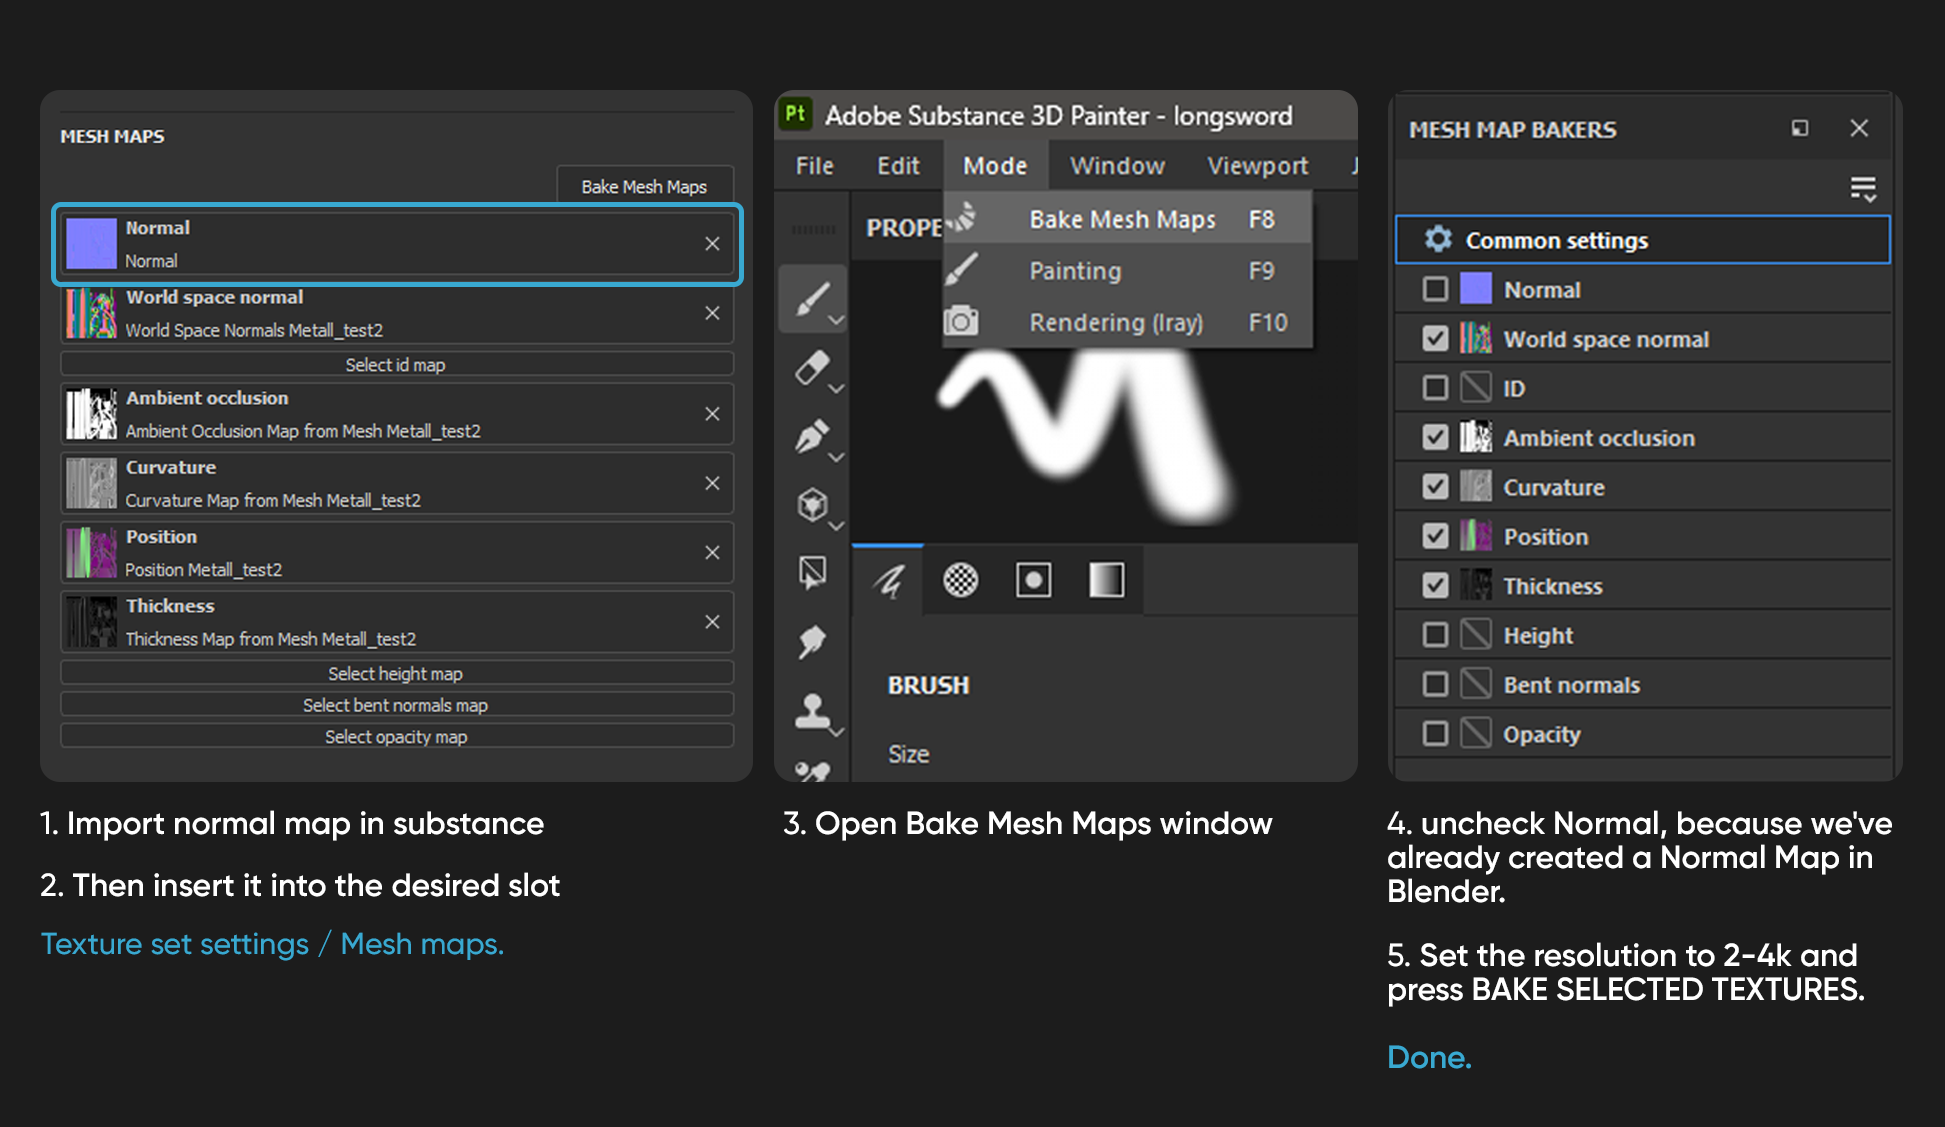
¶3. How to use our Blender Normal texture in Substance ?
After that, you can start creating your textures. The main thing to keep in mind is that you must have one set of textures for export.
For convenience, you can divide the parts of your sword into separate meshes for texturing. In newer versions of Substance you can put a mask on a separate mesh.
I'm not sure what the last 2 maps are even for, but I made them as in the original sword. How to export this mask into a single texture will be shown below.
Well, I have nothing more to say here. Texturing is very complicated and there could be a million more tips, but this guide doesn't need it.
Once you have created your textures you need to export them properly. I'll tell you right away - you will often redo it, because what you see in Substance is not always what you will see in the game. You will have to spend a lot of time trying to figure out what Roughness and Base Color values you can use for your textures. But sooner or later, you'll figure it out.
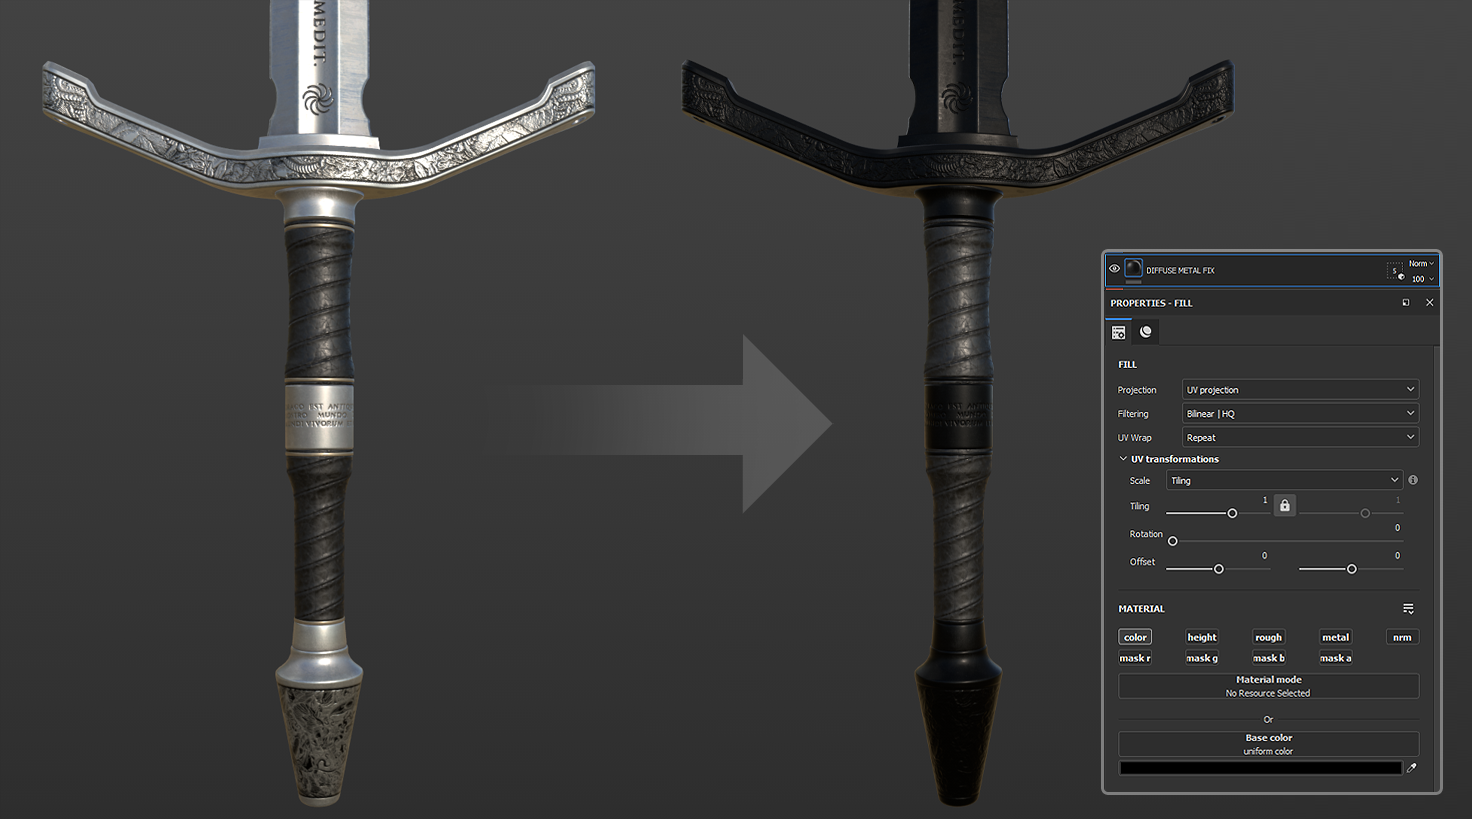
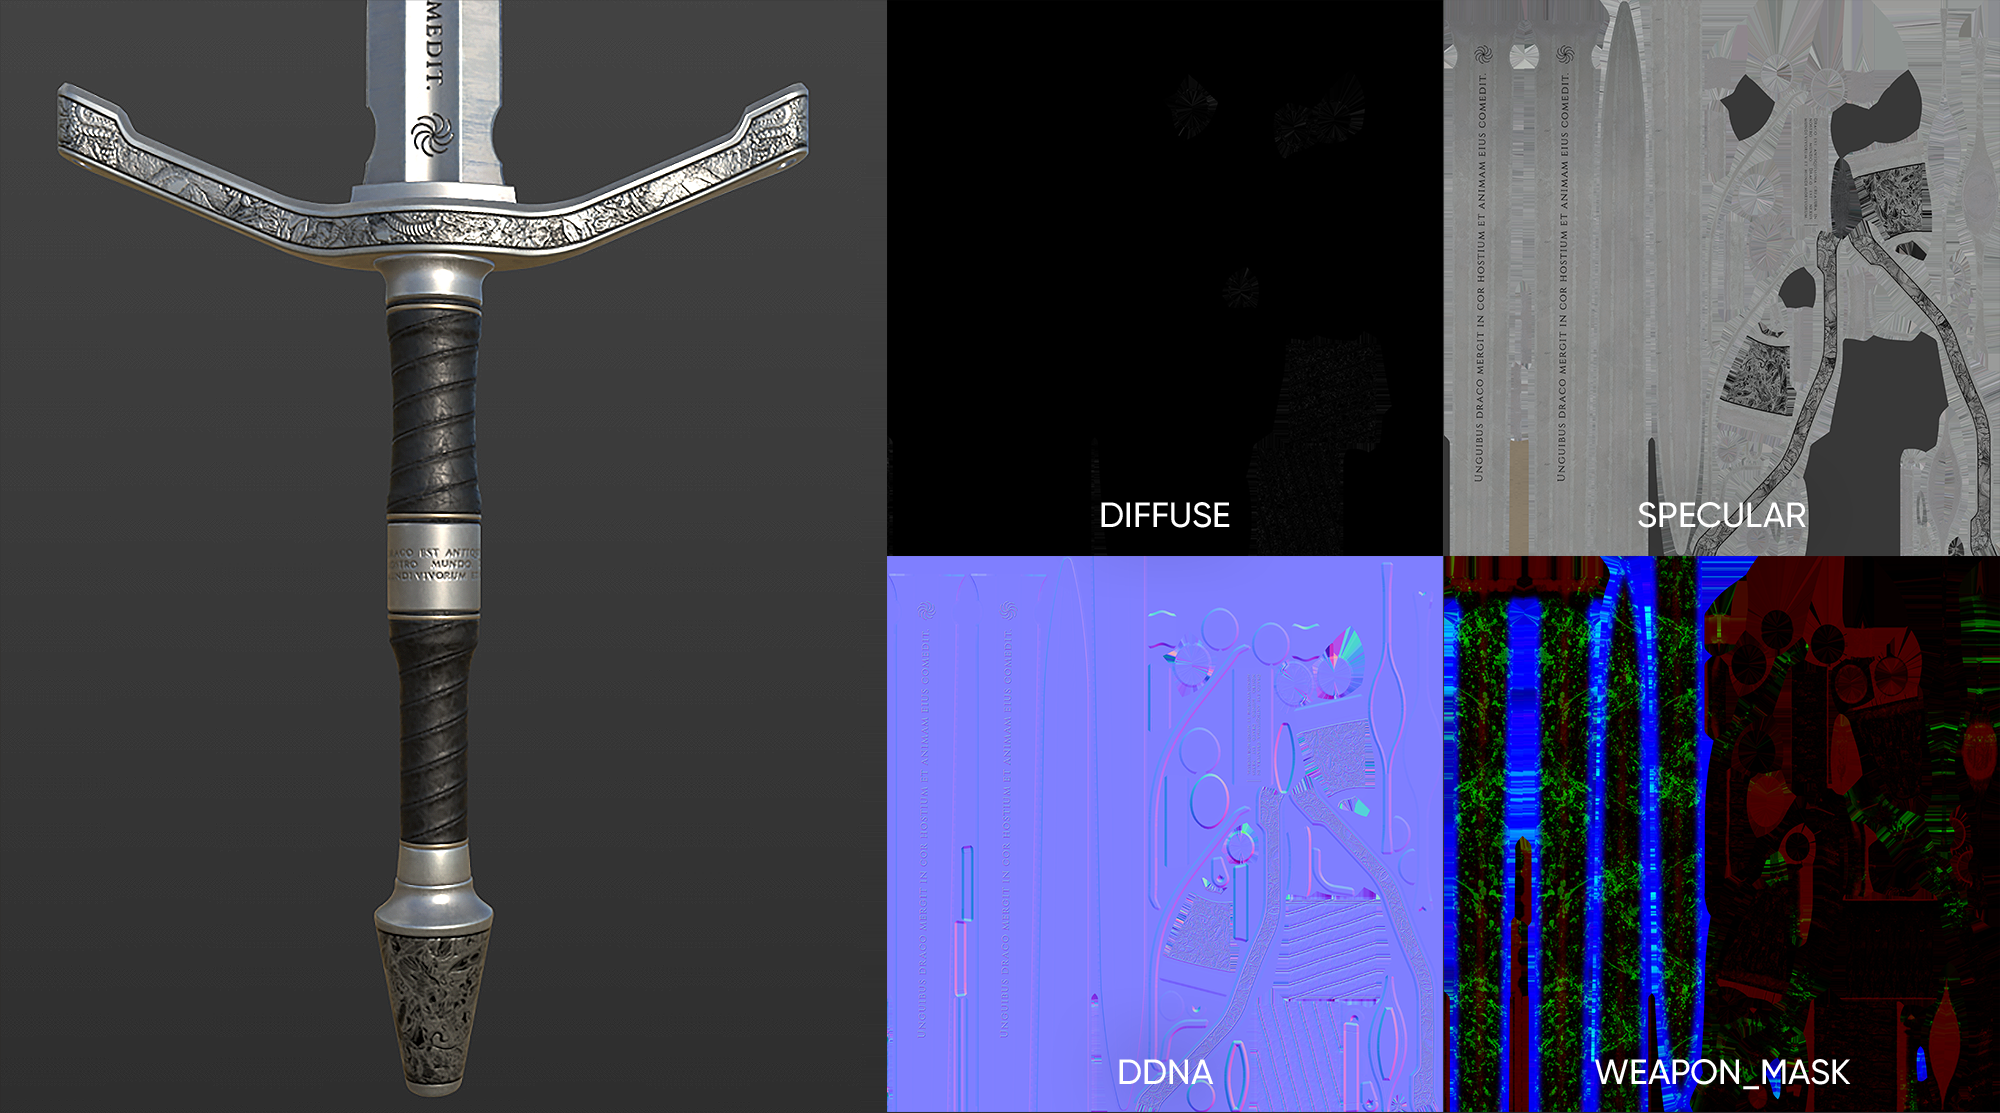
Specular, DDNA and Mask Maps you can export as usual. But in order to export Diffuse map of a metallic object correctly you need all metal elements to be black on the Diffuse Map. This is very important.
Simply create a fill layer using the Diffuse channel and select all the metal objects. Then export the Diffuse Map. This layer is not needed when exporting other textures! Only Diffuse!
This is where you'll need some knowledge of using KCD Pak Builder and mod packaging. I won't stay here for long. Just download my mod and see how it's organized in terms of folders.
1. Сreate new mod folder. As example - KingdomComeDeliverance2 \ Mods \ test_sword_mod The mod folder name can only use lowercase letters and underscores. No numbers and uppercase.
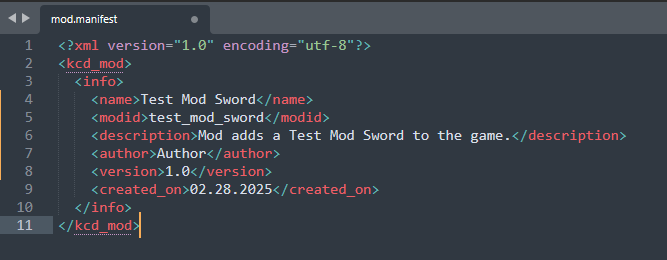
2. Copy Mod Manifest from any mod on the Nexus. It is very important for the tables. Fill it out given the information about your mod. The main thing is that the modid must be the same as the name of the mod folder.
The <modid> will be used later as the suffix for Patched Table Files (PTFs), like item__modid.xml
1. Create path in mod folder: test_sword_mod \ Data \ Libs \ UI \ Textures \ icons \ items
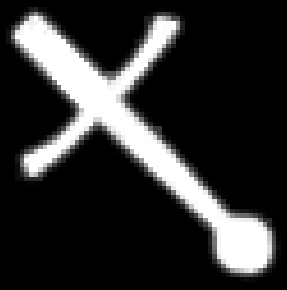
2. Create custom icon:
Icon name: itemname + _icon = test_sword_icon.tif
Icon textures must use the _icon suffix, but this will not be included in the Item definition IconId, for example: IconId="test_sword"
Maximum size: 64x64
RGB:
Alpha:
Channels in Photoshop: RGB + A
3. After you have finished working with the icon and saved icon.tif it in the desired directory - convert .tif to .dds. How to do it - Another my guide
Icons must use BC7 compression format if exporting directly to DDS.
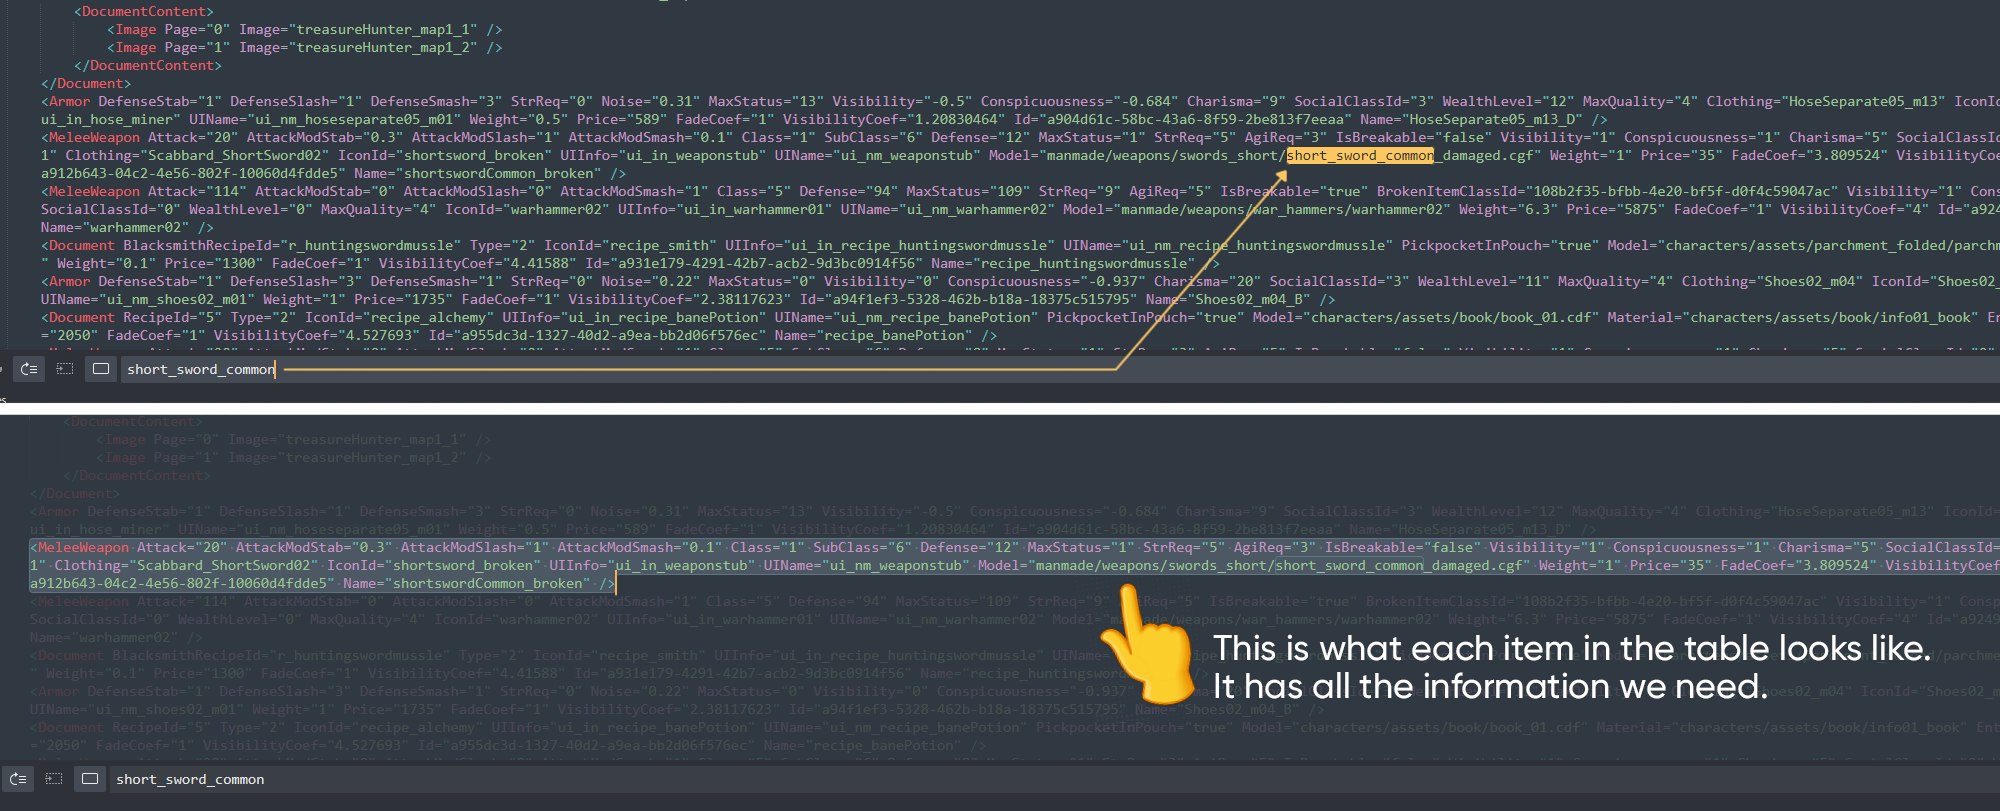
Find the table at the path and open it: SteamLibrary\steamapps\common\KingdomComeDeliverance2\Data\Libs\Tables\item\item.xml
Then we can press Ctrl + F and find, for example, items that use the model we took as a reference.
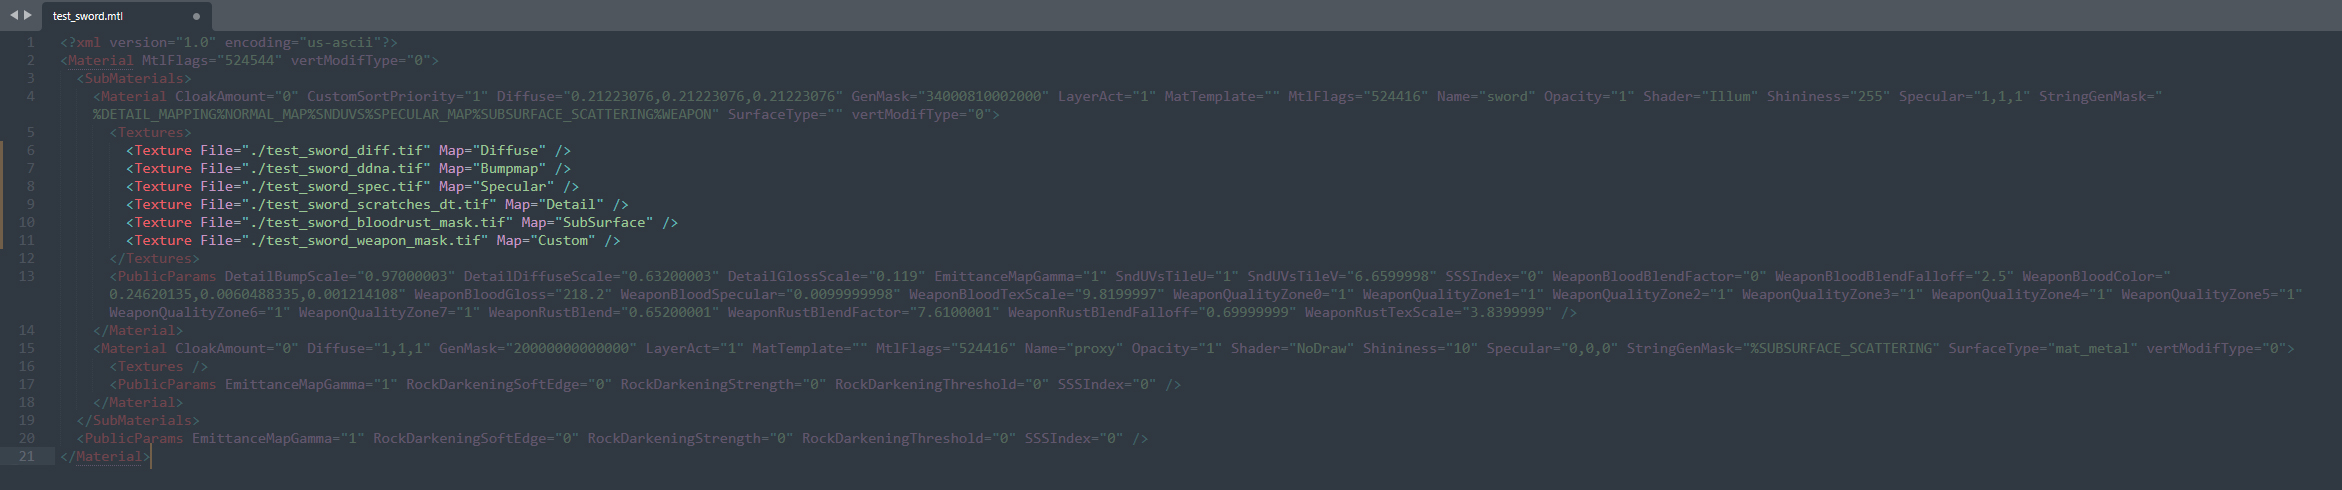
Just explore it. I can't tell you everything. I am still studying all these tables myself. But as you can see, here is a link to the 3d model, to the material .mtl file, the name of the item, its characteristics, etc.
Now we need to create a patch for this table. After all, we don't need to replace it for create our custom item.
1. Create path in mod folder: test_sword_mod \ Data \ Libs \ Tables \ item
2. Create “item__test_sword_mod.xml” The name of the patch is generated like this: item + __modid .xml There must be two underscores between the table name and the modid suffix!
3. Open it. For the short sword, you insert lines like this:
4. Complete item__test_sword_mod.xml based on your preferences. That's something you have to figure out for yourself. But I'll give you a little help:
“Attack” - Amount of damage
“AttackModStab” - Stab multiplier
“AttackModSlash” - Slash multiplier
“AttackModSmash” - Smash multiplier
“Class” - Weapon class (1- shortsword, 4 - longsword )
“MaxStatus” - Max object durability
"Сlothing" - In this line you need to insert the name of the desired belt. Here I will not tell you how to create a custom belt. If you are interested, I suggest you download my mods and see how it works there. You can figure out how character_component.xml works and you can create a patch for it in the same way as we did for item.xml. You can find all scabbard in character_component. Just search “scabbard”. For the short sword test, type in ”Scabbard_ShortSword01"
"IconId" - Name of your icon. The name of the icon file has the suffix “_icon” at the end. But in the file you need to specify the name without the suffix.
“UiInfo” - Name of your localization
“UiName” - Name of your localization (We'll create it below)
"Model" - Path to your model .cgf file.
“Material” - Path to your .mtl file.
“Id” - The item id must necessarily be unique for each item. Link to generator
“Name” - Unique name of the item. This name will be used when adding the item to merchants.
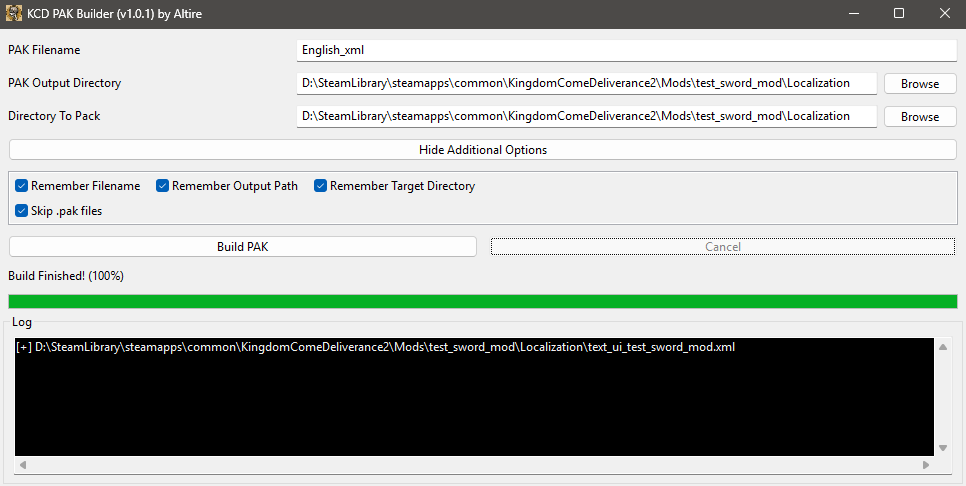
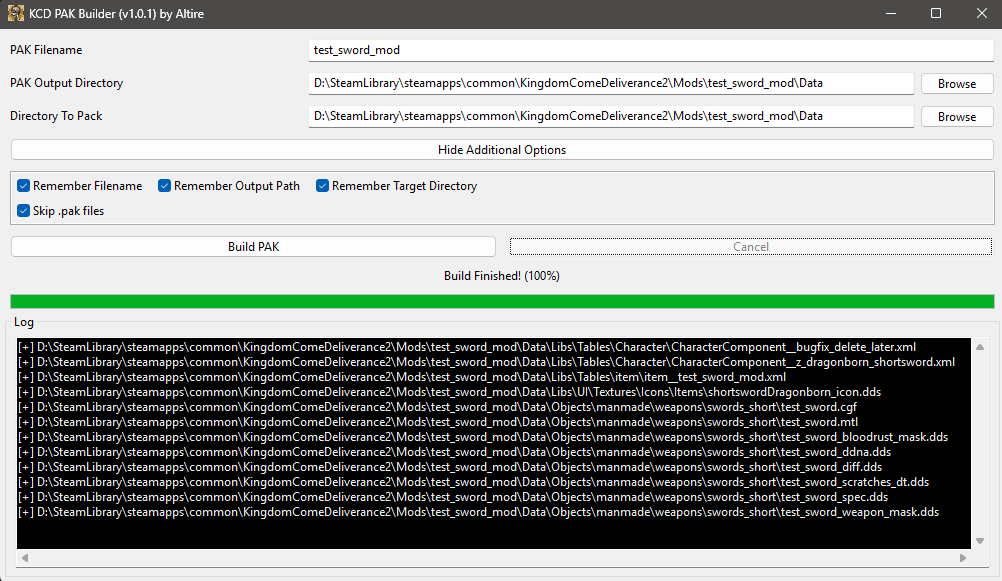
To do this, we will need the KCD Pak Builder. Link above
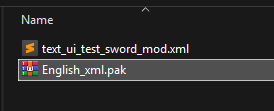
1. Packing localization:
We package our file text_ui_test_sword_mod.xml into a pak file called English_xml.
After packing, the file text_ui_test_sword_mod.xml can be deleted. We only need the pak file. By the same principle you can create localization to other languages. In the localization file, you should enter the translation on the right side, and leave the text in English on the left side.
1. Packing mod:
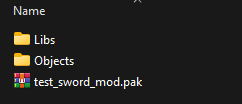
We package Libs & Objects into a pak file called test_sword_mod.pak
After packing, the folders Libs & Objects can be deleted. We only need the pak file.
We created our own model, textures. After that, we converted them. We created our custom item and packaged the mod. By the same principle you can learn to work with armor, but there you basically need to work with cnaracter_component, which I did not tell you about here.
I also advise you to download mods from Nexus and study them. So you can understand how to do the same. Good luck!