¶ Packaging your mod
There are a few prerequisites you'll have to check before you can successfully package your mod for testing and distribution. This applies only to mods that you build with Unreal Engine, and other modding methods will have other packaging and distribution methods.
This tutorial assumes you're using Sprite's custom uproject. The principles are the same with basic uprojects, though make sure you've at least set up your basic project's settings correctly.
The example resources shown in this tutorial are a continuation of the texture swap tutorial.
¶ Tl;dr summary
- Make a collection
- Make a PrimaryAssetLabel PAL
- Assign all settings in PAL to point to collection and specify your pakchunk
- Move all assets into collection, including PAL
- File > Package Project > Windows (x64)
- Rename your cooked packages
- Test in game
- Zip and publish. Or don't!
¶ Tutorial
¶ Create a Collection
You've created a mod and are ready to package it all up, test it, and then perhaps even publish it! Great. Here's how to make sure the game engine can read it and you don't accidentally step on someone else's toes by setting up a non-conflicting pakchunk.
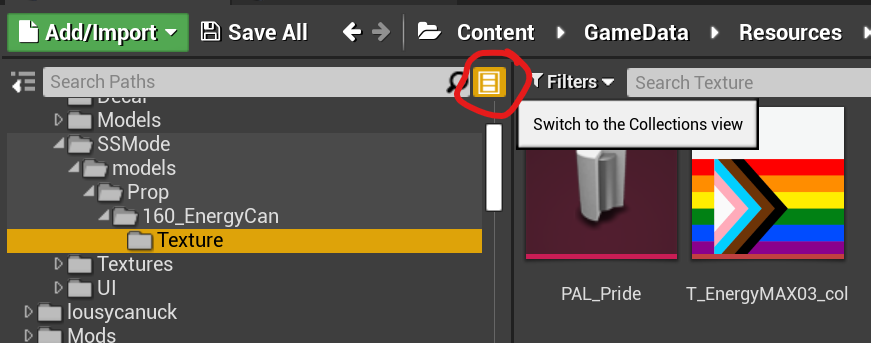
In your Content Browser, this button toggles between folder view and collection view:
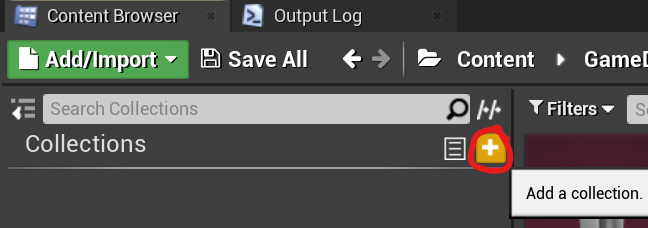
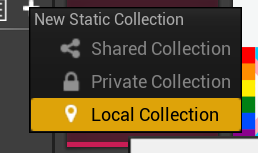
Here, you can create a new collection by clicking the Plus button, then choosing Local Collection:
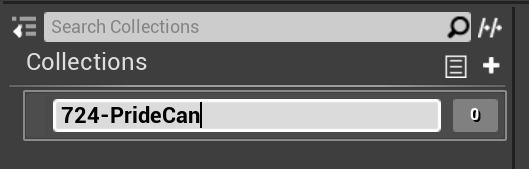
I have been working in the 700's for my pakchunks, so I choose one I know is unused at least amongst my own mods, and name the collection 724-PrideCan, so I can identify quickly which collection belongs to which pakchunk. This is especially handy if you are working on multiple mods at once.
¶ Create a PrimaryAssetLabel
A PrimaryAssetLabel (PAL) is an asset that identifies cooking rules for all the assets within a collection.
Right-click in the content view, choose Miscellaneous, then Data Asset.
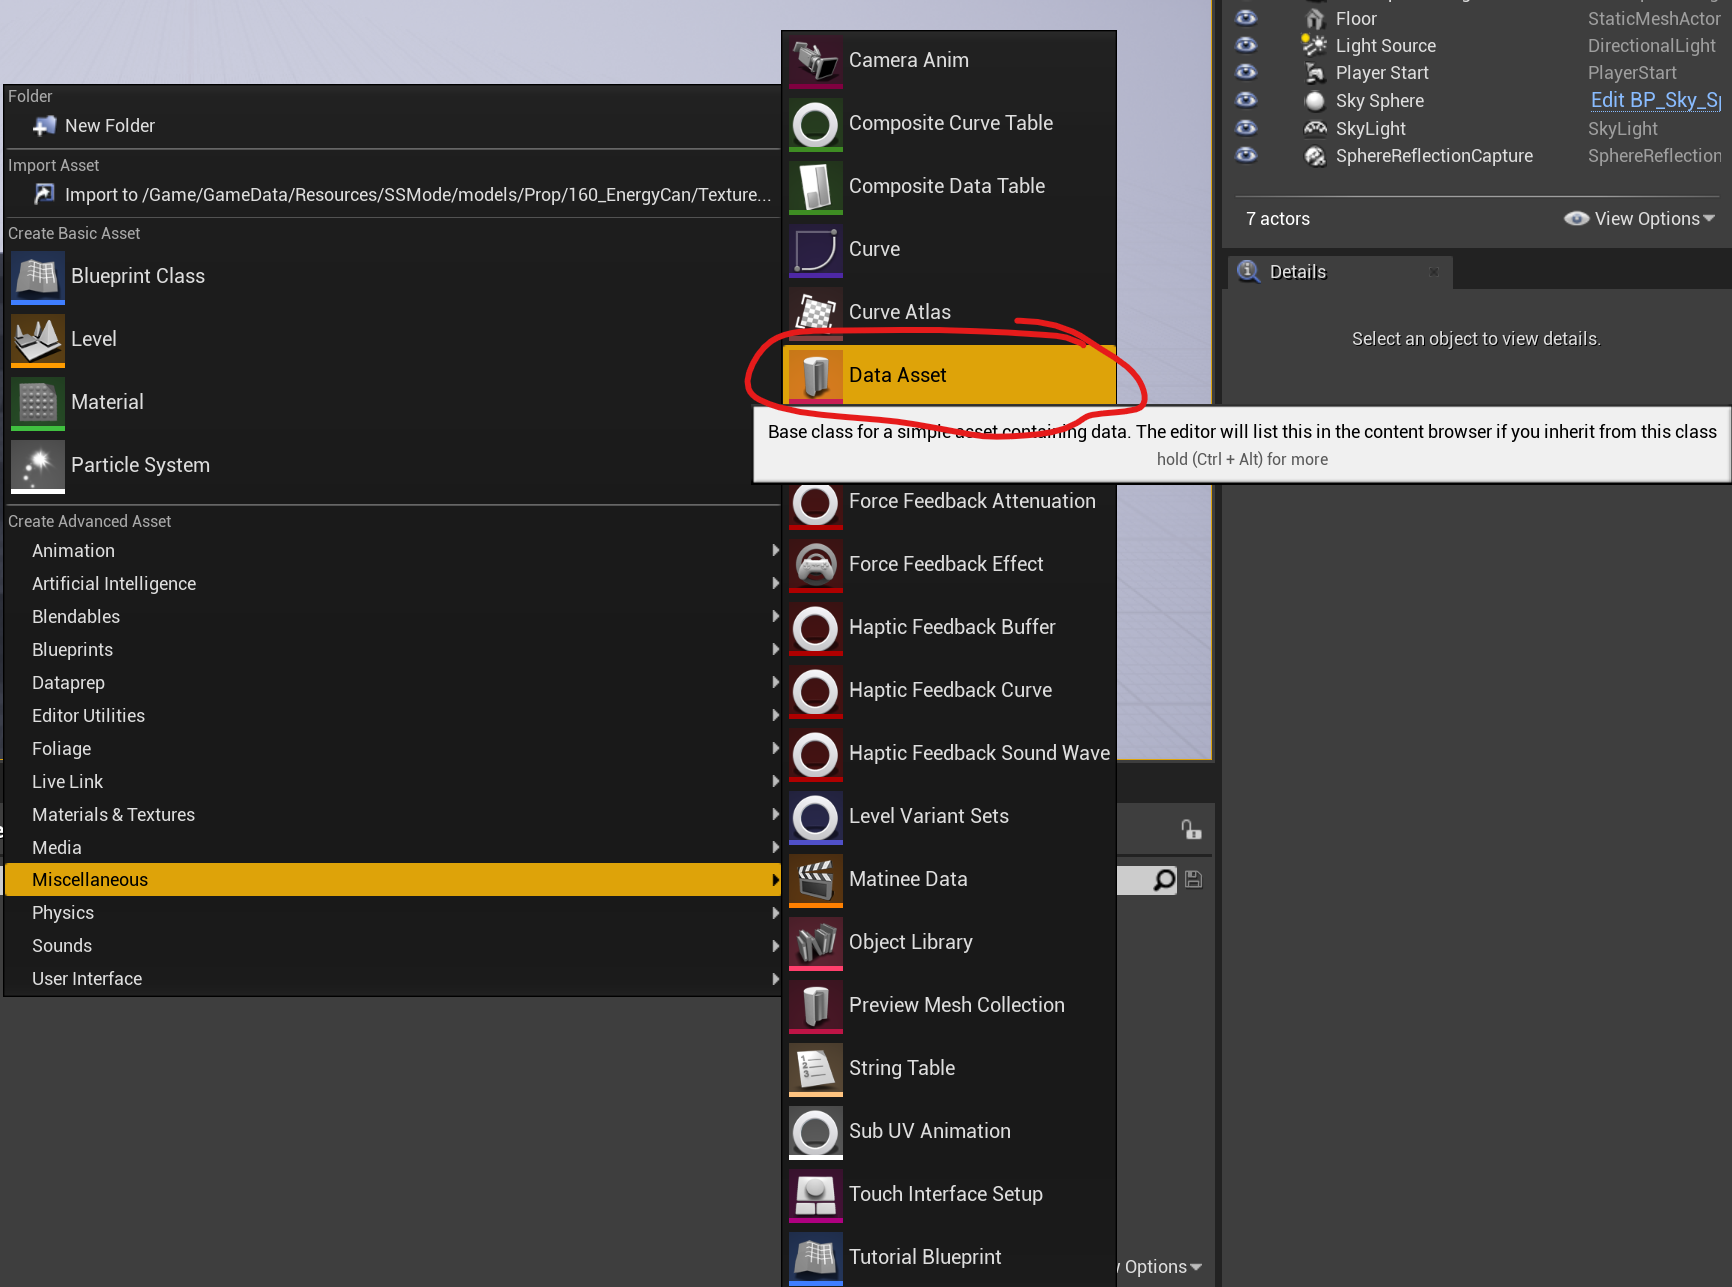
There are many classes of data assets available, but the one we want is PrimaryAssetLabel. If you start typing it, you can quickly find it in the list.

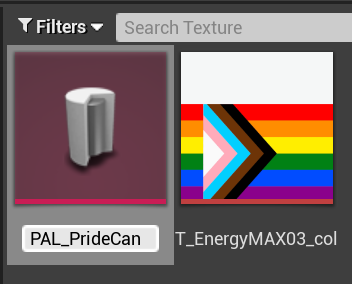
We will name this new asset "PAL_PrideCan" to match the collection.
Now, doubleclick it, and this form will appear, where you will have to configure the PAL as shown:
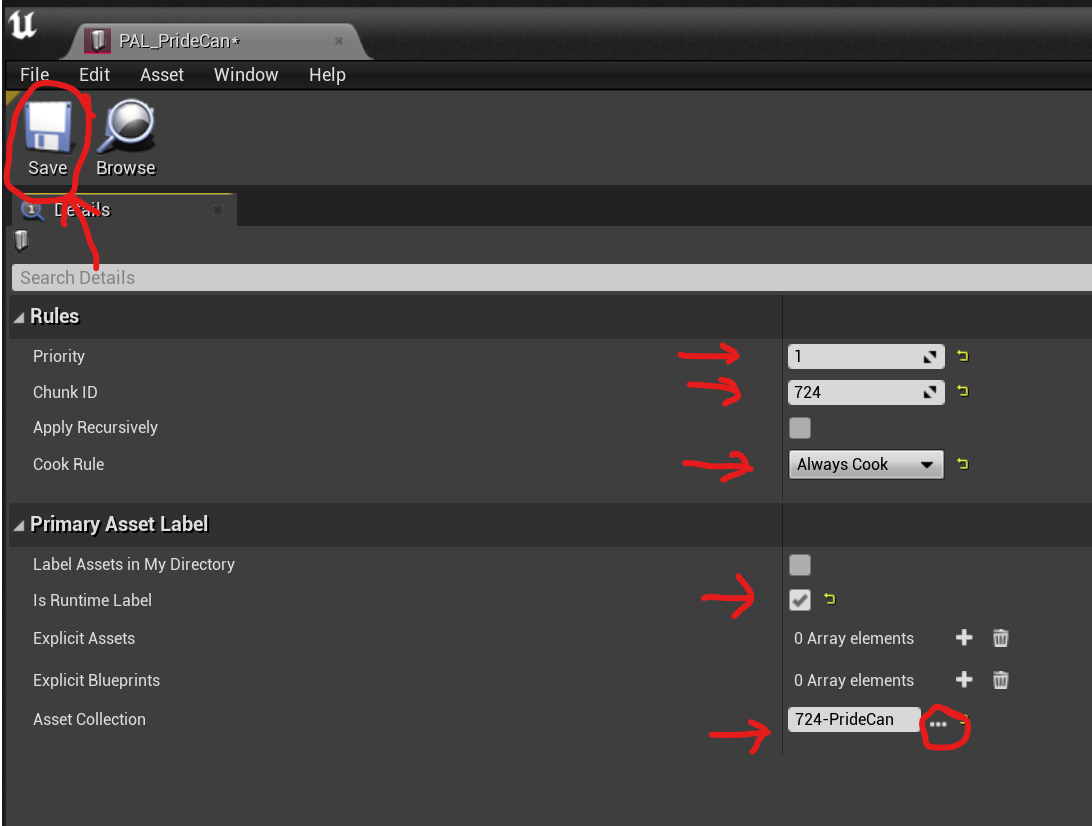
Priority should be 1, we've entered my selected pakchunk number 724, set Cook Rule to Always Cook, ensure Is Runtime is ticked, and click on the "..." next to Asset Collection to choose the collection we are assigning these assets to. When done, click Save at the top of the window to save the asset. If you simply close this window, the changes will remain, but the PAL will have a star in the thumbnail indicating the changes were not saved to disk.
¶ Adding your assets to your collection
Now that you have a PAL and a collection, you must assign all your assets to that collection. First, ensure you don't have any pakchunk assigned to your assets by selecting them, right-clicking, and choosing Remove from All Chunks (although if it does not show in a chunk in Remove from Chunks, you're safe.)

Note that some assets for certain mod types should NOT be packed in with your mod! Other walkthroughs will note where you should avoid packing assets that are dummies for important objects in-game, like the skeleton or master materials. Such dummies are necessary for Unreal to allow you to work with what you're replacing, but actually packing the dummies into the game will break the game in a number of (occasionally hilarious, in the case of skeletons) ways.
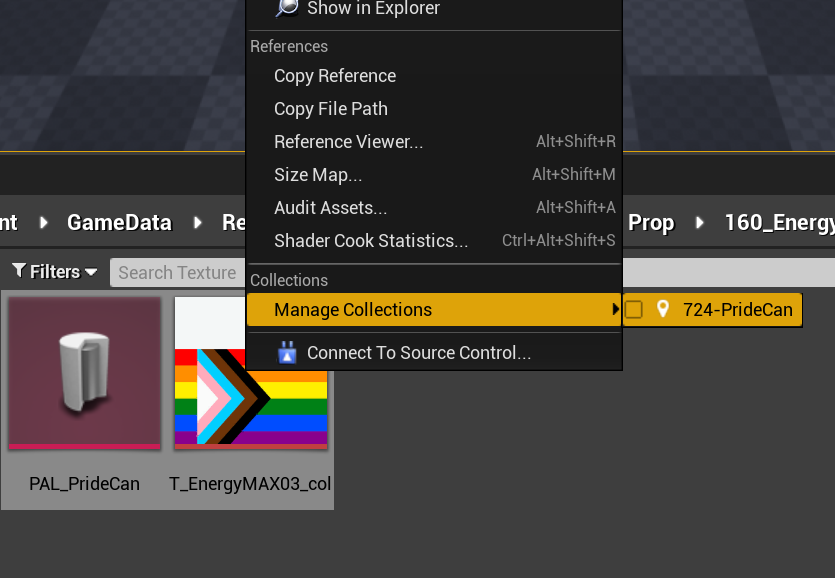
Now, you may simply select each asset you wish to pack, including the PAL file, in the collection by right-clicking the assets, going to Manage Collections, and ticking the box for your collection.
You also have the option of toggling back and forth between the Collections pane and the folder view, finding assets and dragging and dropping them onto the collection.
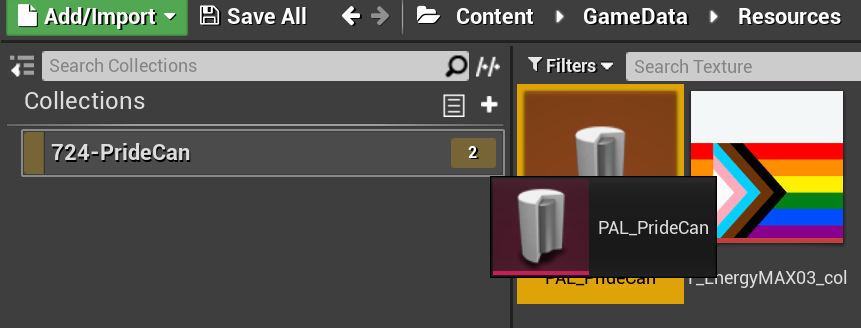
You can see how many items are presently in the collection (in my case, 2). If you click on this collection, you'll see all assests assigned to it, regardless of where in the folder hierarchy they reside. You can put assets from multiple locations into the same mod -- no need to keep them all in the same folder tree, if you're replacing items from different parts of the game in the same mod.
If necessary, if you have a large number of assets or several mods in your workspace, you can use the Window menu > Developer Tools > Asset Audit, which will bring up a window showing all the assets in your environment, what pakchunk they're assigned to, and other useful information. You can also manage these assets to some degree from this pane.
¶ Selecting a pakchunk
Unfortunately there is no central registry of what pakchunks are being used by which authors, although a number of modders have picked a range and are staying within it. If you play using a lot of mods, you will end up getting a sense of what ranges each author uses. Browse around on Nexus Mods and most mods will tell you what pakchunk is used.
The absolute maximum pakchunk ID that Unreal allows you to enter into your PAL is 2147483647, which = (2^31 - 1), e.g. a 32 bit signed variable.
The base game uses pakchunks 0 through 10, so any attempts to build mods with those pakchunks will definitely conflict and likely crash the game.
Avoid using anything below 300, because most of the mods created during the first few months of the game's existence were cooked into this space, under the assumption that was a limitation of Unreal modding. Once AEW:FF modders learned about PALs, that limitation was broken.
Note that if you choose a very high number, e.g. 1,000,000, for your pakchunk, it will work, however during cooking Unreal builds a small text file manifest for every pakchunk from 0 up to the maximum, so cooking may take an extremely long time because it's building empty manifests for 999,990 pakchunks. If you don't plan on releasing, lower numbers are preferable for the time to cook, but lower numbers also run higher risks of pakchunk conflict.
Ultimately, where you cook your mods is your own choice, and if end-users report any issues with pakchunk conflicts, you should point them to the Unreal Pakchunk Conflict Manager. While this utility was made for Hogwarts Legacy, it works for other Unreal games as well.
¶ Cooking your mod
That was all the prepwork -- time for the actual packaging!
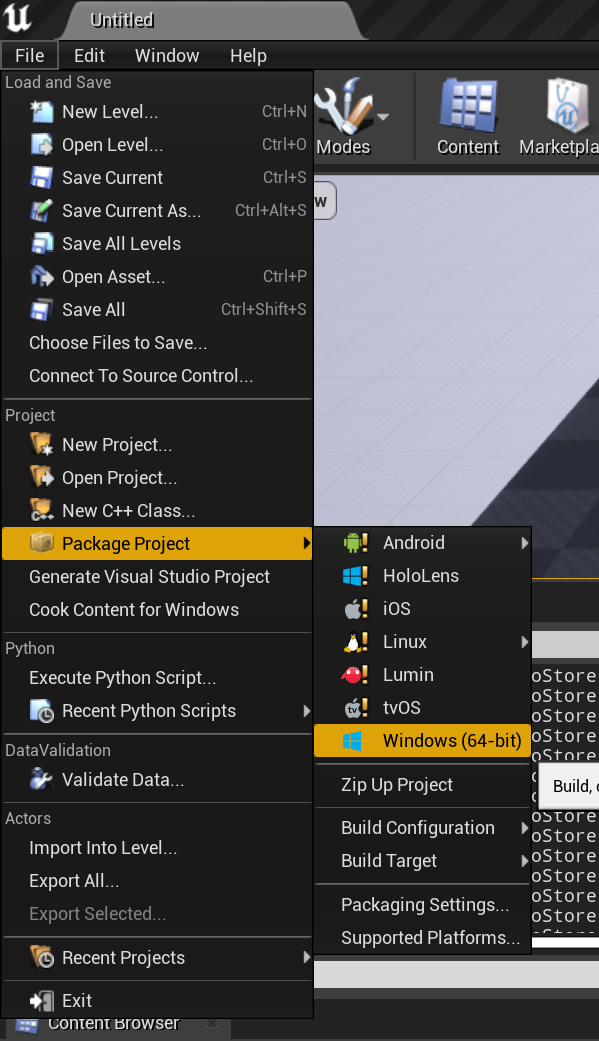
Click on File > Package Project > Windows (64 bit) in the main Unreal window:
As Unreal packages your mod(s), a good deal of information will scroll past, describing the process of cooking, and whether or not any errors occur. Note that if you are using a custom UProject, a large number of Warnings (in yellow) will be included, describing uninitialized structs.
One important part of the log output shows information about all the pakchunks you're cooking in your environment, and it's a good place to start looking to ensure they have the number of assets expected. Each line of this set of logs will start with UATHelper: Packaging (Windows (64-bit)): LogIoStore: Display: so for display purposes here, I've removed that text so it's clearer:
--------------------------------------------------- PackageHeader (KB) --------------------------------------------------
Container                             Header       Summary         Graph     ImportMap     ExportMap       NameMap
-------------------------------------------------------------------------------------------------------------------------
pakchunk0                              12331           238           611           871          1483          9128
pakchunk2                                 33             0             0             0             0            32
pakchunk700                              128             5             4             5             8           106
pakchunk701                                2             0             0             0             0             1
pakchunk702                                5             0             0             0             0             4
pakchunk704                                2             0             0             0             0             1
pakchunk705                               47             3             2             2             3            37
pakchunk707                                5             0             0             0             0             4
pakchunk712                               34             0             0             0             0            34
pakchunk724                                2             0             0             0             0             1
pakchunk725                               15             0             0             1             3            11
pakchunk726                               11             0             0             1             2             8
pakchunk727                              954             0             0             0             0           953
TOTAL                                  13569           248           618           881          1501         10321

Input:    321.52 MB UExp
Input:     16.58 MB UAsset
Input:      0.74 MB FPackageFileSummary
Input:      3965 Packages
Input:     30838 Imported package entries
Input:      1102 Packages without imports
Input:    278310 Name map entries
Input:    222602 PreloadDependencies entries
Input:    112730 ImportMap entries
Input:     21328 ExportMap entries
Input:     19241 Public exports

Output:     3967 Export bundles
Output:    42656 Export bundle entries
Output:    30838 Export bundle arcs
Output:    33782 Public runtime script objects
Output:     1.97 MB InitialLoadData
Note that any assets that are undefined as being part of a collection, or are dummies of original items in the game, will end up in pakchunks 0-10. These are built into the compiled mods folder but will not be used, but rather ignored.
The output should match the file sizes of all the packaged mods, and this is a quick way to figure out whether or not assets made it into the intended pakchunks.
If any errors occur, they will be displayed in red and will result in a compilation failure. See below for troubleshooting.
¶ Renaming your file
In Windows 10 and 11, you can select multiple files that have the same file prefix with different file extensions, and rename them in batch, by selecting the first, then holding Shift and hitting the Up or Down arrow keys, or holding Shift on the keyboard while clicking the last item with your mouse.
The mods in your package folder will all be named as follows, matching the assigned pakchunk:

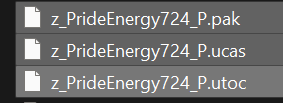
So, for example, in the case of the Pride Can mod, I have renamed the files to z_PrideEnergy724_P:
¶ Mod naming conventions
Because we are using Oodle compression, like the game does, we should prefix the mod files with "z_" to indicate the mod is zipped (compressed). The mod also must end in "_P" to indicate to the engine that it is a Patch, e.g. that it replaces existing assets in the game, rather than merely adding new assets.
If a mod's filename replaces game assets and does not end in _P, the mod will NOT replace the assets, the game will work normally without your alterations, and you'll have no indicators as to why!
It is good practice, also, to include the pakchunk number in the filename of your mod to serve as a visual indicator to end-users whether or not a mod might conflict with another you're using.
¶ Testing
Now's the time to test your mod. For your best-case test, remove all mods from your ~mods folder (aside, of course, for prerequisites, e.g. if your mod requires the Create An Arena Extender), and test with only your new mod. Make sure it works in a "clean" environment. Then test with other mods.
Assuming it all works, you're done!
¶ Troubleshooting compilation errors
If compilation didn't work, here's some common errors that might come up and how to solve them.
(WIP!)
¶ What's next?
Now, you can zip up the .pak, .ucas and .utoc files together with a readme (optional), and upload to Nexus (tutorial for Hogwarts, but principles apply).
Feel free to promote your mod to either of the below Discords' #mod-promotions channel!