¶ Getting started
There are a few steps (and not the easiest, so don't get discouraged!) before beginning to play with outfits!
Firstly, I recommend you to come on the HL modding discord, it’s the best place if you have any questions about modding. There is also a lot of tips and informations in the different channels and the pinned messages, so don’t hesitate to search, maybe someone had the same questions or issues as you!
There are now 2 much more detailed tutorials covering the whole subject of editing outfits, so I suggest you read those instead, especially if you are new to modding!
. How to use JSON2DA to create a Data Asset
. Applying a Gear Mod to an NPC
¶ Installing the prerequisites
¶ Custom engine
To begin, you need the custom UE4 to be able to modify the outfits files and to package the mod. Fortunately, there is a very detailed guide to install everything.
- If you come across an error, see if there isn't a solution here.
Once you have downloaded and installed the custom engine, you can follow the first part of this short tutorial to configure the project.
¶ FModel
FModel is a tool used to export DataAsset files (.json), 3D models (.psk) and textures (.png) from the game.
The second part of the tutorial is about FModel. I advise you to download this custom version for HL instead of the default one, and then follow the instructions.
¶ JSON to DA script
This script is used to import the JSON files (that you exported from FModel) to the engine.
Download and follow the instructions. (We’ll do the 'Process' part together but you can still read it :p)
¶ 3D software
You'll need a 3D modeling software and their plugin to be able to import and edit the .psk format you downloaded from FModel. (Of course, if you only intend to modify colors & textures of the clothes from the base game, you can skip this part.) If you are not familiar with 3D modeling, I advise you to download Blender.
- Blender + Blender3D Import PSK PSA Addon
- If you use 3DS max, you can download this plugin: ActorX Importer for 3ds Max
You have everything? Then let's go!
If this is the 1st time you've tried modding, I'd advise you to follow the tutorial to the letter rather than trying to modify something else. Once you know the whole process, you'll be able to get creative! :p
¶ Importing an outfit with the JSON to DA script
¶ Exporting the UI gear icons
Open FModel and click on Load.

Unfold Phoenix (with a capital P!), go to Phoenix/Content/UI/Icons/Gear, right click on it and export the folder in .png.
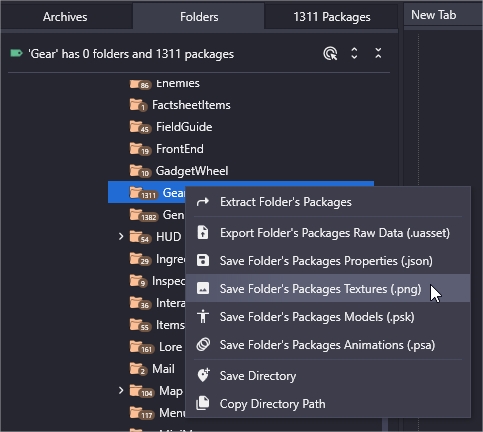
The files will be exported into /HWFModel/Output/Exports/Phoenix/Content/UI/Icons/Gear/

That way it’ll be easier to know which outfit to modify!
¶ From FModel to UE4
For this tutorial, we’ll modify the victorian garb for male. We know now that it's called Outfit_002_M from the UI icons, and that it’s located in /Outfit/.
In FModel, go to /Content/Data/GearAppearances/Outfit/, and double click on DA_GA_Outfit_002_M.

This the GearAppearance DA (DataAsset) file we'll recreate in UE4. Memorize the path and name of the file.
Now, open the custom engine. The file must be created in the SAME location and with the SAME name.
Go to /Content/Data/GearAppearances/Outfit/ (create the folders if you don't have them) and create a blank Data-Asset (Add/Import > Miscellaneous > DataAsset).
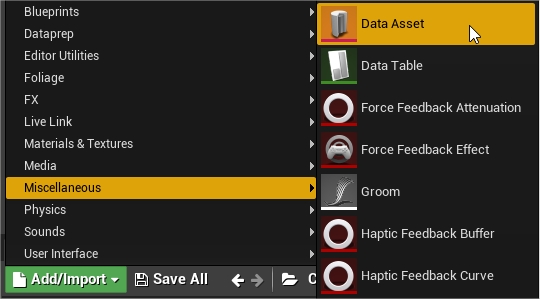
Pick GearAppearanceItemDefinition and Select.
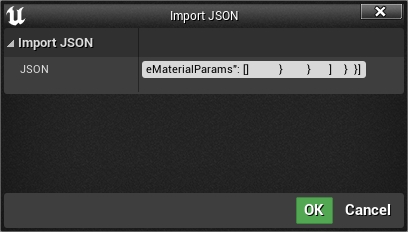
Name the newly created file DA_GA_Outfit_002_M. Right-click on it and select Scripted Actions > "Import Data Asset JSON"
Copy/paste all the code from FModel to that box and save.
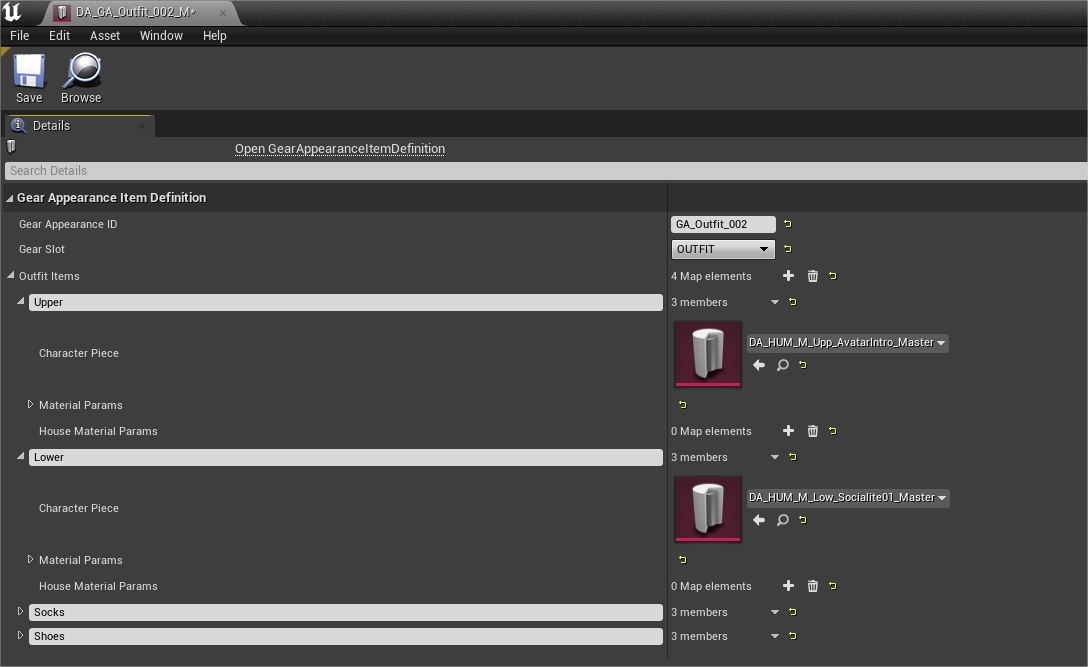
Your new DA file should now look like that:
¶ How to swap an item between 2 outfits
You can see that the outfit is divided between the Upper body, the Lower body, Socks and Shoes. The Character Piece in each Outfit item references another DataAsset, that the script automatically created in the right location.
For example, the Lower slot is referencing a DataAsset named DA_HUM_M_LOW_Socialite01_Master, located in /RiggedObjects/Characters/Human/Clothing/Lower_M/Pants_Socialite01/. (You can click on the magnifying glass to go directly in the folder). That’s the DA for the breeches.
We’ll change those breeches by trousers.
¶ Find the right model in Fmodel
We first have to pick an outfit that we know have pants. Let's take Outfit_003_M.
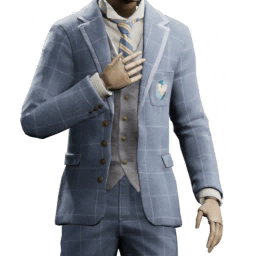
It's a bit difficult to be sure this outfit includes trousers and not breeches from just the picture. So let's check in FModel.
In FModel, search for DA_GA_Outfit_003_M inside Content/Data/GearAppearances/Outfit, and double click on it. Press Ctrl + F and search 'lower'.

Click on the path in pink (DA_HUM_M_Low_HighPants01_Master). It'll open another DA file.
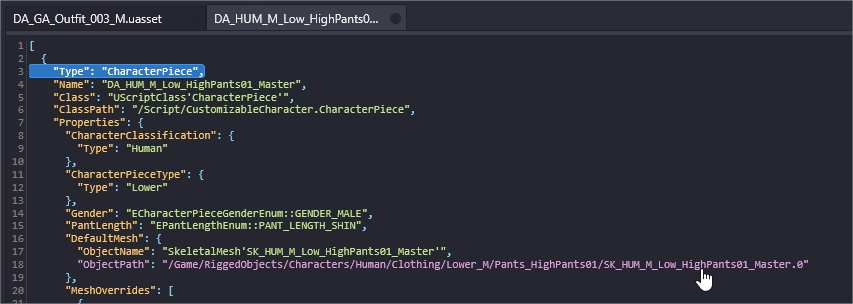
Click again on the path in pink (SK_HUM_M_Low_HighPants01_Master).
This time, it opens a 3D viewer with the model.
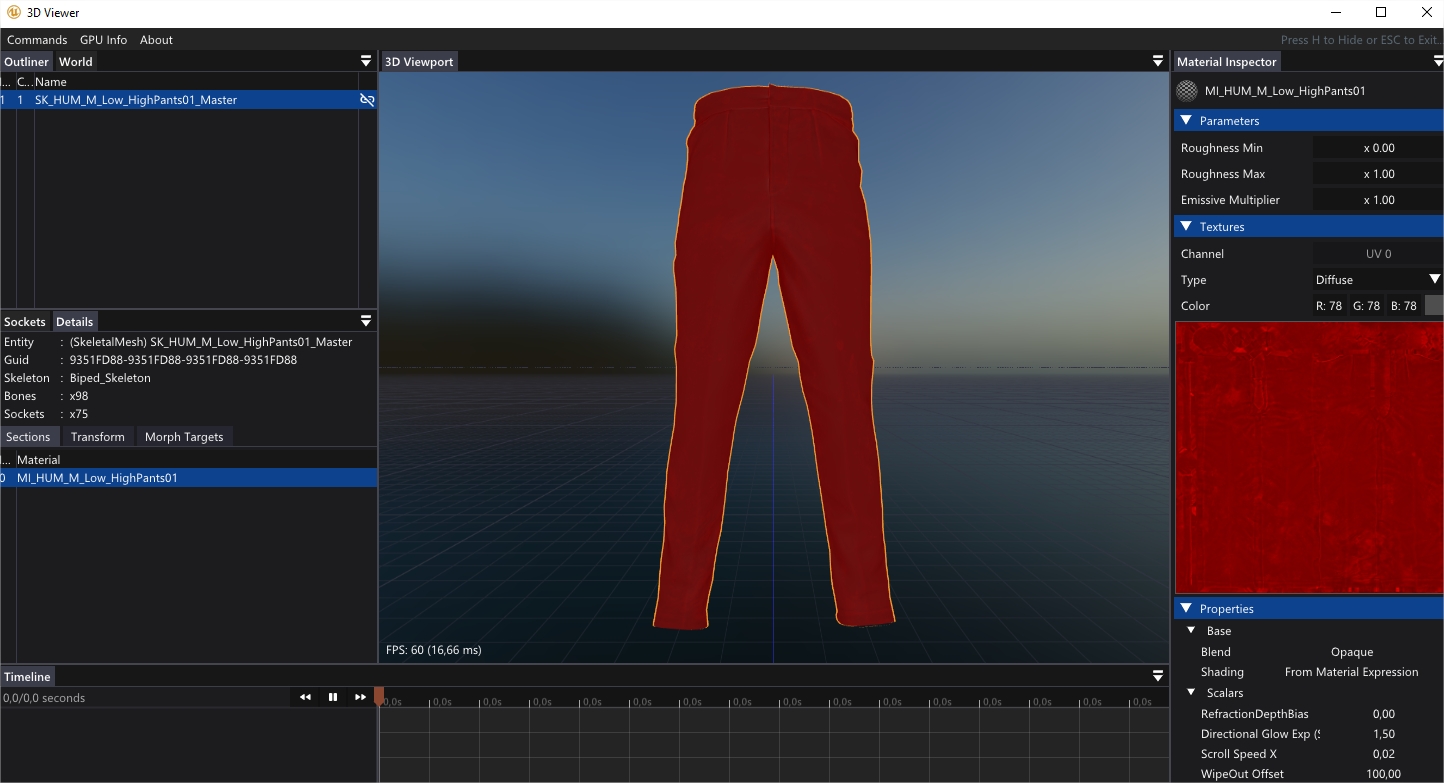
No doubt, that's the trousers we want for the Victorian garb!
Close the 3D viewer and go back to the first tab 'DA_GA_Outfit_003_M'.
¶ Method 1: Create a CharacterPiece DA manually
In FModel, let's go back to DA_GA_Outfit_003_M.

What interests us is the name and the path of the CharacterPiece DA.
Go to UE4, in /RiggedObjects/Characters/Human/Clothing/Lower_M/.
Create a new folder named Pants_HighPants01. Inside, create a DataAsset named DA_HUM_M_Low_HighPants01_Master.
Open Outfit_002_M and replace the DA_HUM_M_Low_Socialite01_Master (the breeches) by the DA_HUM_M_Low_HighPants01_Master (the trousers).

Save, and voilà!
¶ Method 2: Copy/paste from another outfit
We’ll copy the CharacterPiece DA from another outfit instead of creating the blank CharacterPiece of the trousers.
This time we'll recreate the Outfit_003_M DA. Next to DA_GA_Outfit_002_M, create a DataAsset with the same name as in FModel (DA_GA_Outfit_003_M), and copy/paste their code in the box.
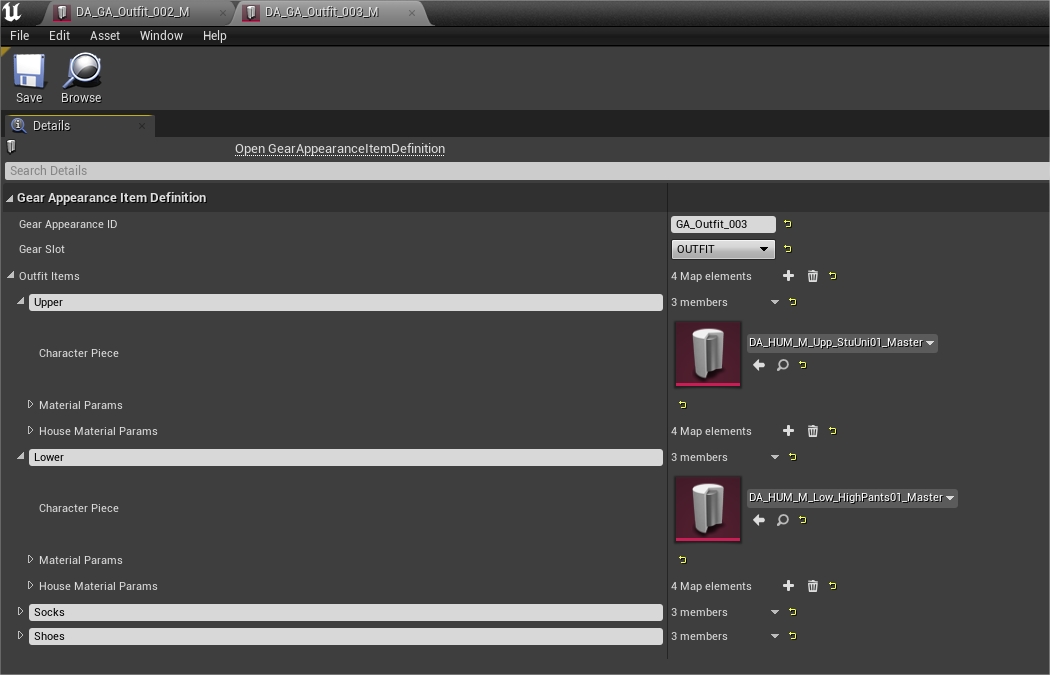
The script directly create the referenced CharacterPiece in the right folder.
Let’s go back to our Outfit_002_M. Now we only have to replace the breeches with the pants!

There's no real advantage between the two methods but it's interesting to know both. That being said, the 1rst method creates fewer unnecessary files if you don't intend to change many things.
For the 2nd method you can also download all the GearAppearances DataAsset here.
To see the result in game, follow this tutorial on how to package a mod.
Note that, for now, the only file that need to be 'assigned to chunk' isDA_GA_Outfit_002_M.

¶ How to change the textures and colors of an outfit
What we did in both methods is replacing “the model” of the breeches by “the model" of the trousers. The trousers will have the same textures and colors as the breeches we replaced.
Fortunately for us, both lower have similar ID (or “Regions”), so our new Victorian garb looks (almost) perfect as it is.
But now we want blue pants instead of black, isn’t it?
¶ Find the ID parts of an outfit
In FModel, go back to DA_GA_Outfit_003_M.

Click on the object path in pink to open the HighPants01 DA. Copy all the code.
In UE4, go to /RiggedObjects/Characters/Human/Clothing/Lower_M/Pants_HighPants01/
Right click on DA_HUM_M_Low_HighPants01_Master, Scripted Actions > Import JSON, and copy/paste the code inside the box.
It should have added a few more details in the DA, in particular “Region Names” at the bottom.
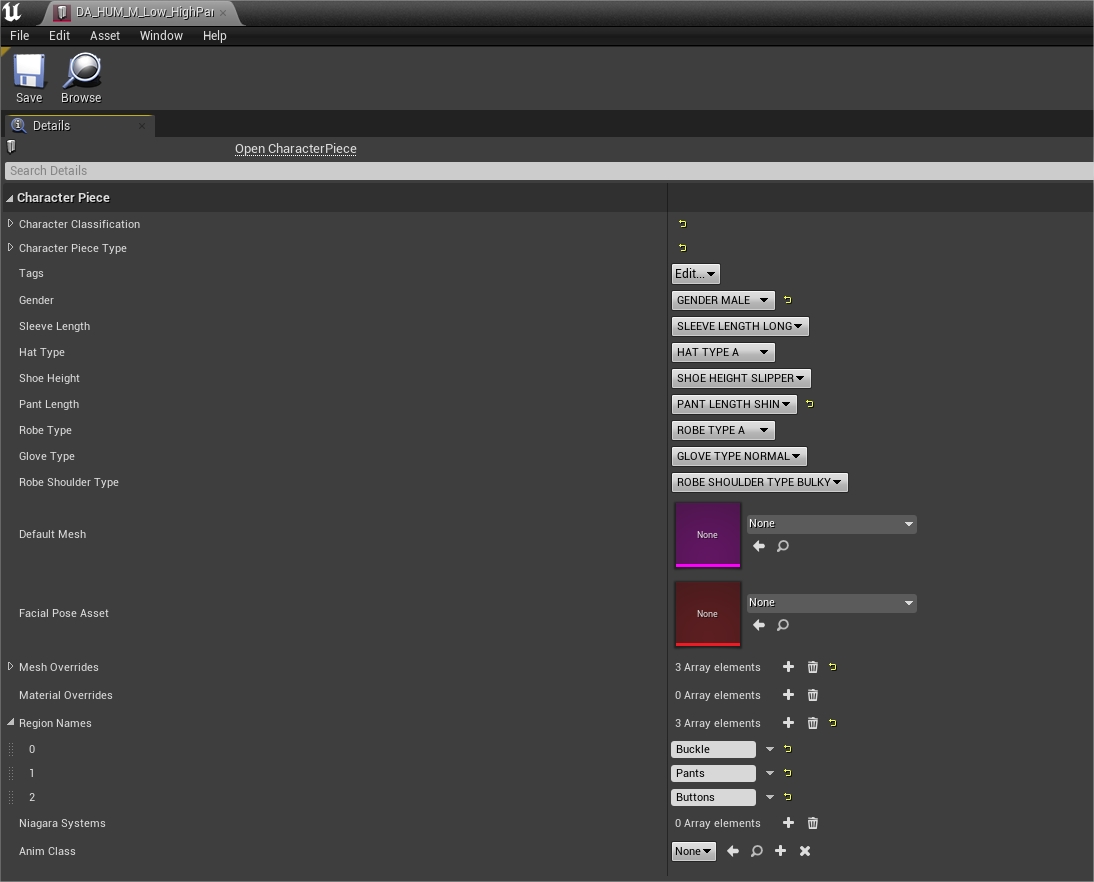
(Sometimes the script doesn’t copy the region names, so you can check in FModel at the end of the code to see them)
The 'HighPants01' trousers are divided in 3 “regions”, for which you can choose a different color and texture.
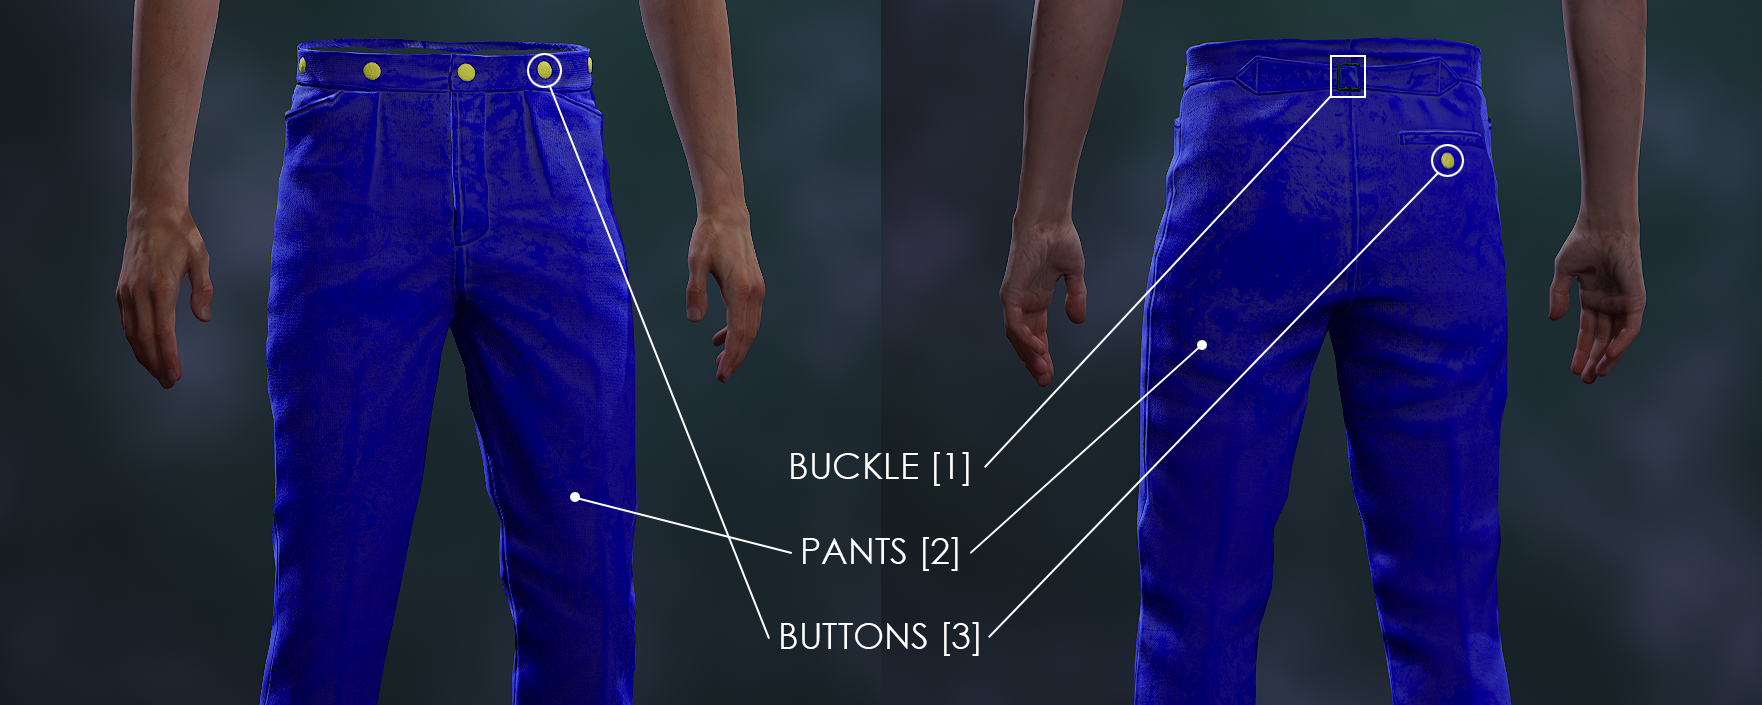
If we check the 'Socialite01' breeches, we can see that it have 4 parts:

In both lower, the “pants” region is in the same 2nd position. That’s why our trousers had the right texture, and didn’t become silver from the "BucklesButtons" of the breeches, for example.
You can also go to
RiggedObjects/Characters/Human/Clothing/Lower_M/Pants_HighPants01/directly, right click on it and click 'Save Folder's Packages Properties (.json)'
It'll download all the .json of the folder and you can read them with Notepad++ (or another text editor).
Note: The .json files are downloaded into/HWFModel/Output/Exports/Game/RiggedObjects/...
¶ Change colors and textures
There is a potential alternative method for editing colors and textures, with the Outfit Studios and Outfits export & import mods, but I must confess I never tried it.
So we'll look at the old method.
Go back to DA_GA_Outfit_002_M. Under the Character Piece, we have a few parameters.

- In Scalar, you’ll be able to change the texture opacity and the normal map intensity.
- In Vector, you can change the specular intensity, the colors (Tint_Low and Tint_High), the diffuse (Scatter_Color), the texture rotation and scale (UVRotationScale) and offset (UVbias).
- In Texture, you can change the... textures.
- House Material Params is only used for school uniforms/robes, to override the above parameters by the player's House colors.

Every parameter has a number that corresponds to the Region/ID part of the cloth. Since we want to change the main color of the trousers, it's the “Pants” (so [2] since in 2nd position) that interest us.


Let's change the green color of 'Color_Tint_Low[2]' for a blue, and the texture for a plaid linen (because why not).


If you don't have any textures other than the one you imported with Outfit_002, you'll have to download them from FModel. Go to
/RiggedObjects/Characters/TileableTextures/, right click on it and select 'Save Folder's Packages Textures (.png)'
In UE4, go to (or create) the same folders and drag & drop every textures you just downloaded.
- That's where the fun part begin (no). With this method, there is no quick way to know if we have the right color. To see the result, we need to pack our mod and check directly in game.
So, we did the easiest modification with the colors and the textures, but it can be difficult to know what to change to have the right specular intensity or even the right color_tint if we changed the texture.
My method is to copy/paste from other outfits and then modify accordingly to what I want. For example, if I want a velvet fabric, I'll search for another outfit which use velvet, copy/paste every parameters and then modify the tint.
¶ Appendices
¶ Edit an NPC outfit
The method is similar as for the player.
To modify Ominis Gaunt's default outfit (or another student), go to /Content/Data/CC/Student/, and search DA_OminisGaunt. (DA_xx_NoRobe_Look is the alternative appearance, only accessible with the AnyTimeCompanions mod)
In UE4, recreate the DataAsset in the same folder, and copy/paste the code with the JSON script.
The DA should look like that:
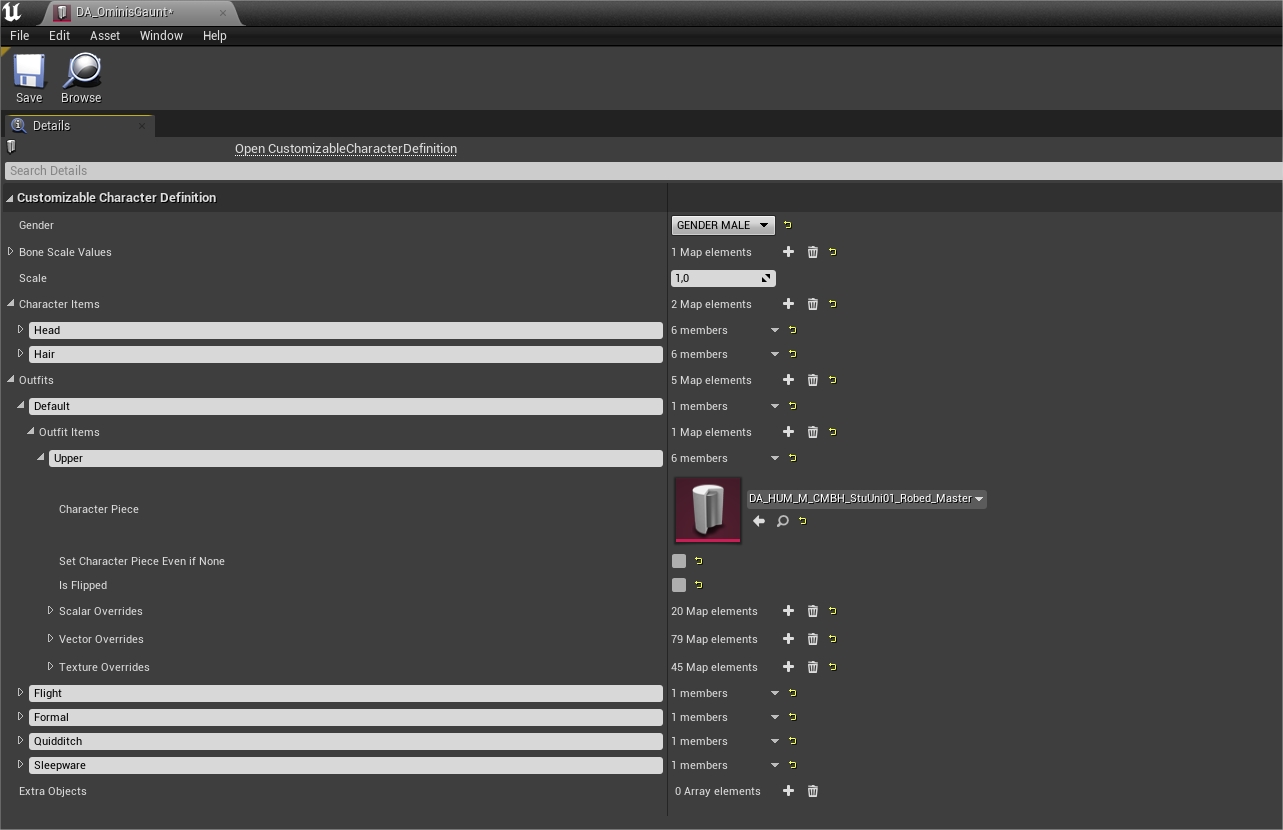
Here, you can modify his head, hair and default outfit. (Flight, Formal, Quidditch and Sleepware outfits are totally useless.)
By default, there is only the 'Upper' slot (in the 'Default' outfit), which reference a single CharacterPiece DA (DA_HUM_M_CMBH_StuUni01_Robed_Master for Ominis).
Unlike the player, NPC have a combined version of the outfits, with lower quality textures. But you can still make them wear some player's outfit!
Click on the small + to the right. It'll create a second slot that you will name according to what you want to add (so, either Hat, Upper, Lower, Robe, Socks or Shoes)

You can now add a CharacterPiece DA (DA_HUM_M_Upp_AvatarIntro_Master in 'Upper' for example) manually.
Alternatively, the more practical is to copy/paste the entire slot from a player outfit.
Let's get back to our Outfit_002_M. Right click on the 'Upper' slot (or 'Outfits Items' if you want the whole outfit) and select Copy.

Inside DA_OminisGaunt, right click on the same place, and select Paste.
Then copy/paste every Overrides (if it's a uniform, copy from the House you want)

Now Ominis will wear the same Victorian garb than the player!
¶ See Also
- HL modding discord
- Creating mods (All the tutorials + recommended tools)
Creating an asset replacement mod
Creating a face/makeup mod
Clothing swap - Packaging a mod
